JSF應用程式入門範例
要建立一個JSF應用程式,我們在這裡使用NetBeans IDE 8.2。 當然您也可以使用其他Java IDE。
在這裡先建立一個專案,之後我們將執行測試它的組態設定。 所以,讓我們首先來建立一個新的專案。
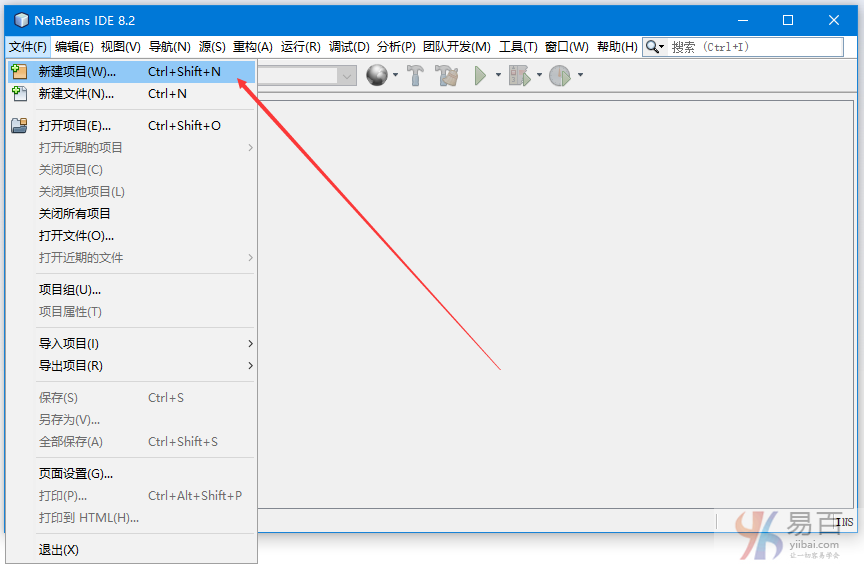
步驟1:建立一個新專案
開啟NetBeans IDE 8.2,轉到【檔案】選單並選擇【新建專案】。如下圖所示 -
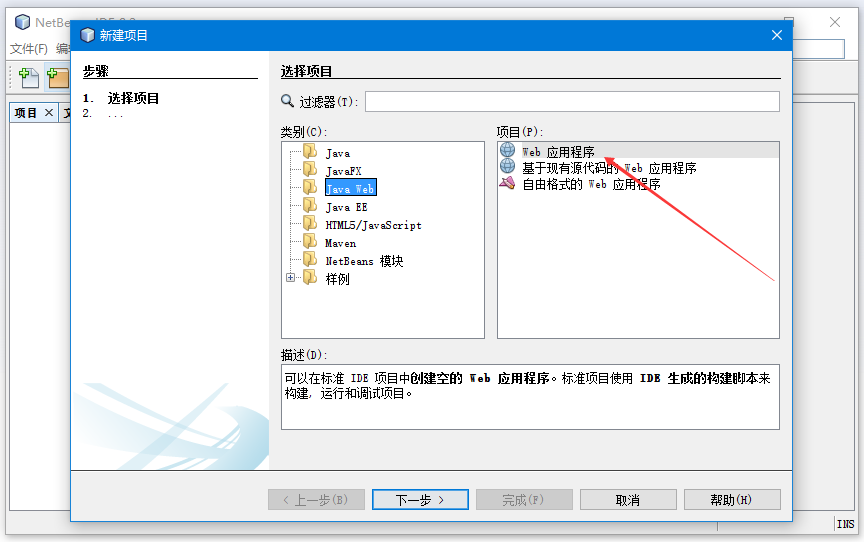
選擇類別為【Java Web】和專案為【Web應用程式】。如下圖所示 -
輸入專案名稱:jsf-helloworld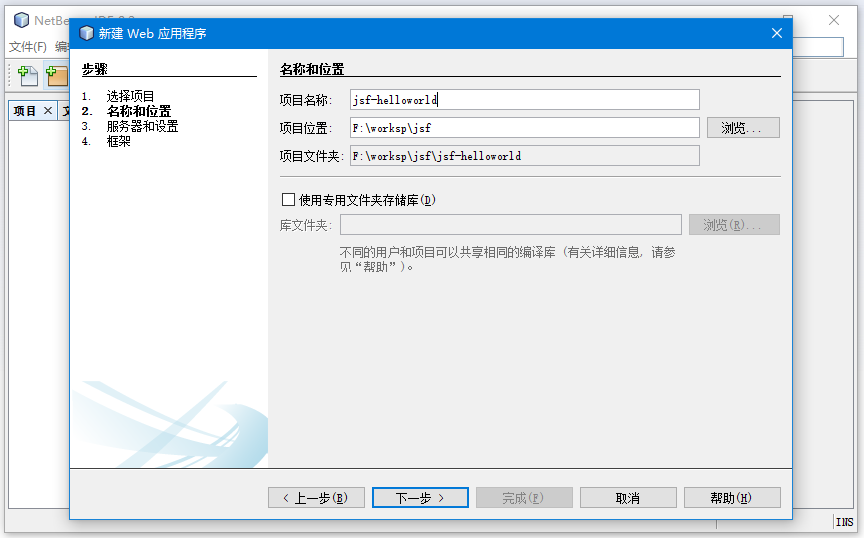
選擇伺服器和Java EE版本。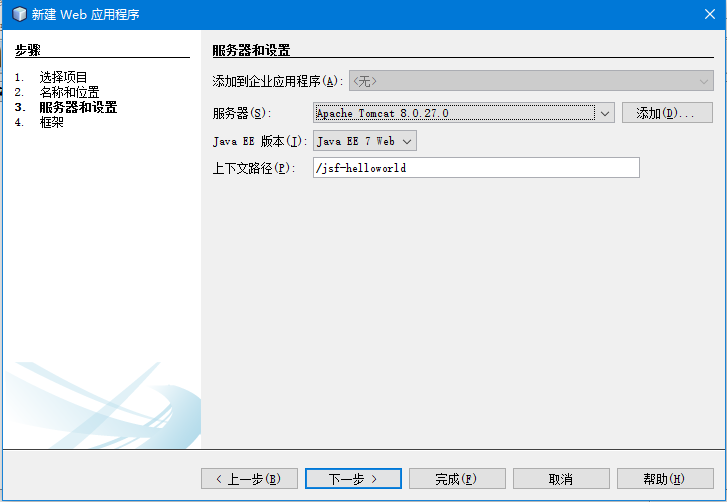
選擇JSF框架,如下圖所示 -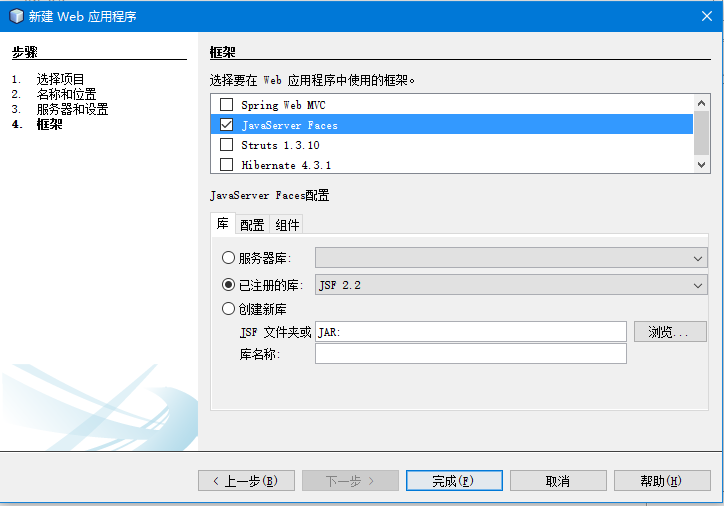
選擇首選頁面語言:JSF框架的早期版本預設為JSP表示頁面。 現在,在最新版本2.0及更高版本中,JSF包含了強大的「Facelets」工具。 所以,這裡我們選擇了Facelets語言作為頁面。 我們將在下一章中詳細討論Facelets。
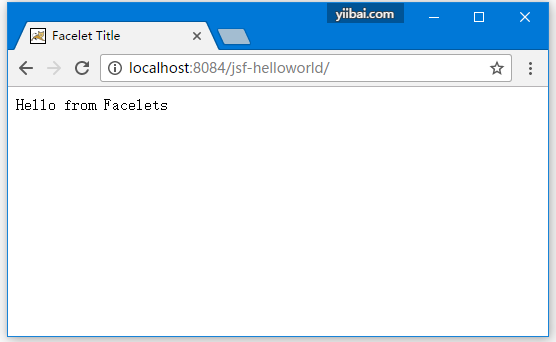
執行:現在,您可以在右鍵單擊專案後選擇執行選項來執行應用程式。 它會產生一個預設訊息「Hello from Facelets」。如下圖所示 -
我們已經成功建立了JSF專案。 該專案包括以下檔案:
index.xhtml:在F:\worksp\jsf\jsf-helloworld\web目錄下。web.xml:在F:\worksp\jsf\jsf-helloworld\web\WEB-INF目錄下。
每執行該專案時,它會將index.xhtml作為輸出。 現在,我們建立一個包含兩個網頁,一個bean類和一個組態檔案的應用程式。
為了開發新的應用程式,它需要以下步驟:
- 建立使用者介面
- 建立託管bean
- 組態和管理FacesServlet
1)建立使用者介面
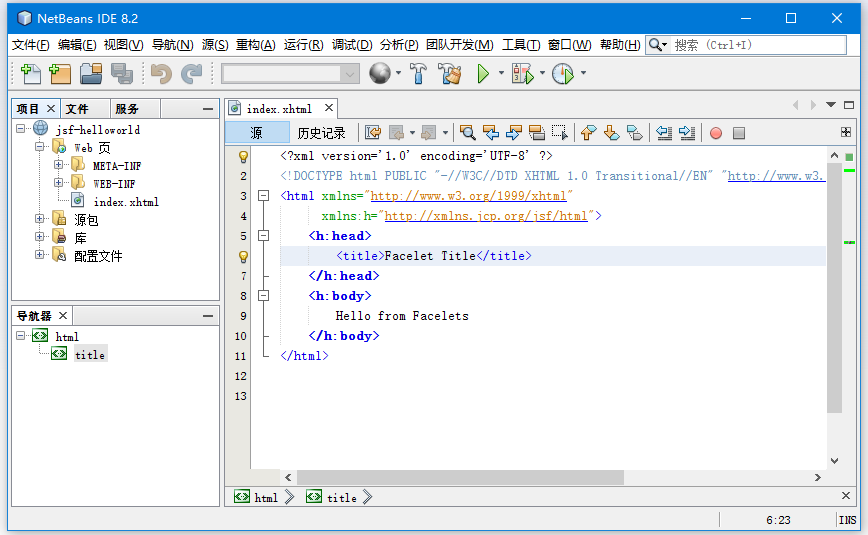
我們將使用預設頁面index.xhtml來呈現網頁。 修改index.xhtml原始碼,如下所示。
<?xml version='1.0' encoding='UTF-8' ?>
<!DOCTYPE html PUBLIC "-//W3C//DTD XHTML 1.0 Transitional//EN""http://www.w3.org/TR/xhtml1/DTD/xhtml1-transitional.dtd">
<html xmlns="http://www.w3.org/1999/xhtml"
      xmlns:h="http://xmlns.jcp.org/jsf/html">
    <h:head>
        <title>User Form</title>
    </h:head>
    <h:body>
        <h:form>
            <h:outputLabel for="username">User Name</h:outputLabel>
            <h:inputText id="username" value="#{user.name}" required="true" requiredMessage="User Name is required" /><br/>
            <h:commandButton id="submit-button" value="Submit" action="response.xhtml"/>
        </h:form>
    </h:body>
</html>
建立第二個JSF網頁,response.xhtml如下所示 -

response.xhtml的原始碼,如下所示
<?xml version='1.0' encoding='UTF-8' ?>
<!DOCTYPE html PUBLIC "-//W3C//DTD XHTML 1.0 Transitional//EN""http://www.w3.org/TR/xhtml1/DTD/xhtml1-transitional.dtd">
<html xmlns="http://www.w3.org/1999/xhtml"
      xmlns:h="http://xmlns.jcp.org/jsf/html">
    <h:head>
        <title>Welcome Page</title>
    </h:head>
    <h:body>
        <h2>Hello, <h:outputText value="#{user.name}"></h:outputText></h2>
    </h:body>
</html>
2)建立託管Bean
它是一個包含屬性和getter/setter方法的Java類。 JSF使用它作為模型。 所以,您也可以使用它來編寫業務邏輯。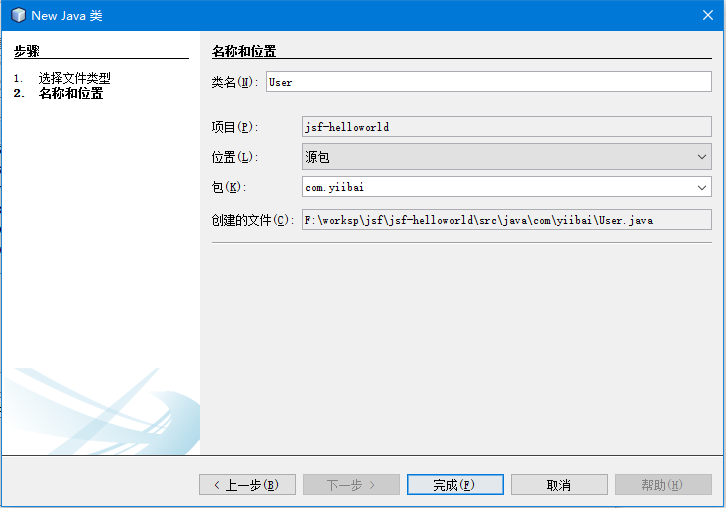
建立Java類後,將以下程式碼放入User.java檔案中。
/*
 * To change this license header, choose License Headers in Project Properties.
 * To change this template file, choose Tools | Templates
 * and open the template in the editor.
 */
package com.yiibai;
import javax.faces.bean.ManagedBean;
import javax.faces.bean.RequestScoped;

@ManagedBean
@RequestScoped
public class User {

    String name;

    public String getName() {
        return name;
    }

    public void setName(String name) {
        this.name = name;
    }
}
3)組態應用程式
要組態應用程式,開啟專案包含的web.xml檔案,設定FacesServlet範例。 您還可以設定應用程式歡迎頁面和其他。
以下是此應用程式的web.xml程式碼的程式碼 -
<?xml version="1.0" encoding="UTF-8"?>
<web-app version="3.1" xmlns="http://xmlns.jcp.org/xml/ns/javaee"
         xmlns:xsi="http://www.w3.org/2001/XMLSchema-instance" xsi:schemaLocation="http://xmlns.jcp.org/xml/ns/javaee
http://xmlns.jcp.org/xml/ns/javaee/web-app_3_1.xsd">
    <context-param>
        <param-name>javax.faces.PROJECT_STAGE</param-name>
        <param-value>Development</param-value>
    </context-param>
    <servlet>
        <servlet-name>Faces Servlet</servlet-name>
        <servlet-class>javax.faces.webapFacelet Titlep.FacesServlet</servlet-class>
        <load-on-startup>1</load-on-startup>
    </servlet>
    <servlet-mapping>
        <servlet-name>Faces Servlet</servlet-name>
        <url-pattern>/faces/*</url-pattern>
    </servlet-mapping>
    <session-config>
        <session-timeout>
            30
        </session-timeout>
    </session-config>
    <welcome-file-list>
        <welcome-file>faces/index.xhtml</welcome-file>
    </welcome-file-list>
</web-app>
現在,可以執行應用程式來看看結果(這是應用程式的索引(預設index.xhtml)頁。) -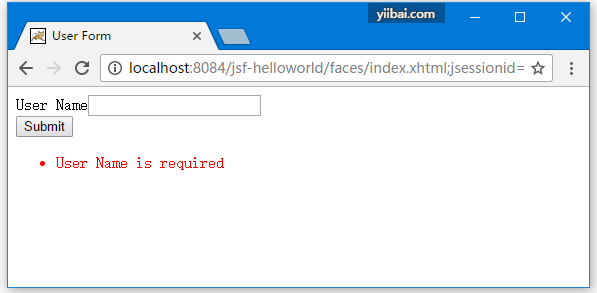
填寫一個有效的值 -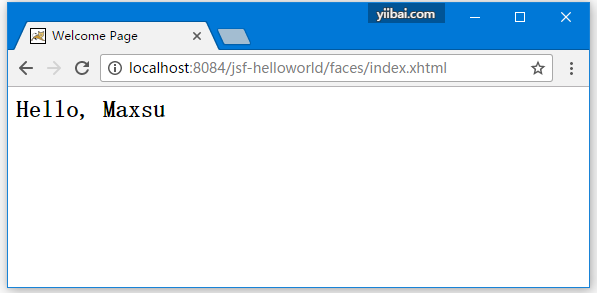
完!