Node.js快速入門
Node.js是什麼?
Node.js是建立在谷歌Chrome的JavaScript引擎(V8引擎)的Web應用程式框架。 它的最新版本是:v0.12.7(在編寫本教學時的版本)。Node.js在官方網站的定義檔案內容如下:
Node.js® is a platform built on Chrome's JavaScript runtime for easily building fast, scalable network applications. Node.js uses an event-driven, non-blocking I/O model that makes it lightweight and efficient, perfect for data-intensive real-time applications that run across distributed devices.
Node.js自帶執行時環境可在Javascript指令碼的基礎上可以解釋和執行(這類似於JVM的Java位元組碼)。這個執行時允許在瀏覽器以外的任何機器上執行JavaScript程式碼。由於這種執行時在Node.js上,所以JavaScript現在可以在伺服器上並執行。
Node.js還提供了各種豐富的JavaScript模組庫,它極大簡化了使用Node.js來擴充套件Web應用程式的研究與開發。
Node.js特性
-
Node.js庫的非同步和事件驅動的API全部都是非同步就是非阻塞。它主要是指基於Node.js的伺服器不會等待API返回的資料。伺服器移動到下一個API呼叫,Node.js發生的事件通知機制後有助於伺服器獲得從之前的API呼叫的響應。
-
非常快的內建谷歌Chrome的V8 JavaScript引擎,Node.js庫程式碼執行是非常快的。
-
單執行緒但高度可延伸 - Node.js使用具有迴圈事件單執行緒模型。事件機制有助於伺服器在一個非阻塞的方式響應並使得伺服器高度可延伸,而不是建立執行緒限制來處理請求的傳統伺服器。Node.js使用單執行緒的程式,但可以提供比傳統的伺服器(比如Apache HTTP伺服器)的請求服務數量要大得多。
-
沒有緩衝 - Node.js的應用從來不使用緩衝任何資料。這些應用只是輸出資料在塊中。
-
許可證協定 - Node.js 在 MIT 協定 下發布
都有誰在使用Node.js?
以下是包含正在使用node.js的專案,應用和公司,一個詳盡的清單請點選 github維基連結檢視,這些清單裡包括:eBay, General Electric, GoDaddy, Microsoft, PayPal, Uber, Wikipins, Yahoo!, Yammer 並越來越多加入繼續擴大這個列表:使用NodeJS的專案, 應用和公司
概念
下圖描述了 Node.js 的一些重要組成部分,我們將詳細的在後續章節進行討論。


在哪裡可以使用Node.js?
以下是Node.js證明自己完美的技術的合作夥伴的領域。
-
I/O 係結應用程式
-
資料流應用
-
資料密集型實時應用(DIRT)
-
JSON API的應用程式
-
單頁面應用
在哪些地方不要使用Node.js?
不建議使用Node.js的就是針對CPU密集型應用。
Node.js - 環境安裝組態
如果願意安裝設定Node.js環境,需要計算機上提供以下兩個軟體:
一、文字編輯器
二、Node.js二進位制安裝包
文字編輯器
這將用來編寫程式程式碼。 一些編輯器包括:Windows記事本,OS Edit命令,Brief, Epsilon, EMACS和VIM或vi。
文字編輯器的名稱和版本的在不同的作業系統可能不太相同。例如,記事本可用在Windows,VIM或vi可以在Windows以及Linux或UNIX上使用。
編輯器建立的檔案稱為原始檔並包含程式的原始碼。 對於Node.js的程式的原始檔名通常命名擴充套件是 ".js".
在開始程式設計之前,請確保文字編輯器可用,並且有足夠的經驗來寫計算機程式,將其儲存在一個檔案,如:helloworld.js,編譯並執行。
Node.js 執行時
編寫原始檔中的原始碼只需知道了解JavaScript。Node.js直譯器將用於解釋和執行JavaScript程式碼。
Node.js的發行版以二進位制安裝在SunOS,Linux,Mac OS X和Windows的32位元(386)和64位元(AMD64)的x86處理器架構作業系統。
以下部分將指導如何將Node.js的二進位制分發版安裝在各種作業系統上。
下載Node.js的歸檔檔案
下載最新版本Node.js的安裝歸檔檔案在: Node.js 下載. 在寫這篇教學的時候,下載的是 node-v0.12.7-x64.msi 並複製到“桌面”。
| OS | Archive name |
|---|---|
| Windows | node-v0.12.7-x64.msi |
| Linux | node-v0.12.7-linux-x86.tar.gz |
| Mac | node-v0.12.7-darwin-x86.tar.gz |
| SunOS | node-v0.12.7-sunos-x86.tar.gz |
在UNIX/Linux/Mac OS X和SunOS上安裝(可選)
解壓縮下載歸檔檔案到 /usr/local, 建立一個NodeJs樹 /usr/local/nodejs. 例如:
tar -C /usr/local -xzf node-v0.12.0-linux-x86.tar.gz
新增 /usr/local/nodejs 到PATH環境變數。
| OS | 輸出 |
|---|---|
| Linux | export PATH=$PATH:/usr/local/nodejs |
| Mac | export PATH=$PATH:/usr/local/nodejs |
| FreeBSD | export PATH=$PATH:/usr/local/nodejs |
在Windows上安裝Node.js(本教學中使用)
使用MSI檔案,並按照提示安裝node.js,預設情況下,安裝程式將 Node.js 發行到 C:\Program Files\nodejs. 但這裡我們需要修改安裝路徑到:D:\yiibai_worksp\nodejs,並將 D:\yiibai_worksp\nodejs 目錄新增到Window系統的PATH環境變數中。重新啟動開啟命令提示字元,以使更改生效。
第一步:雙擊下載的 “node-v0.12.7-x64.msi" 檔案,出現提示安裝介面:

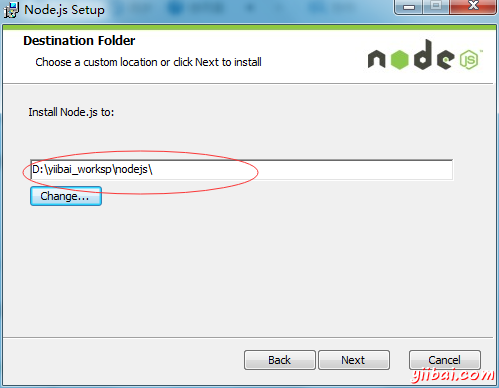
第二步:選擇安裝目錄,這裡安裝在目錄 D:\yiibai_worksp\nodejs 中,如下圖:

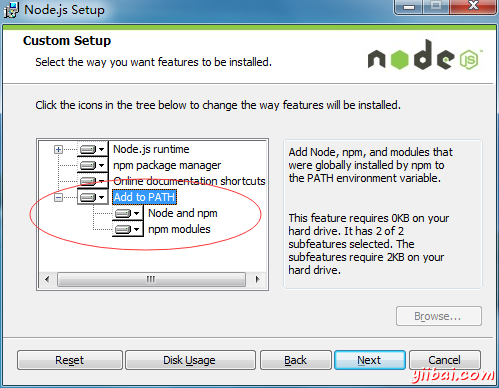
第三步:選擇安裝的模組和功能,這裡全部安裝,並新增到系統環境變數,如下圖所示:

最後一步:安裝完成!
驗證安裝:執行檔案
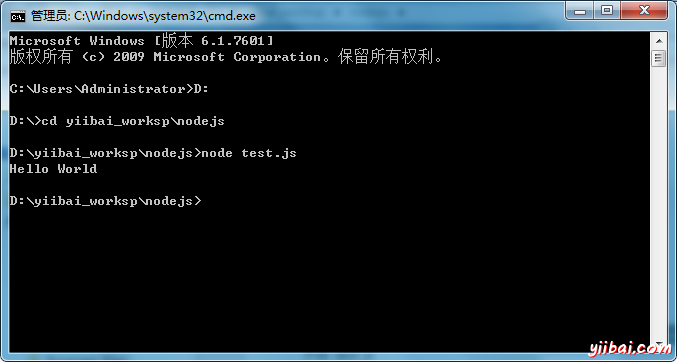
建立一個js檔案名為test.js 在 D:\>yiibai_worksp\nodejs.
File: test.js
console.log("Hello World")
現在執行test.js看到的結果:
D:\yiibai_worksp\nodejs> node test.js
驗證輸出結果:

Node.js - 第一個應用程式
在使用 Node.js 建立 Hello World ! 應用程式之前, 讓我們看看Node.js的應用程式的組成部分。Node.js應用程式由以下三個重要部分組成:
-
匯入所需模組: 使用require指令來載入javascript模組
-
建立一個伺服器: 伺服器這將聽監聽在Apache HTTP伺服器用戶端的請求。
-
讀取請求並返回響應: 在前面的步驟中建立的伺服器將響應讀取由客戶機發出的HTTP請求(可以是一個瀏覽器或控制台)並返回響應。
建立Node.js應用
步驟 1:匯入所需的包
使用require指令來載入 HTTP 模組。
var http = require("http")
步驟 2:使用http.createServer方法建立HTTP伺服器。通過引數函式請求並響應。編寫範例實現返回“Hello World”。伺服器在8081埠監聽。
http.createServer(function (request, response) {
   // HTTP Status: 200 : OK
   // Content Type: text/plain
   response.writeHead(200, {'Content-Type': 'text/plain'});
   // send the response body as "Hello World"
   response.end('Hello World\n');
}).listen(8081);
// console will print the message
console.log('Server running at http://127.0.0.1:8081/');
步驟 3: 建立一個 js 檔案在 helloworld.js 在 D:\>yiibai_worksp.
File: helloworld.js
var http = require("http")
http.createServer(function (request, response) {
   response.writeHead(200, {'Content-Type': 'text/plain'});
   response.end('Hello World\n');
}).listen(8081);
console.log('Server running at http://127.0.0.1:8081/');
現在執行 helloworld.js 看到結果:
D:\yiibai_worksp\nodejs>node helloworld.js
驗證輸出,伺服器應用已經啟動!
Server running at http://127.0.0.1:8081/
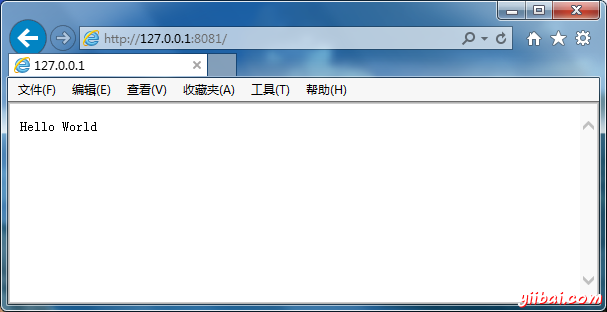
向Node.js伺服器發出請求
開啟瀏覽器(IE),在位址列中輸入:http://127.0.0.1:8081/ 在瀏覽器中,看看下面的結果。

Node.js - REPL
REPL代表讀取評估和演示列印回圈,它就像 Window 下的控制台的計算機環境,或 Unix/Linux 系統的 Shell命令輸入響應輸出。 Node.js或Node 綑綁了一個REPL環境。可執行以下任務。
-
讀取- 讀取使用者的輸入,解析輸入的JavaScript資料結構並儲存在記憶體
-
計算- 採取並評估計算資料結構
-
列印- 列印結果
-
迴圈 - 迴圈上面的命令,直到使用者按Ctrl-C兩次終止
Node 的REPL 與 Node.js 的實驗程式碼非常有用,用於偵錯JavaScript程式碼。
特點
REPL可以通過簡單地在shell/控制台執行node不帶任何引數來啟動。
D:\yiibai_worksp\nodejs> node
可以看到REPL 命令提示字元:
D:\yiibai_worksp\nodejs> node
>
簡單的表示式
讓我們嘗試在REPL命令提示字元下執行簡單的數學運算:
D:\yiibai_worksp\nodejs>node
> 1 + 3
4
> 1 + ( 2 * 3 ) - 4
3
>
使用變數
使用變數儲存值後並列印。如果不使用var關鍵字,那麼值儲存在變數並列印。而如果使用var關鍵字儲存值,那麼不會列印。稍後,可以使用這兩個變數。使用console.log()列印來任何東西
D:\yiibai_worksp\nodejs> node
> x = 10
10
> var y = 10
undefined
> x + y
20
> console.log("Hello World")
Hello Workd
undefined
多行表達
Node REPL支援類似於JavaScript的多表達。請參閱下列do-while迴圈:
D:\yiibai_worksp\nodejs> node
> var x = 0
undefined
> do {
... x++;
... console.log("x: " + x);
... } while ( x < 5 );
x: 1
x: 2
x: 3
x: 4
x: 5
undefined
>
... 當按下進入自動開啟來後括號。Node自動檢查表示式的連續性。
下劃線變數
使用_得到最後的結果。
D:\yiibai_worksp\nodejs> node
> var x = 10
undefined
> var y = 20
undefined
> x + y
30
> var sum = _
undefined
> console.log(sum)
30
undefined
>
REPL 命令
-
ctrl + c - 終止當前命令
-
ctrl + c twice - 終止 Node REPL
-
ctrl + d - 終止 Node REPL
-
Up/Down Keys - 檢視命令歷史記錄和修改以前的命令
-
tab Keys - 當前命令列表
-
.help - 列出所有命令
-
.break - 退出多行表達
-
.clear - 從多行表示式退出
-
.save - 當前 Node REPL對談儲存到一個檔案
-
.load - 載入檔案的內容到當前Node REPL對談
D:\yiibai_worksp\nodejs> node
> var x = 10
undefined
> var y = 20
undefined
> x + y
30
> var sum = _
undefined
> console.log(sum)
30
undefined
> .save test.js
Session saved to:test.js
> .load test.js
> var x = 10
undefined
> var y = 20
undefined
> x + y
30
> var sum = _
undefined
> console.log(sum)
30
undefined
>
Node.js - npm
npm 表示節點程式包管理器。npm 提供以下兩個主要功能:
-
Node.js包/模組的線上軟體倉庫,可通過搜尋 search.nodejs.org
-
命令列實用程式安裝包,作為Node.js版本管理和依賴包管理。
Node.js v0.6.3版本後才開始綑綁 npm 安裝。為了驗證,開啟控制台,然後輸入以下命令並檢視結果:
D:\yiibai_worksp\nodejs>npm --version
2.11.3
全域性VS本地安裝
預設情況下,NPM安裝在任何依賴性的本地模式。在這裡,本地模式指的是包在安裝目錄node_modules,位於Node應用的檔案夾中。本地部署的包都可以通過require() 存取 。
全域性安裝的軟體包/依賴儲存在<使用者目錄>/npm目錄。 這種依賴關係可以在命令列中使用Node.js的(命令列介面)任何功能,但不能使用require()在Node直接應用匯入。
我們來開始安裝明確,使用本地來安裝一個流行的Web框架。
D:\yiibai_worksp\nodejs>npm install express
[email protected] node_modules\express
|-- [email protected]
|-- [email protected]
|-- [email protected]
|-- [email protected]
|-- [email protected]
|-- [email protected]
|-- [email protected]
|-- [email protected]
|-- [email protected]
|-- [email protected]
|-- [email protected]
|-- [email protected]
|-- [email protected]
|-- [email protected]
|-- [email protected]
|-- [email protected]
|-- [email protected]
|-- [email protected] ([email protected])
|-- [email protected] ([email protected], [email protected], [email protected])
|-- [email protected] ([email protected])
|-- [email protected] ([email protected])
|-- [email protected] ([email protected], [email protected])
|-- [email protected] ([email protected])
|-- [email protected] ([email protected], [email protected])
一旦NPM完成下載,可以通過檢視 D:\yiibai_worksp\nodejs\node_modules 的內容驗證,或鍵入以下命令:
D:\yiibai_worksp\nodejs> npm ls
D:\yiibai_worksp\nodejs
|-- [email protected]
  |-- [email protected]
  | |-- [email protected]
  | | |-- [email protected]
  | |-- [email protected]
  |-- [email protected]
  |-- [email protected]
  |-- [email protected]
  |-- [email protected]
  | |-- [email protected]
  |-- [email protected]
  |-- [email protected]
  |-- [email protected]
  | |-- [email protected]
  |-- [email protected]
  |-- [email protected]
  |-- [email protected]
  |-- [email protected]
  |-- [email protected]
  |-- [email protected]
  | |-- [email protected]
  |-- [email protected]
  |-- [email protected]
  |-- [email protected]
  | |-- [email protected]
  | |-- [email protected]
  |-- [email protected]
  |-- [email protected]
  |-- [email protected]
  | |-- [email protected]
  | |-- [email protected]
  | |-- [email protected]
  |-- [email protected]
  |-- [email protected]
  | |-- [email protected]
  |   |-- [email protected]
  |-- [email protected]
  |-- [email protected]
上面列出的內容很長,這裡省略了一部分。
現在,讓我們嘗試安裝明確,使用全域性安裝流行Web框架。
D:\yiibai_worksp\nodjs> npm install express - g
一旦NPM完成下載,可以通過檢視<使用者目錄>/nmp/node_modules中的內容來驗證。或輸入以下命令:
D:\yiibai_worksp\nodejs> npm ls -g
以上可能會遇網路問題無法安裝,需要翻牆。
安裝模組
安裝模組很簡單,只要鍵入以下命令。
D:\yiibai_worksp\nodejs> npm install express
現在,可以在 js 檔案中使用它,如下:
var express = require('express');
package.json 包
package.json是存在於任何Node應用程式/模組的根目錄,並用於定義一個包的屬性。 讓我們開啟 package.json express包在 D:\yiibai_worksp\nodejs\node_modules\express\
{
  "name": "express",
  "description": "Fast, unopinionated, minimalist web framework",
  "version": "4.11.2",
  "author": {
    "name": "TJ Holowaychuk",
    "email": "[email protected]"
  },
  "contributors": [
    {
      "name": "Aaron Heckmann",
      "email": "[email protected]"
    },
    {
      "name": "Ciaran Jessup",
      "email": "[email protected]"
    },
    {
      "name": "Douglas Christopher Wilson",
      "email": "[email protected]"
    },
    {
      "name": "Guillermo Rauch",
      "email": "[email protected]"
    },
    {
      "name": "Jonathan Ong",
      "email": "[email protected]"
    },
    {
      "name": "Roman Shtylman",
      "email": "[email protected]"
    },
    {
      "name": "Young Jae Sim",
      "email": "[email protected]"
    }
  ],
  "license": "MIT",
  "repository": {
    "type": "git",
    "url": "https://github.com/strongloop/express"
  },
  "homepage": "http://expressjs.com/",
  "keywords": [
    "express",
    "framework",
    "sinatra",
    "web",
    "rest",
    "restful",
    "router",
    "app",
    "api"
  ],
  "dependencies": {
    "accepts": "~1.2.3",
    "content-disposition": "0.5.0",
    "cookie-signature": "1.0.5",
    "debug": "~2.1.1",
    "depd": "~1.0.0",
    "escape-html": "1.0.1",
    "etag": "~1.5.1",
    "finalhandler": "0.3.3",
    "fresh": "0.2.4",
    "media-typer": "0.3.0",
    "methods": "~1.1.1",
    "on-finished": "~2.2.0",
    "parseurl": "~1.3.0",
    "path-to-regexp": "0.1.3",
    "proxy-addr": "~1.0.6",
    "qs": "2.3.3",
    "range-parser": "~1.0.2",
    "send": "0.11.1",
    "serve-static": "~1.8.1",
    "type-is": "~1.5.6",
    "vary": "~1.0.0",
    "cookie": "0.1.2",
    "merge-descriptors": "0.0.2",
    "utils-merge": "1.0.0"
  },
  "devDependencies": {
    "after": "0.8.1",
    "ejs": "2.1.4",
    "istanbul": "0.3.5",
    "marked": "0.3.3",
    "mocha": "~2.1.0",
    "should": "~4.6.2",
    "supertest": "~0.15.0",
    "hjs": "~0.0.6",
    "body-parser": "~1.11.0",
    "connect-redis": "~2.2.0",
    "cookie-parser": "~1.3.3",
    "express-session": "~1.10.2",
    "jade": "~1.9.1",
    "method-override": "~2.3.1",
    "morgan": "~1.5.1",
    "multiparty": "~4.1.1",
    "vhost": "~3.0.0"
  },
  "engines": {
    "node": ">= 0.10.0"
  },
  "files": [
    "LICENSE",
    "History.md",
    "Readme.md",
    "index.js",
    "lib/"
  ],
  "scripts": {
    "test": "mocha --require test/support/env --reporter spec --bail --check-leaks test/ test/acceptance/",
    "test-cov": "istanbul cover node_modules/mocha/bin/_mocha -- --require test/support/env --reporter dot --check-leaks test/ test/acceptance/",
    "test-tap": "mocha --require test/support/env --reporter tap --check-leaks test/ test/acceptance/",
    "test-travis": "istanbul cover node_modules/mocha/bin/_mocha --report lcovonly -- --require test/support/env --reporter spec --check-leaks test/ test/acceptance/"
  },
  "gitHead": "63ab25579bda70b4927a179b580a9c580b6c7ada",
  "bugs": {
    "url": "https://github.com/strongloop/express/issues"
  },
  "_id": "[email protected]",
  "_shasum": "8df3d5a9ac848585f00a0777601823faecd3b148",
  "_from": "express@*",
  "_npmVersion": "1.4.28",
  "_npmUser": {
    "name": "dougwilson",
    "email": "[email protected]"
  },
  "maintainers": [
    {
      "name": "tjholowaychuk",
      "email": "[email protected]"
    },
    {
      "name": "jongleberry",
      "email": "[email protected]"
    },
    {
      "name": "shtylman",
      "email": "[email protected]"
    },
    {
      "name": "dougwilson",
      "email": "[email protected]"
    },
    {
      "name": "aredridel",
      "email": "[email protected]"
    },
    {
      "name": "strongloop",
      "email": "[email protected]"
    },
    {
      "name": "rfeng",
      "email": "[email protected]"
    }
  ],
  "dist": {
    "shasum": "8df3d5a9ac848585f00a0777601823faecd3b148",
    "tarball": "http://registry.npmjs.org/express/-/express-4.11.2.tgz"
  },
  "directories": {},
  "_resolved": "https://registry.npmjs.org/express/-/express-4.11.2.tgz",
  "readme": "ERROR: No README data found!"
}
Package.json 屬性
-
name - 包的名稱
-
version - 包的版本
-
description - 包的描述
-
homepage - 包的網站主頁
-
author - 包的作者
-
contributors - 包的貢獻者的名稱列表
-
dependencies - 依賴性列表。npm自動安裝所有在node_module檔案夾中的包提到的依賴關係。
-
repository - 包的儲存庫型別和URL
-
main - 包的入口點
-
keywords - 關鍵字
解除安裝模組
請使用以下命令解除安裝模組。
D:\yiibai_worksp\nodejs> npm uninstall express
當npm解除安裝的軟體包,可以通過檢視<使用者目錄>/npm/node_modules 的內容驗證。或鍵入以下命令:
D:\yiibai_worksp\nodejs> npm ls
更新模組
更新的package.json並更改其版本依賴關係進行更新,執行以下命令。
D:\yiibai_worksp\nodejs> npm update
搜尋模組
使用npm搜尋包名。
D:\yiibai_worksp\nodejs>npm search express
建立一個模組
建立模組需要要生成package.json。讓我們使用 npm 產生 package.json。
D:\yiibai_worksp\nodejs> npm init
This utility will walk you through creating a package.json file.
It only covers the most common items, and tries to guess sane defaults.

See 'npm help json' for definitive documentation on these fields
and exactly what they do.

Use 'npm install <pkg> --save' afterwards to install a package and
save it as a dependency in the package.json file.

Press ^C at any time to quit.
name: (Nodejs_WorkSpace)
一旦的 package.json 產生。使用一個有效的電子郵件地址在npm庫網站上註冊自己,使用如面的命令。
D:\yiibai_worksp\nodejs> npm adduser
現在,是時候來發布模組了:
D:\yiibai_worksp\nodejs> npm publish
Node.js - 回撥概念
什麼是回撥?
回撥是一種非同步相當於一個函式。回撥函式被呼叫在完成既定任務。Node大量使用了回撥。Node所有的API寫的都是支援回撥的這樣一種方式。例如,一個函式讀取一個檔案可能開始讀取檔案,並立即返回控制到執行環境 使得下一個指令可以馬上被執行。一旦檔案 I/O 完成,它會呼叫回撥函式,同時傳遞回撥函式,該檔案作為引數的內容。因此不會有堵塞或等待檔案I/O。這使得Node.js高度可延伸,因此可以處理大量的請求,而無需等待任何函式來返回結果。
阻塞程式碼範例
建立一個 txt 檔案:test.txt 在 D:\>yiibai_worksp\nodejs 目錄
Yiibai.Com
建立一個名為test.js 的js檔案在 D:\>yiibai_worksp\nodejs
var fs = require("fs");
var data = fs.readFileSync('test.txt');
console.log(data.toString());
console.log("Program Ended");
現在執行 test.js 看到的結果:
D:\yiibai_worksp\nodejs>node test.js
驗證輸出結果:
Tw511.com
Program Ended
非阻塞程式碼範例
建立一個 txt 檔案:test.txt 在 D:\>yiibai_worksp\nodejs 目錄
Yiibai.Com
更新 test.js 的內容在目錄D:\>yiibai_worksp\nodejs
var fs = require("fs");

fs.readFile('test.txt', function (err, data) {
    if (err) return console.error(err);
    console.log(data.toString());
});
console.log("Program Ended");
現在執行 test.js 看到的結果:
D:\yiibai_worksp\nodejs> node test.js
驗證輸出
Program Ended
Tw511.Com
事件迴圈概述
Node JS是單執行緒應用程式,但它通過事件和回撥的概念,支援並行。NodeJS的每一個API都是非同步的,作為一個單獨的執行緒,它使用非同步函式呼叫來維護並行。Node使用觀察者模式。Node執行緒保持一個事件迴圈,每當任何任務完成後得到結果,它觸發通知事件偵聽函式來執行相應的事件。
事件驅動程式設計
Node.js使用大量事件,這也是為什麼Node.js相對於其他類似技術比較快的原因之一。當Node啟動其伺服器,就可以簡單地初始化其變數,宣告函式,然後等待事件的發生。
雖然事件似乎類似於回撥。不同之處在於當回撥函式被呼叫非同步函式返回結果,其中的事件處理工作在觀察者模式。監聽事件函式作為觀察者。每當一個事件被解雇,其監聽函式開始執行。Node.js有多個內建的事件。 主要扮演者是 EventEmitter,可使用以下語法匯入。
//import events module
var events = require('events');
//create an eventEmitter object
var eventEmitter = new events.EventEmitter();
範例
建立一個 js 檔案名為 test.js 的檔案在D:\>yiibai_worksp\nodejs
File: test.js
//import events module
var events = require('events');
//create an eventEmitter object
var eventEmitter = new events.EventEmitter();

//create a function connected which is to be executed
//when 'connection' event occurs
var connected = function connected() {
   console.log('connection succesful.');

   // fire the data_received event
   eventEmitter.emit('data_received.');
}

// bind the connection event with the connected function
eventEmitter.on('connection', connected);

// bind the data_received event with the anonymous function
eventEmitter.on('data_received', function(){
   console.log('data received succesfully.');
});

// fire the connection event
eventEmitter.emit('connection');

console.log("Program Ended.");
現在執行test.js看到的結果:
D:\yiibai_worksp\nodejs> node test.js
驗證輸出。伺服器已經啟動
connection succesful.
data received succesfully.
Program Ended.
Node應用程式如何工作?
在Node 應用,任何非同步函式接受回撥作為最後的引數,並回撥函式接受錯誤作為第一個引數。我們再看一下前面的例子。
var fs = require("fs");

fs.readFile('test.txt', function (err, data) {
    if (err){
	   console.log(err.stack);
	   return;
	}
    console.log(data.toString());
});
console.log("Program Ended");
這裡fs.readFile是一個非同步函式,其目的是用於讀取檔案。 如果在檔案的讀取發生了錯誤,則err 物件將包含相應的錯誤,否則data將包含該檔案的內容。readFile通過err和data到回撥函式後,檔案讀取操作完成。
Node.js - 事件發射器
EventEmitter類在於事件的模組。它通過通俗易懂的語法如下:
//import events module
var events = require('events');
//create an eventEmitter object
var eventEmitter = new events.EventEmitter();
當EventEmitter範例出現任何錯誤,它會發出“error”事件。當新的監聽器新增,'newListener'事件被觸發,當一個監聽器被刪除,'removeListener“事件被觸發。
EventEmitter提供多種屬性,如:on和emit。on屬性用於系結與該事件的函式,而 emit 用於觸發一個事件。
方法
| Sr. No. | 方法 | 描述 |
|---|---|---|
| 1 | addListener(event, listener) | 指定事件新增一個監聽器到監聽器陣列的結尾。不用檢查檢視監聽器是否已經新增。多個呼叫傳遞事件和監聽器的相同組合將導致在監聽器被多次新增。返回發射器,因此呼叫可以連結。 |
| 2 | on(event, listener) | 新增一個監聽器到指定事件的監聽器陣列的結尾。沒有進行檢查以檢視是否收聽已經新增。多個呼叫傳遞事件和監聽器的相同的組合將導致監聽器被多次新增。 返回發射器,因此呼叫可以連結。 |
| 3 | once(event, listener) | 增加了一次監聽事件。該監聽器只被呼叫在下一次的事件被觸發後它將被刪除。 返回發射器,因此呼叫可連結。 |
| 4 | removeListener(event, listener) | 返回發射器,因此呼叫可連結。注意:改變陣列索引的監聽器陣列在監聽器後面。removeListener從監聽陣列中刪除一個監聽器的一個範例。如果單個監聽器已多次新增到監聽器陣列中指定的事件,那麼removeListener被多次呼叫刪除每個範例。 返回發射器,因此呼叫可連結。 |
| 5 | removeAllListeners([event]) | 刪除所有監聽器,或者那些指定的事件。這不是一個好主意,刪除監聽器在其他地方新增程式碼,特別是當它在發射器但沒有建立(如通訊端或檔案流)。返回發射器,因此呼叫可連結。 |
| 6 | setMaxListeners(n) | 預設情況下,如果超過10監聽器新增特定事件EventEmitters會列印警告。這是一個有用的預設這有助於發現記憶體洩漏。顯然,並非所有的發射器應限制在10個。此功能可以設定增加。設定為零無限。 |
| 7 | listeners(event) | 返回監聽指定事件的陣列。 |
| 8 | emit(event, [arg1], [arg2], [...]) | 為了與提供的引數執行每個監聽器。如果事件有監聽器返回true,否則為false。 |
類方法
| Sr. No. | 方法 | 描述 |
|---|---|---|
| 1 | listenerCount(emitter, event) | 返回對於一個給定事件的監聽器的數量。 |
事件
| Sr. No. | 事件名稱 | 引數 | 描述 |
|---|---|---|---|
| 1 | newListener |
|
事件在任何時間發出新增監聽器。當該事件被觸發時,監聽器可能還沒有為事件新增到監聽器的陣列。 |
| 2 | removeListener |
|
事件在任何時候發出刪除一個監聽器。當該事件被觸發時,監聽器可能還沒有為事件新增到監聽器的陣列。 |
範例
建立一個js檔案名為test.js,在 D:\>yiibai_worksp\nodejs
File: test.js
var events = require('events');
var eventEmitter = new events.EventEmitter();

//listener #1
var listner1 = function listner1() {
   console.log('listner1 executed.');
}

//listener #2
var listner2 = function listner2() {
  console.log('listner2 executed.');
}

// bind the connection event with the listner1 function
eventEmitter.addListener('connection', listner1);

// bind the connection event with the listner2 function
eventEmitter.on('connection', listner2);

var eventListeners = require('events').EventEmitter.listenerCount(eventEmitter,'connection');
console.log(eventListeners + " Listner(s) listening to connection event");

// fire the connection event
eventEmitter.emit('connection');

// remove the binding of listner1 function
eventEmitter.removeListener('connection', listner1);
console.log("Listner1 will not listen now.");

// fire the connection event
eventEmitter.emit('connection');

eventListeners = require('events').EventEmitter.listenerCount(eventEmitter,'connection');
console.log(eventListeners + " Listner(s) listening to connection event");

console.log("Program Ended.");
現在執行test.js看到的結果:
D:\yiibai_worksp\nodejs> node test.js
驗證輸出。伺服器已經啟動
2 Listner(s) listening to connection event
listner1 executed.
listner2 executed.
Listner1 will not listen now.
listner2 executed.
1 Listner(s) listening to connection event
Program Ended.
Node.js - 緩衝模組
緩衝器模組可以被用來建立緩衝區和SlowBuffer類。緩衝模組可以使用以下語法匯入。var buffer = require("buffer")
Buffer 類
Buffer類是一個全域性類,可以在應用程式,無需匯入緩衝模組進行存取。緩衝區是一種整數陣列並對應於原始儲存器V8堆以外分配。 緩衝區不能調整大小。
類方法
| Sr. No. | 方法 | 引數 | 描述 |
|---|---|---|---|
| 1 | Buffer.isEncoding(encoding) |
|
如果編碼是一種有效的編碼引數,返回true,否則返回false |
| 2 | Buffer.isBuffer(obj) |
|
測試 obj 是否為一個緩衝區 |
| 3 | Buffer.byteLength(string[, encoding]) |
|
給出了一個字串的實際位元組長度。encoding 的預設值是 'utf8'.這與String.prototype.length是不一樣的,因為它返回字串中的字元的數目。 |
| 4 | Buffer.concat(list[, totalLength]) |
|
返回一個緩衝器是連線所有的緩衝器列表中在一起的結果。 |
| 5 | Buffer.compare(buf1, buf2) |
|
同樣作為buf1.compare(buf2)。用於排序緩衝器陣列。 |
範例
建立一個js檔案名為test.js,在 D:\>yiibai_worksp\nodejs
File: test.js
//create a buffer
var buffer = new Buffer(26);
console.log("buffer length: " + buffer.length);

//write to buffer
var data = "YiiBai.com";
buffer.write(data);
console.log(data + ": " + data.length + " characters, " + Buffer.byteLength(data, 'utf8') + " bytes");

//slicing a buffer
var buffer1 = buffer.slice(0,14);
console.log("buffer1 length: " + buffer1.length);
console.log("buffer1 content: " + buffer1.toString());

//modify buffer by indexes
for (var i = 0 ; i < 26 ; i++) {
  buffer[i] = i + 97; // 97 is ASCII a
}
console.log("buffer content: " + buffer.toString('ascii'));

var buffer2 = new Buffer(4);

buffer2[0] = 0x3;
buffer2[1] = 0x4;
buffer2[2] = 0x23;
buffer2[3] = 0x42;

//reading from buffer
console.log(buffer2.readUInt16BE(0));
console.log(buffer2.readUInt16LE(0));
console.log(buffer2.readUInt16BE(1));
console.log(buffer2.readUInt16LE(1));
console.log(buffer2.readUInt16BE(2));
console.log(buffer2.readUInt16LE(2));


var buffer3 = new Buffer(4);
buffer3.writeUInt16BE(0xdead, 0);
buffer3.writeUInt16BE(0xbeef, 2);

console.log(buffer3);

buffer3.writeUInt16LE(0xdead, 0);
buffer3.writeUInt16LE(0xbeef, 2);

console.log(buffer3);
//convert to a JSON Object
var json = buffer3.toJSON();
console.log("JSON Representation : ");
console.log(json);

//Get a buffer from JSON Object
var buffer6 = new Buffer(json);
console.log(buffer6);

//copy a buffer
var buffer4 = new Buffer(26);
buffer.copy(buffer4);
console.log("buffer4 content: " + buffer4.toString());

//concatenate a buffer
var buffer5 = Buffer.concat([buffer,buffer4]);
console.log("buffer5 content: " + buffer5.toString());
現在執行test.js看到的結果:
D:\yiibai_worksp\nodejs> node test.js
驗證輸出結果
buffer length: 26
YiiBai.com: 18 characters, 18 bytes
buffer1 length: 14
buffer1 content: YiiBai
buffer content: abcdefghijklmnopqrstuvwxyz
772
1027
1059
8964
9026
16931
<Buffer de ad be ef>
<Buffer ad de ef be>
buffer4 content: abcdefghijklmnopqrstuvwxyz
buffer5 content: abcdefghijklmnopqrstuvwxyzabcdefghijklmnopqrstuvwxyz
Node.js - 資料流
什麼是資料流?
資料流是從源資料讀取或寫入資料到目標物件以。在節點中,有四種型別的流:
-
Readable - 資料流,其是用於讀操作
-
Writable - 資料流,用在寫操作
-
Duplex - 資料流,其可以用於讀取和寫入操作
-
Transform - 雙相型別流,輸出基於輸入進行計算
每種型別的流是EventEmitter,並且一次引發幾個事件。例如,一些常用的事件是:
-
data - 當有資料可讀取時觸發此事件
-
end - 當沒有更多的資料讀取時觸發此事件
-
error - 當有錯誤或接收資料寫入時觸發此事件
-
finish - 當所有資料已重新整理到底層系統時觸發此事件
從資料流中讀取
建立一個txt檔案名為test.txt,在 D:\>yiibai_worksp\nodejs
Yiibai.Com
建立一個檔案 test.js 在目錄 D:\>yiibai_worksp\nodejs
var fs = require("fs");
var data = '';
//create a readable stream
var readerStream = fs.createReadStream('test.txt');

//set the encoding to be utf8.
readerStream.setEncoding('UTF8');

//handle stream events
readerStream.on('data', function(chunk) {
   data += chunk;
});

readerStream.on('end',function(){
   console.log(data);
});

readerStream.on('error', function(err){
   console.log(err.stack);
});
console.log("Program Ended");
現在執行 test.js 看到的結果如下:
D:\yiibai_worksp\nodejs> node test.js
驗證輸出結果:
Program Ended
Tw511.Com
寫入到流
更新檔案 test.js 內容在目錄 D:\>yiibai_worksp\nodejs
var fs = require("fs");
var data = 'Tw511.Com';
//create a writable stream
var writerStream = fs.createWriteStream('test1.txt');

//write the data to stream
//set the encoding to be utf8.
writerStream.write(data,'UTF8');

//mark the end of file
writerStream.end();

//handle stream events
writerStream.on('finish', function() {
    console.log("Write completed.");
});

writerStream.on('error', function(err){
   console.log(err.stack);
});
console.log("Program Ended");
現在執行 test.js 看到的結果:
D:\yiibai_worksp\nodejs>node test.js
驗證輸出:
Program Ended
Write completed.
開啟檔案 test1.txt 在目錄 D:\>yiibai_worksp\nodejs. 驗證輸出結果:
Yiibai.Com
管道流
管道是一種機制,一個流的輸出連線到另一個流(作為另外一個流的輸入)。它通常用來從一個流中獲取資料,並通過該流輸出到另一個流。管道沒有對操作限制。考慮上面的例子中,在這裡我們使用readerStream 讀取test.txt的內容,並使用 writerStream 寫入 test1.txt。現在,我們將用管道來簡化操作,或者從一個檔案中讀取並寫入到另一個檔案。
更新 test.js 檔案的內容,在目錄 D:\>yiibai_worksp\nodejs, 如下:
var fs = require("fs");

//create a readable stream
var readerStream = fs.createReadStream('test.txt');

//create a writable stream
var writerStream = fs.createWriteStream('test2.txt');

//pipe the read and write operations
//read test.txt and write data to test2.txt
readerStream.pipe(writerStream);

console.log("Program Ended");
現在執行test.js看到的結果:
D:\yiibai_worksp\nodejs> node test.js
驗證輸出的結果:
Program Ended
開啟檔案 test2.txt 在 D:\>yiibai_worksp\nodejs. 驗證輸出結果:
Yiibai.Com
Node.js - 檔案系統
fs模組用於檔案I/O。 fs模組可以使用以下語法匯入。var fs = require("fs")
同步 vs 非同步
每一個fs模組的方法都有同步和非同步形式。非同步方法接受一個最後的引數為完成回撥函式,而回撥函式的第一個引數是錯誤。它優選使用非同步方法來代替同步方法,前者從未阻塞程式執行,而後者則會阻塞。
範例
建立一個js檔案名為test.js 在目錄 D:\>yiibai_worksp\nodejs
File: test.js
var fs = require("fs");

//Asynchronous read
fs.readFile('test.txt', function (err, data) {
    if (err) return console.error(err);
    console.log("Asynchronous read: " + data.toString());
});

//Synchronous read
var data = fs.readFileSync('test.txt');
console.log("Synchronous read: " + data.toString());

console.log("Program Ended");
現在執行test.js看到的結果:
D:\yiibai_worksp\nodejs> node test.js
驗證輸出結果:
Synchronous read: Tw511.Com
Program Ended
Asynchronous read: Tw511.Com
方法
| Sr. No. | 方法 | 描述 |
|---|---|---|
| 1 | fs.rename(oldPath, newPath, callback) | rename()非同步,不帶引數可能是個例外,提供完成回撥 |
| 2 | fs.ftruncate(fd, len, callback) | ftruncate()非同步,不帶引數可能是個例外,提供完成回撥 |
| 3 | fs.ftruncateSync(fd, len) | ftruncate() 同步 |
| 4 | fs.truncate(path, len, callback) | truncate()非同步. 沒有引數時它可能是例外,提供給完成回撥。 |
| 5 | fs.truncateSync(path, len) | truncate()同步 |
| 6 | fs.chown(path, uid, gid, callback) | chown()非同步. 沒有引數時它可能是例外,提供給完成回撥。 |
| 7 | fs.chownSync(path, uid, gid) | chown() 同步 |
| 8 | fs.fchown(fd, uid, gid, callback) | fchown()非同步. 沒有引數時它可能是例外,提供給完成回撥。 |
| 9 | fs.fchownSync(fd, uid, gid) | fchown()非同步 |
| 10 | fs.lchown(path, uid, gid, callback) | lchown()非同步. 沒有引數時它可能是例外,提供給完成回撥。 |
| 11 | fs.lchownSync(path, uid, gid) | lchown()同步 |
| 12 | fs.chmod(path, mode, callback) | chmod()非同步. 沒有引數時它可能產生例外,提供給完成回撥。 |
| 13 | fs.chmodSync(path, mode) | chmod() 同步 |
| 14 | fs.fchmod(fd, mode, callback) | fchmod() 非同步. 沒有引數時它可能產生例外,提供給完成回撥。 |
| 15 | fs.fchmodSync(fd, mode) | fchmod() 同步 |
| 16 | fs.lchmod(path, mode, callback) | lchmod() 非同步, 沒有引數時它可能產生例外,提供給完成回撥。僅可在Mac OS X 上使用 |
| 17 | fs.lchmodSync(path, mode) | lchmod() 同步 |
| 18 | fs.stat(path, callback) | stat() 同步,回撥函式得到兩個引數(err, stats) ,其中stats是一個fs.Stats物件 |
| 19 | fs.lstat(path, callback) | lstat()非同步,回撥函式得到兩個引數(err, stats),其中stats是一個fs.Stats物件。lstat()等同於stat(),不同之處在於,如果路徑path是一個符號連結,那麼連結本身是stat-ed,而不是指檔案。 |
| 20 | fs.fstat(fd, callback) | fstat() 非同步. 回撥函式得到兩個引數 (err, stats) ,其中統計資料是一個fs.Stats物件。fstat()等同於stat(),除了該檔案是stat-ed 由檔案描述符fd指定。 |
| 21 | fs.statSync(path) | stat()同步,返回fs.Stats的一個範例。 |
| 22 | fs.lstatSync(path) | lstat()同步,返回fs.Stats的一個範例。 |
| 23 | fs.fstatSync(fd) | fstat() 同步,返回fs.Stats的一個範例。 |
| 24 | fs.link(srcpath, dstpath, callback) | link() 非同步. 沒有引數時它可能產生例外,提供給完成回撥。 |
| 25 | fs.linkSync(srcpath, dstpath) | link() 同步 |
| 26 | fs.symlink(srcpath, dstpath[, type], callback) | symlink()非同步,沒有引數時它可能是例外,提供給完成回撥。該型別引數可以設定為 'dir', 'file', 或 'junction' (預設為'file') ,只適用於Windows(忽略其他平台)。請注意,Windows結點需要目標路徑是絕對的。當使用'junction',目標引數將自動歸絕對路徑。 |
| 27 | fs.symlinkSync(srcpath, dstpath[, type]) | symlink()同步 |
| 28 | fs.readlink(path, callback) | readlink()同步,回撥函式得到兩個引數(err, linkString)。 |
| 29 | fs.realpath(path[, cache], callback) | realpath() 非同步. 回撥函式得到兩個引數(err, resolvedPath)。可以使用process.cwd解決相對路徑。快取cache是一個物件字面量,可以用來強制一個特定路徑解析或避免額外的fs.stat呼叫真正的路徑對映路徑。 |
| 30 | fs.realpathSync(path[, cache]) | realpath()同步,返回解決路徑。 |
| 31 | fs.unlink(path, callback) | unlink()非同步,沒有引數時它可能產生例外,提供給完成回撥。 |
| 32 | fs.unlinkSync(path) | unlink()同步 |
| 33 | fs.rmdir(path, callback) | rmdir()非同步,沒有引數時它可能產生例外,提供給完成回撥。 |
| 34 | fs.rmdirSync(path) | rmdir()同步 |
| 35 | fs.mkdir(path[, mode], callback) | mkdir(2)非同步,模式預設為0777。 |
| 36 | fs.mkdirSync(path[, mode]) | mkdir()同步 |
| 37 | fs.readdir(path, callback) | readdir(3) 同步,讀取目錄中的內容。回撥函式得到兩個引數 (err, files) ,其中檔案是檔案的陣列名稱在目錄中,不包括 '.' 和 '..'. |
| 38 | fs.readdirSync(path) | readdir()同步,返回檔案名陣列不含 '.' 和 '..'. |
| 39 | fs.close(fd, callback) | close() 同步,沒有引數時它可能產生例外,提供給完成回撥。 |
| 40 | fs.closeSync(fd) | close() 同步 |
| 41 | fs.open(path, flags[, mode], callback) | 非同步檔案開啟 |
| 42 | fs.openSync(path, flags[, mode]) | fs.open()同步 |
| 43 | fs.utimes(path, atime, mtime, callback) |
|
| 44 | fs.utimesSync(path, atime, mtime) | 改變所提供的路徑參照的檔案的檔案時間戳。 |
| 45 | fs.futimes(fd, atime, mtime, callback) |
|
| 46 | fs.futimesSync(fd, atime, mtime) | 改變由提供的檔案的描述符所參照的檔案的檔案時間戳。 |
| 47 | fs.fsync(fd, callback) | fsync(2) 非同步,沒有引數時它可能產生例外,提供給完成回撥。 |
| 48 | fs.fsyncSync(fd) | fsync(2)同步 |
| 49 | fs.write(fd, buffer, offset, length[, position], callback) | fd指定的檔案寫緩衝器 |
| 50 | fs.write(fd, data[, position[, encoding]], callback) | 指定的fd寫入檔案資料。如果資料不是一個緩衝區範例則該值將被強制轉換為字串。 |
| 51 | fs.writeSync(fd, buffer, offset, length[, position]) | fs.write()同步。返回寫入的位元組數。 |
| 52 | fs.writeSync(fd, data[, position[, encoding]]) | fs.write()同步。返回寫入的位元組數。 |
| 53 | fs.read(fd, buffer, offset, length, position, callback) | 從fd指定檔案讀取資料。 |
| 54 | fs.readSync(fd, buffer, offset, length, position) | fs.read同步。返回 bytesRead 讀取的數量。 |
| 55 | fs.readFile(filename[, options], callback) | 非同步讀取檔案的全部內容。 |
| 56 | fs.readFileSync(filename[, options]) | fs.readFile同步,返回檔案名的內容。 |
| 57 | fs.writeFile(filename, data[, options], callback) | 非同步資料寫入到檔案,如果它已經存在則替換檔案。資料可以是字串或緩衝。 |
| 58 | fs.writeFileSync(filename, data[, options]) | fs.writeFile 同步 |
| 59 | fs.appendFile(filename, data[, options], callback) | 非同步資料追加到檔案,建立檔案如果檔案不存在。資料可以是字串或緩衝。 |
| 60 | fs.appendFileSync(filename, data[, options]) | fs.appendFile同步 |
| 61 | fs.watchFile(filename[, options], listener) | 關注有關檔案名更改,回撥監聽器在每個被存取的檔案名時。 |
| 62 | fs.unwatchFile(filename[, listener]) | 停止監視對於檔案名的更改。如果指定監聽器,只有特定的監聽器被刪除。否則,所有監聽器都會刪除,已經有效地停止監聽檔案名。 |
| 63 | fs.watch(filename[, options][, listener]) | 關注檔案名的變化,其中 filename 是一個檔案或目錄。返回是一個 fs.FSWatcher 的物件。 |
| 64 | fs.exists(path, callback) | 測試給定的路徑通過使用檔案系統檢查是否存在。然後呼叫回撥引數為真或假。 |
| 65 | fs.existsSync(path) | fs.exists同步 |
| 66 | fs.access(path[, mode], callback) | 由path指定的檔案測試使用者的許可權。mode是一個可選整數,指定要執行輔助功能的檢查。 |
| 67 | fs.accessSync(path[, mode]) | fs.access同步。這將引發輔助功能失敗,否則什麼也不做。 |
| 68 | fs.createReadStream(path[, options]) | 返回一個新的ReadStream物件 |
| 69 | fs.createWriteStream(path[, options]) | 返回一個新的WriteStream物件 |
| 70 | fs.symlink(srcpath, dstpath[, type], callback) | 非同步symlink(). 該型別引數可以設定為'dir','file',或'junction'(預設為“檔案”),只適用於Windows(忽略其他平台)。請注意,Windows交界點需要的目標路徑是絕對的。當使用'junction',目標引數將自動標準化為絕對路徑。 |
標誌
標誌進行讀/寫操作是:
-
r - 開啟檔案進行讀取。如果該檔案不存在發生異常。
-
r+ - 開啟檔案進行讀取和寫入。如果該檔案不存在發生異常。
-
rs - 開啟檔案,用於讀取在同步方式。指示作業系統繞過本地檔案系統快取記憶體。這是對NFS掛載開啟檔案,因為它可以讓你跳過潛在陳舊的本地快取中很有用。它對I/O效能有非常現實的影響,除非需要它,否則不要使用此標誌。注意,這無法開啟 fs.open() 到一個同步阻塞呼叫。如果這不是真想要的,那麼應該使用fs.openSync()。
-
rs+ - 開啟檔案進行讀取和寫入,告訴作業系統同步地開啟它。 對於'rs'有關非同步使用 - 要慎用。
-
w - 開啟檔案進行寫入。該檔案被建立(如果它不存在)或截斷清空內容(如果存在)。
-
wx - 類似“w”,但如果路徑存在,則失敗。
-
w+ - 開啟檔案進行讀取和寫入。該檔案被建立(如果它不存在)或截斷清空內容(如果存在)。
-
wx+ - 類似 “w+”,但如果路徑存在,則失敗
-
a - 開啟檔案進行追加。如果檔案不存在,則建立該檔案
-
ax - 類似“a”,但如果路徑存在則失敗
-
a+ - 開啟檔案進行讀取和追加內容。如果檔案不存在,則建立該檔案
-
ax+' - 類似 'a+',但如果路徑存在則會失敗
範例
建立一個 txt 檔案:test.txt 在 D:\>yiibai_worksp\nodejs,內容如下:Yiibai.Com
建立一個js檔案名為test.js 在D:\>yiibai_worksp\nodejs 目錄中。
File: test.js
var fs = require("fs");
var buffer = new Buffer(1024);

//Example: Opening File
function openFile(){
   console.log("\nOpen file");
   fs.open('test.txt', 'r+', function(err,fd) {
      if (err) console.log(err.stack);
	  console.log("File opened");
   });
}

//Example: Getting File Info
function getStats(){
   console.log("\nGetting File Info");
   fs.stat('test.txt', function (err, stats) {
      if (err) console.log(err.stack);
      console.log(stats);
      console.log("isFile ? "+stats.isFile());
      console.log("isDirectory ? "+stats.isDirectory());
   });
}

//Example: Writing File
function writeFile(){
   console.log("\nWrite file");
   fs.open('test1.txt', 'w+', function(err,fd) {
      var data = "Tw511.com - Simply Easy Learning!";
      buffer.write(data);

      fs.write(fd, buffer,0,data.length,0,function(err, bytes){
         if (err) console.log(err.stack);
	     console.log(bytes + " written!");
      });
   });
}

//Example: Read File
function readFile(){
   console.log("\nRead file");
   fs.open('test1.txt', 'r+', function(err,fd) {
      if (err) console.log(err.stack);
      fs.read(fd, buffer,0,buffer.length,0,function(err, bytes){
         if (err) console.log(err.stack);
	     console.log(bytes + " read!");
	     if(bytes > 0){
            console.log(buffer.slice(0,bytes).toString());
	     }
      });
   });
}

function closeFile(){
   console.log("\nClose file");
   fs.open('test.txt', 'r+', function(err,fd) {
      if (err) console.log(err.stack);
	  fs.close(fd,function(){
	     if (err) console.log(err.stack);
		 console.log("File closed!");
	  });
   });
}

function deleteFile(){
   console.log("\nDelete file");
   fs.open('test1.txt', 'r+', function(err,fd) {
	   fs.unlink('test1.txt', function(err) {
		  if (err) console.log(err.stack);
		  console.log("File deleted!");
	   });
   });
}

function truncateFile(){
   console.log("\nTruncate file");
   fs.open('test.txt', 'r+', function(err,fd) {
	   fs.ftruncate(fd, function(err) {
		  if (err) console.log(err.stack);
		  console.log("File truncated!");
	   });
   });
}

function createDirectory(){
	console.log("\nCreate Directory");
	fs.mkdir('test',function(err){
      if(!err){
	     console.log("Directory created!");
	  }
      if(err && err.code === 'EEXIST'){
         console.log("Directory exists!");
      } else if (err) {
         console.log(err.stack);
      }
	});
}

function removeDirectory(){
	console.log("\nRemove Directory");
	fs.rmdir('test',function(err){
      if(!err){
	     console.log("Directory removed!");
	  }
      if (err) {
		 console.log("Directory do not exist!");
      }
	});
}

function watchFile(){
   fs.watch('test.txt', function (event, filename) {
      console.log('event is: ' + event);
   });
}

//Opening file
openFile();

//Writing File
writeFile();

//Reading File
readFile();

//Closing Files
closeFile();

//Getting file information
getStats();

//Deleting Files
deleteFile();

//Truncating Files
truncateFile();

//Creating Directories
createDirectory();

//Removing Directories
removeDirectory();

//Watching File Changes
watchFile();
現在執行 test.js 看到的結果:
D:\yiibai_worksp\nodejs> node test.js
驗證輸出:
Open file

Write file

Read file

Close file

Getting File Info

Delete file

Truncate file

Create Directory

Remove Directory
File opened
{ dev: 0,
  mode: 33206,
  nlink: 1,
  uid: 0,
  gid: 0,
  rdev: 0,
  ino: 0,
  size: 0,
  atime: Fri Jan 01 2010 00:02:15 GMT+0530 (India Standard Time),
  mtime: Sun Feb 15 2015 13:33:09 GMT+0530 (India Standard Time),
  ctime: Fri Jan 01 2010 00:02:15 GMT+0530 (India Standard Time) }
isFile ? true
isDirectory ? false
Directory created!
Directory removed!
event is: rename
event is: rename
42 written!
42 read!
Tw511.com - Simply Easy Learning!
File closed!
File deleted!
File truncated!
event is: change
Node.js - 工具模組
在這篇文章中,我們將討論一些Node.js庫提供的工具模組,這是非常常見的,經常使用在整個應用程式中。
| Sr.No. | 模組的名稱和說明 |
|---|---|
| 1 |
Console 用於列印輸出和錯誤資訊 |
| 2 |
Process 用於獲取當前進程的資訊,提供處理相關活動的多個事件 |
| 3 |
OS Module 提供基本的作業系統相關的實用功能 |
| 4 |
Path Module 實用工具提供用於處理和轉化檔案路徑 |
| 5 |
Net Module 提供伺服器和用戶端的資料流。作為一個網路應用包 |
| 6 |
DNS Module 提供的功能做實際的DNS查詢,以及使用底層作業系統的名稱解析功能 |
| 7 |
Domain Module 提供一種方式來處理多個不同的I/O操作為一個組 |
Node.js - 控制台
方法
| Sr. No. | 方法 | 描述 |
|---|---|---|
| 1 | console.log([data][, ...]) | 列印及帶有換行符到stdout,此函式可將多個引數在printf()類似的方式 |
| 2 | console.info([data][, ...]) | 列印及帶有換行符到stdout,此函式可將多個引數在printf()類似的方式 |
| 3 | console.error([data][, ...]) | 列印及帶有換行符到stderr,此函式可將多個引數在printf()類似的方 |
| 4 | console.warn([data][, ...]) | 列印及帶有換行符到stderr,此函式可將多個引數在printf()類似的方式 |
| 5 | console.dir(obj[, options]) | 使用util.inspect在obj和生成的字串列印到stdout |
| 6 | console.time(label) | 標記時間 |
| 7 | console.timeEnd(label) | 完成定時,記錄輸出 |
| 8 | console.trace(message[, ...]) | 列印到stderr“Trace :',其次是格式化的訊息和堆疊跟蹤到當前位置 |
| 9 | console.assert(value[, message][, ...]) | 類似於assert.ok(),但錯誤資訊被格式化為util.format(message...) |
範例
建立一個js檔案名為test.js 在目錄 D:\>yiibai_worksp\nodejs
File: test.js
var counter = 10;

console.log("Counter: %d", counter);

console.time("Getting data");
//make a database call to retrive the data
//getDataFromDataBase();
console.timeEnd('Getting data');

console.info("Program Ended!")
現在執行test.js看到的結果:
D:\yiibai_worksp\nodejs> node test.js
驗證輸出
Counter: 10
Getting data: 0ms
Program Ended!
Node.js - 進程
process 是一個全域性性物件,並用於表示Node進程。
退出碼
節點正常退出時帶狀態0碼,在沒有更多的非同步操作掛起時。其他退出程式碼描述如下:
| Code | 名稱 | 描述 |
|---|---|---|
| 1 | 未捕獲致命異常 | 有一個未捕獲的異常,它不是由域或uncaughtException事件處理程式處理 |
| 2 | 未使用 | 通過對於Bash濫用內建保留 |
| 3 | 內部的JavaScript解析錯誤 | JavaScript原始碼,在內部Node引導過程引起了解析錯誤。這是極為罕見的,一般只是在Node本身的開發過程中才發生的。 |
| 4 | 內部的JavaScript評估計算失敗 | JavaScript原始碼,在內部Node的引導過程未能評估計算時返回一個函式值。這是極為罕見的,一般只是在Node本身的開發過程中發生的。 |
| 5 | 致命錯誤 | 在V8中的一個致命不可恢復的錯誤。通常情況下一個訊息將被列印到stderr使用字首致命錯誤。 |
| 6 | 非函式內部例外處理程式 | 有一個未捕獲的異常,但內部致命的例外處理函式被莫名其妙地設定為一個非函式,並且不能被呼叫。 |
| 7 | 內部例外處理程式執行時故障 | 這裡是一個未捕獲的異常,並試圖處理它內部的致命的例外處理函式本身丟擲一個錯誤。 |
| 8 | 未使用 |
|
| 9 | 無效的引數 | 要麼未知選項指定,或沒有值時需要提供一個值的選項。 |
| 10 | 內部的JavaScript執行時故障 | JavaScript原始碼,在內部Node引導過程中丟擲一個錯誤,當引導函式被呼叫。這是極為罕見的,一般Node是在開發過程中發生的。 |
| 12 | 無效的偵錯引數 | --debug和/或--debug-brk選項都設定,但不能選擇無效的埠號。 |
| >128 | 信號退出 | 如果Node接收到一個致命信號如SIGKILL或SIGHUP,然後它的退出程式碼是128加上的信號程式碼的值。這是一個標準Unix,實際上由於退出程式碼被定義為7位整數,信號退出設定的高序位,包含所述信號的程式碼值。 |
事件
Process(進程)是一個eventEmitter,並且它發出下列事件
| Sr.No. | Event | 描述 |
|---|---|---|
| 1 | exit | 發射當進程即將退出。沒有辦法來防止事件迴圈退出在這一點上, 並且一旦所有的退出監聽器執行完成,程式將退出。 |
| 2 | beforeExit | 當Node清空它的事件迴圈,並沒有其他事情安排此事件被發射。通常情況下,當沒有預定的工作Node退出,但是一個監聽'beforeExit'可進行非同步呼叫,並導致Node繼續。 |
| 3 | uncaughtException | 發射當異常冒泡一路回到事件迴圈。如果一個監聽器新增了此異常,則預設操作(這是列印堆疊跟蹤並退出)不會發生。 |
| 4 | Signal Events | 發射當進程接收到信號,例如SIGINT,SIGHUP等 |
屬性
Process(進程)提供了許多有用的特性,以更好地控制系統的相互作用。
| Sr.No. | 屬性 | 描述 |
|---|---|---|
| 1 | stdout | 可寫流到標準輸出 |
| 2 | stderr | 可寫流到stderr |
| 3 | stdin | 可寫流標準輸入 |
| 4 | argv | 包含命令列引數陣列。第一元件將是“節點”,第二個元素是JavaScript檔案的名稱。接下來元素的內容是額外的命令列引數 |
| 5 | execPath | 這是啟動進程的可執行檔案的絕對路徑 |
| 6 | execArgv | 這是一組Node特定的命令列選項從可執行啟動進程 |
| 7 | env | 包含使用者環境的物件 |
| 8 | exitCode | 許多可作為進程退出程式碼優雅地退出,或者是通過process.exit()無需指定程式碼退出 |
| 9 | version | 編譯時屬性暴露NODE_VERSION |
| 10 | versions | 屬性用來暴露node及其依賴的版本字串 |
| 11 | config | 物件包含JavaScript用來表示編譯當前Node可執行的組態選項能力。這是類似於“config.gypi”檔案,所產生在./configure指令碼執行時 |
| 12 | pid | 進程的PID |
| 13 | title | getter/setter設定 'ps' 所顯示 |
| 14 | arch | 在什麼處理器架構上執行: 'arm', 'ia32', 或 'x64' |
| 15 | platform | 正在執行在什麼平台: 'darwin', 'freebsd', 'linux', 'sunos' 或 'win32' |
| 16 | mainModule | 備選的方法來檢索require.main。不同的是,如果主模組改變在執行時,require.main仍可能指的是原來的主模組中被要求的變化發生之前的模組。通常它是安全假設的,這兩個指的是相同的模組 |
方法
Process(進程)提供了許多有用的方法,以更好的控制系統的相互作用。
| Sr.No. | 方法 | 描述 |
|---|---|---|
| 1 | abort() | 這導致node發出中止。node退出並生成一個核心檔案 |
| 2 | chdir(directory) | 改變進程的當前工作目錄,或如果失敗將引發異常 |
| 3 | cwd() | 返回進程的當前工作目錄 |
| 4 | exit([code]) | 終止使用指定的程式碼進程。如果省略,退出使用'成功'的程式碼0 |
| 5 | getgid() | 獲取行程群組標識,這是數值組ID,而不是組名。此函式僅適用於POSIX平台(即非Windows,Android)。 |
| 6 | setgid(id) | 設定行程群組的標識。 (詳看setgid(2).) 這要麼接受一個數位ID或組名字串。如果指定了組名,則此方法阻塞在解析到一個數位ID。此函式僅適用於POSIX平台(即非Windows,Android)。 |
| 7 | getuid() | 獲取進程的使用者身份。這是數位ID,而不是使用者名。此函式僅適用於POSIX平台(即非Windows,Android)。 |
| 8 | setuid(id) | 設定進程的使用者的身份。(請參閱setgid(2))。這接受一個數位ID或使用者名字串。如果指定一個使用者名,這個方法會阻塞,同時解析到一個數位ID。此函式僅適用於POSIX平台(即非Windows,Android)。 |
| 9 | getgroups() | 返回帶有補充組ID的陣列。POSIX離開未指定是否該有效組ID包函,而Node.js保證它始終是。此函式僅適用於POSIX平台(即非Windows,Android)。 |
| 10 | setgroups(groups) | 設定輔助組標識。這是一個許可權操作,這意味著需要以root或具有CAP_SETGID許可權。此函式僅適用於POSIX平台(即非Windows,Android)。 |
| 11 | initgroups(user, extra_group) | 讀取/etc/group檔案並初始化組存取列表,使用所有這些組的使用者是其成員。這是一個許可權操作,這意味著需要以root或具有CAP_SETGID權力。此函式僅適用於POSIX平台(即非Windows,Android)。 |
| 12 | kill(pid[, signal]) | 傳送信號給一個進程。pid是進程ID和信號描述傳送信號的字串。信號的名字就像'SIGINT'或'SIGHUP'字串。如果省略,信號是'SIGTERM'。 |
| 13 | memoryUsage() | 返回描述以位元組為單位的Node進程的記憶體使用量的物件 |
| 14 | nextTick(callback) | 一旦當前事件迴圈轉到執行結束,呼叫回撥函式 |
| 15 | umask([mask]) | 設定或讀取進程的檔案模式建立掩碼。子進程繼承父進程的掩碼。返回老掩碼如果掩碼引數給出,否則返回當前掩碼 |
| 16 | uptime() | Node已經執行的秒數 |
| 17 | hrtime() | 返回當前高解析度實時在[seconds, nanoseconds] 元組。它是相對於過去的任意時間。它是不相關的一天中的時間,因此,不會受到時鐘偏移。 主要用途是用於測量時間間隔之間的效能。 |
範例
建立一個js檔案名為test.js 在目錄 D:\>yiibai_worksp\nodejs
File: test.js
var util = require('util');

//printing to console
process.stdout.write("Hello World!" + "\n");

//reading passed parameter
process.argv.forEach(function(val, index, array) {
   console.log(index + ': ' + val);
});

//executable path
console.log(process.execPath);

//print the current directory
console.log('Current directory: ' + process.cwd());

//print the process version
console.log('Current version: ' + process.version);

//print the memory usage
console.log(util.inspect(process.memoryUsage()));
現在執行test.js看到的結果:
D:\yiibai_worksp\nodejs> node test.js
驗證輸出:
Hello World!
0: node
1: D:\yiibai_worksp\nodejs\test.js
D:\yiibai_worksp\nodejs\node.exe
Current directory: D:\yiibai_worksp\nodejs
Current version: v0.12.7
{ rss: 16379904, heapTotal: 9751808, heapUsed: 4067896 }
Node.js - OS 模組
os模組用於一些基本的作業系統相關的實用功能。os模組可以使用以下語法匯入。
var os = require("os")
方法
| Sr. No. | 方法 | 描述 |
|---|---|---|
| 1 | os.tmpdir() | 返回臨時檔案作業系統的預設目錄 |
| 2 | os.endianness() | 返回CPU的儲存方式。可能的值是“BE”或“LE” |
| 3 | os.hostname() | 返回作業系統的主機名 |
| 4 | os.type() | 返回作業系統名稱 |
| 5 | os.platform() | 返回作業系統平台 |
| 6 | os.arch() | 返回作業系統的CPU架構。可能的值是“64”,“arm”和“ia32” |
| 7 | os.release() | 返回作業系統版本 |
| 8 | os.uptime() | 返回系統正常執行時間(秒) |
| 9 | os.loadavg() | 返回包含1,5和15分鐘的負載量平均值的陣列 |
| 10 | os.totalmem() | 返回以位元組系統儲存器的總量 |
| 11 | os.freemem() | 返回可用系統記憶體量(位元組) |
| 12 | os.cpus() | 返回一個包含每個已安裝的CPU/核心的資訊物件的陣列:model, speed (in MHz),和時間(含有用在CPU/核心的毫秒數量的物件:user, nice, sys, idle, and irq). |
| 13 | os.networkInterfaces() | 得到的網路介面的列表 |
屬性
| Sr. No. | 屬性 | 描述 |
|---|---|---|
| 1 | os.EOL | 作業系統限定行尾的適當標記的常數 |
範例
建立一個js檔案名為test.js 在 D:\>yiibai_worksp\nodejs
File: test.js
var os = require("os");

//endianness
console.log('endianness : ' + os.endianness());

//type
console.log('type : ' + os.type());

//platform
console.log('platform : ' + os.platform());

//totalmem
console.log('total memory : ' + os.totalmem() + " bytes.");

//freemem
console.log('free memory : ' + os.freemem() + " bytes.");
現在執行test.js看到的結果:
D:\yiibai_worksp\nodejs> node test.js
驗證輸出:
endianness : LE
type : Windows_NT
platform : win32
total memory : 4201889792 bytes.
free memory : 1233211392 bytes.
Node.js - Path 模組
path 模組用於處理和轉換檔案路徑。path模組可以使用以下語法匯入。
var path = require("path")
屬性
進程提供了許多有用的特性,以獲得更好的控制系統的相互作用。
| Sr.No. | 屬性 | 描述 |
|---|---|---|
| 1 | path.sep | 特定於平台的檔案分隔符 '\\' 或 '/'. |
| 2 | path.delimiter | 特定於平台的路徑分隔符, ; 或 ':'. |
| 3 | path.posix | 提供存取路徑上述方法,但始終在POSIX相容的方式進行互動 |
| 4 | path.win32 | 提供存取路徑上述方法,但總是在Win32相容的方式進行互動 |
方法
| Sr. No. | 方法 | 描述 |
|---|---|---|
| 1 | path.normalize(p) | 規範化字串路徑,採用'..'和'.'部分 |
| 2 | path.join([path1][, path2][, ...]) | 連線所有引數一起和規範生成的路徑 |
| 3 | path.resolve([from ...], to) | 解析到一個絕對路徑 |
| 4 | path.isAbsolute(path) | 確定路徑是否是一個絕對路徑。絕對路徑將始終解析到相同的位置,而不考慮工作目錄 |
| 5 | path.relative(from, to) | 解決相對路徑從from到to |
| 6 | path.dirname(p) | 返回路徑的目錄名稱,類似於Unix的目錄名的命令。 |
| 7 | path.basename(p[, ext]) | 返回路徑的最後部分,類似於UNIX命令基名。 |
| 8 | path.extname(p) | 返回路徑的擴充套件,從最後一個“.”結束到字串在路徑的最後部分。如果沒有'.'在路徑最後部分或第一個字元的是“.”,那麼它返回一個空字串。 |
| 9 | path.parse(pathString) | 從路徑字串返回物件 |
| 10 | path.format(pathObject) | 從一個物件返回 path.parse上述相反的路徑字串 |
範例
建立一個js檔案名為test.js 在 D:\>yiibai_worksp\nodejs
File: test.js
var path = require("path");

//normalization
console.log('normalization : ' + path.normalize('/test/test1//2slashes/1slash/tab/..'));

//join
console.log('joint path : ' + path.join('/test', 'test1', '2slashes/1slash', 'tab', '..'));

//resolve
console.log('resolve : ' + path.resolve('test.js'));

//extName
console.log('ext name : ' + path.extname('test.js'));
現在執行test.js看到的結果:
D:\yiibai_worksp\nodejs> node test.js
驗證輸出:
normalization : \test\test1\2slashes\1slash
joint path : \test\test1\2slashes\1slash
resolve : D:\yiibai_worksp\nodejs\test.js
ext name : .js
Node.js - Net模組
net 模組是用來建立伺服器和用戶端。它提供了一個非同步網路包裝。 net模組可以使用以下語法匯入。
var net = require("net")
方法
| Sr. No. | 方法 | 描述 |
|---|---|---|
| 1 | net.createServer([options][, connectionListener]) | 建立一個新的TCP伺服器。connectionListener引數自動設定為監聽器的'連線'事件 |
| 2 | net.connect(options[, connectionListener]) | 工廠方法,它返回一個新的“net.Socket”,並連線到提供的地址和埠 |
| 3 | net.createConnection(options[, connectionListener]) | 工廠方法,它返回一個新的“net.Socket”,並連線到提供的地址和埠 |
| 4 | net.connect(port[, host][, connectListener]) | 建立於主機的TCP連線埠。如果省略主機,預設使用“localhost”。connectListener引數將作為一個監聽器“連線”事件。它返回一個新的“net.Socket”工廠方法 |
| 5 | net.createConnection(port[, host][, connectListener]) | 建立於主機的TCP連線埠。如果省略主機,預設是“localhost”。 connectListener引數將作為一個監聽器“連線”事件。它返回一個新的“net.Socket”工廠方法 |
| 6 | net.connect(path[, connectListener]) | 建立Unix通訊端連線路徑。connectListener引數將作為一個監聽器“連線”事件。工廠方法返回一個新的“net.Socket” |
| 7 | net.createConnection(path[, connectListener]) | 建立Unix通訊端連線路徑,connectListener引數將作為一個監聽器“連線”事件。工廠方法返回一個新的“net.Socket” |
| 8 | net.isIP(input) | 測試輸入是否為IP地址,返回0則是無效的字串,返回4則是IP版本4的地址, 返回6 則是IP版本6的地址 |
| 9 | net.isIPv4(input) | 返回true,如果輸入的是版本4的IP地址,否則返回false |
| 10 | net.isIPv6(input) | 返回true,如果輸入的是版本6的IP地址,否則返回false |
Class:net.Server
此類用於建立TCP或本地伺服器。
方法
| Sr. No. | 方法 | 描述 |
|---|---|---|
| 1 | server.listen(port[, host][, backlog][, callback]) | 開始接受指定的埠和主機上的連線。如果省略主機,伺服器將接受針對任何IPv4地址(INADDR_ANY)連線,埠值為0時將分配一個隨機埠 |
| 2 | server.listen(path[, callback]) | 啟動本地socket伺服器監聽給定的路徑上的連線 |
| 3 | server.listen(handle[, callback]) | 控制代碼物件可以被設定為一個伺服器或socket(下面_handle構件任何東西),或一個{fd:<n>}物件。這將導致伺服器接受指定控制代碼連線,但可以推測該檔案描述符或控制代碼已被系結到埠或域通訊端。監聽檔案描述符在Windows上不支援。 |
| 4 | server.listen(options[, callback]) | port,host和backlog選項的屬性,以及可選callback 函式,這些做一個呼叫 server.listen(port, [host], [backlog], [callback]) 。或者,可使用的路徑選項指定一個UNIX通訊端。 |
| 5 | server.close([callback]) | 最終關閉時結束所有連線和伺服器發出一個“關閉”事件 |
| 6 | server.address() | 作業系統返回伺服器的系結地址,所述地址族名稱和埠。 |
| 7 | server.unref() | 在伺服器上呼叫unref將允許程式退出,如果這是在事件系統中唯一的活動伺服器。如果伺服器已經unrefd再次呼叫unref將無任何作用。 |
| 8 | server.ref() | 與unref相反,如果它是僅存的伺服器(預設行為)呼叫ref在unrefd之前伺服器不會讓程式退出。如果伺服器refd呼叫再次ref不會有任何效果。 |
| 9 | server.getConnections(callback) | 非同步獲取伺服器上的並行連線數量。 當通訊端被送往forks。回撥函式應該用兩個引數 err和count。 |
事件
| Sr. No. | 事件 | 描述 |
|---|---|---|
| 1 | listening | 發射在伺服器系結呼叫server.listen後 |
| 2 | connection | 當一個新的連線建立時發射。Socket物件,連線物件提供給事件處理。Socket是net.Socket的一個範例。 |
| 3 | close | 伺服器關閉時發出。需要注意的是,如果連線存在,這個事件是不會發射的,直到所有的連線都結束。 |
| 4 | error | 當錯誤發生時發出。 “關閉”將被直接呼叫此事件之後。 |
Class:net.Socket
這個物件是一個TCP或本地通訊端的抽象。net.Socket的範例實現全雙工流介面。它們可以由使用者建立,並用作一個用戶端(使用connect()),也可以由Node建立並通過伺服器的'連線'事件傳遞給使用者。
事件
net.Socket是一個eventEmitter,它發出下列事件。
| Sr.No. | 事件 | 描述 |
|---|---|---|
| 1 | lookup | 解析主機名之後,但在連線之前發射。不適用於Unix通訊端 |
| 2 | connect | 當成功建立一個通訊端連線時發射 |
| 3 | data | 當接收資料時發射。引數資料將是一個緩衝或字串。重新編碼的資料是通過socket.setEncoding()設定的 |
| 4 | end | 當通訊端的另一端傳送一個FIN包發射 |
| 5 | timeout | 如果通訊端超閒置時發射。這是唯一的,以通知通訊端已經空閒。使用者必須手動關閉連線 |
| 6 | drain | 當寫緩衝區變空時發射。可用於限制上傳 |
| 7 | error | 當錯誤發生時發射,“關閉”事件將被直接稱為繼此事件。 |
| 8 | close | 當通訊端被完全關閉時發射,引數had_error是一個布林值,指明如果通訊端是由於傳輸錯誤關閉。 |
屬性
net.Socket提供了許多有用的特性,以更好的控制通訊端的相互作用。
| Sr.No. | 屬性 | 描述 |
|---|---|---|
| 1 | socket.bufferSize | 此屬性表示要寫入當前緩衝的字元數 |
| 2 | socket.remoteAddress | 遠端IP地址的字串表示。例如, '74.125.127.100' 或 '2001:4860:a005::68' |
| 3 | socket.remoteFamily | 遠端IP系列(簇)的字串表示。 'IPv4' 或 'IPv6' |
| 4 | socket.remotePort | 遠端埠的數位表示。例如,80 或 21 |
| 5 | socket.localAddress | 遠端用戶端連線到原生的IP地址的字串表示。例如,如果正在在“0.0.0.0”監聽,用戶端連線到 '192.168.1.1', 那麼它的值就是 '192.168.1.1' |
| 6 | socket.localPort | 本地埠的數位表示。例如,80 或 21 |
| 7 | socket.bytesRead | 接收的位元組數 |
| 8 | socket.bytesWritten | 傳送的位元組數 |
方法
| Sr. No. | 方法 | 描述 |
|---|---|---|
| 1 | new net.Socket([options]) | 構造一個新的 Socket 物件 |
| 2 | socket.connect(port[, host][, connectListener]) | 開啟一個給定的通訊端連線。如果埠和主機給出,那麼通訊端就會被開啟作為TCP通訊端,如果省略主機,將使用localhost。如果路徑給定,通訊端就會被開啟作為一個Unix通訊端到該路徑 |
| 3 | socket.connect(path[, connectListener]) | 開啟一個給定的通訊端連線。如果埠和主機給出,那麼通訊端就會被開啟作為TCP通訊端,如果省略主機,將使用localhost。如果路徑給定,通訊端就會被開啟作為一個Unix通訊端到該路徑 |
| 4 | socket.setEncoding([encoding]) | 通訊端為唯讀流設定編碼 |
| 5 | socket.write(data[, encoding][, callback]) | 傳送通訊端上的資料。第二個引數指定的編碼是在字串的情況 - 它預設為UTF8編碼。 |
| 6 | socket.end([data][, encoding]) | 半關閉通訊端,即它傳送FIN包。可能伺服器仍然會傳送一些資料。 |
| 7 | socket.destroy() | 確保沒有更多的I/O活動發生在此通訊端。只有在錯誤的情況下(解析錯誤)有必要。 |
| 8 | socket.pause() | 暫停資料讀出。即,“資料”事件將不會被發射。有用的節流回到上載 |
| 9 | socket.resume() | 呼叫 pause() 後讀取暫停 |
| 10 | socket.setTimeout(timeout[, callback]) | 設定通訊端不活動的通訊端在timeout毫秒後超時。預設 net.Socket 不會超時。 |
| 11 | socket.setNoDelay([noDelay]) | 禁用Nagle演算法。預設情況下TCP連線使用Nagle演算法,它們在傳送之前關閉快取資料。noDelay設定true時每次socket.write()被呼叫將立即釋放掉的資料。noDelay 預設值是true. |
| 12 | socket.setKeepAlive([enable][, initialDelay]) | 啟用/禁用保持有效功能, 可選設定初始延遲後,第一存活探測被傳送在空閒插槽。 enable 預設值是 false. |
| 13 | socket.address() | 返回系結地址, 報告作業系統的地址系列名稱和通訊端的埠。 返回一個物件有三個屬性,例如{ port: 12346, family: 'IPv4', address: '127.0.0.1' }. |
| 14 | socket.unref() | 通訊端上呼叫unref 將允許程式退出,如果這是事件系統中唯一的活動通訊端。如果通訊端已經unrefd再次呼叫unref 將不會起作用。 |
| 15 | socket.ref() | 與unref相反,呼叫ref在unrefd通訊端之前不會讓程式退出,如果它是唯一剩下的socket(預設行為)。如果通訊端refd呼叫再次ref將沒有起任何作用。 |
範例
建立一個js檔案名為server.js 在 D:\>yiibai_worksp\nodejs
File: server.js
var net = require('net');
var server = net.createServer(function(connection) {
   console.log('client connected');
   connection.on('end', function() {
      console.log('client disconnected');
   });
   connection.write('Welcome to Yiibai Yiibai!\r\n');
   connection.pipe(connection);
});
server.listen(8080, function() {
  console.log('server is listening');
});
現在執行server.js看到的結果:
D:\yiibai_worksp\nodejs>node server.js
驗證輸出。
server is listening
建立一個js檔案名為client.js 在 C:\>Nodejs_WorkSpace.
File: client.js
var net = require('net');
var client = net.connect({port: 8080}, function() {
   console.log('connected to server!');
});
client.on('data', function(data) {
   console.log(data.toString());
   client.end();
});
client.on('end', function() {
   console.log('disconnected from server');
});
現在啟動另一個命令列視窗,執行 client.js 看到結果:
D:\yiibai_worksp\nodejs>node client.js
驗證輸出:
connected to server!
Welcome to Yiibai Yiibai!

disconnected from server
驗證,其中server.js執行輸出在終端上如下:
server is listening
client connected
client disconnected
Node.js - DNS 模組
dns 模組是用來做實際的DNS查詢,以及使用底層作業系統的名稱解析功能..它提供了一個非同步網路包裝。dns模組可以使用以下語法匯入。
var dns = require("dns")
方法
| Sr. No. | 方法 | 描述 |
|---|---|---|
| 1 | dns.lookup(hostname[, options], callback) | 解析主機名(如“google.com”)進入第一找到A(IPv4)或AAAA(IPv6)紀錄。選項可以是物件或整數。如果未提供選項,那麼IP v4和v6的地址都是有效的。如果選項是整數,那麼它必須是4或6 |
| 2 | dns.lookupService(address, port, callback) | 使用getnameinfo會解析給定的地址和埠成一個主機名和服務 |
| 3 | dns.resolve(hostname[, rrtype], callback) | 解析主機名(如“google.com”)到由rrtype指定的記錄型別的陣列 |
| 4 | dns.resolve4(hostname, callback) | 與 dns.resolve() 相同, 但僅限於IPv4的查詢(A記錄)。地址是IPv4地址的陣列(如,['74.125.79.104', '74.125.79.105', '74.125.79.106']) |
| 5 | dns.resolve6(hostname, callback) | 與dns.resolve4()相同,除了IPv6的查詢(一個AAAA查詢) |
| 6 | dns.resolveMx(hostname, callback) | 與dns.resolve()相同,但僅限於郵件交換查詢(MX記錄) |
| 7 | dns.resolveTxt(hostname, callback) | 與 dns.resolve()相同,但僅限於文字查詢(TXT記錄)。地址是文字紀錄,以供主機的2-D陣列 (如, [ ['v=spf1 ip4:0.0.0.0 ', '~all' ] ]). 每個子陣列包含一個記錄的TXT塊。根據使用的情況,可以任意連線在一起或分別處理 |
| 8 | dns.resolveSrv(hostname, callback) | 與dns.resolve()相同,但僅用於服務記錄(SRV記錄)。 地址是一個SRV記錄的陣列提供主機名。SRV記錄屬性包括優先順序,權重,埠和名稱(e.g., [{'priority': 10, 'weight': 5, 'port': 21223, 'name': 'service.example.com'}, ...]). |
| 9 | dns.resolveSoa(hostname, callback) | 與 dns.resolve() 相同, 但僅限於認證記錄查詢開始(SOA記錄) |
| 10 | dns.resolveNs(hostname, callback) | 與 dns.resolve() 相同, 但只針對域名伺服器記錄(NS記錄)。地址是可用於主機的名稱伺服器記錄的陣列 (如, ['ns1.example.com', 'ns2.example.com']). |
| 11 | dns.resolveCname(hostname, callback) | 與 dns.resolve()相同, 但僅限於規範名稱記錄(CNAME記錄)。地址是的規範名稱記錄可用於主機的陣列 (如, ['bar.example.com']). |
| 12 | dns.reverse(ip, callback) | Reverse resolves an ip address to an array of hostnames. |
| 13 | dns.getServers() | Returns an array of IP addresses as strings that are currently being used for resolution. |
| 14 | dns.setServers(servers) | Given an array of IP addresses as strings, set them as the servers to use for resolving. |
rrtypes
以下是所使用dns.resolve()方法的有效rrtypes的列表
-
A - IPV4 地址(預設)
-
AAAA - IPV6 地址
-
MX - 郵件交換記錄
-
TXT - 文字記錄
-
SRV - SRV記錄
-
PTR - 用於逆向IP查詢
-
NS - 域名伺服器記錄
-
CNAME - 規範名稱記錄
-
SOA - 規範記錄的開始
錯誤程式碼
每個DNS查詢可以返回下列錯誤程式碼之一:
-
dns.NODATA - DNS伺服器返回回答不含資料
-
dns.FORMERR - DNS伺服器要求查詢是misformatted
-
dns.SERVFAIL - DNS伺服器返回的一般故障
-
dns.NOTFOUND - 域名未找到
-
dns.NOTIMP - DNS伺服器不執行請求操作
-
dns.REFUSED - DNS伺服器拒絕查詢
-
dns.BADQUERY - 非格式化的DNS查詢
-
dns.BADNAME - 非格式化的主機名
-
dns.BADFAMILY - 不支援的地址族
-
dns.BADRESP - Misformatted DNS回復
-
dns.CONNREFUSED - 無法聯絡DNS伺服器
-
dns.TIMEOUT - 超時在聯絡DNS伺服器的時候
-
dns.EOF - 檔案的結尾
-
dns.FILE - 讀取檔案錯誤
-
dns.NOMEM - 記憶體不足
-
dns.DESTRUCTION - 通道被銷毀
-
dns.BADSTR - 非法格式化字串
-
dns.BADFLAGS - 非法標誌指定
-
dns.NONAME - 給定主機名不是數位
-
dns.BADHINTS - 非法提示標誌指定
-
dns.NOTINITIALIZED - c-ares庫初始化尚未執行
-
dns.LOADIPHLPAPI - 載入 iphlpapi.dll 錯誤
-
dns.ADDRGETNETWORKPARAMS - 找不到GetNetworkParams函式
-
dns.CANCELLED - DNS查詢取消
範例
建立一個js檔案名為test.js 在 D:\>yiibai_worksp\nodejs
File: test.js
var dns = require('dns');

dns.lookup('www.tw511.com', function onLookup(err, address, family) {
   console.log('address:', address);
   dns.reverse(address, function (err, hostnames) {
   if (err) {
      console.log(err.stack);
   }

   console.log('reverse for ' + address + ': ' + JSON.stringify(hostnames));
});
});
現在執行test.js看到的結果:
D:\yiibai_worksp\nodejs> node test.js
驗證輸出:
address: 112.124.103.85
Error: getHostByAddr ENOTFOUND 112.124.103.85
    at errnoException (dns.js:44:10)
    at Object.onresolve [as oncomplete] (dns.js:199:19)
reverse for 112.124.103.85: undefined
Node.js - Domain模組
domain 模組是用於攔截未處理的錯誤。這些未處理的錯誤可以使用內部系結或外部系結來攔截。如果錯誤都那麼不處理,那麼Node應用會崩潰。
-
內部系結 - 錯誤發生執行程式碼是在一個域的run方法。
-
外部系結 - 使用它的add方法將錯誤發生明確地加入到域。
domain(域)模組可以使用以下語法匯入。
var domain = require("domain")
域模組的Domain類是用來提供路由錯誤以及未捕獲異常活動域物件的功能。 這是一個EventEmitter的子類。為了處理它捕獲錯誤,監聽它的錯誤事件。它使用如下的語法建立:
var domain = require("domain");
var domain1 = domain.create();
方法
| Sr. No. | 方法 | 描述 |
|---|---|---|
| 1 | domain.run(function) | 執行所提供的函式在域的上下文中,隱式係結在這種情況下建立的所有事件發射器,定時器和低階請求,這是使用域的最基本的方法 |
| 2 | domain.add(emitter) | 顯式地將一個發射器到域。如果由發射器事件處理程式丟擲一個錯誤,或者,如果發射器發出一個錯誤事件,它會被路由到該域的錯誤事件,就如隱式係結 |
| 3 | domain.remove(emitter) | 與domain.add(emitter)相反。從指定的發射器處理刪除域 |
| 4 | domain.bind(callback) | 返回的函式將被圍繞包裝提供回撥函式。當返回的函式被呼叫時,被丟擲的任何錯誤都將被路由到該域的錯誤事件 |
| 5 | domain.intercept(callback) | 此方法幾乎是domain.bind(callback)相同, 然而,除了捕獲丟擲錯誤,它也將擷取Error 物件傳送作為第一個引數到函式。 |
| 6 | domain.enter() | 輸入是一種用於執行,係結,並攔截方法來設定活動域管道。它設定domain.active和process.domain到域,並隱式地推到域,域管理模組域棧(詳見domain.exit()詳細資訊,域名棧)。呼叫以進入分隔鏈開始系結到域非同步呼叫和I/O操作。 |
| 7 | domain.exit() | exit方法退出當前域,它彈出關閉域堆疊。任何時間執行將要切換到不同鏈的非同步呼叫的上下文中,重要的是要確保當前域退出。呼叫以退出分隔末尾或者中斷鏈系結到一個域的非同步呼叫和I/O操作。 |
| 8 | domain.dispose() | 一旦處理被呼叫,該域將不再使用回撥系結到通過執行,係結或攔截該域。以及一個dispose事件發射 |
屬性
| Sr.No. | 屬性 | 描述 |
|---|---|---|
| 1 | domain.members | 定時器和事件發射器陣列已明確新增到域 |
範例
建立一個js檔案名為test.js 在 D:\>yiibai_worksp\nodejs
File: test.js
var EventEmitter = require("events").EventEmitter;
var domain = require("domain");

var emitter1 = new EventEmitter();

//Create a domain
var domain1 = domain.create();

domain1.on('error', function(err){
   console.log("domain1 handled this error ("+err.message+")");
});

//explicit binding
domain1.add(emitter1);

emitter1.on('error',function(err){
   console.log("listener handled this error ("+err.message+")");
});

emitter1.emit('error',new Error('To be handled by listener'));

emitter1.removeAllListeners('error');

emitter1.emit('error',new Error('To be handled by domain1'));

var domain2 = domain.create();

domain2.on('error', function(err){
   console.log("domain2 handled this error ("+err.message+")");
});

//implicit binding
domain2.run(function(){
   var emitter2 = new EventEmitter();

   emitter2.emit('error',new Error('To be handled by domain2'));
});


domain1.remove(emitter1);

emitter1.emit('error',new Error('Converted to exception. System will crash!'));
現在執行test.js看到的結果:
D:\yiibai_worksp\nodejs>node test.js
驗證輸出:
listener handled this error (To be handled by listener)
domain1 handled this error (To be handled by domain1)
domain2 handled this error (To be handled by domain2)

events.js:72
        throw er; // Unhandled 'error' event
              ^
Error: Converted to exception. System will crash!
    at Object.<anonymous> (C:\Nodejs_WorkSpace\test.js:42:23)
    at Module._compile (module.js:456:26)
    at Object.Module._extensions..js (module.js:474:10)
    at Module.load (module.js:356:32)
    at Function.Module._load (module.js:312:12)
    at Function.Module.runMain (module.js:497:10)
    at startup (node.js:119:16)
    at node.js:929:3
Node.js - Web模組
Web伺服器簡介
Web伺服器是用於處理使用HTTP協定請求並返回網頁作為響應到用戶端的軟體應用程式。 Web伺服器通常提供HTML文件並伴隨著圖片,樣式表和指令碼。大多數Web伺服器還支援使用指令碼語言作為伺服器端指令碼,或重定向到從資料庫中獲取資料的執行特定任務的應用程式伺服器,執行複雜的邏輯等,Web伺服器然後返回應用伺服器到用戶端輸出。
Apache web伺服器是最常見的一個網路伺服器。它是一個開源專案。
路徑定位過程
Web伺服器對映使用URL,統一資源定位符的檔案的路徑。它可以是一個本地檔案系統或一個外部/內部程式。例如:
用戶端使用的瀏覽器發起一個URL請求:http://www.test-example-site.com/website/index.htm.
瀏覽器發起的一個請求是:
Web伺服器將追加路徑到根目錄。舉個例子:根目錄是home/www,那麼實際路徑將被轉換為 home/www/website/index.htm.
Web網路架構介紹
Web應用程式的使用分為四層:

-
Client - 此層是由Web瀏覽器,移動瀏覽器或應用程式,它可以發起HTTP請求到伺服器。
-
Server - 這一層包括可攔截發出的用戶端請求,並將其傳遞到由Web伺服器響應。
-
Business - 這一層由應用程式伺服器組成,它通過利用Web伺服器執行動態任務。這一層互動通過資料庫或某些外部程式資料層。
-
Data - 此層由資料庫或任何來源的資料。
使用Node建立Web伺服器
使用http.createServer方法建立HTTP伺服器。通過它一個函式帶引數請求和響應。編寫一個範例實現返回一個請求頁面。通過在8081埠上監聽。
建立一個js檔案名為server.js 在 D:\>yiibai_worksp\nodejs
File: server.js
//http module is required to create a web server
var http = require('http');
//fs module is required to read file from file system
var fs = require('fs');
//url module is required to parse the URL passed to server
var url = require('url');

//create the server
http.createServer(function (request, response) {
   //parse the pathname containing file name
   var pathname = url.parse(request.url).pathname;
   //print the name of the file for which request is made.
   //if url is http://localhost:8081/test.htm then
   //pathname will be /test.html
   console.log("Request for " + pathname + " received.");
   //read the requested file content from file system
   fs.readFile(pathname.substr(1), function (err, data) {
      //if error occured during file read
      //send a error response to client
      //that web page is not found.
      if (err) {
         console.log(err.stack);
         // HTTP Status: 404 : NOT FOUND
         // Content Type: text/plain
         response.writeHead(404, {'Content-Type': 'text/html'});
      }else{
         //Page found
         // HTTP Status: 200 : OK
         // Content Type: text/plain
         response.writeHead(200, {'Content-Type': 'text/html'});
         // write the content of the file to response body
         response.write(data.toString());
      }
      // send the response body
      response.end();
   });
}).listen(8081);
// console will print the message
console.log('Server running at http://127.0.0.1:8081/');
建立一個名為 test.html 的 html 檔案在 D:\>yiibai_worksp\nodejs
File: test.html
<html>
<head>
<title>Sample Page</title>
</head>
<body>
    Hello World!
</body>
</html>
現在執行server.js看到的結果:
D:\yiibai_worksp\nodejs>node server.js
驗證輸出。伺服器已經啟動
Server running at http://127.0.0.1:8081/
發出請求到Node.js伺服器
在任何瀏覽器中開啟以下網址:http://127.0.0.1:8081/test.html,看看下面的結果。

驗證伺服器端的輸出
Server running at http://127.0.0.1:8081/
Request for /test.html received.
使用Node建立Web用戶端
Web用戶端可以使用http模組來建立。參見下面的例子:
建立一個名為client.js的js檔案在 D:\>yiibai_worksp\nodejs
File: client.js
//http module is required to create a web client
var http = require('http');

//options are to be used by request
var options = {
   host: 'localhost',
   port: '8081',
   path: '/test.html'
};


//callback function is used to deal with response
var callback = function(response){
   // Continuously update stream with data
   var body = '';
   response.on('data', function(data) {
      body += data;
   });
   response.on('end', function() {
      // Data received completely.
      console.log(body);
   });
}
//make a request to the server
var req = http.request(options, callback);
req.end();
現在執行client.js在不同的終端命令列,也就是在server.js以外終端上看到的結果:
D:\yiibai_worksp\nodejs>node client.js
驗證輸出:
<html>
<head>
<title>Sample Page</title>
</head>
<body>
    Hello World!
</body>
</html>
驗證伺服器端的輸出
Server running at http://127.0.0.1:8081/
Request for /test.html received.
Request for /test.html received.
Node.js - Express應用程式
Express 概述
Express JS是用於建立Node JS的Web應用程式非常流行的Web應用程式框架。它提供了一個整合的環境便於快速開發基於Node的Web應用程式。Express框架是基於連線的中介軟體引擎並使用Jade HTML模板框架來做HTML模板。以下是一些Express 框架的核心功能:
-
允許設立中介軟體來響應HTTP請求
-
定義了用於執行基於HTTP方法和URL不同作用的路由表
-
允許動態渲染基於引數傳遞給模板的HTML頁面
安裝Express
首先,使用NPM安裝Express框架到全域性,以便它可以使用Node終端來建立Web應用程式。
D:\yiibai_worksp\nodejs> npm install express -g
當npm完成下載,可以通過檢視內容來驗證,內容在 <user-directory>/npm/node_modules. 或輸入以下命令:
D:\yiibai_worksp\nodejs> npm ls -g
將看到以下的輸出:
C:\Documents and Settings\Administrator\Application Data\npm
+-- [email protected]
  +-- [email protected]
  | +-- [email protected]
  | | +-- [email protected]
  | +-- [email protected]
  +-- [email protected]
  +-- [email protected]
  +-- [email protected]
  +-- [email protected]
  | +-- [email protected]
  +-- [email protected]
  +-- [email protected]
  +-- [email protected]
  | +-- [email protected]
  +-- [email protected]
  +-- [email protected]
  +-- [email protected]
  +-- [email protected]
  +-- [email protected]
  +-- [email protected]
  | +-- [email protected]
  +-- [email protected]
  +-- [email protected]
  +-- [email protected]
  | +-- [email protected]
  | +-- [email protected]
  +-- [email protected]
  +-- [email protected]
  +-- [email protected]
  | +-- [email protected]
  | +-- [email protected]
  | +-- [email protected]
  +-- [email protected]
  +-- [email protected]
  | +-- [email protected]
  |   +-- [email protected]
  +-- [email protected]
  +-- [email protected]
Express生成器
現在使用NPM安裝express生成器。express生成器用於使用express命令建立應用程式框架。
D:\yiibai_worksp\nodejs> npm install express-generator -g
將看到以下的輸出:
D:\yiibai_worksp\nodejs>npm install express-generator -g
C:\Users\Administrator\AppData\Roaming\npm\express -> C:\Users\Administrator\AppData\Roaming\npm\node_modules\express-generator\bin\express[email protected] C:\Users\Administrator\AppData\Roaming\npm\node_modules
\express-generator
+-- [email protected]
+-- [email protected]
+-- [email protected] ([email protected])
Hello world 範例
現在使用下面的命令建立一個範例應用程式 firstApplication:
D:\yiibai_worksp\nodejs> express firstApplication
將看到以下的輸出:
   create : firstApplication
   create : firstApplication/package.json
   create : firstApplication/app.js
   create : firstApplication/public
   create : firstApplication/public/javascripts
   create : firstApplication/public/images
   create : firstApplication/public/stylesheets
   create : firstApplication/public/stylesheets/style.css
   create : firstApplication/routes
   create : firstApplication/routes/index.js
   create : firstApplication/routes/users.js
   create : firstApplication/views
   create : firstApplication/views/index.jade
   create : firstApplication/views/layout.jade
   create : firstApplication/views/error.jade
   create : firstApplication/bin
   create : firstApplication/bin/www

   install dependencies:
     $ cd firstApplication && npm install

   run the app:
     $ DEBUG=firstApplication:* ./bin/www
進入 firstApplication 檔案夾並使用下面的命令來安裝 firstApplication 的依賴關係:
D:\yiibai_worksp\nodejs\firstApplication> npm install
將看到以下的輸出:
[email protected] node_modules\debug
+-- [email protected]

[email protected] node_modules\cookie-parser
+-- [email protected]
+-- [email protected]

[email protected] node_modules\morgan
+-- [email protected]
+-- [email protected]
+-- [email protected] ([email protected])

[email protected] node_modules\serve-favicon
+-- [email protected]
+-- [email protected]
+-- [email protected]
+-- [email protected] ([email protected])

[email protected] node_modules\jade
+-- [email protected]
+-- [email protected]
+-- [email protected]
+-- [email protected] ([email protected])
+-- [email protected] ([email protected], [email protected], [email protected])
+-- [email protected] ([email protected], [email protected])
+-- [email protected] ([email protected])

[email protected] node_modules\express
+-- [email protected]
+-- [email protected]
+-- [email protected]
+-- [email protected]
+-- [email protected]
+-- [email protected]
+-- [email protected]
+-- [email protected]
+-- [email protected]
+-- [email protected]
+-- [email protected]
+-- [email protected]
+-- [email protected]
+-- [email protected]
+-- [email protected]
+-- [email protected]
+-- [email protected]
+-- [email protected] ([email protected])
+-- [email protected] ([email protected])
+-- [email protected] ([email protected], [email protected])
+-- [email protected] ([email protected], [email protected], [email protected])
+-- [email protected] ([email protected], [email protected])
+-- [email protected] ([email protected], [email protected])

[email protected] node_modules\body-parser
+-- [email protected]
+-- [email protected]
+-- [email protected]
+-- [email protected]
+-- [email protected]
+-- [email protected]
+-- [email protected] ([email protected])
+-- [email protected] ([email protected], [email protected])
在這裡,express生成器建立了一個完整的應用程式結構,可以驗證在 firstApplication 檔案夾中(Nodejs_WorkSpace檔案夾下面)裡建立的檔案夾/檔案:
.
+-- app.js
+-- bin
|   +-- www
+-- package.json
+-- public
|   +-- images
|   +-- javascripts
|   +-- stylesheets
|       +-- style.css
+-- routes
|   +-- index.js
|   +-- users.js
+-- views
    +-- error.jade
    +-- index.jade
    +-- layout.jade
-
package.json 是應用程式描述符檔案包含在依賴項列表中,應用程式使用 Node 的其他屬性
-
app.js 包含了伺服器的初始化程式碼
-
bin是用於儲存在生產模式下的應用程式
-
public用於儲存影象,樣式表和JavaScript檔案
-
routes 包含路由處理程式
-
views 包含HTML模板來生成Web應用各種檢視
第一個應用程式
app.js 是基於 express 的應用核心引擎。讓我們更新預設app.js包括埠資訊,並使用它來建立一個伺服器。新增以下行到app.js :
//set the server port
app.set('port', process.env.PORT || 3000);

//create the server
http.createServer(app).listen(app.get('port'), function(){
  console.log('Express server listening on port ' + app.get('port'));
});
更新 app.js
以下是app.js檔案的全部內容
更新 app.js 檔案的內容在 D:\>yiibai_worksp\nodejs\firstApplication.
File: app.js
var express = require('express');
var path = require('path');
var favicon = require('serve-favicon');
var logger = require('morgan');
var cookieParser = require('cookie-parser');
var bodyParser = require('body-parser');
var http = require('http');

var routes = require('./routes/index');
var users = require('./routes/users');

var app = express();

// view engine setup
app.set('port', process.env.PORT || 8891);
app.set('views', path.join(__dirname, 'views'));
app.set('view engine', 'jade');

// uncomment after placing your favicon in /public
//app.use(favicon(__dirname + '/public/favicon.ico'));
app.use(logger('dev'));
app.use(bodyParser.json());
app.use(bodyParser.urlencoded({ extended: false }));
app.use(cookieParser());
app.use(express.static(path.join(__dirname, 'public')));

app.use('/', routes);
app.use('/users', users);

// catch 404 and forward to error handler
app.use(function(req, res, next) {
   var err = new Error('Not Found');
   err.status = 404;
   next(err);
});

// error handlers

// development error handler
// will print stacktrace
if (app.get('env') === 'development') {
   app.use(function(err, req, res, next) {
      res.status(err.status || 500);
      res.render('error', {
         message: err.message,
         error: err
      });
   });
}

// production error handler
// no stacktraces leaked to user
app.use(function(err, req, res, next) {
   res.status(err.status || 500);
   res.render('error', {
      message: err.message,
      error: {}
   });
});

http.createServer(app).listen(app.get('port'), function(){
  console.log('Express server listening on port ' + app.get('port'));
});

module.exports = app;
現在執行app.js看到的結果:
D:\yiibai_worksp\firstApplication>node app
驗證輸出,伺服器已經啟動
Express server listening on port 8891
發出一個請求到firstApplication
在瀏覽器開啟網址:http://localhost:8891/,看看下面的結果:

再次在瀏覽器開啟網址:http://localhost:8891/users,看看下面的結果:

基本的路由
在app.js下面的程式碼系結兩個Route處理。
var routes = require('./routes/index');
var users = require('./routes/users');
...
app.use('/', routes);
app.use('/users', users);
-
routes - 路由(index.js), 路由處理程式處理所有請求,主頁發出通過 localhost:8891
-
users - users (users.js), 路由處理來處理所有發出的請求 /users 通過 localhost:3000/users
以下是對應折程式碼:D:\>yiibai_worksp\nodejs\firstApplication\routes\index.js是由express生成器建立。
var express = require('express');
var router = express.Router();

/* GET home page. */
router.get('/', function(req, res, next) {
  res.render('index', { title: 'Express' });
});

module.exports = router;
當Node伺服器接收到一個主頁的請求,express路由器渲染索引頁是使用模板index.jade同時傳遞引數title的值為'Express'。以下是模板程式碼內容:D:\>yiibai_worksp\nodejs\firstApplication\views\index.jade
extends layout

block content
  h1= title
  p Welcome to #{title}
Node.js - 加強第一個應用程式
概述
在這篇文章中,我們將加強Express第一個應用程式,建立 Express JS 應用程式:
-
顯示所有使用者的列表
-
顯示一個特定的使用者的細節
-
新增新的使用者的詳細資訊
第1步:建立一個基於JSON資料庫
首先,讓我們建立一個使用者範例JSON基礎資料庫。
建立一個名為 user.json 在一個 JSON 檔案於 D:\>yiibai_worksp\nodejs\firstApplication
File: user.json
{
   "user1" : {
      "name" : "mahesh",
	  "password" : "password1",
	  "profession" : "teacher"
   },
   "user2" : {
      "name" : "suresh",
	  "password" : "password2",
	  "profession" : "librarian"
   },
   "user3" : {
      "name" : "newuser",
	  "password" : "password3",
	  "profession" : "clerk"
   }
}
第2步:建立特定的使用者Jade檢視
在建立一個 user 目錄在 D:\>yiibai_worksp\node\firstApplication\views 如下檢視:index.jade - 檢視顯示所有使用者的列表。
-
new.jade - 檢視顯示一個表單來新增一個新使用者。
-
profile.jade - 檢視顯示的使用者的細節
建立一個index.jade在 D:\>yiibai_worksp\nodejs\firstApplication\views\users.
File: index.jade
h1 Users

p
   a(href="/users/new/") Create new user
ul
   - for (var username in users) {
   li
      a(href="/users/" + encodeURIComponent(username))= users[username].name
   - };
建立一個檔案 new.jade 在 D:\>yiibai_worksp\nodejs\firstApplication\views\users.
File: new.jade
h1 New User

form(method="POST" action="/Users/addUser")
	P
		label(for="name") Name

		input#name(name="name")
	P
		label(for="password") Password

		input#name(name="password")
	P
		label(for="profession") Profession

		input#name(name="profession")
	P
		input(type="submit", value="Create")
建立一個檔案 profile.jade 在 D:\>yiibai_worksp\nodejs\firstApplication\views\users.
File: profile.jade
h1 Name: #{user.name}

h2 Profession: #{user.profession}
第3步:更新使用者路由處理 users.js
更新檔案 users.js 在 D:\>yiibai_worksp\nodejs\firstApplication\routes.
File: users.js
var express = require('express');
var router = express.Router();

var users = require('../users.json');
/* GET users listing. */
router.get('/', function(req, res) {
   res.render('users/index', { title: 'Users',users:users });
});

/* Get form to add a new user*/
router.get('/new', function(req, res) {
   res.render('users/new', { title: 'New User'});
});

/* Get detail of a new user */
router.get('/:name', function(req, res, next) {
   var user = users[req.params.name]
   if(user){
      res.render('users/profile', { title: 'User Profile', user:user});
   }else{
      next();
   }
});

/* post the form to add new user */
router.post('/addUser', function(req, res, next) {
   if(users[req.body.name]){
      res.send('Conflict', 409);
   }else{
     users[req.body.name] = req.body;
	 res.redirect('/users/');
   }
});

module.exports = router;
現在執行app.js看到的結果:
D:\yiibai_worksp\nodejs\firstApplication>node app
驗證輸出,伺服器已經啟動
Express server listening on port 3000
發出請求到firstApplication得到所有使用者的列表。在瀏覽器開啟網址:http://localhost:8891/users,看看下面的結果。

點選建立新的使用者連結看到表單。

提交表單並檢視更新列表。

點選檢視使用者的詳細。

可以檢查伺服器狀態如下:
D:\yiibai_worksp\nodejs\firstApplication>node app
Express server listening on port 3000
GET /users/ 200 809.161 ms - 201
GET /users/new/ 304 101.627 ms - -
GET /users/new/ 304 33.496 ms - -
POST /Users/addUser 302 56.206 ms - 70
GET /users/ 200 43.548 ms - 245
GET /users/naresh 200 12.313 ms - 47
Node.js - Restful API
什麼是REST架構?
REST表示代表狀態傳輸。REST是基於Web標準的體系結構並使用HTTP協定。它圍繞著資源,其中每一個元件是資源,資源是由一個共同的介面使用HTTP的標準方法獲得。REST首先是由Roy Fielding在2000年推出。
在REST架構中,REST伺服器只是提供獲取資源,REST用戶端存取和修改的資源。這裡每個資源由URI標識的/全域性ID。REST使用不同方式表示資源,如文字,JSON,XML。 JSON是最流行的一種。
HTTP 方法
以下四個HTTP方法通常用在基於的REST架構。
-
GET - 提供資源的唯讀存取
-
PUT - 用於建立一個新的資源
-
DELETE - 用於刪除資源
-
POST - 用於更新現有的一個資源或建立新的資源
RESTful Web服務介紹
Web服務是用於交換應用程式或系統之間的資料開放的協定和標準的集合。寫在各種程式設計語言的軟體應用, 並在各種平台上執行可以使用Web服務以類似的進程間通訊的方式在一台計算機上,通過計算機網路交換資料,如網際網路。這種互操作性(如Java和Python,或Windows和Linux應用程式之間),是由於使用了開放標準。
基於REST架構的Web服務稱為RESTful Web服務。這些Web服務使用HTTP方法來實現REST架構的概念。RESTful Web服務通常定義的URI,統一資源識別符號的服務,提供資源的表示,如JSON,並設定HTTP方法。
為一個庫建立RESTful
現在,我們將加強express範例應用程式,以下建立一個Web服務來使用者管理:
| Sr. No. | URI | HTTP 方法 | POST body | 結果 |
|---|---|---|---|---|
| 1 | /users/ | GET | empty | 顯示所有使用者的列表 |
| 2 | /users/addUser | POST | JSON String | 新增新的使用者的詳細資訊 |
| 3 | /users/:id | GET | empty | 使用者的檢視詳細 |
獲取所有使用者資訊
首先,讓我們更新使用者的樣本基於JSON的資料庫。
更新JSON檔案名為user.json在 D:\>yiibai_worksp\nodejs\firstApplication.
File: user.json
{
   "user1" : {
      "name" : "mahesh",
	  "password" : "password1",
	  "profession" : "teacher",
	  "id": 1
   },
   "user2" : {
      "name" : "suresh",
	  "password" : "password2",
	  "profession" : "librarian",
	  "id": 2
   },
   "user3" : {
      "name" : "ramesh",
	  "password" : "password3",
	  "profession" : "clerk",
	  "id": 3
   }
}
當用戶端傳送GET請求/使用者,伺服器應該傳送一個包含所有使用者的響應。更新使用者的路由處理,users.js
更新 users.js 在 D:\>yiibai_worksp\nodejs\firstApplication\routes.
File: users.js
/* GET users listing. */
router.get('/', function(req, res) {
   res.send({ title: 'Users',users:users });
});
新增新的使用者的詳細資訊
當用戶端傳送一個POST請求 /users/addUser 包含JSON字串,伺服器應該傳送一個響應宣告狀態。更新使用者的路由處理users.js
更新 users.js 在 D:\>Nodejs_WorkSpace\firstApplication\routes.
File: users.js
/*add a user*/
router.post('/addUser', function(req, res, next) {
    var body = '';
    req.on('data', function (data) {
        body += data;
    });
    req.on('end', function () {
	   var json = JSON.parse(body);
       users["user"+json.id] = body;
	   res.send({ Message: 'User Added'});
    });
});
顯示新使用者的詳細資訊
當用戶端傳送GET請求到/users並帶有id,伺服器響應返回包含該使用者的詳細資訊。更新使用者的路由處理程式:users.js
更新 users.js 在 D:\>yiibai_worksp\nodejs\firstApplication\routes,如下:
File: users.js
router.get('/:id', function(req, res, next) {
   var user = users["user" + req.params.id]
   if(user){
      res.send({ title: 'User Profile', user:user});
   }else{
      res.send({ Message: 'User not present'});
   }
});
完整的users.js 程式碼
File: users.js
var express = require('express');
var router = express.Router();

var users = require('../users.json');
/* GET users listing. */
router.get('/', function(req, res) {
   res.send({ title: 'Users',users:users });
});

router.get('/:id', function(req, res, next) {
   console.log(req.params)
   var user = users["user" + req.params.id]
   if(user){
      res.send({ title: 'User Profile', user:user});
   }else{
      res.send({ Message: 'User not present'});
   }
});

router.post('/addUser', function(req, res, next) {
    var body = '';
    req.on('data', function (data) {
        body += data;
    });
    req.on('end', function () {
	   var json = JSON.parse(body);
       users["user"+json.id] = body;
	   res.send({ Message: 'User Added'});
    });
});

module.exports = router;
輸出
我們使用一個Chrome瀏覽器的掃外掛:Postman, 來測試我們編寫的 webservices,安裝Postman需要到以下網址下載(可能需要翻牆):https://chrome.google.com/webstore/detail/postman-interceptor/aicmkgpgakddgnaphhhpliifpcfhicfo 安裝好這個外掛後,開啟後顯示如下圖:
現在執行app.js看到的結果:
D:\yiibai_worksp\nodejs\firstApplication> node app
驗證輸出。伺服器已經啟動
Express server listening on port 8891
提出一個請求到firstApplication獲取所有使用者的資訊列表。把 http://localhost:8891/users 到POSTMAN 位址列中,並使用GET請求,看到下面的結果。

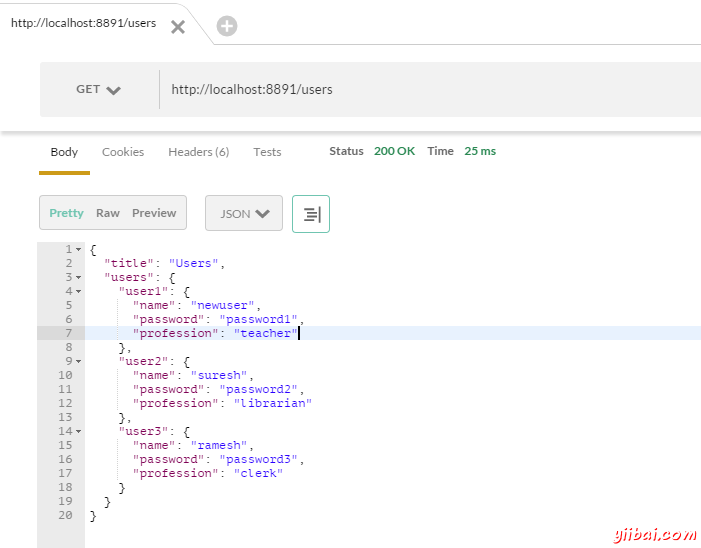
發出一個請求到 firstApplication 以新增一個新使用者。把 http://localhost:8891/users/addUser 放入到POSTMAN中並使用POST方式提交,看看下面的結果。
新增JSON資料格式,並選擇POST方法。
{"name":"rakesh","password":"password4","profession":"teacher","id":5}
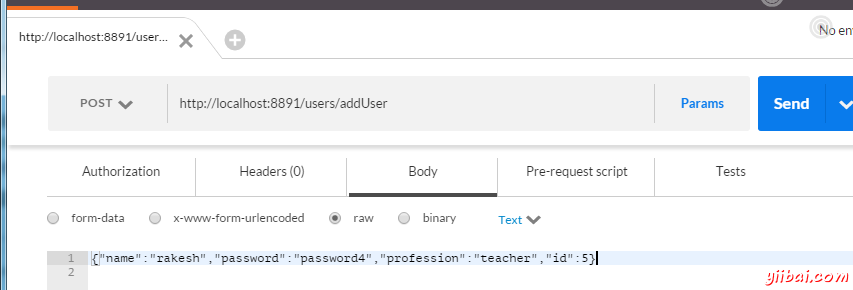
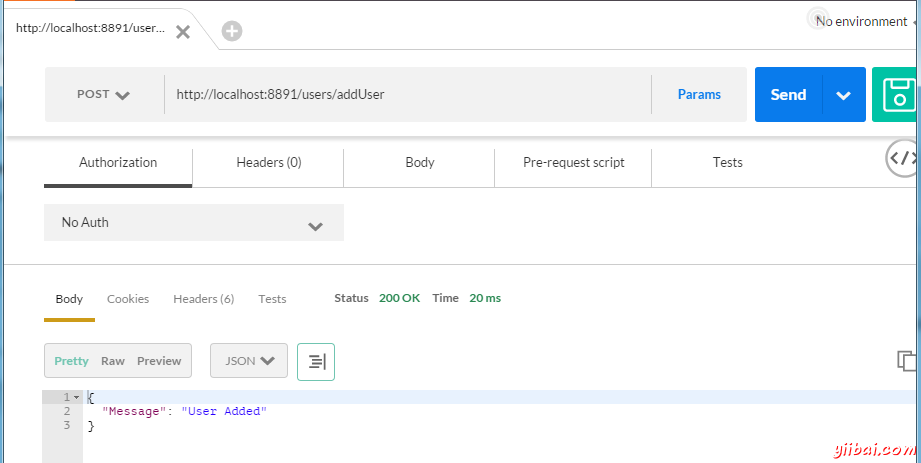
發出一個請求 firstApplication 獲得使用者。把 http://localhost:8891/users/1 在POSTMAN中找開啟並用GET請求,看看下面的結果。
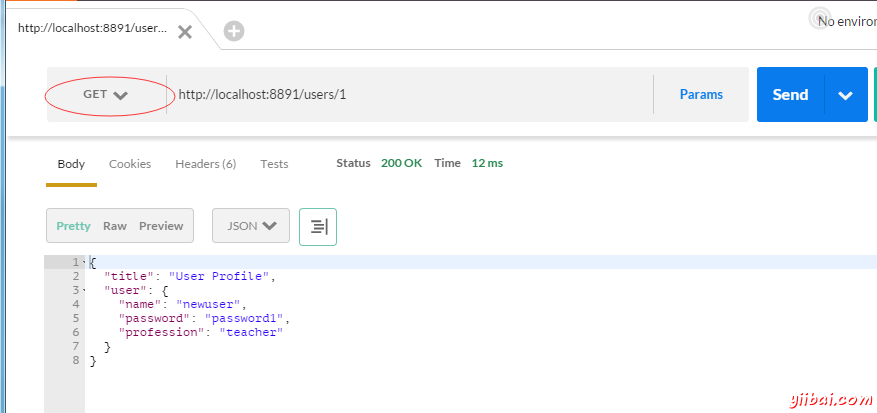
Node.js - 縮放應用
Node是在單執行緒模式下執行,它使用事件驅動的模式來處理並行。它還有助於建立子進程來利用併行處理在多核CPU的系統。
子進程始終有三個流child.stdin,child.stdout和child.stderr ,可以與父進程共用標准輸入輸出流。它們能夠通過一個單獨的流物件管道輸送。
主要有三種方法來建立子進程。
-
exec - child_process.exec方法在shell/控制台執行一個命令並緩衝輸出。
-
spawn - child_process.spawn由給定的命令啟動一個新的進程
-
fork - child_process.fork方法是spawn() 建立Node進程的一個特例。
exec() 方法
child_process.exec方法在shell執行一個命令並緩衝輸出。它簽名如下:
child_process.exec(command[, options], callback)
-
command String要執行的命令,用空格分隔引數
-
options 物件
-
cwd 當前工作目錄子進程的字串
-
env 物件環境鍵值對
-
encoding 字串(預設:'utf8'')
-
shell 字串Shell來執行(預設命令:在UNIX上在“/bin/sh”,在Windows為cmd.exe“,在shell中應該知道在Windows或UNIX/S/C-c開關。在Windows中,命令列解析應與cmd.exe相容)
-
timeout 數位(預設值: 0)
-
maxBuffer 數位(預設值: 200*1024)
-
killSignal 字串(預設值: 'SIGTERM')
-
uid 數位設定進程的使用者身份
-
gid 數位設定進程的組標識
-
-
callback 當進程終止函式呼叫輸出
-
error Error
-
stdout Buffer
-
stderr Buffer
-
-
Return:ChildProcess物件
exec() 返回一個緩衝器的最大尺寸,並等待該進程結束,並試圖在一次返回所有緩衝的資料
範例
建立兩個JS檔案名為worker.js和master.js在 D:\>yiibai_worksp\nodejs
File: worker.js
console.log("Child Process "+ process.argv[2] +" executed." );
File: master.js
const fs = require('fs');
const child_process = require('child_process');

for(var i=0; i<3; i++) {
   var workerProcess = child_process.exec('node worker.js '+i,
      function (error, stdout, stderr) {
         if (error) {
            console.log(error.stack);
            console.log('Error code: '+error.code);
            console.log('Signal received: '+error.signal);
         }
         console.log('stdout: ' + stdout);
         console.log('stderr: ' + stderr);
      });

      workerProcess.on('exit', function (code) {
      console.log('Child process exited with exit code '+code);
   });
}
現在執行master.js看到的結果:
D:\yiibai_worksp\nodejs> node master.js
驗證輸出。伺服器已經啟動
Child process exited with exit code 0
stdout: Child Process 1 executed.

stderr:
Child process exited with exit code 0
stdout: Child Process 0 executed.

stderr:
Child process exited with exit code 0
stdout: Child Process 2 executed.
spawn() 方法
child_process.spawn方法由給定的命令啟動一個新的進程。它具有以下簽名
child_process.spawn(command[, args][, options])
-
command 字串 - 要執行的命令
-
args 字串引數陣列列表
-
options 物件
-
cwd 當前工作目錄子進程的字串
-
env 物件環境鍵值對
-
stdio 陣列|子字串的標準輸入輸出組態
-
customFds Array不推薦檔案描述符由子進程使用標准輸入輸出
-
detached boolean值 - 子進程是一個行程群組頭進程
-
uid 數位設定進程的使用者身份
-
gid Number設定進程的組標識
-
-
Return: ChildProcess物件
spawn() 返回流(標準輸出與標準錯誤),並會使用當該過程返回巨量資料量。spawn()即開始接收到響應進程開始執行。
範例
建立兩個JS檔案名為worker.js和master.js在 D:\>yiibai_worksp\nodejs
File: worker.js
console.log("Child Process "+ process.argv[2] +" executed." );
File: master.js
const fs = require('fs');
const child_process = require('child_process');

for(var i=0; i<3; i++) {
   var workerProcess = child_process.spawn('node', ['worker.js', i]);

   workerProcess.stdout.on('data', function (data) {
      console.log('stdout: ' + data);
   });

   workerProcess.stderr.on('data', function (data) {
      console.log('stderr: ' + data);
   });

   workerProcess.on('close', function (code) {
      console.log('child process exited with code ' + code);
   });
}
現在執行master.js看到的結果:
D:\yiibai_worksp\nodejs> node master.js
驗證輸出。伺服器已經啟動
stdout: Child Process 0 executed.

child process exited with code 0
stdout: Child Process 2 executed.

child process exited with code 0
stdout: Child Process 1 executed.

child process exited with code 0
fork 方法
child_process.fork方法是spawn() 的一個特例用來建立Node進程。它具有以下簽名
child_process.fork(modulePath[, args][, options])
-
modulePath 字串- 模組執行所在的子進程
-
args 字串引數陣列列表
-
options 物件
-
cwd 當前工作目錄子進程的字串
-
env 物件環境鍵值對
-
execPath 字串可執行用於建立子進程
-
execArgv 傳遞給程式的可執行字串引數陣列列表(預設值:process.execArgv)
-
silent Boolean如果為true,stdin, stdout, 和 stderr 的標準錯誤將被輸送到父進程,否則它們將繼承自父,詳情參見“管道”和“繼承” 選項spawn()的標準輸入輸出(預設為false)
-
uid 數位設定進程的使用者身份
-
gid 數位設定進程的組標識
-
-
Return: ChildProcess 物件
fork返回物件有內建的通訊通道,除了具有正常的ChildProcess範例的所有方法。
範例
建立兩個JS檔案名為 worker.js 和 master.js 在 D:\>yiibai_worksp\nodejs
File: worker.js
console.log("Child Process "+ process.argv[2] +" executed." );
File: master.js
const fs = require('fs');
const child_process = require('child_process');

for(var i=0; i<3; i++) {
   var worker_process = child_process.fork("worker.js", [i]);

   worker_process.on('close', function (code) {
      console.log('child process exited with code ' + code);
   });
}
現在執行master.js看到的結果:
D:\yiibai_worksp> node master.js
驗證輸出。伺服器已經啟動
Child Process 0 executed.
Child Process 1 executed.
Child Process 2 executed.
child process exited with code 0
child process exited with code 0
child process exited with code 0