JSP傳送郵件
在本章中,我們將討論如何使用JSP傳送電子郵件。要使用JSP傳送電子郵件,應該在計算機上安裝JavaMail API和Java Activation Framework(JAF)。
- 從Java的標準網站下載最新版本的JavaMail(1.2版),下載地址: http://www.oracle.com/technetwork/java/javasebusiness/downloads/java-archive-downloads-eeplat-419426.html 。
在新建立的頂級目錄中下載並解壓縮這些檔案。可以看到許多應用程式的jar檔案。需要新增mail.jar檔案到專案的WEB-INFO/lib。
開啟Eclipse建立一個動態Web專案:SendingEmail ,其專案中的檔案如下所示 -
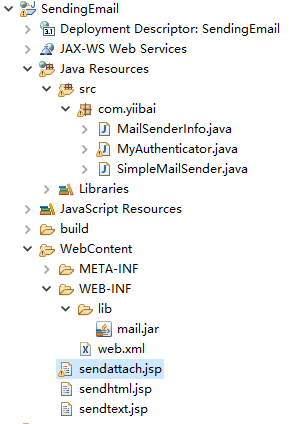
以下是傳送郵件的程式碼範例 -
用於表述郵件內容的類,檔案:MailSenderInfo.java
package com.yiibai;

/**
* 傳送郵件需要使用的基本資訊
*/
import java.util.Properties;

public class MailSenderInfo {
    // 傳送郵件的伺服器的IP和埠
    private String mailServerHost;
    private String mailServerPort = "25";
    // 郵件傳送者的地址
    private String fromAddress;
    // 郵件接收者的地址
    private String toAddress;
    // 登陸郵件傳送伺服器的使用者名和密碼
    private String userName;
    private String password;
    // 是否需要身份驗證
    private boolean validate = false;
    // 郵件主題
    private String subject;
    // 郵件的文字內容
    private String content;
    // 郵件附件的檔案名
    private String[] attachFileNames;

    /**
     * 獲得郵件對談屬性
     */
    public Properties getProperties() {
        Properties p = new Properties();
        p.put("mail.smtp.host", this.mailServerHost);
        p.put("mail.smtp.port", this.mailServerPort);
        p.put("mail.smtp.auth", validate ? "true" : "false");
        p.put("mail.smtp.ssl.enable", "true");//
        return p;
    }

    public String getMailServerHost() {
        return mailServerHost;
    }

    public void setMailServerHost(String mailServerHost) {
        this.mailServerHost = mailServerHost;
    }

    public String getMailServerPort() {
        return mailServerPort;
    }

    public void setMailServerPort(String mailServerPort) {
        this.mailServerPort = mailServerPort;
    }

    public boolean isValidate() {
        return validate;
    }

    public void setValidate(boolean validate) {
        this.validate = validate;
    }

    public String[] getAttachFileNames() {
        return attachFileNames;
    }

    public void setAttachFileNames(String[] fileNames) {
        this.attachFileNames = fileNames;
    }

    public String getFromAddress() {
        return fromAddress;
    }

    public void setFromAddress(String fromAddress) {
        this.fromAddress = fromAddress;
    }

    public String getPassword() {
        return password;
    }

    public void setPassword(String password) {
        this.password = password;
    }

    public String getToAddress() {
        return toAddress;
    }

    public void setToAddress(String toAddress) {
        this.toAddress = toAddress;
    }

    public String getUserName() {
        return userName;
    }

    public void setUserName(String userName) {
        this.userName = userName;
    }

    public String getSubject() {
        return subject;
    }

    public void setSubject(String subject) {
        this.subject = subject;
    }

    public String getContent() {
        return content;
    }

    public void setContent(String textContent) {
        this.content = textContent;
    }
}
用於實現傳送各類格式的程式碼實現,檔案:SimpleMailSender.java -
package com.yiibai;

import java.io.UnsupportedEncodingException;
import java.util.Date;
import java.util.Properties;

import javax.activation.DataHandler;
import javax.activation.FileDataSource;
import javax.mail.Address;
import javax.mail.BodyPart;
import javax.mail.Message;
import javax.mail.MessagingException;
import javax.mail.Multipart;
import javax.mail.Session;
import javax.mail.Transport;
import javax.mail.internet.InternetAddress;
import javax.mail.internet.MimeBodyPart;
import javax.mail.internet.MimeMessage;
import javax.mail.internet.MimeMultipart;
import javax.mail.internet.MimeUtility;

/**
 * 簡單郵件(不帶附件的郵件)傳送器
 */
public class SimpleMailSender {
    /**
     * 以文字格式傳送郵件
     *
     * @param mailInfo
     *            待傳送的郵件的資訊
     */
    public boolean sendTextMail(MailSenderInfo mailInfo) {
        // 判斷是否需要身份認證
        MyAuthenticator authenticator = null;
        Properties pro = mailInfo.getProperties();
        if (mailInfo.isValidate()) {
            // 如果需要身份認證,則建立一個密碼驗證器
            authenticator = new MyAuthenticator(mailInfo.getUserName(), mailInfo.getPassword());
        }
        // 根據郵件對談屬性和密碼驗證器構造一個傳送郵件的session
        Session sendMailSession = Session.getDefaultInstance(pro, authenticator);
        try {
            // 根據session建立一個郵件訊息
            Message mailMessage = new MimeMessage(sendMailSession);
            // 建立郵件傳送者地址
            Address from = new InternetAddress(mailInfo.getFromAddress());
            // 設定郵件訊息的傳送者
            mailMessage.setFrom(from);
            // 建立郵件的接收者地址,並設定到郵件訊息中
            Address to = new InternetAddress(mailInfo.getToAddress());
            mailMessage.setRecipient(Message.RecipientType.TO, to);
            // 設定郵件訊息的主題
            mailMessage.setSubject(mailInfo.getSubject());
            // 設定郵件訊息傳送的時間
            mailMessage.setSentDate(new Date());
            // 設定郵件訊息的主要內容
            String mailContent = mailInfo.getContent();
            mailMessage.setText(mailContent);
            // 傳送郵件
            Transport.send(mailMessage);
            return true;
        } catch (MessagingException ex) {
            ex.printStackTrace();
        }
        return false;
    }

    /**
     * 以HTML格式傳送郵件
     *
     * @param mailInfo
     *            待傳送的郵件資訊
     */
    public static boolean sendHtmlMail(MailSenderInfo mailInfo) {
        // 判斷是否需要身份認證
        MyAuthenticator authenticator = null;
        Properties pro = mailInfo.getProperties();
        // 如果需要身份認證,則建立一個密碼驗證器
        if (mailInfo.isValidate()) {
            authenticator = new MyAuthenticator(mailInfo.getUserName(), mailInfo.getPassword());
        }
        // 根據郵件對談屬性和密碼驗證器構造一個傳送郵件的session
        Session sendMailSession = Session.getDefaultInstance(pro, authenticator);
        try {
            // 根據session建立一個郵件訊息
            Message mailMessage = new MimeMessage(sendMailSession);
            // 建立郵件傳送者地址
            Address from = new InternetAddress(mailInfo.getFromAddress());
            // 設定郵件訊息的傳送者
            mailMessage.setFrom(from);
            // 建立郵件的接收者地址,並設定到郵件訊息中
            Address to = new InternetAddress(mailInfo.getToAddress());
            // Message.RecipientType.TO屬性表示接收者的型別為TO
            mailMessage.setRecipient(Message.RecipientType.TO, to);
            // 設定郵件訊息的主題
            mailMessage.setSubject(mailInfo.getSubject());
            // 設定郵件訊息傳送的時間
            mailMessage.setSentDate(new Date());
            // MiniMultipart類是一個容器類,包含MimeBodyPart型別的物件
            Multipart mainPart = new MimeMultipart();
            // 建立一個包含HTML內容的MimeBodyPart
            BodyPart html = new MimeBodyPart();
            // 設定HTML內容
            html.setContent(mailInfo.getContent(), "text/html; charset=utf-8");
            mainPart.addBodyPart(html);
            // 將MiniMultipart物件設定為郵件內容
            mailMessage.setContent(mainPart);
            // 傳送郵件
            Transport.send(mailMessage);
            return true;
        } catch (MessagingException ex) {
            ex.printStackTrace();
        }
        return false;
    }

    /**
     * 以HTML格式傳送郵件
     *
     * @param mailInfo
     *            待傳送的郵件資訊
     * @throws UnsupportedEncodingException
     */
    public static boolean sendAttachMail(MailSenderInfo mailInfo, String path) {
        // 判斷是否需要身份認證
        MyAuthenticator authenticator = null;
        Properties pro = mailInfo.getProperties();
        // 如果需要身份認證,則建立一個密碼驗證器
        if (mailInfo.isValidate()) {
            authenticator = new MyAuthenticator(mailInfo.getUserName(), mailInfo.getPassword());
        }
        // 根據郵件對談屬性和密碼驗證器構造一個傳送郵件的session
        Session sendMailSession = Session.getDefaultInstance(pro, authenticator);
        try {
            // 根據session建立一個郵件訊息
            Message mailMessage = new MimeMessage(sendMailSession);
            // 建立郵件傳送者地址
            Address from = new InternetAddress(mailInfo.getFromAddress());
            // 設定郵件訊息的傳送者
            mailMessage.setFrom(from);
            // 建立郵件的接收者地址,並設定到郵件訊息中
            Address to = new InternetAddress(mailInfo.getToAddress());
            // Message.RecipientType.TO屬性表示接收者的型別為TO
            mailMessage.setRecipient(Message.RecipientType.TO, to);
            // 設定郵件訊息的主題
            mailMessage.setSubject(mailInfo.getSubject());
            // 設定郵件訊息傳送的時間
            mailMessage.setSentDate(new Date());

            // 新增附件部分
            // 郵件內容部分1---文字內容
            MimeBodyPart body0 = new MimeBodyPart(); // 郵件中的文字部分
            body0.setContent("這是兩張<font color='red'>圖片</font>....", "text/html;charset=utf-8");

            // 郵件內容部分2---附件1
            MimeBodyPart body1 = new MimeBodyPart(); // 附件1
            if (path != null) {
                body1.setDataHandler(new DataHandler(new FileDataSource(path + "/mydog.jpg")));// 專案根目錄下

                body1.setFileName(MimeUtility.encodeText(path + "/mydog.jpg"));// 中文附件名,解決亂碼
            } else {
                body1.setDataHandler(new DataHandler(new FileDataSource("mydog.jpg")));// 專案根目錄下
                body1.setFileName(MimeUtility.encodeText("mydog.jpg"));// 中文附件名,解決亂碼
            }

            // 郵件內容部分3---附件2
            MimeBodyPart body2 = new MimeBodyPart(); // 附件2
            if (path != null) {
                body2.setDataHandler(new DataHandler(new FileDataSource(path + "/mydog2.jpg")));
                body2.setFileName(path + "/2.jpg");
            }

            // 把上面的3部分組裝在一起,設定到msg中
            MimeMultipart mm = new MimeMultipart();

            mm.addBodyPart(body0);
            mm.addBodyPart(body1);
            mm.addBodyPart(body2);

            mailMessage.setContent(mm);

            // 傳送郵件
            Transport.send(mailMessage);
            return true;
        } catch (MessagingException | UnsupportedEncodingException ex) {
            ex.printStackTrace();
        }
        return false;
    }
}
JSP程式碼部分
用於傳送文字內容的JSP實現程式碼,檔案:sendtext.jsp -
<%@ page language="java" contentType="text/html; charset=UTF-8"
    pageEncoding="UTF-8"%>
<%@ page import="java.io.*,java.util.*,javax.mail.*"%>
<%@ page import="javax.mail.internet.*,javax.activation.*"%>
<%@ page import="javax.servlet.http.*,javax.servlet.*"%>
<%@ page import="com.yiibai.*"%>

<%
    //這個類主要是設定郵件
    MailSenderInfo mailInfo = new MailSenderInfo();
    mailInfo.setMailServerHost("smtp.qq.com"); // 將 smtp.qq.com 改為smtp.exmail.qq.com
    mailInfo.setMailServerPort("465");
    mailInfo.setValidate(true);
    mailInfo.setUserName("[email protected]"); //自己的郵箱
    mailInfo.setPassword("xxxxxxxxxxxxxxx");//自己組態的郵箱密碼,用於驗證

    mailInfo.setFromAddress("[email protected]"); ///自己的郵箱
    mailInfo.setToAddress("[email protected]"); ///對方收件的郵箱

    SimpleMailSender sms = new SimpleMailSender();

    //傳送文字郵件
    mailInfo.setSubject("傳送Text郵箱標題");
    mailInfo.setContent("這是一封文字郵箱內容,<p>這裡使用P標籤</p>");
    sms.sendTextMail(mailInfo);//傳送文體格式

%>

<!DOCTYPE html PUBLIC "-//W3C//DTD HTML 4.01 Transitional//EN" "http://www.w3.org/TR/html4/loose.dtd">
<html>
<head>
<meta http-equiv="Content-Type" content="text/html; charset=UTF-8">
<title>JSP傳送郵件範例</title>
</head>
<body>
    <div style="margin: auto; width: 80%;">
        <h2>JSP傳送郵件範例</h2>
        <p>傳送文字郵件完成...</p>
    </div>
</body>
</html>
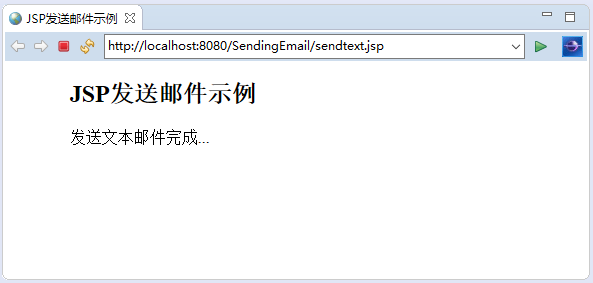
執行上面範例程式碼,開啟瀏覽器存取URL: http://localhost:8080/SendingEmail/sendtext.jsp ,可以看到以下結果 -
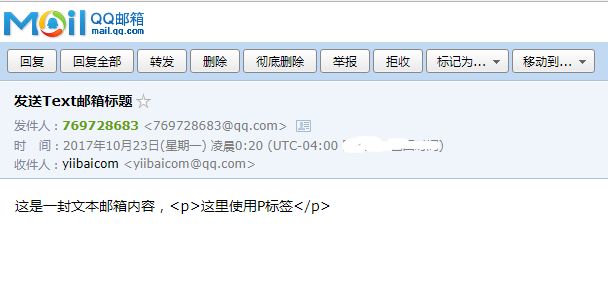
登入收件郵箱賬號,可以到收到了一封郵件,如下所示 -
傳送HTML格式郵件
以下是一個傳送HTML格式郵件的程式碼,檔案:sendhtml.jsp -
傳送HTML內容郵件
以下是一個傳送帶有附件郵件的程式碼,檔案:sendhtml.jsp -
<%@ page language="java" contentType="text/html; charset=UTF-8"
    pageEncoding="UTF-8"%>
<%@ page import="com.yiibai.*"%>

<%
    //這個類主要是設定郵件
    MailSenderInfo mailInfo = new MailSenderInfo();
    mailInfo.setMailServerHost("smtp.qq.com"); // 將 smtp.qq.com 改為smtp.exmail.qq.com
    mailInfo.setMailServerPort("465");
    mailInfo.setValidate(true);
    mailInfo.setUserName("[email protected]"); //自己的郵箱
    mailInfo.setPassword("xxxxxxxxxxxxxx");//自己的郵箱密碼,用於驗證

    mailInfo.setFromAddress("[email protected]"); ///自己的郵箱
    mailInfo.setToAddress("[email protected]"); ///對方收件的郵箱

    SimpleMailSender sms = new SimpleMailSender();

    //傳送文字郵件
    mailInfo.setSubject("傳送Text郵箱標題");
    mailInfo.setContent("這是一封文字郵箱內容,<p>這裡使用P標籤</p>");
    sms.sendTextMail(mailInfo);//傳送文體格式

%>

<!DOCTYPE html PUBLIC "-//W3C//DTD HTML 4.01 Transitional//EN" "http://www.w3.org/TR/html4/loose.dtd">
<html>
<head>
<meta http-equiv="Content-Type" content="text/html; charset=UTF-8">
<title>JSP傳送郵件範例</title>
</head>
<body>
    <div style="margin: auto; width: 80%;">
        <h2>JSP傳送郵件範例</h2>
        <p>傳送HTML格式郵件完成...</p>
    </div>
</body>
</html>
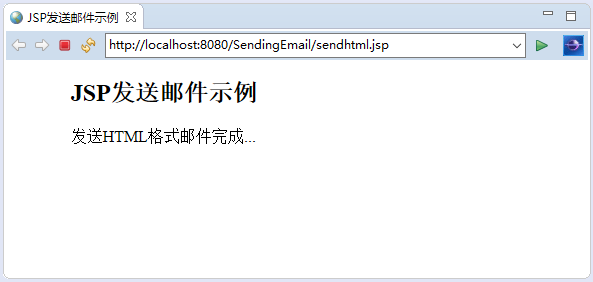
執行上面範例程式碼,開啟瀏覽器存取URL: http://localhost:8080/SendingEmail/sendhtml.jsp ,可以看到以下結果 -
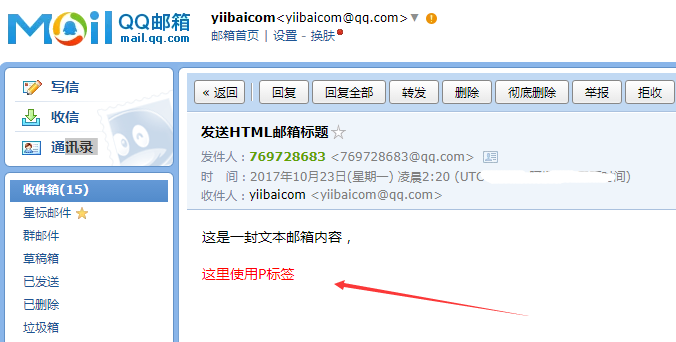
登入收件郵箱賬號,可以到收到了一封郵件,如下所示 -
傳送帶有附件郵件
以下是一個傳送帶有附件郵件的程式碼,檔案:sendattach.jsp -
<%@ page language="java" contentType="text/html; charset=UTF-8"
    pageEncoding="UTF-8"%>
<%@ page import="com.yiibai.*"%>

<%
    //這個類主要是設定郵件
    MailSenderInfo mailInfo = new MailSenderInfo();
    mailInfo.setMailServerHost("smtp.qq.com"); // 將 smtp.qq.com 改為smtp.exmail.qq.com
    mailInfo.setMailServerPort("465");
    mailInfo.setValidate(true);
    mailInfo.setUserName("[email protected]"); //自己的郵箱
    mailInfo.setPassword("xxxxxxxxxxxxx");//自己的郵箱密碼,用於驗證

    mailInfo.setFromAddress("[email protected]"); ///自己的郵箱
    mailInfo.setToAddress("[email protected]"); ///對方收件的郵箱

    SimpleMailSender sms = new SimpleMailSender();

    // 傳送帶有附件的郵件
     mailInfo.setSubject("傳送附件郵件標題");
     mailInfo.setContent("<h2>這是郵箱內容</h2><p style='color:red;'>這是一封使用JAVA傳送帶有附件的測試郵件</p>");
     String path = request.getSession().getServletContext().getRealPath("");
     sms.sendAttachMail(mailInfo, path);

%>

<!DOCTYPE html PUBLIC "-//W3C//DTD HTML 4.01 Transitional//EN" "http://www.w3.org/TR/html4/loose.dtd">
<html>
<head>
<meta http-equiv="Content-Type" content="text/html; charset=UTF-8">
<title>JSP傳送郵件範例</title>
</head>
<body>
    <div style="margin: auto; width: 80%;">
        <h2>JSP傳送郵件範例</h2>
        <p>傳送帶有附件的郵件完成...</p>
    </div>
</body>
</html>
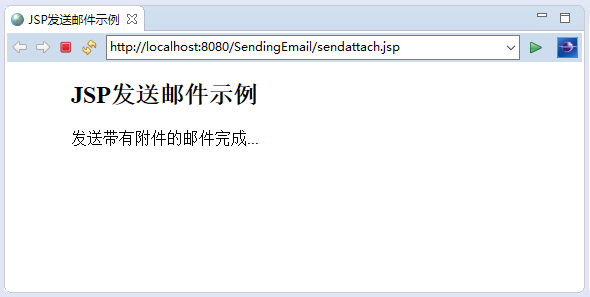
執行上面範例程式碼,開啟瀏覽器存取URL: http://localhost:8080/SendingEmail/sendattach.jsp ,可以看到以下結果 -
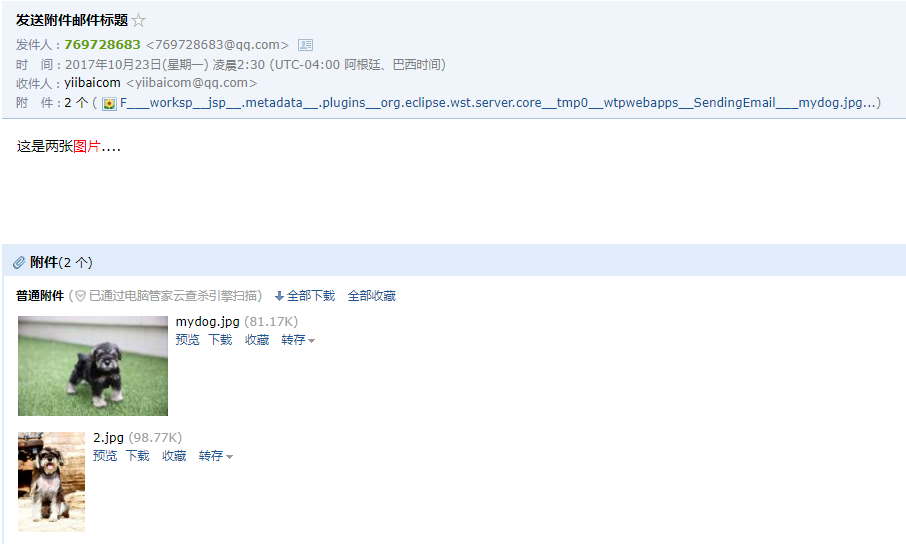
登入收件郵箱賬號,可以到收到了一封郵件,如下所示 -
使用者認證部分
如果需要向電子郵件伺服器提供使用者ID和密碼進行身份驗證,則可以按如下方式設定這些屬性:
props.setProperty("mail.user", "myuser");
props.setProperty("mail.password", "mypwd");
`
使用表單傳送電子郵件
可以使用HTML表單接受電子郵件引數,然後可以使用請求物件獲取以下所有資訊:
String to = request.getParameter("to");
String from = request.getParameter("from");
String subject = request.getParameter("subject");
String messageText = request.getParameter("body");
獲得所有資訊後,可以使用上述程式傳送電子郵件。