Nginx+PHP7原始碼安裝組態
在前面幾篇文章中,我們已經介紹並演示安裝 Nginx 的幾種方式,在開始本篇文章的閱讀和實踐之前,建議先閱讀「Nginx安裝組態」:/12/121/3608.html ,在上面文章的基礎之上,我們再新增 PHP7 的安裝組態。
1. Nginx安裝組態
如果需要一些特殊的功能,在包和埠不可用的情況下,也可以從原始碼編譯來安裝nginx。雖然原始碼編譯安裝更靈活,但這種方法對於初學者來說可能很複雜(建議初學者自己使用原始碼編譯安裝來安裝nginx)。有關更多資訊,請參閱從源構建nginx。
在本文中,主要介紹從原始碼安裝nginx,這篇教學是基於CentOS7 64bit系統來安裝的,非Centos系統不適用。現在我們就開始吧!
1.1 安裝前工作
首先更新系統軟體源,使用以下命令更新系統 -
[root@localhost ~]# yum update
有關兩個命令的一點解釋:
yum -y update- 升級所有包,改變軟體設定和系統設定,系統版本核心都升級yum -y upgrade- 升級所有包,不改變軟體設定和系統設定,系統版本升級,核心不改變
依賴包安裝
[root@localhost src]# yum -y install gcc gcc-c++ autoconf automake libtool make cmake
[root@localhost src]# yum -y install zlib zlib-devel openssl openssl-devel pcre-devel
1.2. 下載Nginx安裝原始檔
原始碼下載,可官網下載地址:http://nginx.org/en/download.html 下載並上傳到伺服器(這裡選擇最新穩定版本:nginx-1.10.3),如下圖所示 -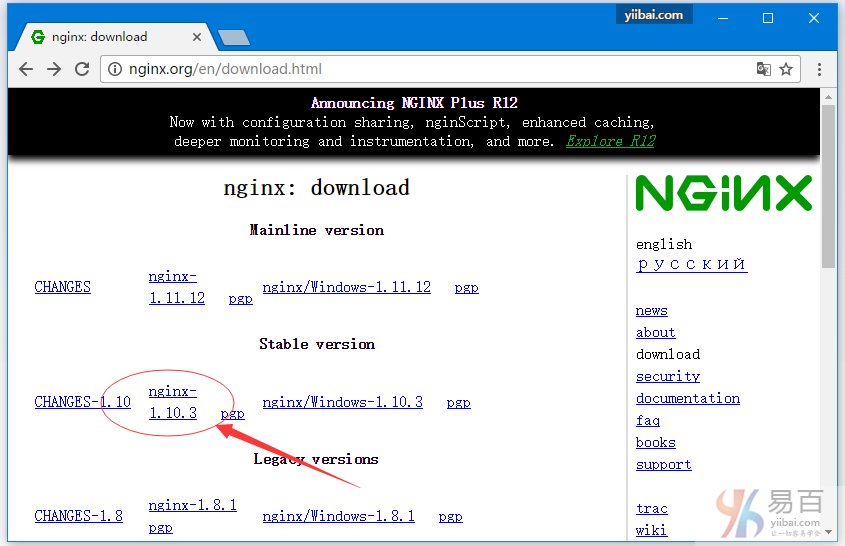
或直接在服務上執行以下命令下載 -
[root@localhost ~]# cd /usr/local/src
[root@localhost src]# wget -c http://nginx.org/download/nginx-1.10.3.tar.gz
解壓上面下載的檔案 -
[root@localhost src]# tar zxvf nginx-1.10.3.tar.gz
在編譯之前還要做一些前期的準備工作,如:依懶包安裝,Nginx使用者和使用者組等。
1.3. 新建nginx使用者及使用者組
使用 root 使用者身份登入系統,執行以下命令建立新的使用者。
[root@localhost src]# groupadd nginx
[root@localhost src]# useradd -g nginx -M nginx
useradd命令的-M引數用於不為nginx建立home目錄
修改/etc/passwd,使得nginx使用者無法bash登陸(nginx使用者後面由/bin/bash改為/sbin/nologin),
[root@localhost src]# vi /etc/passwd
然後找到有 nginx 那一行,把它修改為(後面由/bin/bash改為/sbin/nologin):
nginx:x:1002:1003::/home/nginx:/sbin/nologin
1.4. 編譯組態、編譯、安裝
下面我們進入解壓的nginx原始碼目錄:/usr/local/src/ 執行以下命令 -
[root@localhost ~]# cd /usr/local/src/nginx*
[root@localhost nginx-1.10.3]# pwd
/usr/local/src/nginx-1.10.3
[root@localhost nginx-1.10.3]#
[root@localhost nginx-1.10.3]# ./configure --prefix=/usr/local/nginx \
--pid-path=/usr/local/nginx/run/nginx.pid \
--with-http_ssl_module \
--user=nginx \
 --group=nginx \
--with-pcre \
--without-mail_pop3_module \
--without-mail_imap_module \
--without-mail_smtp_module
注意:上面的反斜槓
\表示換行繼續。
--prefix=/usr/local/nginx 指定安裝到 /usr/local/nginx 目錄下。
上面組態完成後,接下來執行編譯 -
[root@localhost nginx-1.10.3]# make
[root@localhost nginx-1.10.3]# make install
... ...
cp conf/nginx.conf '/usr/local/nginx/conf/nginx.conf.default'
test -d '/usr/local/nginx/run' \
        || mkdir -p '/usr/local/nginx/run'
test -d '/usr/local/nginx/logs' \
        || mkdir -p '/usr/local/nginx/logs'
test -d '/usr/local/nginx/html' \
        || cp -R html '/usr/local/nginx'
test -d '/usr/local/nginx/logs' \
        || mkdir -p '/usr/local/nginx/logs'
make[1]: Leaving directory `/usr/local/src/nginx-1.10.3'
[root@localhost nginx-1.10.3]#
上面編譯時間跟你的電腦組態相關,所以可能需要一些等待時間。
檢視安裝後的程式版本:
[root@localhost nginx-1.10.3]# /usr/local/nginx/sbin/nginx -v
nginx version: nginx/1.10.3
修改Nginx預設埠(可選):
[root@localhost nginx-1.10.3]# vi /usr/local/nginx/conf/nginx.conf
找到 -
... ...
    #gzip  on;

    server {
        listen       80;
        server_name  localhost;

        #charset koi8-r;
... ...
把上面的 80 修改為你想要的埠,如:8080 。
修改組態後驗證組態是否合法:
[root@localhost nginx-1.10.3]# /usr/local/nginx/sbin/nginx -t
nginx: the configuration file /usr/local/nginx/conf/nginx.conf syntax is ok
nginx: configuration file /usr/local/nginx/conf/nginx.conf test is successful
啟動Nginx程式、檢視進程 -
[root@localhost nginx-1.10.3]# /usr/local/nginx/sbin/nginx
[root@localhost nginx-1.10.3]# ps -ef | grep nginx
root      29151      1  0 22:01 ?        00:00:00 nginx: master process /usr/local/nginx/sbin/nginx
nginx     29152  29151  0 22:01 ?        00:00:00 nginx: worker process
root      29154   2302  0 22:01 pts/0    00:00:00 grep --color=auto nginx
[root@localhost nginx-1.10.3]#
nginx停止、重新啟動
未新增nginx服務前對nginx的管理只能通過一下方式管理:
#  nginx 管理的幾種方式 -
# 啟動Nginx
/usr/local/nginx/sbin/nginx
# 從容停止Nginx:
kill -QUIT 主進程號 # 如上一步中的 ps 命令輸出的 29151,就是 Nginx的主進程號
# 快速停止Nginx:
kill -TERM 主進程號
# 強制停止Nginx:
pkill -9 nginx
# 平滑重新啟動nginx
/usr/nginx/sbin/nginx -s reload
現在我們來看看安裝的Nginx的執行結果,可以簡單地使用curl命令存取localhost測試,結果如下 -
[root@localhost nginx-1.10.3]# curl localhost
<!DOCTYPE html>
<html>
<head>
<title>Welcome to nginx!</title>
<style>
    body {
        width: 35em;
        margin: 0 auto;
        font-family: Tahoma, Verdana, Arial, sans-serif;
    }
</style>
</head>
<body>
<h1>Welcome to nginx!</h1>
<p>If you see this page, the nginx web server is successfully installed and
working. Further configuration is required.</p>

<p>For online documentation and support please refer to
<a href="http://nginx.org/">nginx.org</a>.<br/>
Commercial support is available at
<a href="http://nginx.com/">nginx.com</a>.</p>

<p><em>Thank you for using nginx.</em></p>
</body>
</html>
[root@localhost nginx-1.10.3]#
或者也可以開啟瀏覽存取目標伺服器的IP,在本範例中,伺服器的IP地址是:192.168.0.195,所以開啟瀏覽器存取如下結果 -
提示: 如果沒有看到以上介面,在確保Nginx啟動的前提下,檢查SeLinux和防火牆是否已關閉。關閉防火牆命令:
systemctl stop firewalld.service。
2. PHP7安裝組態
2.1 原始碼下載
官網地址:php7下載
[root@localhost ~]# cd /usr/local/src
[root@localhost src]# wget -c http://cn2.php.net/distributions/php-7.1.3.tar.gz
解壓壓縮包:
[root@localhost src]# tar -xzvf php-7.*
[root@localhost src]# cd php-7*
2.2 安裝編譯所需依賴包
[root@localhost php-7.1.3]# yum -y install libxml2 libxml2-devel openssl openssl-devel curl-devel libjpeg-devel libpng-devel freetype-devel libmcrypt-devel
或者常見大部分依懶包安裝 -
[root@localhost php-7.1.3]# yum install -y wget gcc gcc-c++ autoconf libjpeg libjpeg-devel perl perl* perl-CPAN libpng libpng-devel freetype freetype-devel libxml2 libxml2-devel zlib zlib-devel glibc glibc-devel glib2 glib2-devel bzip2 bzip2-devel ncurses ncurses-devel curl curl-devel e2fsprogs e2fsprogs-devel krb5 krb5-devel libidn libidn-devel openssl openssl-devel openldap openldap-devel nss_ldap openldap-clients openldap-servers png jpeg autoconf gcc cmake make gcc-c++ gcc ladp ldap* ncurses ncurses-devel zlib zlib-devel zlib-static pcre pcre-devel pcre-static openssl openssl-devel perl libtoolt openldap-devel libxml2-devel ntpdate cmake gd* gd2 ImageMagick-devel jpeg jpeg* pcre-dev* fontconfig libpng libxml2 zip unzip gzip
2.3 原始碼編譯、安裝
通過 ./configure –help 檢視支援的編譯組態引數,如下所示 -
[root@localhost php-7.1.3]# ./configure --help
`configure' configures this package to adapt to many kinds of systems.

Usage: ./configure [OPTION]... [VAR=VALUE]...

To assign environment variables (e.g., CC, CFLAGS...), specify them as
VAR=VALUE.  See below for descriptions of some of the useful variables.

Defaults for the options are specified in brackets.

Configuration:
  -h, --helpdisplay this help and exit
      --help=short        display options specific to this package
      --help=recursive    display the short help of all the included packages
  -V, --versiondisplayversion information and exit
  -q, --quiet, --silent   do not print `checking ...' messages
      --cache-file=FILE   cache test results inFILE [disabled]
  -C, --config-cache      alias for `--cache-file=config.cache'
  -n, --no-create         do not create output files
      --srcdir=DIR        find the sources inDIR [configure dir or `..']

Installation directories:
  --prefix=PREFIX         install architecture-independent files in PREFIX
                          [/usr/local]
  --exec-prefix=EPREFIX   install architecture-dependent files in EPREFIX
                          [PREFIX]

By default, `make install' will install all the files in
`/usr/local/bin', `/usr/local/lib' etc.  You can specify
an installation prefix other than `/usr/local' using `--prefix',
for instance `--prefix=$HOME'.

For better control, use the options below.
PHP+Nginx組合的編譯組態命令 -
[root@localhost php-7.1.3]# ./configure --prefix=/usr/local/php7 \
--with-config-file-path=/usr/local/php7/etc \
--with-config-file-scan-dir=/usr/local/php7/etc/php.d \
--with-mcrypt=/usr/include \
--enable-mysqlnd \
--with-mysqli \
--with-pdo-mysql \
--enable-fpm \
--with-fpm-user=nginx \
--with-fpm-group=nginx \
--with-gd \
--with-iconv \
--with-zlib \
--enable-xml \
--enable-shmop \
--enable-sysvsem \
--enable-inline-optimization \
--enable-mbregex \
--enable-mbstring \
--enable-ftp \
--enable-gd-native-ttf \
--with-openssl \
--enable-pcntl \
--enable-sockets \
--with-xmlrpc \
--enable-zip \
--enable-soap \
--without-pear \
--with-gettext \
--enable-session \
--with-curl \
--with-jpeg-dir \
--with-freetype-dir \
--enable-opcache

# 執行完成後的結果:
Generating files
configure: creating ./config.status
creating main/internal_functions.c
creating main/internal_functions_cli.c
+--------------------------------------------------------------------+
| License:                                                           |
| This software is subject to the PHP License, available in this     |
| distribution in the file LICENSE.  By continuing this installation |
| process, you are bound by the terms of this license agreement.     |
| If you do not agree with the terms of this license, you must abort |
| the installation process at this point.                            |
+--------------------------------------------------------------------+

Thank you for using PHP.

config.status: creating php7.spec
config.status: creating main/build-defs.h
config.status: creating scripts/phpize
config.status: creating scripts/man1/phpize.1
config.status: creating scripts/php-config
config.status: creating scripts/man1/php-config.1
config.status: creating sapi/cli/php.1
config.status: creating sapi/fpm/php-fpm.conf
config.status: creating sapi/fpm/www.conf
config.status: creating sapi/fpm/init.d.php-fpm
config.status: creating sapi/fpm/php-fpm.service
config.status: creating sapi/fpm/php-fpm.8
config.status: creating sapi/fpm/status.html
config.status: creating sapi/cgi/php-cgi.1
config.status: creating ext/phar/phar.1
config.status: creating ext/phar/phar.phar.1
config.status: creating main/php_config.h
config.status: executing default commands
編譯 + 安裝,編譯原始碼, 如下所示 -
$ make
Generating phar.php
Generating phar.phar
PEAR package PHP_Archive not installed: generated phar will require PHP's phar extension be enabled.
directorytreeiterator.inc
pharcommand.inc
directorygraphiterator.inc
invertedregexiterator.inc
clicommand.inc
phar.inc

Build complete.
Don't forget to run 'make test'.

## 對編譯結果進行測試:
[root@localhost php-7.1.3]# make test
## 很遺憾,我這裡make test報錯了,已反饋php test資訊。

## 安裝程式至指定目錄:
[root@localhost php-7.1.3]# make install
Installing shared extensions:     /usr/local/php7/lib/php/extensions/no-debug-non-zts-20160303/
Installing PHP CLI binary:        /usr/local/php7/bin/
Installing PHP CLI man page:      /usr/local/php7/php/man/man1/
Installing PHP FPM binary:        /usr/local/php7/sbin/
Installing PHP FPM defconfig:     /usr/local/php7/etc/
Installing PHP FPM man page:      /usr/local/php7/php/man/man8/
Installing PHP FPM status page:   /usr/local/php7/php/php/fpm/
Installing phpdbg binary:         /usr/local/php7/bin/
Installing phpdbg man page:       /usr/local/php7/php/man/man1/
Installing PHP CGI binary:        /usr/local/php7/bin/
Installing PHP CGI man page:      /usr/local/php7/php/man/man1/
Installing build environment:     /usr/local/php7/lib/php/build/
Installing header files:          /usr/local/php7/include/php/
Installing helper programs:       /usr/local/php7/bin/
  program: phpize
  program: php-config
Installing man pages:             /usr/local/php7/php/man/man1/
  page: phpize.1
  page: php-config.1
/usr/local/src/php-7.1.3/build/shtool install -c ext/phar/phar.phar /usr/local/php7/bin
ln -s -f phar.phar /usr/local/php7/bin/phar
Installing PDO headers:           /usr/local/php7/include/php/ext/pdo/
[root@localhost php-7.1.3]#
檢視安裝成功後的版本資訊 -
[root@localhost local]# /usr/local/php7/bin/php -v
PHP 7.1.3 (cli) (built: Apr 13 2017 22:47:30) ( NTS )
Copyright (c) 1997-2017 The PHP Group
Zend Engine v3.1.0, Copyright (c) 1998-2017 Zend Technologies
[root@localhost local]#
2.4. 修改組態
修改php組態,檢視php載入組態檔案路徑:
[root@localhost local]# /usr/local/php7/bin/php -i | grep php.ini
Configuration File (php.ini) Path => /usr/local/php7/etc
[root@localhost local]#
php-7.1.3原始碼目錄下:
[root@localhost local]# ll /usr/local/src/php-7.1.3/ | grep ini
-rw-rw-r--.  1 yiibai yiibai   71063 Mar 14 09:17 php.ini-development
-rw-rw-r--.  1 yiibai yiibai   71095 Mar 14 09:17 php.ini-production
[root@localhost local]#
複製PHP的組態檔案,使用以下命令 -
[root@localhost local]# cp /usr/local/src/php-7.1.3/php.ini-production /usr/local/php7/etc/php.ini
## 根據需要對`php.ini`組態進行組態修改,請自行參考官方文件組態 。
[root@localhost local]# /usr/local/php7/bin/php -i | grep php.ini
Configuration File (php.ini) Path => /usr/local/php7/etc
Loaded Configuration File => /usr/local/php7/etc/php.ini
[root@localhost local]#
2.5 啟用php-fpm服務
上面我們在編譯php7的時候,已經將fpm模組編譯了,那麼接下來,我們要啟用php-fpm。但是預設情況下它的組態檔案和服務都沒有啟用,所以要我們自己來組態,先重新命名並移動以下兩個檔案:
[root@localhost local]# cd /usr/local/php7/etc
[root@localhost etc]# cp php-fpm.conf.default php-fpm.conf
[root@localhost etc]# cp php-fpm.d/www.conf.default php-fpm.d/www.conf
php-fpm的具體組態這裡不做深入去詳解,因為在編譯之前./configure的時候,我們都已經確定了一些組態,比如執行fpm的使用者和使用者組之類的,所以預設組態應該不會存在路徑問題和許可權問題。
組態php-fpm的服務載入:
就像上面的nginx一樣,我們希望使用 service php-fpm start|stop|restart 這些操作來實現服務的重新啟動,但沒有像nginx那麼複雜,php編譯好之後,給我們提供了一個php-fpm的程式。這個檔案放在php編譯原始碼目錄中:
[root@localhost local]#  cd /usr/local/src/php-7.1.3/sapi/fpm/
## 或直接使用可執行檔案: /usr/local/php7/sbin/php-fpm
[root@localhost local]# ls
[root@localhost local]# cp init.d.php-fpm /etc/init.d/php-fpm
[root@localhost local]# chmod +x /etc/init.d/php-fpm
[root@localhost local]# chkconfig --add php-fpm
[root@localhost local]# chkconfig php-fpm on
通過上面這個操作,我們就可以使用 service php-fpm start 來啟用php-fpm了。用 ps -ef | grep php-fpm看看進程吧。
[root@localhost fpm]# ps -ef | grep php-fpm
root     108421      1  0 23:19 ?        00:00:00 php-fpm: master process (/usr/local/php7/etc/php-fpm.conf)
nginx    108422 108421  0 23:19 ?        00:00:00 php-fpm: pool www
nginx    108423 108421  0 23:19 ?        00:00:00 php-fpm: pool www
root     108507   2285  0 23:23 pts/0    00:00:00 grep --color=auto php-fpm
[root@localhost fpm]#
這樣,PHP環境就安裝完成了,接下來我們通過Nginx代理整合PHP7,來實現Nginx+PHP服務。
3. Nginx代理整合PHP7組態
通過上面的操作,nginx和php-fpm服務都已經正常執行起來了,但是php-fpm只是在127.0.0.1:9000上提供服務,外網是無法存取的,而且也不可能直接通過php-fpm給外網提供服務,因此需要使用nginx去代理9000埠執行php。
實際上這個過程只需要對nginx進行組態即可,php-fpm已經在後台執行了,我們需要在nginx的組態檔案中增加代理的規則,即可讓使用者在存取80埠,請求php的時候,交由後端的php-fpm去執行,並返回結果。現在編輯Nginx的組態檔案 -
[root@localhost local]# vi /usr/local/nginx/conf/nginx.conf
如果你大致了解過nginx的組態,應該能夠很快分辨出這個組態檔案裡面的結構,並且知道server塊代表一個虛擬主機,要增加虛擬主機就再增加一個server塊,而且這個conf檔案中也給出了例子。那麼怎麼代理php-fpm呢?找到:
#location ~ \.php$ {
#   root           html;
#  fastcgi_pass   127.0.0.1:9000;
#  fastcgi_index  index.php;
#  fastcgi_param  SCRIPT_FILENAME  /script$fastcgi_script_name;
#  include        fastcgi_params;
#}
把前面的#注釋符號去掉,把script改為$document_root最終如下:
location ~ \.php$ {
            root           html;
            fastcgi_pass   127.0.0.1:9000;
            fastcgi_index  index.php;
            fastcgi_param  SCRIPT_FILENAME  /usr/local/nginx/html/$fastcgi_script_name;
            include        fastcgi_params;
        }
這樣就可以了,重新載入nginx組態即可,使用以下命令 -
/usr/local/nginx/sbin/nginx -s reload
然後到/usr/local/nginx/html去寫一個php檔案:index.php進行測試,檔案:index.php的程式碼如下 -
<?php
    phpinfo();
?>
現在存取目錄IP,應該能看到結果如下 -
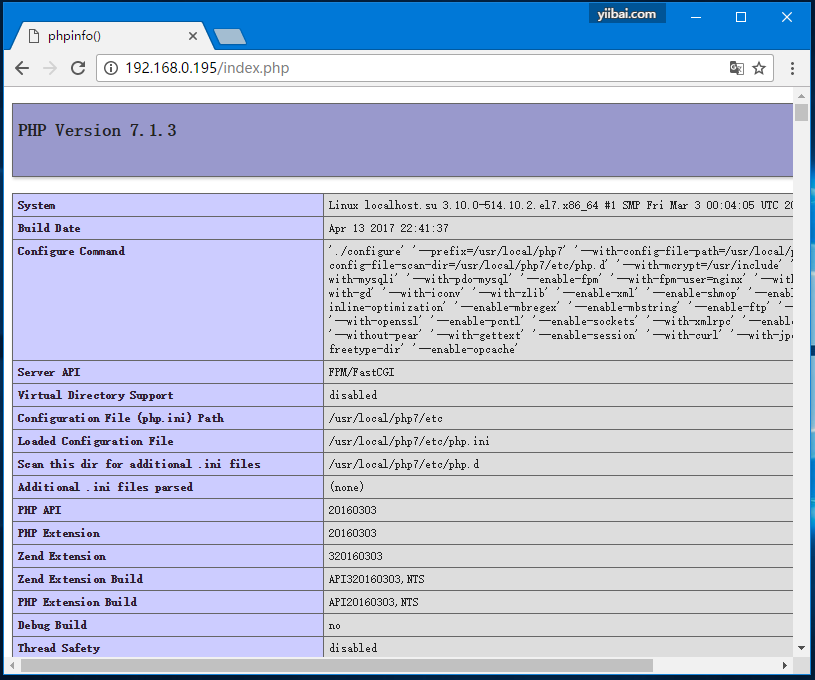
提示:如果無法開啟,可能需要關閉防火牆,使用命令:
systemctl stop firewalld
附完整的Nginx組態(/usr/local/nginx/conf/nginx.conf)檔案內容:
#user  nobody;
worker_processes  1;

#error_log  logs/error.log;
#error_log  logs/error.log  notice;
#error_log  logs/error.log  info;

#pid        logs/nginx.pid;


events {
    worker_connections  1024;
}


http {
    include       mime.types;
    default_type  application/octet-stream;

    #log_format  main  '$remote_addr - $remote_user [$time_local] "$request" '
    #                  '$status $body_bytes_sent "$http_referer" '
    #                  '"$http_user_agent" "$http_x_forwarded_for"';

    #access_log  logs/access.log  main;

    sendfile        on;
    #tcp_nopush     on;

    #keepalive_timeout  0;
    keepalive_timeout  65;

    #gzip  on;

    server {
        listen       80;
        server_name  localhost;

        #charset koi8-r;

        #access_log  logs/host.access.log  main;

        location / {
            root   html;
            index  index.html index.html;
        }

        #error_page  404              /404.html;

        # redirect server error pages to the static page /50x.html
        #
        error_page   500 502 503 504  /50x.html;
        location = /50x.html {
            root   html;
        }

        # proxy the PHP scripts to Apache listening on 127.0.0.1:80
        #
        #location ~ \.php$ {
        #    proxy_pass   http://127.0.0.1;
        #}

        # pass the PHP scripts to FastCGI server listening on 127.0.0.1:9000
        #
        #location ~ \.php$ {
        #    root           html;
        #    fastcgi_pass   127.0.0.1:9000;
        #    fastcgi_index  index.php;
        #    fastcgi_param  SCRIPT_FILENAME  /scripts$fastcgi_script_name;
        #    include        fastcgi_params;
        #}

        # deny access to .htaccess files, if Apache's document root
        # concurs with nginx's one
        #
        #location ~ /\.ht {
        #    deny  all;
        #}
    }


    # another virtual host using mix of IP-, name-, and port-based configuration
    #
    #server {
    #    listen       8000;
    #    listen       somename:8080;
    #    server_name  somename  alias  another.alias;

    #    location / {
    #        root   html;
    #        index  index.html index.html;
    #    }
    #}


    # HTTPS server
    #
    #server {
    #    listen       443 ssl;
    #    server_name  localhost;

    #    ssl_certificate      cert.pem;
    #    ssl_certificate_key  cert.key;

    #    ssl_session_cache    shared:SSL:1m;
    #    ssl_session_timeout  5m;

    #    ssl_ciphers  HIGH:!aNULL:!MD5;
    #    ssl_prefer_server_ciphers  on;

    #    location / {
    #        root   html;
    #        index  index.html index.html;
    #    }
    #}

}