Hibernate通過one-to-one元素的一對一對映
正如我們在前面的例子中討論過的,在hibernate中執行一對一對映有兩種方法:
- 通過
many-to-one元素 - 通過
one-to-one元素
這裡,我們將通過one-to-one元素進行一對一的對映。 在這種情況下,不會在主表中建立外來鍵。
在這個例子中,一個員工只能有一個地址,一個地址只能屬於一個員工。 在這裡使用雙向關聯。我們來看看持久化類。
1)一對一對映的持久類
有兩個持久化類Employee.java和Address.java。 Employee類包含Address類參照,反之亦然。
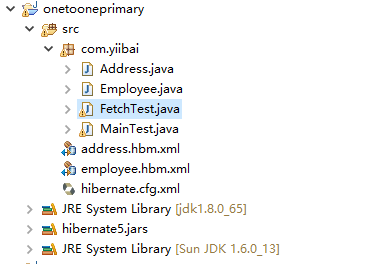
建立一個名稱為:onetooneprimary 的java專案,其專案檔案目錄結構如下 -
檔案:Employee.java
package com.yiibai;

public class Employee {
    private int employeeId;
    private String name, email;

    private Address address;

    public int getEmployeeId() {
        return employeeId;
    }

    public void setEmployeeId(int employeeId) {
        this.employeeId = employeeId;
    }

    public String getName() {
        return name;
    }

    public void setName(String name) {
        this.name = name;
    }

    public String getEmail() {
        return email;
    }

    public void setEmail(String email) {
        this.email = email;
    }

    public Address getAddress() {
        return address;
    }

    public void setAddress(Address address) {
        this.address = address;
    }

}
檔案:Address.java
package com.yiibai;

public class Address {
    private int addressId;
    private String addressLine1, city, state, country;
    private int pincode;
    private Employee employee;

    public int getAddressId() {
        return addressId;
    }

    public void setAddressId(int addressId) {
        this.addressId = addressId;
    }

    public String getAddressLine1() {
        return addressLine1;
    }

    public void setAddressLine1(String addressLine1) {
        this.addressLine1 = addressLine1;
    }

    public String getCity() {
        return city;
    }

    public void setCity(String city) {
        this.city = city;
    }

    public String getState() {
        return state;
    }

    public void setState(String state) {
        this.state = state;
    }

    public String getCountry() {
        return country;
    }

    public void setCountry(String country) {
        this.country = country;
    }

    public int getPincode() {
        return pincode;
    }

    public void setPincode(int pincode) {
        this.pincode = pincode;
    }

    public Employee getEmployee() {
        return employee;
    }

    public void setEmployee(Employee employee) {
        this.employee = employee;
    }

}
2)持久化類對映檔案
兩個對映檔案分別是:employee.hbm.xml和address.hbm.xml。
檔案:employee.hbm.xml
在這個對映檔案中,我們在對映檔案中使用one-to-one元素進行一對一對映。
<?xml version='1.0' encoding='UTF-8'?>
<!DOCTYPE hibernate-mapping PUBLIC
          "-//Hibernate/Hibernate Mapping DTD 3.0//EN"
          "http://hibernate.sourceforge.net/hibernate-mapping-3.0.dtd">

<hibernate-mapping>
    <class name="com.yiibai.Employee" table="emp_2120">
        <id name="employeeId">
            <generator class="increment"></generator>
        </id>
        <property name="name"></property>
        <property name="email"></property>

        <one-to-one name="address" cascade="all"></one-to-one>
    </class>

</hibernate-mapping>
檔案:address.hbm.xml
這是Address類的簡單對映檔案。 但重要的是生成器(generator)類。 在這裡,我們正在使用依賴於Employee類主鍵的外部generator類。
<?xml version='1.0' encoding='UTF-8'?>
<!DOCTYPE hibernate-mapping PUBLIC
          "-//Hibernate/Hibernate Mapping DTD 3.0//EN"
          "http://hibernate.sourceforge.net/hibernate-mapping-3.0.dtd">

<hibernate-mapping>
    <class name="com.yiibai.Address" table="address_2120">
        <id name="addressId">
            <generator class="foreign">
                <param name="property">employee</param>
            </generator>
        </id>
        <property name="addressLine1"></property>
        <property name="city"></property>
        <property name="state"></property>
        <property name="country"></property>

        <one-to-one name="employee" cascade="all"></one-to-one>
    </class>

</hibernate-mapping>
3)組態檔案
此檔案包含有關資料庫和對映檔案的資訊。
檔案:hibernate.cfg.xml
<?xml version='1.0' encoding='UTF-8'?>
<!DOCTYPE hibernate-configuration PUBLIC
          "-//Hibernate/Hibernate Configuration DTD 3.0//EN"
          "http://hibernate.sourceforge.net/hibernate-configuration-3.0.dtd">

<!-- Generated by MyEclipse Hibernate Tools. -->
<hibernate-configuration>

    <session-factory>
        <property name="hbm2ddl.auto">update</property>

        <property name="connection.driver_class">com.mysql.jdbc.Driver</property>
        <property name="connection.url">jdbc:mysql://localhost:3306/test</property>
        <property name="connection.username">root</property>
        <property name="connection.password">123456</property>
        <property name="dialect">org.hibernate.dialect.MySQL5InnoDBDialect</property>
        <property name="show_sql">true</property>

        <mapping resource="employee.hbm.xml" />
        <mapping resource="address.hbm.xml" />
    </session-factory>

</hibernate-configuration>
4)儲存和獲取資料的使用者類
檔案:MainTest.java
package com.yiibai;

import org.hibernate.boot.MetadataSources;
import org.hibernate.boot.registry.StandardServiceRegistry;
import org.hibernate.boot.registry.StandardServiceRegistryBuilder;
import org.hibernate.cfg.*;
import org.hibernate.*;

public class MainTest {
    public static void main(String[] args) {
        // 在5.1.0版本匯總,hibernate則採用如下新方式獲取:
        // 1. 組態型別安全的準服務註冊類,這是當前應用的單例物件,不作修改,所以宣告為final
        // 在configure("cfg/hibernate.cfg.xml")方法中,如果不指定資源路徑,預設在類路徑下尋找名為hibernate.cfg.xml的檔案
        final StandardServiceRegistry registry = new StandardServiceRegistryBuilder()
                .configure("hibernate.cfg.xml").build();
        // 2. 根據服務註冊類建立一個後設資料資源集,同時構建後設資料並生成應用一般唯一的的session工廠
        SessionFactory sessionFactory = new MetadataSources(registry)
                .buildMetadata().buildSessionFactory();

        /**** 上面是組態準備,下面開始我們的資料庫操作 ******/
        Session session = sessionFactory.openSession();// 從對談工廠獲取一個session
        // creating transaction object
        Transaction t = session.beginTransaction();

        Employee e1 = new Employee();
        e1.setName("蘇小明");
        e1.setEmail("[email protected]");

        Address address1 = new Address();
        address1.setAddressLine1("G-1621, Renmin Road");
        address1.setCity("海口");
        address1.setState("海南");
        address1.setCountry("中國");
        address1.setPincode(572201);

        e1.setAddress(address1);
        address1.setEmployee(e1);

        session.persist(e1);
        t.commit();

        session.close();
        System.out.println("success");
    }
}
檔案:FetchTest.java
package com.yiibai;

import java.util.Iterator;
import java.util.List;
import org.hibernate.Query;
import org.hibernate.Session;
import org.hibernate.SessionFactory;
import org.hibernate.Transaction;
import org.hibernate.boot.MetadataSources;
import org.hibernate.boot.registry.StandardServiceRegistry;
import org.hibernate.boot.registry.StandardServiceRegistryBuilder;
import org.hibernate.cfg.Configuration;

public class FetchTest {
    public static void main(String[] args) {
        // 在5.1.0版本匯總,hibernate則採用如下新方式獲取:
        // 1. 組態型別安全的準服務註冊類,這是當前應用的單例物件,不作修改,所以宣告為final
        // 在configure("cfg/hibernate.cfg.xml")方法中,如果不指定資源路徑,預設在類路徑下尋找名為hibernate.cfg.xml的檔案
        final StandardServiceRegistry registry = new StandardServiceRegistryBuilder()
                .configure("hibernate.cfg.xml").build();
        // 2. 根據服務註冊類建立一個後設資料資源集,同時構建後設資料並生成應用一般唯一的的session工廠
        SessionFactory sessionFactory = new MetadataSources(registry)
                .buildMetadata().buildSessionFactory();

        /**** 上面是組態準備,下面開始我們的資料庫操作 ******/
        Session session = sessionFactory.openSession();// 從對談工廠獲取一個session
        // creating transaction object
        Transaction t = session.beginTransaction();

        Query query = session.createQuery("from Employee e");
        List<Employee> list = query.list();

        Iterator<Employee> itr = list.iterator();
        while (itr.hasNext()) {
            Employee emp = itr.next();
            System.out.println(emp.getEmployeeId() + " " + emp.getName() + " "
                    + emp.getEmail());
            Address address = emp.getAddress();
            System.out.println(address.getAddressLine1() + " "
                    + address.getCity() + " " + address.getState() + " "
                    + address.getCountry());
        }

        session.close();
        System.out.println("success");
    }
}
5) 執行範例
首先執行 MainTest.java 來建立表並向表中插入一些資料,然後執行FetchTest.java來讀取上面插入的資料資訊。
執行 MainTest.java 得到的結果如下-
log4j:WARN No appenders could be found for logger (org.jboss.logging).
log4j:WARN Please initialize the log4j system properly.
log4j:WARN See http://logging.apache.org/log4j/1.2/faq.html#noconfig for more info.
Tue Mar 28 21:07:32 CST 2017 WARN: Establishing SSL connection without server's identity verification is not recommended. According to MySQL 5.5.45+, 5.6.26+ and 5.7.6+ requirements SSL connection must be established by default if explicit option isn't set. For compliance with existing applications not using SSL the verifyServerCertificate property is set to 'false'. You need either to explicitly disable SSL by setting useSSL=false, or set useSSL=true and provide truststore for server certificate verification.
Hibernate: select max(employeeId) from emp_2120
Hibernate: insert into emp_2120 (name, email, employeeId) values (?, ?, ?)
Hibernate: insert into address_2120 (addressLine1, city, state, country, addressId) values (?, ?, ?, ?, ?)
success
執行 FetchTest.java 得到的結果如下-
log4j:WARN No appenders could be found for logger (org.jboss.logging).
log4j:WARN Please initialize the log4j system properly.
log4j:WARN See http://logging.apache.org/log4j/1.2/faq.html#noconfig for more info.
Tue Mar 28 21:07:57 CST 2017 WARN: Establishing SSL connection without server's identity verification is not recommended. According to MySQL 5.5.45+, 5.6.26+ and 5.7.6+ requirements SSL connection must be established by default if explicit option isn't set. For compliance with existing applications not using SSL the verifyServerCertificate property is set to 'false'. You need either to explicitly disable SSL by setting useSSL=false, or set useSSL=true and provide truststore for server certificate verification.
Hibernate: select employee0_.employeeId as employee1_1_, employee0_.name as name2_1_, employee0_.email as email3_1_ from emp_2120 employee0_
Hibernate: select address0_.addressId as addressI1_0_0_, address0_.addressLine1 as addressL2_0_0_, address0_.city as city3_0_0_, address0_.state as state4_0_0_, address0_.country as country5_0_0_, employee1_.employeeId as employee1_1_1_, employee1_.name as name2_1_1_, employee1_.email as email3_1_1_ from address_2120 address0_ left outer join emp_2120 employee1_ on address0_.addressId=employee1_.employeeId where address0_.addressId=?
Hibernate: select address0_.addressId as addressI1_0_0_, address0_.addressLine1 as addressL2_0_0_, address0_.city as city3_0_0_, address0_.state as state4_0_0_, address0_.country as country5_0_0_, employee1_.employeeId as employee1_1_1_, employee1_.name as name2_1_1_, employee1_.email as email3_1_1_ from address_2120 address0_ left outer join emp_2120 employee1_ on address0_.addressId=employee1_.employeeId where address0_.addressId=?
Hibernate: select address0_.addressId as addressI1_0_0_, address0_.addressLine1 as addressL2_0_0_, address0_.city as city3_0_0_, address0_.state as state4_0_0_, address0_.country as country5_0_0_, employee1_.employeeId as employee1_1_1_, employee1_.name as name2_1_1_, employee1_.email as email3_1_1_ from address_2120 address0_ left outer join emp_2120 employee1_ on address0_.addressId=employee1_.employeeId where address0_.addressId=?
1 Yiibai Su [email protected]
G-1621, Renmin Road Haikou Hainan China
2 蘇小明 [email protected]
G-1621, Renmin Road 海口 海南 中國
3 蘇小明 [email protected]
G-1621, Renmin Road 海口 海南 中國
success