.NET Core建立UWP應用程式
在本章中,我們將討論如何使用.NET Core建立UWP應用程式。 UWP也被稱為Windows 10 UWP應用程式。 此應用程式不能在以前版本的Windows上執行,但只能在未來版本的Windows上執行。
現在按照下面這些步驟來建立並實現一個UWP應用程式。
- 首先,啟動Visual Studio 2017社群版本。
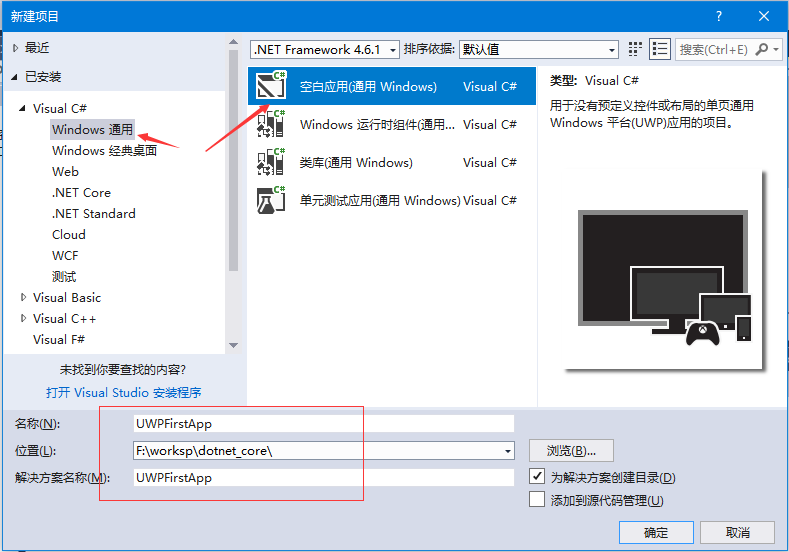
- 點選選單:檔案,並選擇:新建 -> 專案; 一個新的專案對話方塊將會出現。可以在對話方塊的左側窗格中看到不同型別的模板。
- 在左窗格中,從模板左側中選擇:Visual C# -> Windows中選擇通用模板。
從中央窗格中,選擇空白應用程式(通用Windows)模板。

在名稱欄位中輸入UWPFirstApp 命名該專案,並選擇儲存目錄,然後單擊【確定】。
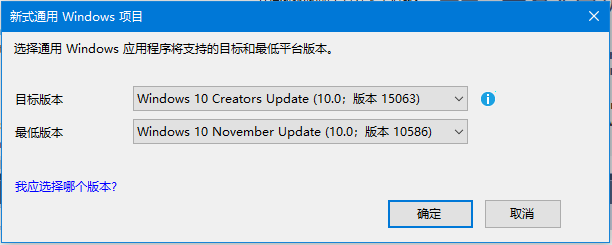
出現目標版本/最低版本對話方塊。本教學使用預設設定,所以直接選擇【確定】來建立專案。

在這裡,有一個可以針對所有Windows 10裝置的專案,並且您可能會注意到,.NET Core和UWP都是簡化了多重定位。
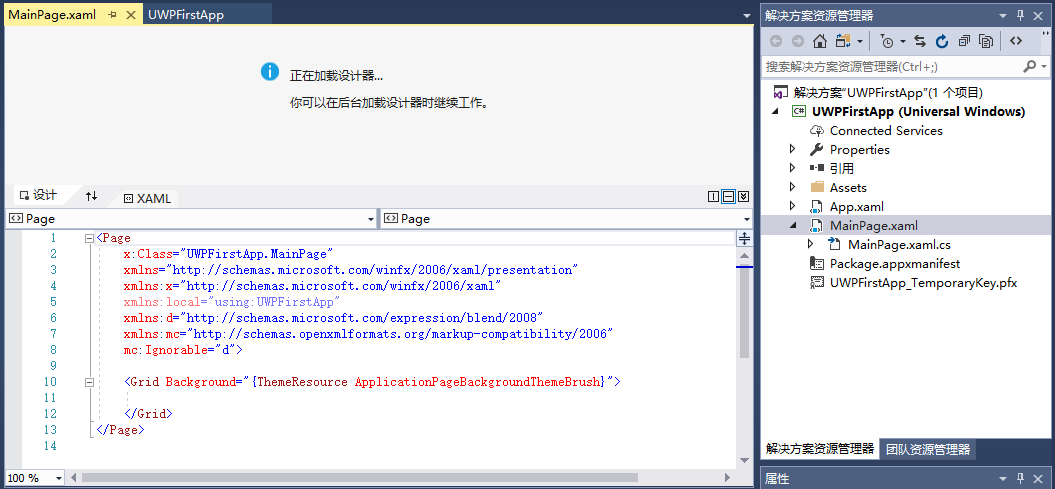
新專案開啟時,其檔案顯示在「解決方案資源管理器」窗格的右側。需要選擇「解決方案資源管理器」索引標籤,而不是「屬性」索引標籤來檢視檔案。
- 雖然空白應用程式(通用視窗)是一個最小的模板,它仍然包含大量的檔案。 這些檔案對使用 C# 的所有UWP應用程式都是必不可少的。在Visual Studio中建立的每個專案都包含這些檔案。
建立專案的工作區如下 -

要檢視執行的範例,可以開啟MainPage.XAML 並新增下面的程式碼。
<Page
   x:Class = "UWPFirstApp.MainPage"
   xmlns = "http://schemas.microsoft.com/winfx/2006/xaml/presentation"
   xmlns:x = "http://schemas.microsoft.com/winfx/2006/xaml"
   xmlns:local = "using:UWPFirstApp"
   xmlns:d = "http://schemas.microsoft.com/expression/blend/2008"
   xmlns:mc = "http://schemas.openxmlformats.org/markup-compatibility/2006"
   mc:Ignorable = "d">

   <Grid Background = "{ThemeResource ApplicationPageBackgroundThemeBrush}">
      <StackPanel HorizontalAlignment = "Center">
         <TextBlock Text = "Hello, world!"
            Margin = "20"
            Width = "200"
            HorizontalAlignment = "Left"/>
         <TextBlock Text = "Write your name."
            Margin = "20"
            Width = "200"
            HorizontalAlignment = "Left"/>
         <TextBox x:Name = "txtbox"
            Width = "280"
            Margin = "20"
            HorizontalAlignment = "Left"/>
         <Button x:Name = "button" Content = "Click Me"
            Margin = "20"
            Click = "button_Click"/>
         <TextBlock x:Name = "txtblock"
            HorizontalAlignment = "Left"
            Margin = "20"/>
      </StackPanel>
   </Grid>
</Page>
以下是處理按鈕的點選事件的 C# 程式碼。開啟MainPage.XAML.cs 並新增下面的程式碼。
private void button_Click(object sender, RoutedEventArgs e) {
         if (txtbox.Text != "")
            txtblock.Text = "Hello: " + txtbox.Text;
         else
            txtblock.Text = "You have not write your name";
      }
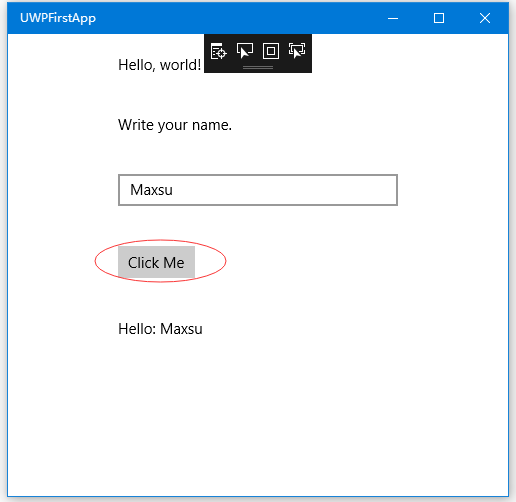
現在在本地機器上執行上面的程式碼,點選選單:「生成」->生成UWPFirstApp(可能系統會提示要求設定系統模式,選擇「開發人員」),然後點選Visual Studio正上方綠色箭頭的「本地計算機」開始執行,會看到下面的視窗。在文字框中輸入字串名字,然後點選:【Click Me】 按鈕。得到以下結果 -
