Spring WS靜態WSDL
在前一章Spring-WS入門程式中,我們使用Spring WS Configuration自動生成了WSDL。 在這篇教學文章中,我們將演示如何使用Spring WS公開一個WSDL。
本教學是在Spring-WS入門程式教學的基礎上修改編寫的。
請參考以下步驟:
第1步: 按照Spring-WS入門程式章節的介紹,在leaveService專案下建立一個名稱為:com.yiibai的包。
第2步: 在/WEB-INF/wsdl 子檔案夾下建立一個WSDL檔案,名稱為: leave.wsdl 。
第3步: 更新/WEB-INF子檔案夾下的檔案:spring-ws-servlet.xml。 在這裡使用static-wsdl標籤(而不是dynamic-wsdl)。
第4步: 最後一步是建立所有原始檔和組態檔案的內容並匯出應用程式,如下所述。
檔案: /WEB-INF/wsdl/leave.wsdl -
<wsdl:definitions
    xmlns:wsdl="http://schemas.xmlsoap.org/wsdl/"
    xmlns:soap="http://schemas.xmlsoap.org/wsdl/soap/"
    xmlns:schema="https://www.tw511.com/hr/schemas"
    xmlns:tns="https://www.tw511.com/hr/definitions"
    targetNamespace="https://www.tw511.com/hr/definitions">

    <wsdl:types>
        <xsd:schema xmlns:xsd="http://www.w3.org/2001/XMLSchema">
            <xsd:import namespace="https://www.tw511.com/hr/schemas"
                schemaLocation="hr.xsd" />
        </xsd:schema>
    </wsdl:types>

    <wsdl:message name="LeaveRequest">
        <wsdl:part element="schema:LeaveRequest" name="LeaveRequest" />
    </wsdl:message>

    <wsdl:portType name="HumanResource">
        <wsdl:operation name="Leave">
            <wsdl:input message="tns:LeaveRequest" name="LeaveRequest" />
        </wsdl:operation>
    </wsdl:portType>

    <wsdl:binding name="HumanResourceBinding"
        type="tns:HumanResource">
        <soap:binding style="document"
            transport="http://schemas.xmlsoap.org/soap/http" />
        <wsdl:operation name="Leave">
            <soap:operation
                soapAction="https://www.tw511.com/RequestLeave" />
            <wsdl:input name="LeaveRequest">
                <soap:body use="literal" />
            </wsdl:input>
        </wsdl:operation>
    </wsdl:binding>

    <wsdl:service name="HumanResourceService">
        <wsdl:port binding="tns:HumanResourceBinding"
            name="HumanResourcePort">
            <soap:address
                location="http://localhost:8080/leaveService/" />
        </wsdl:port>
    </wsdl:service>
</wsdl:definitions>
檔案: /WEB-INF/spring-ws-servlet.xml -
<beans xmlns="http://www.springframework.org/schema/beans"
    xmlns:xsi="http://www.w3.org/2001/XMLSchema-instance"
    xmlns:context="http://www.springframework.org/schema/context"
    xmlns:sws="http://www.springframework.org/schema/web-services"
    xsi:schemaLocation="http://www.springframework.org/schema/beans

   http://www.springframework.org/schema/beans/spring-beans-3.0.xsd
   http://www.springframework.org/schema/web-services
   http://www.springframework.org/schema/web-services/web-services-2.0.xsd
   http://www.springframework.org/schema/context
   http://www.springframework.org/schema/context/spring-context-3.0.xsd">

    <context:component-scan
        base-package="com.yiibai.hr" />
    <sws:annotation-driven />
    <sws:static-wsdl id="leave"
        location="/WEB-INF/wsdl/leave.wsdl" />
</beans>
執行專案
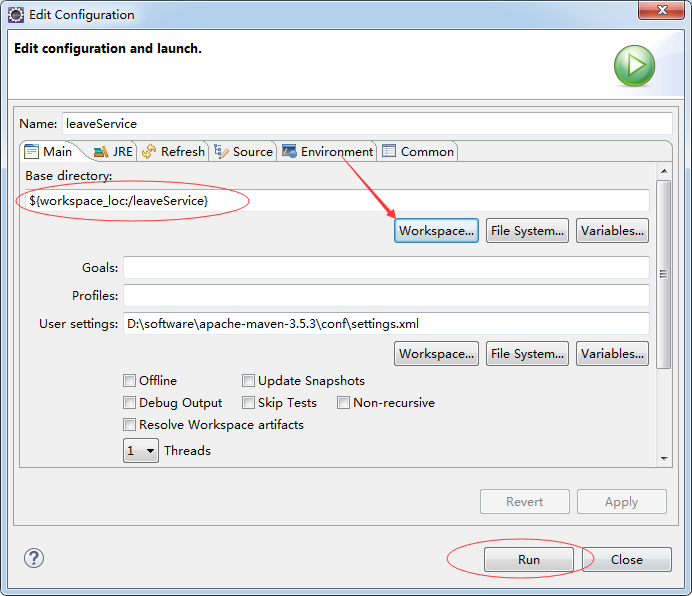
當完成建立原始檔和組態檔案,使用Maven構建應用程式。 右鍵單擊應用程式專案名稱,在彈出的選單中選擇:Run As -> Maven Build… ,如下所示 -
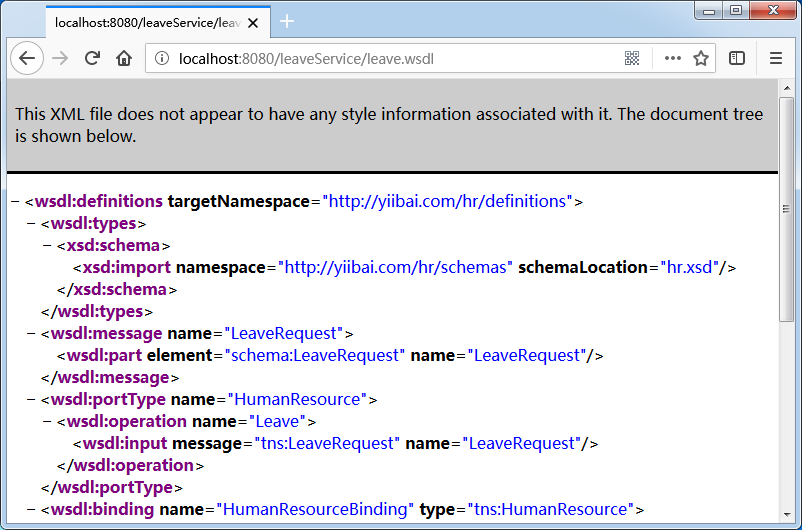
Eclipse啟動Tomcat伺服器後, 嘗試存取URL => http://localhost:8080/leaveService/leave.wsdl ,如果Spring Web應用程式一切正常,應該看到以下輸出結果 -