使用Openresty實現WAF防火牆功能
Openresty簡介
OpenResty® 是一個結合了 Nginx 與 Lua 的高效能 Web 平臺,其內部整合了大量精良的 Lua 庫、第三方模組以及大多數的依賴項。用於方便地搭建能夠處理超高併發、擴充套件性極高的動態 Web 應用、Web 服務和動態閘道器。
OpenResty® 通過匯聚各種設計精良的 Nginx 模組(主要由 OpenResty 團隊自主開發),從而將 Nginx 有效地變成一個強大的通用 Web 應用平臺。
這樣,Web 開發人員和系統工程師可以使用 Lua 指令碼語言調動 Nginx 支援的各種 C 以及 Lua 模組,快速構造出足以勝任 10K 乃至 1000K 以上單機併發連線的高效能 Web 應用系統。
OpenResty® 的目標是讓你的Web服務直接跑在 Nginx 服務內部,充分利用 Nginx 的非阻塞 I/O 模型,不僅僅對 HTTP 用戶端請求,甚至於對遠端後端諸如 MySQL、PostgreSQL、Memcached 以及 Redis 等都進行一致的高效能響應。
Openresty安裝
以下採用CentOS 7.6進行部署
1.安裝依賴開發元件
•pcre-devel:擴充套件的正則表達式引擎,爲了使Nginx處理更復雜的正則表達式機制 機製
•openssl-devel:--with-http_ssl_module使用該模組必需裝openssl庫,來實現http支援https協定
•zlib-devel:zlib庫是網路通訊壓縮庫,ngx_http_gzip_module(gzip壓縮模組)所必需的
•readline-devel:readline是安裝Openresty所必須的依賴包
yum install gcc-c++ libtool gmake make -y
yum install pcre pcre-devel openssl openssl-devel zlib zlib-devel readline readline-devel-y
2.建立nginx使用者組 Nginx的Master主進程以root使用者身份執行,而worker子進程我們指定它爲nginx使用者執行
groupadd nginx
useradd -d /home/nginx -g nginx -s /sbin/nginx nginx
3.下載編譯並安裝Openresty
wget https://openresty.org/download/openresty-1.17.8.2.tar.gz
tar xf openresty-1.17.8.2.tar.gz
cd openresty-1.17.8.2
./configure --prefix=/usr/local/openresty \
--sbin-path=/usr/local/openresty/nginx/sbin/nginx \
--conf-path=/usr/local/openresty/nginx/conf/nginx.conf \
--pid-path=/usr/local/openresty/nginx/run/nginx.pid \
--error-log-path=/usr/local/openresty/nginx/logs/error.log \
--http-log-path=/usr/local/openresty/nginx/logs/access.log \
--user=nginx \
--group=nginx \
--with-pcre \
--with-stream \
--with-threads \
--with-file-aio \
--with-http_v2_module \
--with-http_ssl_module \
--with-http_realip_module \
--with-http_gzip_static_module \
--with-http_stub_status_module
gamke && gmake install
4.爲Openresty新增環境變數
vim /etc/profile.d/openresty.sh
export PATH=/usr/local/openresty/bin:$PATH
5.新增location設定確認結合了Nginx與Lua的Openresty部署成功
        location /hello {
            default_type text/html;
            content_by_lua_block {
                ngx.say("HelloWorld")       #通過呼叫lua來列印HelloWorld
            }
        }
上面已經實現了Openresty的部署,下面 下麪將結合WAF實現防火牆
什麼是WAF
Web應用防護系統(也稱爲:網站應用級入侵防禦系統。英文:Web Application Firewall,簡稱:WAF)。利用國際上公認的一種說法:Web應用防火牆是通過執行一系列針對HTTP/HTTPS的安全策略來專門爲Web應用提供保護的一款產品。
實現WAF
實現WAF的方式有兩種
1.使用nginx+lua來實現WAF,须在編譯nginx的時候設定上lua
2.部署OpenResty,不需要在編譯nginx的時候指定lua這裏我們採用的是第二種WAF一句話描述,就是解析HTTP請求(協定解析模組),規則檢測(規則模組),做不同的防禦動作(動作模組),並將防禦過程(日誌模組)記錄下來。所以本文中的WAF的實現由五個模組(設定模組、協定解析模組、規則模組、動作模組、錯誤處理模組)組成。
WAF的功能
1.支援IP白名單和黑名單功能,直接將黑名單的IP存取拒絕。
2.支援URL白名單,將不需要過濾的URL進行定義。
3.支援User-Agent的過濾,匹配自定義規則中的條目,然後進行處理(返回403)。
4.支援CC攻擊防護,單個URL指定時間的存取次數,超過設定值,直接返回403。
5.支援Cookie過濾,匹配自定義規則中的條目,然後進行處理(返回403)。
6.支援URL過濾,匹配自定義規則中的條目,如果使用者請求的URL包含這些,返回403。
7.支援URL參數過濾,原理同上。
8.支援日誌記錄,將所有拒絕的操作,記錄到日誌中去。
9.日誌記錄爲JSON格式,便於日誌分析,例如使用ELKStack進行攻擊日誌收集、儲存、搜尋和展示。
部署WAF
WAF已經有人通過lua寫出了這個開源的功能,在此直接拿來用即可。
GitHub地址:https://github.com/unixhot/waf
1.下載waf模組
git clone https://github.com/unixhot/waf.git
cp -a ./waf/waf /usr/local/openresty/nginx/conf/
2.waf檔案介紹
ls -lrth /usr/local/openresty/nginx/conf/waf/
總用量 20K
-rw-r--r-- 1 root root  408 7月  27 09:30 access.lua
-rw-r--r-- 1 root root 2.3K 7月  27 09:30 lib.lua
-rw-r--r-- 1 root root 5.4K 7月  27 09:30 init.lua
-rw-r--r-- 1 root root 1.3K 7月  27 09:30 config.lua
drwxr-xr-x 2 root root 158 7月 27 09:57 rule-config以上access.lua、lib.lua、init.lua都是功能實現的lua程式碼,如果不具備lua的開發能力,我們一般不會去進行改動 config.lua爲各個功能的組態檔 rule-config目錄存放了各種防禦策略規則 我們需要經常改動config.lua和儲存策略的檔案
ls /usr/local/openresty/nginx/conf/waf/rule-config/ -rlth
總用量 24K
-rw-r--r-- 1 root root 652 7月  27 09:30 cookie.rule             #Cookie策略檔案
-rw-r--r-- 1 root root 749 7月  27 09:30 args.rule               #異常Get參數策略檔案
-rw-r--r-- 1 root root   6 7月  27 09:30 whiteurl.rule           #白名單URL策略檔案
-rw-r--r-- 1 root root   0 7月  27 09:30 whiteip.rule            #IP白名單策略檔案
-rw-r--r-- 1 root root 173 7月  27 09:30 useragent.rule          #異常UserAgent策略檔案
-rw-r--r-- 1 root root 307 7月  27 09:30 url.rule                #異常URL策略檔案
-rw-r--r-- 1 root root 739 7月  27 09:30 post.rule               #異常POST參數策略檔案
-rw-r--r-- 1 root root   0 7月  27 09:57 blackip.rule            #IP黑名單策略檔案
Openresty引入WAF模組
1.修改nginx設定來引入WAF模組
如下在Nginx中加入以下設定來引入WAF模組
vim /usr/local/openresty/nginx/conf/nginx.conf
...
http {
lua_shared_dict limit 10m;
lua_package_path "/usr/local/openresty/nginx/conf/waf/?.lua";
init_by_lua_file "/usr/local/openresty/nginx/conf/waf/init.lua";
access_by_lua_file "/usr/local/openresty/nginx/conf/waf/access.lua";
...
}
2.重新啓動Openrestyd
openresty -t
nginx: the configuration file /usr/local/openresty/nginx/conf/nginx.conf syntax is ok
nginx: configuration file /usr/local/openresty/nginx/conf/nginx.conf test is successful

openresty -s reload
3.檢視nginx error.log
警告如下:failed to load the 'resty.core' module 載入 resty.core 核心模組失敗,然後下面 下麪還有十幾行找不到檔案的日誌
cat /usr/local/openresty/nginx/logs/error.log
2020/07/27 15:39:38 [notice] 12728#12728: signal process started
2020/07/27 15:39:38 [alert] 27311#27311: failed to load the 'resty.core' module (https://github.com/openresty/lua-resty-core); ensure you are using an OpenResty release from https://openresty.org/en/download.html (reason: module 'resty.core' not found:
    no field package.preload['resty.core']
    no file '/usr/local/openresty/nginx/conf/waf/resty/core.lua'
    no file '/usr/local/openresty/site/lualib/resty/core.so'
    no file '/usr/local/openresty/lualib/resty/core.so'
    no file './resty/core.so'
    no file '/usr/local/lib/lua/5.1/resty/core.so'
    no file '/usr/local/openresty/luajit/lib/lua/5.1/resty/core.so'
    no file '/usr/local/lib/lua/5.1/loadall.so'
    no file '/usr/local/openresty/site/lualib/resty.so'
    no file '/usr/local/openresty/lualib/resty.so'
    no file './resty.so'
    no file '/usr/local/lib/lua/5.1/resty.so'
    no file '/usr/local/openresty/luajit/lib/lua/5.1/resty.so'
    no file '/usr/local/lib/lua/5.1/loadall.so') in /usr/local/openresty/nginx/conf/nginx.conf:130
4.解決辦法如下
上面告警是缺少 lua-resty-core 模組,從而找不到這些資訊,所以我們要下載lua-resty-core模組然後引入到Openresty
git clone https://github.com/openresty/lua-resty-core.git然後修改nginx組態檔來引入此模組,如下格式新增到第二行的後面
lua_shared_dict limit 10m;
lua_package_path "/usr/local/openresty/nginx/conf/waf/?.lua;/usr/local/openresty/lua-resty-core/lib/?.lua;;";
init_by_lua_file "/usr/local/openresty/nginx/conf/waf/init.lua";
access_by_lua_file "/usr/local/openresty/nginx/conf/waf/access.lua";
5.然後儲存退出重新啓動看日誌
openresty -t && openresty -s reload確保日誌無異常後則成功引入WAF模組
WAF模組組態檔詳解
來學習一下waf/config.lua組態檔中的內容
cat /usr/local/openresty/nginx/conf/waf/config.lua
--lua檔案中,--爲行註釋,
--[[
這是塊註釋
--]]

config_waf_enable = "on"        --是否啓用waf模組,值爲 on 或 off
config_log_dir = "/tmp"         --waf的日誌位置,日誌格式預設爲json
config_rule_dir = "/usr/local/openresty/nginx/conf/waf/rule-config" --策略規則目錄位置,可根據情況變動
config_white_url_check = "on"   --是否開啓URL檢測
config_white_ip_check = "on"    --是否開啓IP白名單檢測
config_black_ip_check = "on"    --是否開啓IP黑名單檢測
config_url_check = "on"         --是否開啓URL過濾
config_url_args_check = "on"    --是否開啓Get參數過濾
config_user_agent_check = "on"  --是否開啓UserAgent用戶端過濾
config_cookie_check = "on"      --是否開啓cookie過濾
config_cc_check = "on"          --是否開啓cc攻擊過濾
config_cc_rate = "10/60"        --cc攻擊的速率/時間,單位爲秒;預設範例中爲單個IP地址在60秒內存取同一個頁面次數超過10次則認爲是cc攻擊,則自動禁止此IP地址存取此頁面60秒,60秒後解封(封禁過程中此IP地址依然可以存取其它頁面,如果同一個頁面存取次數超過10次依然會被禁止)
config_post_check = "on"        --是否開啓POST檢測
config_waf_output = "html"      --對於違反規則的請求則跳轉到一個自定義html頁面還是指定頁面,值爲 html 和 redirect
config_waf_redirect_url = "https://www.unixhot.com"     --指定違反請求後跳轉的指定html頁面

--指定違反規則後跳轉的自定義html頁面
config_output_html=[[
<html>
<head>
<meta http-equiv="Content-Type" content="text/html; charset=utf-8" />
<meta http-equiv="Content-Language" content="zh-cn" />
<title>網站防火牆</title>
</head>
<body>
<h1 align="center"> 歡迎白帽子進行授權安全測試,安全漏洞請聯繫QQ:1111111。
</body>
</html>
]]
IP黑名單設定
需要在config.lua中開啓config_black_ip_check = "on"參數 IP黑名單設定非常簡單,這個與Nginx的ngx_http_access_module模組原理是一致的,只需要把拒絕的地址加入到 waf/rule-config/blackip.rule檔案中即可
cat /usr/local/openresty/nginx/conf/waf/rule-config/blackip.rule
192.168.31.14
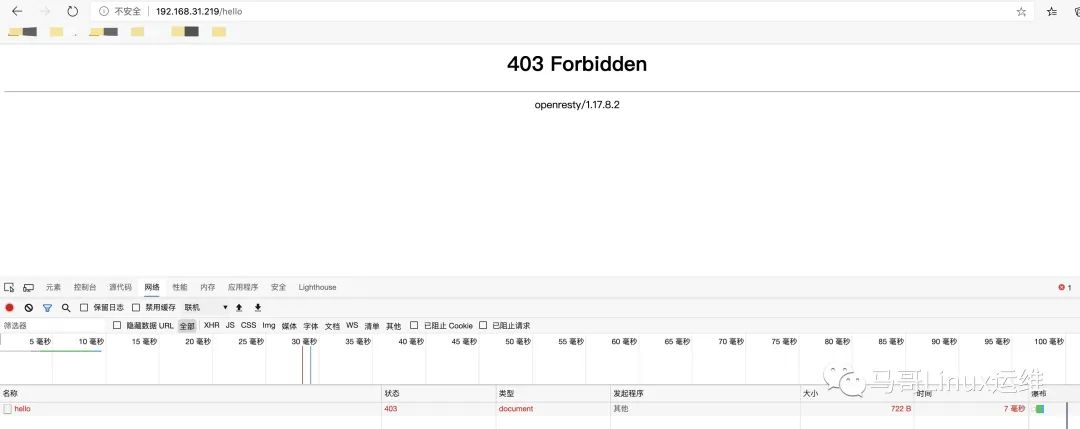
然後存取Openresty地址,如下已返回403被禁止

IP白名單設定
需要在config.lua中開啓config_white_ip_check = "on"參數 IP白名單與黑名單相反,新增到IP白名單中的IP不受WAF限制,具體請自行測試
cat /usr/local/openresty/nginx/conf/waf/rule-config/whiteip.rule
192.168.31.14
CC攻擊過濾
需要在config.lua中開啓config_cc_check = "on"參數,然後指定config_cc_rate = "10/60"速率和時間 CC攻擊只需要在config.lua組態檔中指定上面的兩個參數即可如下指定在60秒內對於單個IP地址存取單個頁面的次數最大10次,超過10次則自動拉入黑名單,60秒後自動解除
vim /usr/local/openresty/nginx/conf/waf/config.lua
config_cc_check = "on"
config_cc_rate = "10/60"
然後進行測試,如下重新整理10次以後就變爲來403

我們換個頁面再次重新整理,如下換個頁面可以正常存取,不過連續對一個頁面60秒內重新整理10次以後將也被拉入黑名單

注:以上的請求速率和時間只能作爲參考,大家線上使用具體還要根據相應環境進行調整
異常URL策略設定
需要在config.lua中開啓config_url_check = "on"參數 然後定義rule-config/url.rule檔案,url.rule檔案預設爲如下,如果匹配到規則的將跳轉到由config.lua中config_waf_output = "html"參數指定的頁面
1.禁止URL存取 .htaccess|.bash_history 的檔案
2.禁止URL存取包含帶有phpmyadmin|jmx-console|admin-console|jmxinvokerservlet地址
3.禁止URL存取包含 java.lang 的地址
4.禁止URL存取包含 .svn/ 的地址
cat url.rule
\.(htaccess|bash_history)
\.(bak|inc|old|mdb|sql|backup|java|class|tgz|gz|tar|zip)$
(phpmyadmin|jmx-console|admin-console|jmxinvokerservlet)
java\.lang
\.svn\/
/(attachments|upimg|images|css|uploadfiles|html|uploads|templets|static|template|data|inc|forumdata|upload|includes|cache|avatar)/(\\w+).(php|jsp)
假如你不想讓別人存取根下的/login,那麼就可以寫入到設定中
cat url.rule
\.(htaccess|bash_history)
\.(bak|inc|old|mdb|sql|backup|java|class|tgz|gz|tar|zip)$
(phpmyadmin|jmx-console|admin-console|jmxinvokerservlet)
java\.lang
\.svn\/
/(attachments|upimg|images|css|uploadfiles|html|uploads|templets|static|template|data|inc|forumdata|upload|includes|cache|avatar)/(\\w+).(php|jsp)
/login
然後進行重新啓動後存取,如下就跳轉到了我們在config.lua中指定的頁面,此頁面可根據需求進行修改。如果上面預設的url規則匹配到了你的地址,那麼你就可以把相應設定去掉

異常UserAgent策略設定
需要在config.lua中開啓config_user_agent_check = "on"參數WAF模組中預設封鎖了以下UserAgent,如 HTTrack網站下載 namp網路掃描 audit網路審計 dirbuster網站目錄掃描 pangolin SQL隱碼攻擊工具 scan網路掃描 hydra密碼暴力破解 libwww漏洞工具 sqlmap自動SQL隱碼攻擊工具 w3af網路掃描 Nikto Web漏洞掃描 ... 等等
cat useragent.rule
(HTTrack|harvest|audit|dirbuster|pangolin|nmap|sqln|-scan|hydra|Parser|libwww|BBBike|sqlmap|w3af|owasp|Nikto|fimap|havij|PycURL|zmeu|BabyKrokodil|netsparker|httperf|bench)
我們正常存取URL是沒問題的,下面 下麪來模擬一個非法的UserAgent進行存取
#模擬網站下載
curl http://192.168.31.219/ --user-agent 'HTTrack'
<html>
<head>
<meta http-equiv="Content-Type" content="text/html; charset=utf-8" />
<meta http-equiv="Content-Language" content="zh-cn" />
<title>網站防火牆</title>
</head>
<body>
<h1 align="center"> 歡迎白帽子進行授權安全測試,安全漏洞請聯繫QQ:1111111。
</body>
</html>

#模擬nmap網路掃描
curl http://192.168.31.219/ --user-agent 'nmap'
<html>
<head>
<meta http-equiv="Content-Type" content="text/html; charset=utf-8" />
<meta http-equiv="Content-Language" content="zh-cn" />
<title>網站防火牆</title>
</head>
<body>
<h1 align="center"> 歡迎白帽子進行授權安全測試,安全漏洞請聯繫QQ:1111111。
</body>
</html>
新增禁止Chrome瀏覽器存取的UserAgent
#跟隨設定新增到最後
cat useragent.rule
(HTTrack|harvest|audit|dirbuster|pangolin|nmap|sqln|-scan|hydra|Parser|libwww|BBBike|sqlmap|w3af|owasp|Nikto|fimap|havij|PycURL|zmeu|BabyKrokodil|netsparker|httperf|bench|Chrome)
然後重新啓動Openrestry,通過Chrome瀏覽器進行存取

如上所示全部命中了WAF的規則
異常Get參數策略設定
需要在config.lua設定中開啓config_url_args_check = "on"
參數預設封鎖瞭如下:
cat args.rule
\.\./
\:\$
\$\{
select.+(from|limit)
(?:(union(.*?)select))
having|rongjitest
sleep\((\s*)(\d*)(\s*)\)
benchmark\((.*)\,(.*)\)
base64_decode\(
(?:from\W+information_schema\W)
(?:(?:current_)user|database|schema|connection_id)\s*\(
(?:etc\/\W*passwd)
into(\s+)+(?:dump|out)file\s*
group\s+by.+\(
xwork.MethodAccessor
(?:define|eval|file_get_contents|include|require|require_once|shell_exec|phpinfo|system|passthru|preg_\w+|execute|echo|print|print_r|var_dump|(fp)open|alert|showmodaldialog)\(
xwork\.MethodAccessor
(gopher|doc|php|glob|file|phar|zlib|ftp|ldap|dict|ogg|data)\:\/
java\.lang
\$_(GET|post|cookie|files|session|env|phplib|GLOBALS|SERVER)\[
\<(iframe|script|body|img|layer|div|meta|style|base|object|input)
(onmouseover|onerror|onload)\=
我們進行存取 http://192.168.31.219/hello?aa=select id from mysql,得到如下,進行匹配
curl 'http://192.168.31.219/hello?aa=select id from mysql'
<html>
<head>
<meta http-equiv="Content-Type" content="text/html; charset=utf-8" />
<meta http-equiv="Content-Language" content="zh-cn" />
<title>網站防火牆</title>
</head>
<body>
<h1 align="center"> 歡迎白帽子進行授權安全測試,安全漏洞請聯繫QQ:1111111。
</body>
</html>
我們也可以根據自己需求去設定,如下最後新增abcops
cat args.rule
\.\./
\:\$
\$\{
select.+(from|limit)
(?:(union(.*?)select))
having|rongjitest
sleep\((\s*)(\d*)(\s*)\)
benchmark\((.*)\,(.*)\)
base64_decode\(
(?:from\W+information_schema\W)
(?:(?:current_)user|database|schema|connection_id)\s*\(
(?:etc\/\W*passwd)
into(\s+)+(?:dump|out)file\s*
group\s+by.+\(
xwork.MethodAccessor
(?:define|eval|file_get_contents|include|require|require_once|shell_exec|phpinfo|system|passthru|preg_\w+|execute|echo|print|print_r|var_dump|(fp)open|alert|showmodaldialog)\(
xwork\.MethodAccessor
(gopher|doc|php|glob|file|phar|zlib|ftp|ldap|dict|ogg|data)\:\/
java\.lang
\$_(GET|post|cookie|files|session|env|phplib|GLOBALS|SERVER)\[
\<(iframe|script|body|img|layer|div|meta|style|base|object|input)
(onmouseover|onerror|onload)\=
abcops 然後我們進行存取http://192.168.31.219/hello?aa=abcops也會匹配到規則

異常POST參數策略設定
需要在config.lua中開啓config_post_check = "on"選項
預設POST請求封禁如下,POST封禁內容與GET相似
cat post.rule
\.\./
select.+(from|limit)
(?:(union(.*?)select))
having|rongjitest
sleep\((\s*)(\d*)(\s*)\)
benchmark\((.*)\,(.*)\)
base64_decode\(
(?:from\W+information_schema\W)
(?:(?:current_)user|database|schema|connection_id)\s*\(
(?:etc\/\W*passwd)
into(\s+)+(?:dump|out)file\s*
group\s+by.+\(
xwork.MethodAccessor
(?:define|eval|file_get_contents|include|require|require_once|shell_exec|phpinfo|system|passthru|preg_\w+|execute|echo|print|print_r|var_dump|(fp)open|alert|showmodaldialog)\(
xwork\.MethodAccessor
(gopher|doc|php|glob|file|phar|zlib|ftp|ldap|dict|ogg|data)\:\/
java\.lang
\$_(GET|post|cookie|files|session|env|phplib|GLOBALS|SERVER)\[
\<(iframe|script|body|img|layer|div|meta|style|base|object|input)
(onmouseover|onerror|onload)\=
直接對POST策略進行提交請求,通過curl -XPOST來進行提交POST請求
curl -XPOST 'http://192.168.31.219/hello?aa=select id from mysql'
<html>
<head>
<meta http-equiv="Content-Type" content="text/html; charset=utf-8" />
<meta http-equiv="Content-Language" content="zh-cn" />
<title>網站防火牆</title>
</head>
<body>
<h1 align="center"> 歡迎白帽子進行授權安全測試,安全漏洞請聯繫QQ:1111111。
</body>
</html>
如上命中規則,我們檢視Openrestry日誌,檢視是否爲POST請求
tail -1 /usr/local/openresty/nginx/logs/access.log
192.168.31.217 - - [27/Jul/2020:18:21:32 +0800] "POST /hello?aa=select id from mysql HTTP/1.1" 403 313 "-" "curl/7.29.0"
最近還爲大家精心整理了一份關於linux和python的學習資料大合集!有需要的可私信,或在「python頭條」後臺回覆 回復關鍵詞「資料合集」即可免費領取!
