企業羣集架構----LNMP
羣集架構LNMP
前言
-
LNMP是指一組通常一起使用來執行動態網站或者伺服器的自由軟體名稱首字母縮寫。L指Linux,N指Nginx,M一般指MySQL,也可以指MariaDB,P一般指PHP,也可以指Perl或Python
-
LNMP代表的就是:Linux系統下Nginx+MySQL+PHP這種網站伺服器架構。
Linux是一類Unix計算機操作系統的統稱,是目前最流行的免費操作系統。代表版本有:debian、centos、ubuntu、fedora、gentoo等。
Nginx是一個高效能的HTTP和反向代理伺服器,也是一個IMAP/POP3/SMTP代理伺服器。
Mysql是一個小型關係型數據庫管理系統。
PHP是一種在伺服器端執行的嵌入HTML文件的指令碼語言。
這四種軟體均爲免費開源軟體,組合到一起,成爲一個免費、高效、擴充套件性強的網站服務系統
一:LNMP架構的部署(理論)
1.1:LNMP架構概述
-
LNMP平臺就是 Linux、 Ngnix、 My SQL、PHP的組合架構,需要 Linux伺服器、MysαL數據庫、PHP解析環境
-
Ngnix特長:高併發,低資源,處理靜態網路存取請求非常強
Apache:靜態處理和動態處理都可以做,更適合做動態處理
Nginx將動態資源請求交給PHP當中的fpm處理動態請求
PHP主組態檔:php.ini
Nginx將動態資源分配給FPM或Apache
1.2:MySQL安裝設定
- 爲了與 Nginx、PHP環境保持一致,此處選擇採用原始碼編譯的方式安裝 My SQL元件
- MySQL部署的方法
編譯安裝 MySQL
優化調整初始化數據庫
啓動mysq服務並設定root數據庫賬號的密碼
1.3:PHP解析環境的安裝
-
設定網頁動靜分離,解析PHP,有兩種方法可以選擇
使用PHP的FPM模組
將存取PHP頁面的Web請求轉交給 Apache伺服器去處理
-
較新版本的PHP已經自帶FPM模組,用來對PHP解析範例進行管理、優化解析效率
FastCG將 Http Server和動態指令碼語言分離開
Nginx專門處理靜態請求,轉發動態請求
PHP FPM專門解析PHP動態請求
單伺服器的LNMP架構通常使用FPM的方式來解析PHP -
PHP編譯安裝步驟
-
編譯安裝PHP
編譯選項時新增"- enable-fpm」以啓用此模組
安裝後的調整,主要是組態檔的建立與相應命令工具的路徑優化
安裝 Zend Guardloader(提高PHP解析效率),並進行載入設定
CGI還有跨平臺的功能
1.4:設定Ngnx支援PHP環境
-
呼叫本機的php-fpm進程設定方法
建立FPM組態檔php- fpm. conf,修改設定選項,如:PD檔案執行使用者、服務進程數等
啓動php-pm進程
-
在Ngnx的組態檔中的 serve}設定段設定將PHP的網頁請求轉給FPM模組處理
-
在Ngnx的組態檔中的 Server{}設定段設定將PHP的網頁請求轉給FPM模組處理
-
[root@localhost~]# vim /usr/local/nginx/conf/nginx.conf
Server{
...
 location ~\.php${
		root	/var/www/kgc;
         fastcgi_pass	 127.0.0.1:9000;
		 fastcgi_index index.php;
         include 	fastcgi.conf;
...
1.5:常見的PHP開源產品介紹
-
Discuz!
-
康盛創想(北京困技有限公司推出的一套通用的社羣論壇軟件系統,如001年6月面世以來,是全球成熟度最高、覆蓋率最大的論壇軟件系統之一
-
PHPWind
PHPWind(簡稱:PW)是一個基於PHP和 MySQL的論壇程式,是國內最受歡迎的通用型論壇程式之一。 PHPWind的前身是onstar,發佈於2004年, PHPWind由杭州德天資訊技術有限公司開發,軟體全面開源免費
二: Nginx 編譯安裝
2.1: 安裝環境依賴包
[root@lnmp opt]# mkdir /opt/LNMP
[root@lnmp LNMP]# ls                                      //上傳壓縮包
Discuz_X3.4_SC_UTF8.zip    ncurses-5.6.tar.gz   php-7.1.10.tar.bz2
mysql-boost-5.7.20.tar.gz  nginx-1.12.2.tar.gz
[root@lnmp LNMP]# tar zxvf nginx-1.12.2.tar.gz -C /opt
[root@lnmp nginx-1.12.2]# yum install -y gcc gcc-c++ zlib-devel pcre pcre-devel
2.2: 建立執行使用者,組
[root@lnmp nginx-1.12.2]# useradd -M -s /sbin/nologin nginx
2.3: 編譯安裝Nginx
[root@lnmp nginx-1.12.2]#
./configure \
--prefix=/usr/local/nginx \
--user=nginx \
--group=nginx \
--with-http_stub_status_module
[root@lnmp nginx-1.12.2]# make && make install
2.4: 路徑優化
- 爲了使Nginx伺服器的執行更加方便,可以爲主程式nginx 建立鏈接檔案,一遍管理員直接指向"nginx"命令就可以呼叫Nginx的主程式
[root@lnmp nginx-1.12.2]# ln -s /usr/local/nginx/sbin/nginx /usr/local/bin/     '//nginx命令執行路徑優化'
[root@lnmp nginx-1.12.2]# ls -l /usr/local/bin
總用量 0
lrwxrwxrwx. 1 root root 27 8月   6 19:52 nginx -> /usr/local/nginx/sbin/nginx
2.5: 檢查組態檔
[root@lnmp nginx-1.12.2]# nginx -t
nginx: the configuration file /usr/local/nginx/conf/nginx.conf syntax is ok
nginx: configuration file /usr/local/nginx/conf/nginx.conf test is successful
[root@lnmp html]# nginx
[root@lnmp html]# netstat -ntap | grep nginx
tcp        0      0 0.0.0.0:80              0.0.0.0:*               LISTEN      14933/nginx: master
[root@lnmp html]# setenforce 0
[root@lnmp html]# iptables -F
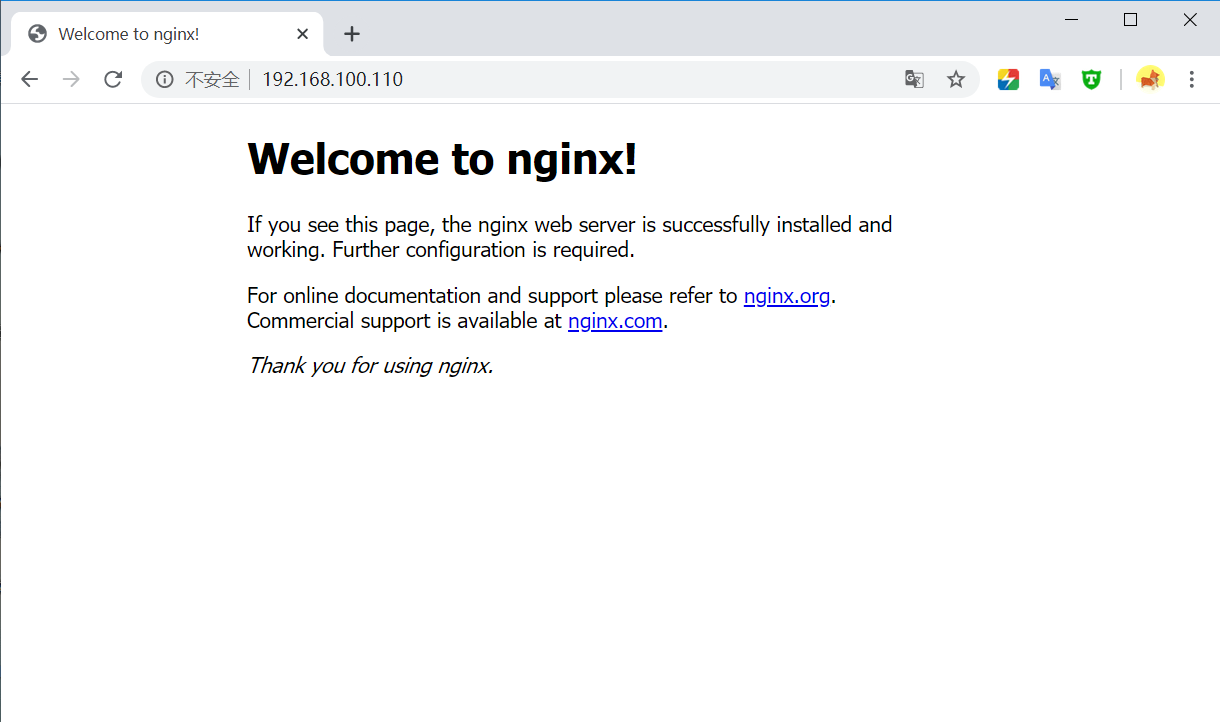
本機瀏覽器可以存取
2.6: 進程管理
-
主程式Nginx支援標準的進程信號,通過kill或killall命令發送HUP信號表示過載設定,QUIT信號表示退出進程,KILL 信號表示殺死進程。例如,若使用killall命令,過載設定、停止服務的操作分別如下所示(通過「-s" 選項指定信號種類)
[root@localhost ~]# killall -s HUP nginx
###選項-s HUP等同於-1重新載入
[root@localhost ~]# killall -s QUIT nginx
###選項-s QUIT等同於-3停止服務
當Nginx進程執行時,PID 號預設存放在logs/目錄下的nginx.pid檔案中,因此若改用kill命令,也可以根據nginx.pid檔案中的PID號來進行控制。
[root@lnmp html]# pkill nginx                              //關閉
[root@lnmp html]# netstat -ntap | grep nginx
[root@lnmp html]# nginx
[root@lnmp html]# netstat -ntap | grep nginx
tcp        0      0 0.0.0.0:80              0.0.0.0:*               LISTEN      15029/nginx: master
2.7: 新增systemctl 管理Nginx
- 爲了使Nginx服務的啓動、停止、過載等操作更加方便,可以編寫基於CentOS 7.6的
Nginx服務控制檔案使用systemctl工具來進行管理,CentOS7.6系統的管理習慣
[root@lnmp ~]# vim /lib/systemd/system/nginx.service

[Unit]
Description=nginx                     '描述'
After=network.target                  '描述服務類別'

[Service]
Type=forking                           ''//後臺執行形勢''
PIDFile =/usr/local/nginx/logs/nginx.pid       'pid進程檔案路徑'
ExecStart=/usr/local/nginx/sbin/nginx          '啓動命令'
ExecReload=/usr/bin/kill -s HUP $MAINPID       '過載命令'
ExecStop=/usr/bin/kill -s QUIT $MAINPID        '停止命令,寫絕對路徑'
PrivateTmp=true

[Install]
WantedBy=multi-user.target                      '多使用者模式'

[root@lnmp ~]# chmod 754 /lib/systemd/nginx.service      '只有屬主陣列使用'
[root@lnmp ~]# systemctl enable nginx.service
2.8: 檢查通過systemctl 命令能否正常 啓動 停止 重新啓動 過載Nginx服務
[root@lnmp html]# pkill nginx
[root@lnmp html]# netstat -ntap | grep nginx
[root@lnmp html]# systemctl start nginx
[root@lnmp html]# netstat -ntap | grep nginx
tcp        0      0 0.0.0.0:80              0.0.0.0:*               LISTEN      15086/nginx: master
2.9: 新增service 管理Nginx
[root@lnmp ~]# vim /etc/init.d/nginx
#!/bin/bash
# chkconfig: - 99 20
# description: Nginx Service Control Script
PROG="/usr/local/nginx/sbin/nginx"
PIDF="/usr/local/nginx/logs/nginx.pid"
case "$1" in
  start)
    $PROG
    ;;
  stop)
    kill -s QUIT $(cat $PIDF)
    ;;
  restart)
    $0 stop
    $0 start
    ;;
  reload)
    kill -s HUP $(cat $PIDF)
    ;;
  *)
    echo "Usage: $0 {start|stop|restart|reload}"
    exit 1
esac
exit 0
[root@lnmp init.d]# cd /etc/init.d/
[root@lnmp init.d]# chmod +x nginx
[root@lnmp init.d]# chkconfig --add nginx
[root@lnmp init.d]# chkconfig --level 35 nginx on
三: Nginx 應用
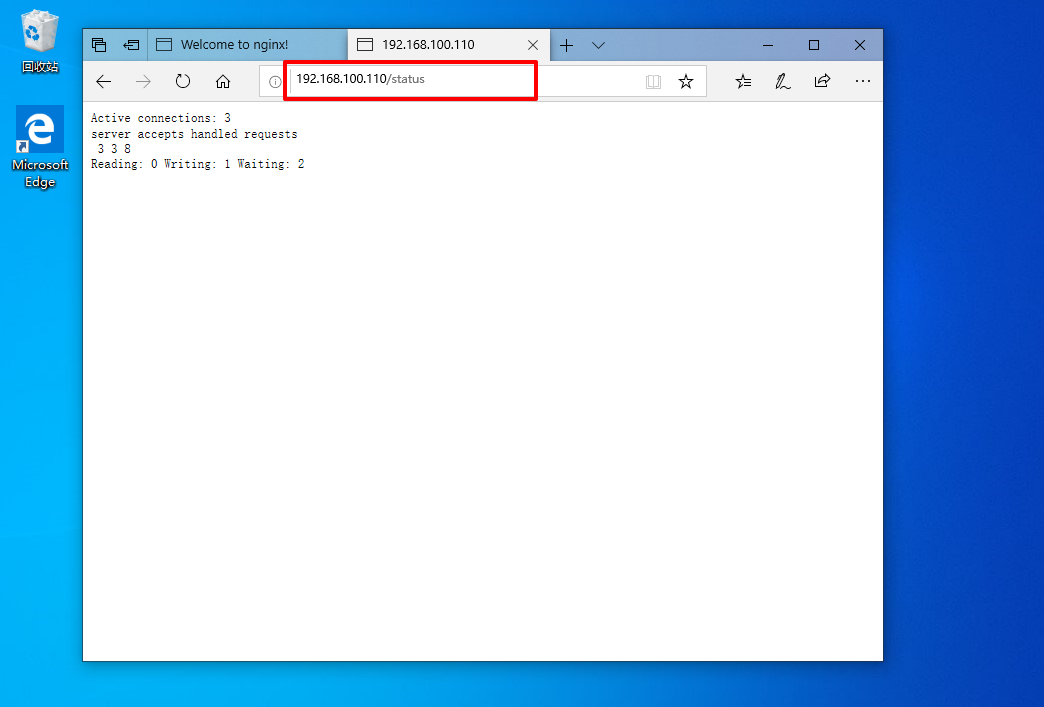
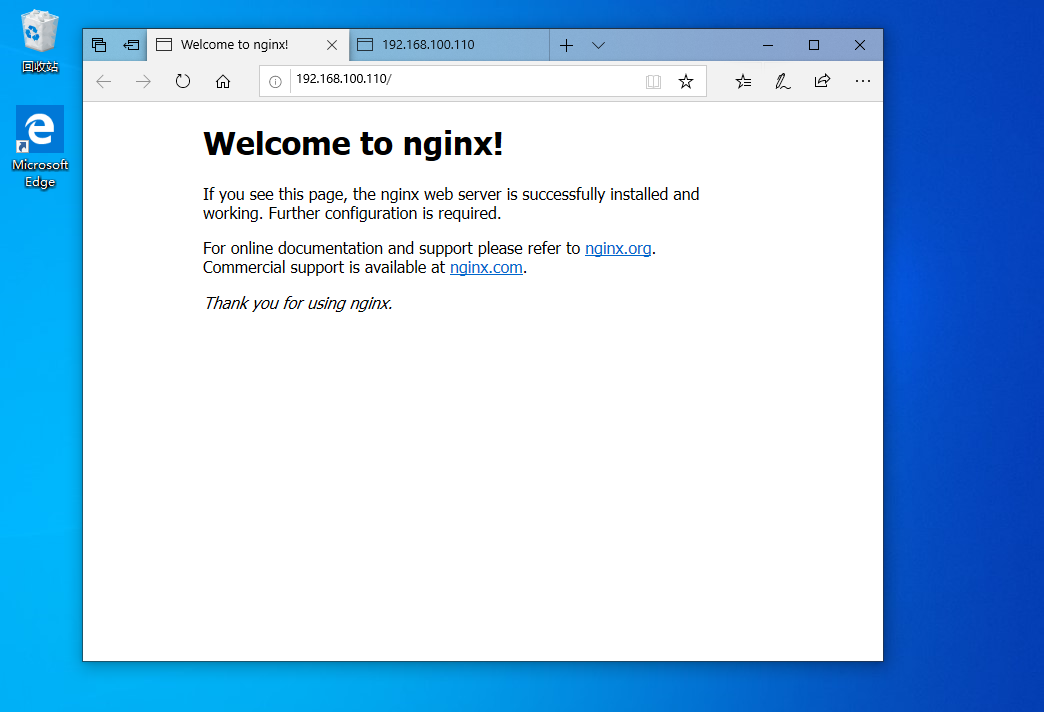
3.1: 存取統計
 [root@lnmp ~]# vim /usr/local/nginx/conf/nginx.conf
......
 43         location / {
 44             root   html;
 45             index  index.html index.htm;
 46         }
 47         location /status {                              '存取位置
 48             stub_status on;                             '開啓狀態統計模組'
 49             access_log off;                             '關閉此位置的存取日誌'
 50         }
[root@lnmp ~]# nginx -t
nginx: the configuration file /usr/local/nginx/conf/nginx.conf syntax is ok
nginx: configuration file /usr/local/nginx/conf/nginx.conf test is successful
[root@lnmp ~]# service nginx stop
[root@lnmp ~]# netstat -ntap | grep nginx
[root@lnmp ~]# service nginx start
[root@lnmp ~]# netstat -ntap | grep nginx
tcp        0      0 0.0.0.0:80              0.0.0.0:*               LISTEN      19131/nginx: master
3.2: 基於域名的虛擬主機
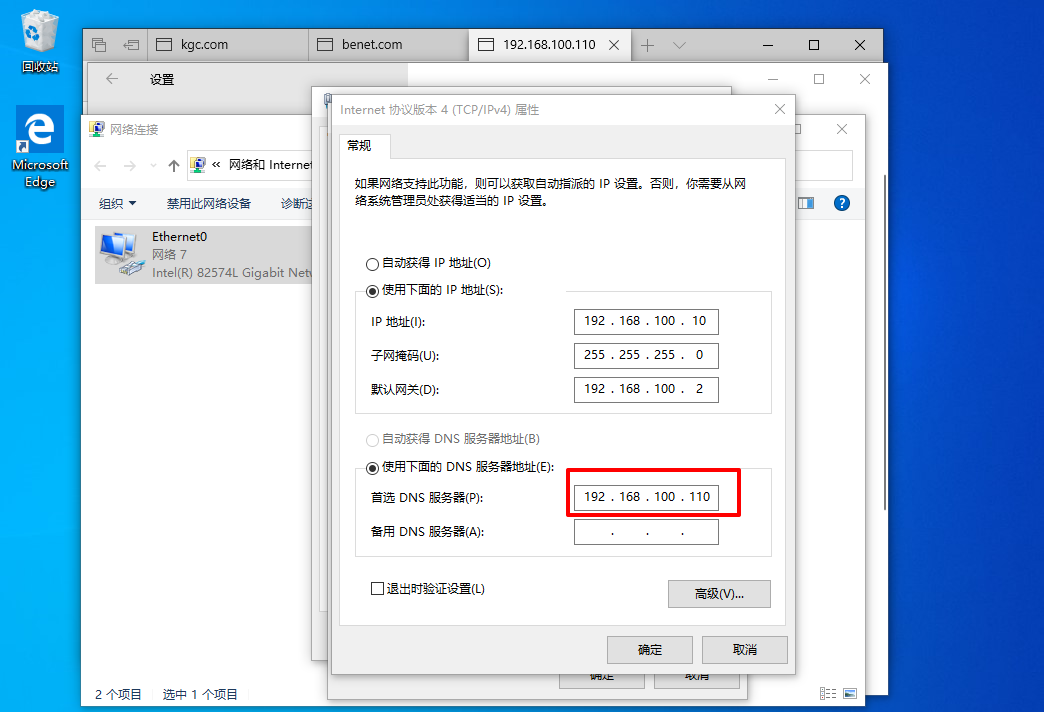
[root@lnmp ~]# yum install -y bind
[root@lnmp ~]# vim /etc/named.conf
options {
        listen-on port 53 { any; };              '改爲any'
        listen-on-v6 port 53 { ::1; };
        directory       "/var/named";
        dump-file       "/var/named/data/cache_dump.db";
        statistics-file "/var/named/data/named_stats.txt";
        memstatistics-file "/var/named/data/named_mem_stats.txt";
        recursing-file  "/var/named/data/named.recursing";
        secroots-file   "/var/named/data/named.secroots";
        allow-query     { any; };                '改爲any'

[root@lnmp ~]# vim /etc/named.rfc1912.zones               "新增以下兩端"
zone "kgc.com" IN {
        type master;
        file "kgc.com.zone";
        allow-update { none; };
};
zone "benet.com" IN {
        type master;
        file "benet.com.zone";
        allow-update { none; };
};
[root@lnmp ~]# cp -p /var/named/named.localhost /var/named/kgc.com.zone
www IN  A       192.168.100.110                       //新增
[root@lnmp ~]# cp -p /var/named/kgc.com.zone /var/named/benet.com.zone
[root@lnmp ~]# systemctl start named
[root@lnmp ~]# vim /usr/local/nginx/conf/nginx.conf

115     #    location / {
116     #        root   html;
117     #        index  index.html index.htm;
118     #    }
119     #}
120     server {
121        server_name www.benet.com;
122        location / {
123          root /var/www/benet;
124          index index.html index.php;
125        }
126     }
127     server {
128        server_name www.kgc.com;
129        location / {
130          root /var/www/kgc;
131          index index.html index.php;
132        }
133     }
134 }                                //注意這個大括號不是新增的,是 最上面 httpd { 所對應的
[root@lnmp ~]# nginx -t
nginx: the configuration file /usr/local/nginx/conf/nginx.conf syntax is ok
nginx: configuration file /usr/local/nginx/conf/nginx.conf test is successful
[root@lnmp ~]# service nginx stop
[root@lnmp ~]# netstat -ntap | grep nginx
[root@lnmp ~]# service nginx start
[root@lnmp ~]# netstat -ntap | grep nginx
tcp        0      0 0.0.0.0:80              0.0.0.0:*               LISTEN      19484/nginx: master
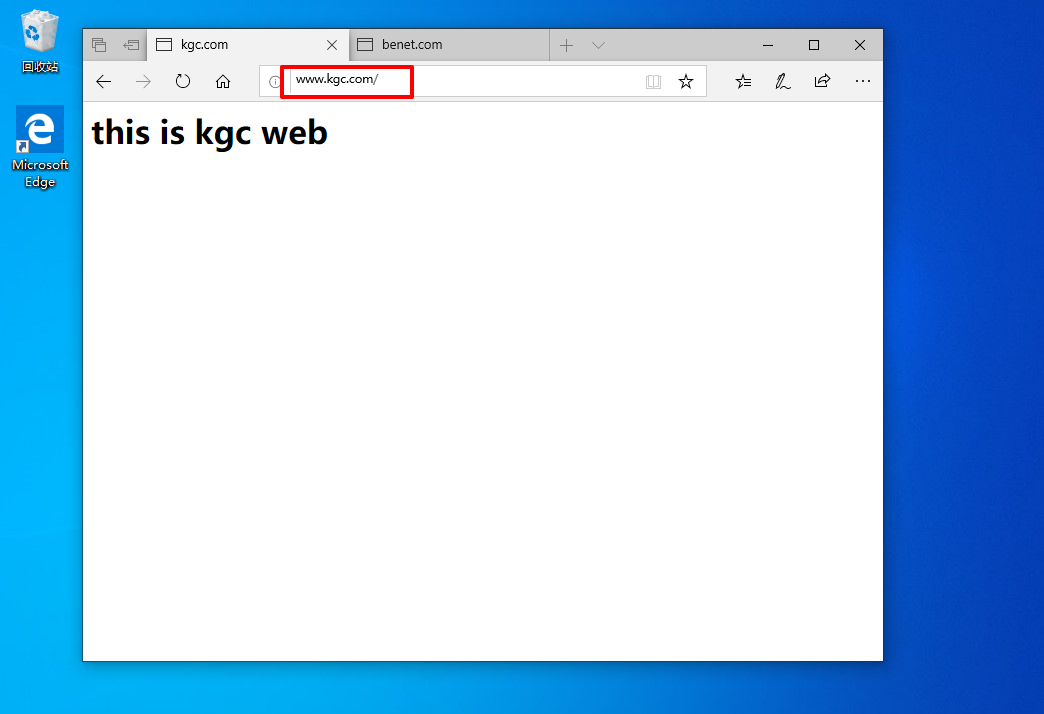
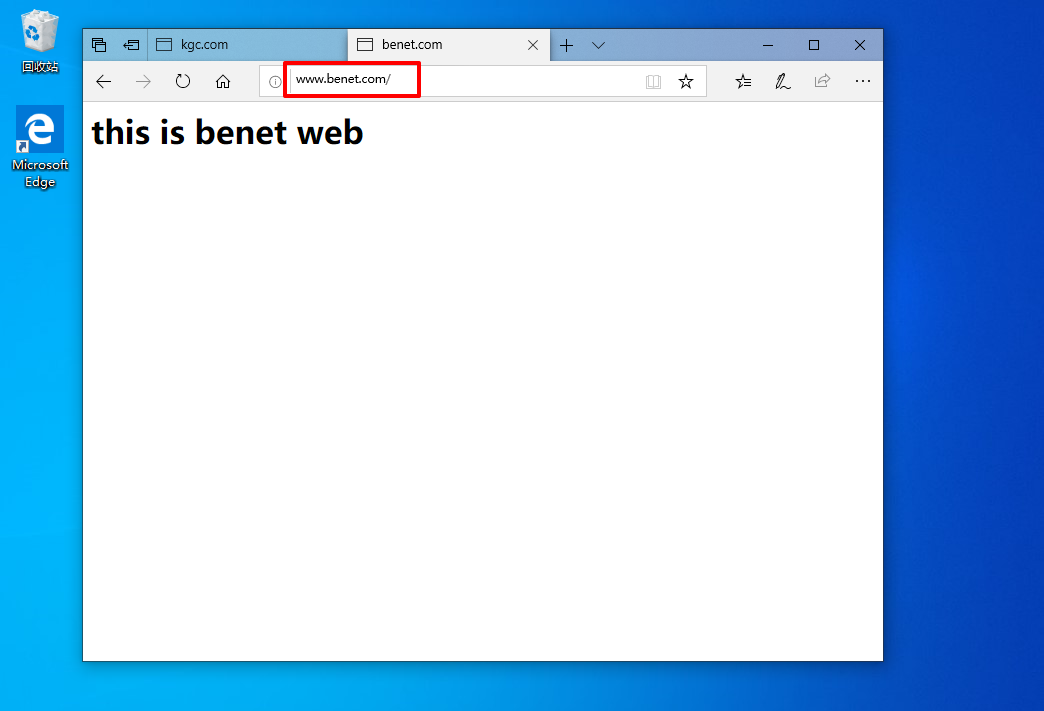
3.3: 基於埠的虛擬主機
[root@lnmp fpm]# vim /usr/local/nginx/conf/nginx.conf
   server {
       listen   8080;
       server_name www.benet.com;
       location / {
         root /var/www/benet;
         index index.html index.php;
       }
    }
    server {
       listen   80;
       server_name www.kgc.com;
       location / {
         root /var/www/kgc;
         index index.html index.php;
       }
[root@lnmp fpm]# systemctl restart nginx
[root@lnmp fpm]# netstat -anpt | grep nginx
tcp        0      0 0.0.0.0:8080            0.0.0.0:*               LISTEN      15615/nginx: master
tcp        0      0 0.0.0.0:80              0.0.0.0:*               LISTEN      15615/nginx: master
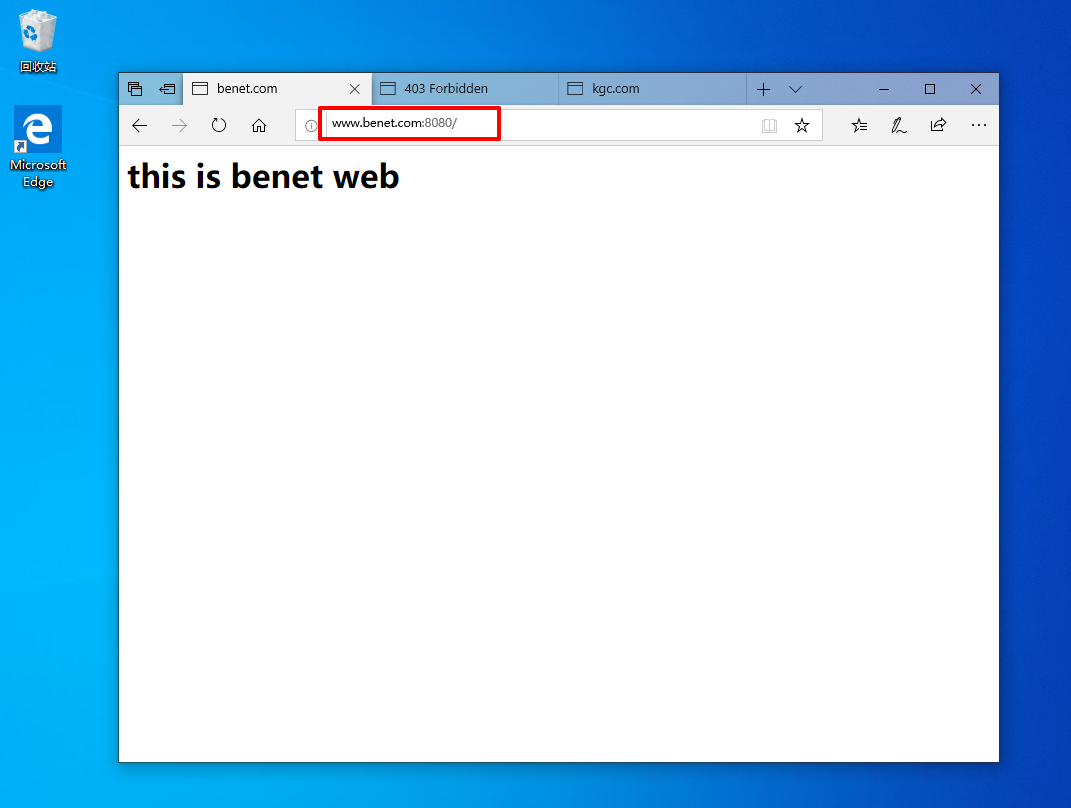
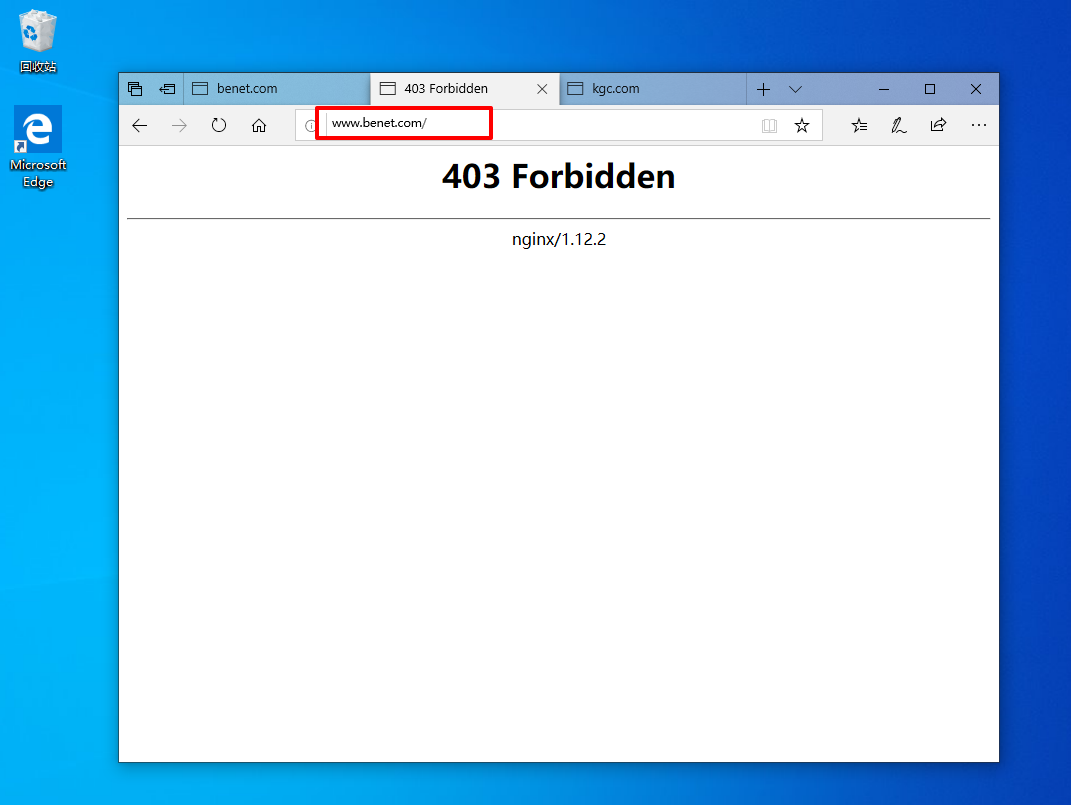

3.4: 基於IP的虛擬主機
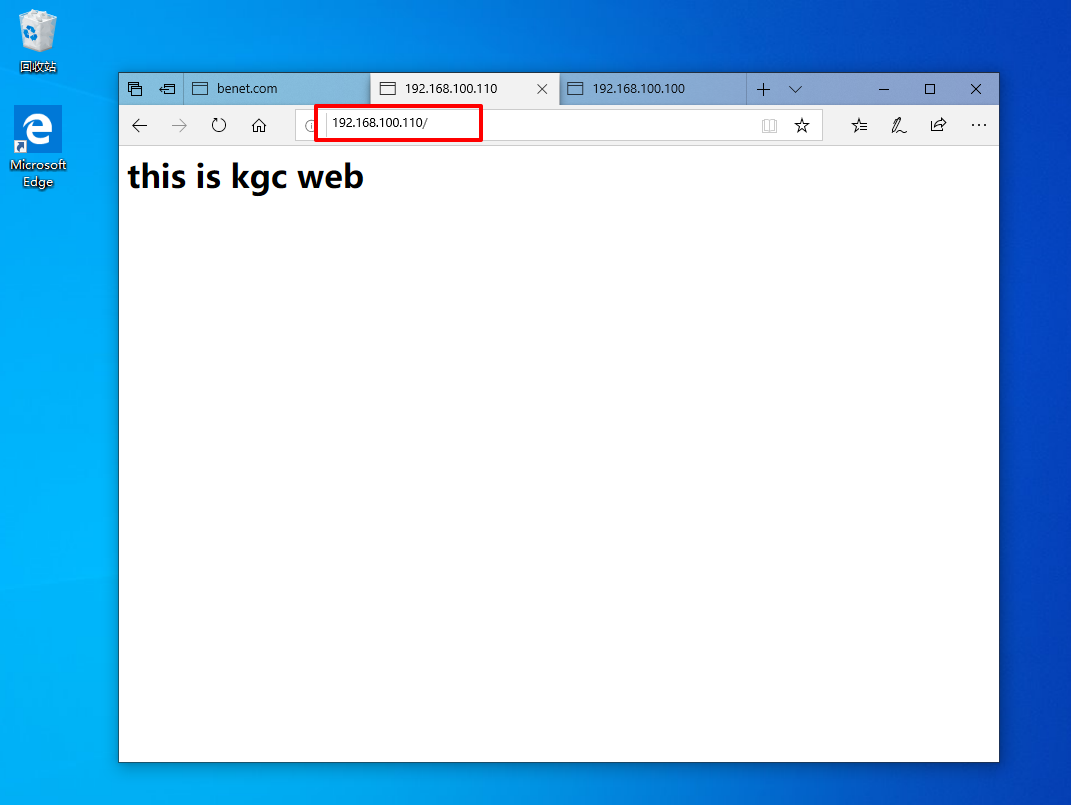
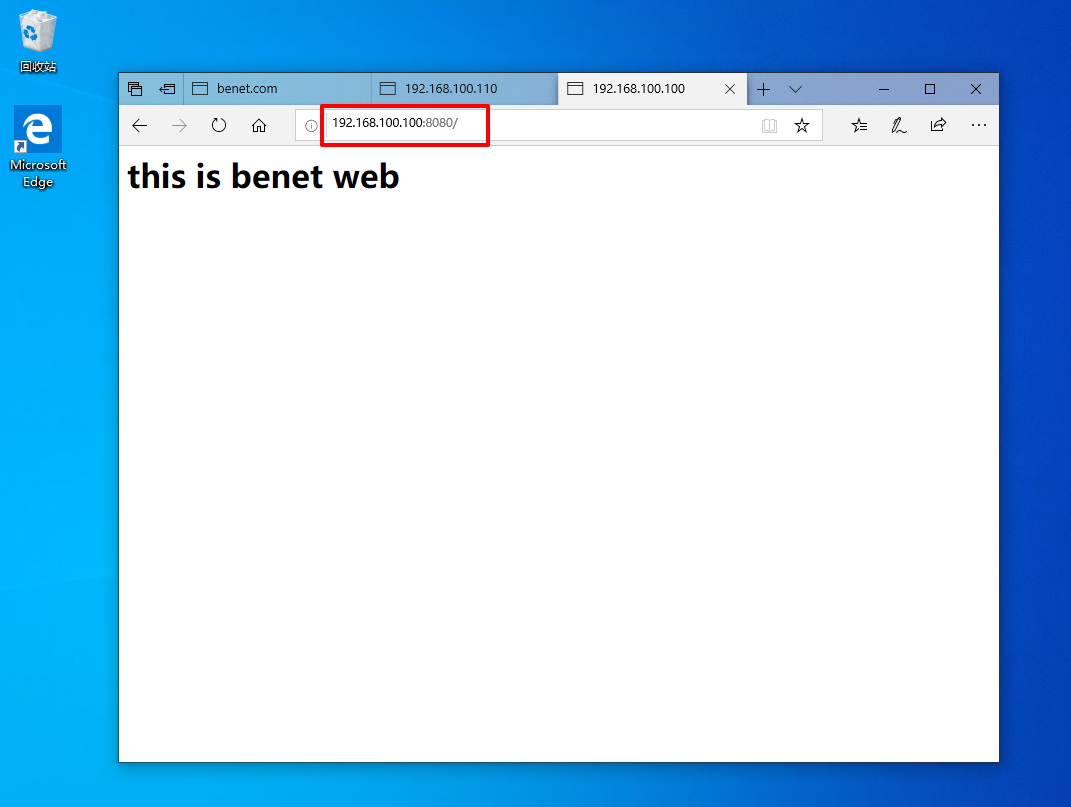
環境設定雙網絡卡 ens33 192.168.100.110 ens36 192.168.100.100
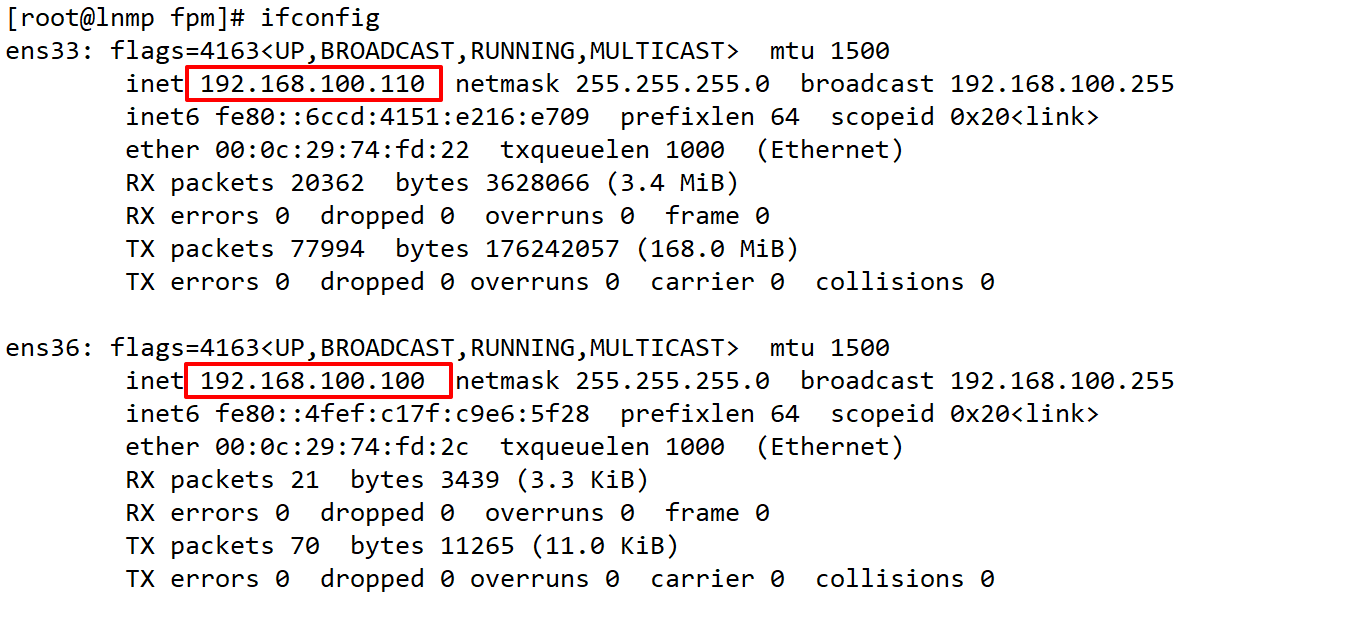
[root@lnmp ~]# vim /usr/local/nginx/conf/nginx.conf
  ......
   server {
       listen   192.168.100.100:8080;
       server_name www.benet.com;
       location / {
         root /var/www/benet;
         index index.html index.php;
       }
    }
    server {
       listen   192.168.100.110:80;
       server_name www.kgc.com;
       location / {
         root /var/www/kgc;
         index index.html index.php;
       }
    }
.....
[root@lnmp ~]# systemctl restart nginx
[root@lnmp ~]# netstat -anpt | grep nginx
tcp        0      0 192.168.100.100:8080    0.0.0.0:*               LISTEN      16640/nginx: master
tcp        0      0 0.0.0.0:80              0.0.0.0:*               LISTEN      16640/nginx: master
3.5: 使用者存取控制
[root@lnmp ~]# which htpasswd
/usr/bin/which: no htpasswd in (/usr/local/sbin:/usr/local/bin:/usr/sbin:/usr/bin:/root/bin)
[root@lnmp ~]# yum install -y httpd
[root@lnmp ~]# which htpasswd
/usr/bin/htpasswd
[root@lnmp ~]# htpasswd -c /usr/local/nginx/passwd.db tom
New password:                                    //設定tom存取密碼123456
Re-type new password:
Adding password for user tom
[root@lnmp ~]# vim /usr/local/nginx/conf/nginx.conf
........
    server {
       server_name www.benet.com;
       location / {
         auth_basic "secret";                               '對benet設定存取限制'
         auth_basic_usr_file /user/local/nginx/passwd.db;   '存取的密碼檔案'
         root /var/www/benet;
         index index.html index.php;
       }
    }
    server {
       server_name www.kgc.com;
       location / {
         root /var/www/kgc;
         index index.html index.php;
       }

[root@lnmp ~]# nginx -t
nginx: the configuration file /usr/local/nginx/conf/nginx.conf syntax is ok
[root@lnmp ~]# service nginx stop
[root@lnmp ~]# netstat -natp |grep nginx
[root@lnmp ~]# service nginx start
[root@lnmp ~]# netstat -natp |grep nginx
tcp        0      0 0.0.0.0:80              0.0.0.0:*               LISTEN      20365/nginx: master: configuration file /usr/local/nginx/conf/nginx.conf test is successful
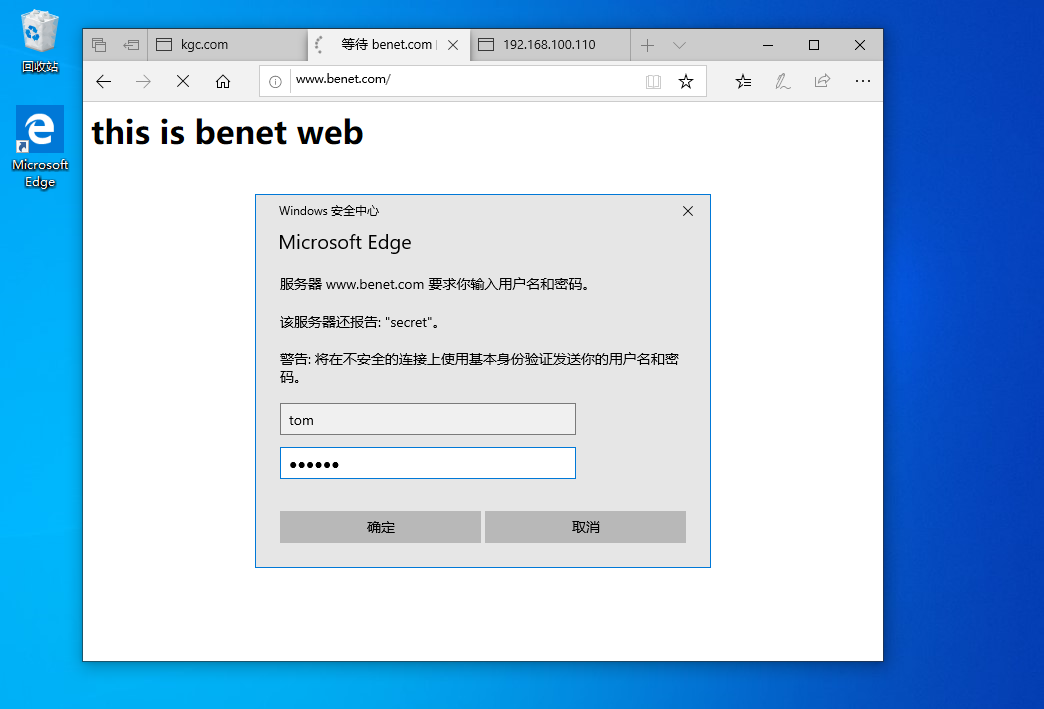
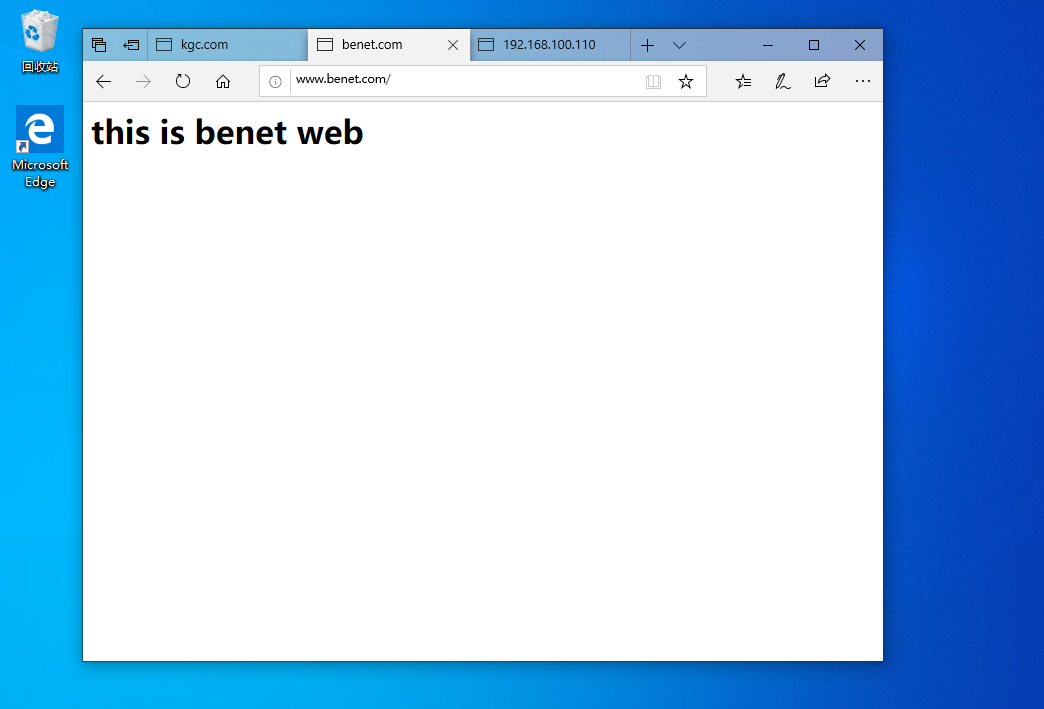
benet已經進行存取控制,而kgc沒有存取限制
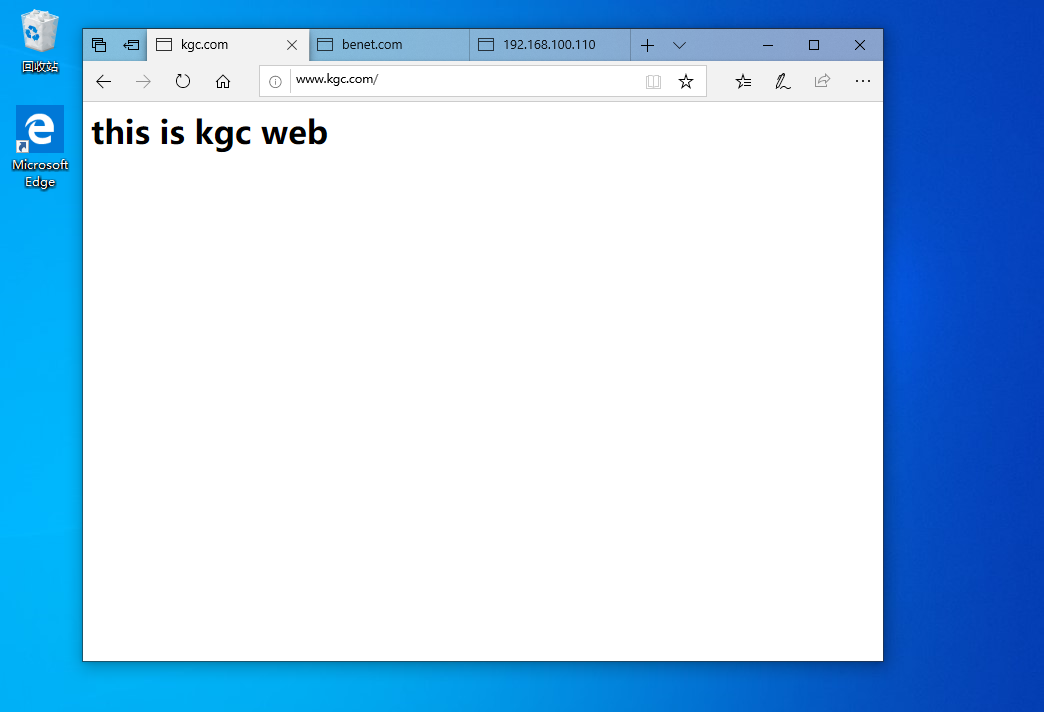
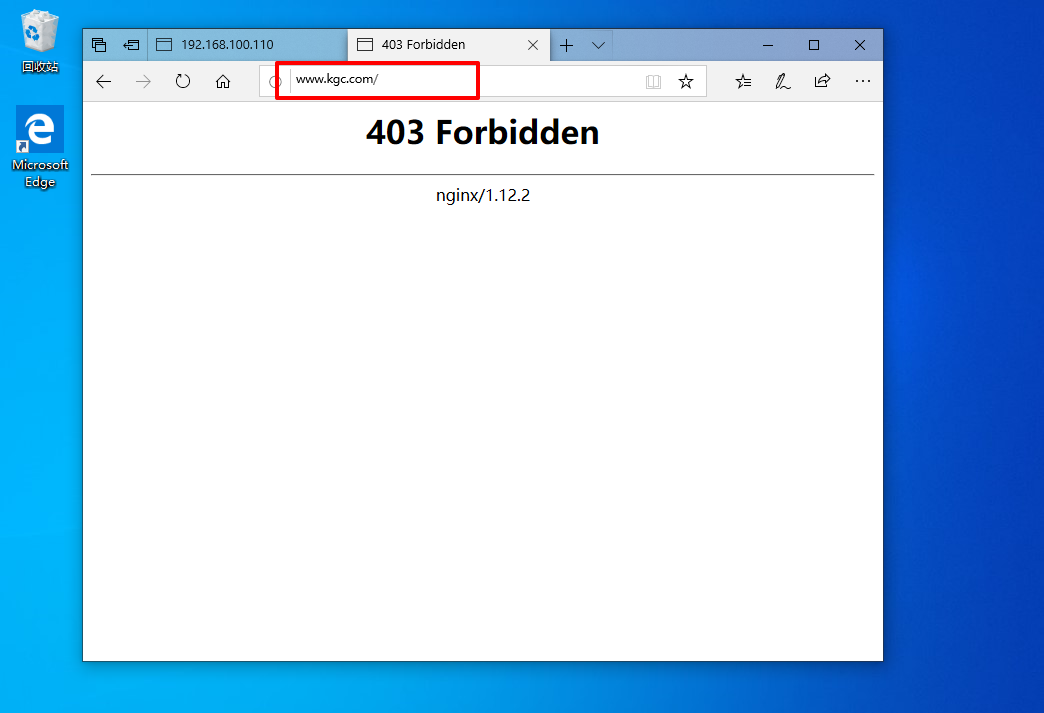
3.6: 使用者存取拒絕
[root@lnmp ~]# vim /usr/local/nginx/conf/nginx.conf
......
 server {
       server_name www.kgc.com;
       location / {
         deny 192.168.100.10;                     '拒絕192.168.100.10'存取
         allow all;                                 '允許其他所有存取'
         root /var/www/kgc;
         index index.html index.php;
       }
    }
[root@lnmp ~]# nginx -t
nginx: the configuration file /usr/local/nginx/conf/nginx.conf syntax is ok
nginx: configuration file /usr/local/nginx/conf/nginx.conf test is successful
[root@lnmp ~]# service nginx stop
[root@lnmp ~]# netstat -natp |grep nginx
[root@lnmp ~]# service nginx start
[root@lnmp ~]# netstat -natp |grep nginx
tcp        0      0 0.0.0.0:80              0.0.0.0:*               LISTEN      20481/nginx: master
四: MySQL 編譯安裝
4.1:MySQL概述
- MySQL是一種開放原始碼的關係型數據庫管理系統(RDBMS),使用最常用的數據庫管理語言–結構化查詢語言(SQL)進行數據庫管理。
- MySQL是開放原始碼的,因此任何人都可以在General Public License的許可下下載並根據個性化的需要對其進行修改。
- MySQL是一個真正的多執行緒,多使用者的SQL數據庫服務,憑藉其速度、可靠性和適應性而備受關注。大多數人都認爲在不需要事務化處理的情況下,MySQL是管理內容最好的選擇。
4.2:原始碼編譯安裝過程
4.2.1:安裝MySQL環境依賴包
[root@lnmp htdocs]# yum install ncurses-devel ncurses bison cmake -y
    '//ncurses-devel是字元終端下螢幕控制的基本庫'
    '//bison //函數庫'
    '//cmake跨平臺編譯安裝工具'
4.2.2:建立執行使用者
[root@lnmp ~ ]# useradd -s /sbin/nologin mysql '//新增使用者,指定shell,禁止使用者登錄系統'
4.2.3:cmake設定 編譯 安裝
[root@lnmp mnt]# cd /opt/LNMP
[root@lnmp LNMP]# ls
Discuz_X3.4_SC_UTF8.zip    ncurses-5.6.tar.gz   php-7.1.10.tar.bz2
mysql-boost-5.7.20.tar.gz  nginx-1.12.2.tar.gz
[root@lnmp LAMP]# tar zxvf mysql-boost-5.7.20.tar.gz -C /opt
[root@lnmp LAMP]# cd /opt
[root@lnmp opt]# ls
LNMP  mysql-5.7.20  nginx-1.12.2   rh
[root@lnmp opt]# cd mysql-5.7.20/
[root@lnmp mysql-5.7.20]# ls
.......
cmake
[root@lnmp mysql-5.7.20]# cmake  \
-DCMAKE_INSTALL_PREFIX=/usr/local/mysql \		'//指定路徑'
-DMYSQL_UNIX_ADDR=/home/mysql/mysql.sock \		'//指定通訊檔案,連線數據庫的必要檔案'
-DSYSCONFIDIR=/etc \		                    '//指定組態檔目錄'
-DSYSTEMD_PID_DIR=/usr/local/mysql \            'PID進程號檔案路徑'
-DDEFAULT_CHARSET=utf8 \		                '//指定字元集'
-DDEFAULT_COLLATION=utf8_general_ci \		    '//指定字元集'
-DWITH_INNOBASE_STORAGE_ENGINE=1 \              '//此行和下三行爲儲存引擎'
-DWITH_ ARCHIVE_STORAGE_ENGINE=1 \
-DWITH_BLACKHOLE_STORAGE_ENGINE=1 \
-DWITH_PERFSCHEMA_STORAGE_ENGINE=1 \
-DMYSQL_DATADIR=/usr/local/mysqI/data \	         '//指定數據檔案目錄,由mysql使用者管理'
-DWITH_BOOST=boost \                             '//指定boost位置'
-DWITH_SYSTEMD=1                                 '//守護行程'
.....

cmake \
-DCMAKE_INSTALL_PREFIX=/usr/local/mysql \
-DMYSQL_UNIX_ADDR=/usr/local/mysql/mysql.sock \
-DSYSCONFDIR=/etc \
-DSYSTEMD_PID_DIR=/usr/local/mysql \
-DDEFAULT_CHARSET=utf8 \
-DDEFAULT_COLLATION=utf8_general_ci \
-DWITH_INNOBASE_STORAGE_ENGINE=1 \
-DWITH_ ARCHIVE_STORAGE_ENGINE=1 \
-DWITH_BLACKHOLE_STORAGE_ENGINE=1 \
-DWITH_PERFSCHEMA_STORAGE_ENGINE=1 \
-DMYSQL_DATADIR=/usr/local/mysqI/data \
-DWITH_BOOST= boost \
-DWITH_SYSTEMD=1
[root@lnmp mysql-5.7.20]# make
[root@lnmp mysql-5.7.20]# make install                  '這個過程大概需要半個多小時'
-----注意:如果在CMAKE的過程中有報錯---
當報錯解決後,需要把原始碼目錄中的CMakeCache.txt檔案刪除,然後再重新CMAKE,否則錯誤依舊
----注意: make: *** No targets specified and no makefile found. Stop.解決方法
1.wget http://ftp.gnu.org/pub/gnu/ncurses/ncurses- 5.6.tar.gz
2.tar zxvf ncurses-5.6.tar.gz
3./configure -prefix= /usr/local -with- shared-without- debug
4.make
5.make install
4.2.4: 數據庫目錄進行調整
[root@lnmp mysql-5.7.20]# chown -R mysql.mysql /usr/local/mysql
4.2.5:調整組態檔
[root@lnmp mysql-5.7.20]# vim /etc/my.cnf             '//將內容全部刪除,新增以下內容'
[client]
port = 3306
default-character-set=utf8
socket = /usr/local/mysql/mysql.sock
[mysql]
port = 3306
default-character-set=utf8
socket = /usr/local/mysql/mysql.sock
[mysqld]
user = mysql
basedir = /usr/local/mysql
datadir = /usr/local/mysql/data
port = 3306
character_set_server=utf8
pid-file = /usr/local/mysql/mysqld.pid
socket = /usr/local/mysql/mysql.sock
server-id = 1
sql_mode=NO_ENGINE_SUBSTITUTION,STRICT_TRANS_TABLES,NO_AUTO_CREATE_USER,NO_AUTO_VALUE_ON_ZERO,NO_ZERO_IN_DATE,NO_ZERO_DATE,ERROR_FOR_DIVISION_BY_ZERO,PIPES_AS_CONCAT,ANSI_QUOTES

[root@lnmp mysql-5.7.20]# chown mysql:mysql /etc/my.cnf
4.2.6: 設定環境變數
[root@lnmp mysql-5.7.20]# echo 'PATH=/usr/local/mysql/bin:/usr/local/mysql/lib:$PATH'>> /etc/profile
[root@lnmp mysql-5.7.20]# echo 'export PATH' >> /etc/profile
[root@lnmp mysql-5.7.20]# source /etc/profile
4.2.7: 初始化數據庫
cd /usr/local/mysql/
bin/mysqld \
--initialize-insecure \
--user= mysql \
--basedir=/usr/local/mysql \
--datadir= /usr/local/mysql/data
4.2.8:數據庫開啓自啓,關閉,狀態
[root@lnmp mysql]# systemctl enable mysqld
[root@lnmp mysql]# systemctl stop mysqld
[root@lnmp mysql]# netstat -ntap | grep 3306
[root@lnmp mysql]# systemctl start mysqld
[root@lnmp mysql]# systemctl status mysqld
[root@lnmp mysql]# netstat -ntap | grep 3306                 '//應該查出來3306埠'
tcp6       0      0 :::3306                 :::*                    LISTEN      23435/mysqld
4.2.9:設定MySQL密碼;登陸
[root@lnmp mysql]# mysqladmin -u root -p password "abc123"
Enter password:               '//剛開始沒密碼是空的直接回車,然後輸入密碼abe123,再次確認密碼'
[root@lnmp mysql]# mysql -u root -p       '//這個命令敲下,提示要輸入密碼,這個就是剛纔設定的密碼abc123'
Enter password:
Welcome to the MySQL monitor.  Commands end with ; or \g.
Your MySQL connection id is 4
Server version: 5.7.20 Source distribution

Copyright (c) 2000, 2017, Oracle and/or its affiliates. All rights reserved.

Oracle is a registered trademark of Oracle Corporation and/or its
affiliates. Other names may be trademarks of their respective
owners.

Type 'help;' or '\h' for help. Type '\c' to clear the current input statement.

mysql>
四: PHP編譯安裝
4.1:PHP概述
- PHP即「超文字前處理器」,是一種通用開源指令碼語言。PHP是在伺服器端執行的指令碼語言,與C語言類似,是常用的網站程式語言。PHP獨特的語法混合了C、Java、Perl以及 PHP 自創的語法。利於學習,使用廣泛,主要適用於Web開發領域
- PHP支援絕大多數流行的數據庫,在數據庫層面的操作功能十分強大,而且能夠支援Unix,Windows,Linux等多種操作系統
4.2:原始碼編譯過程
4.2.1:安裝依賴環境環境
[root@lnmp ~]# yum -y install \
libjpeg \
libjpeg-devel \
libpng libpng-devel \
freetype freetype-devel \
libxml2 \
libxml2-devel \
zlib zlib-devel \
curl curl-devel \
openssl openssl-devel
4.2.2:configure設定
[root@lnmp LNMP]# ls
Discuz_X3.4_SC_UTF8.zip    ncurses-5.6.tar.gz   php-7.1.10.tar.bz2
mysql-boost-5.7.20.tar.gz  nginx-1.12.2.tar.gz
[root@lnmp LNMP]# tar xjvf php-7.1.10.tar.bz2 -C /opt/
[root@lnmp opt]# ls
LNMP  mysql-5.7.20  nginx-1.12.2   php-7.1.10  rh
[root@lnmp php-7.1.10]# ./configure \
> --prefix=/usr/local/php \
> --with-mysql-sock=/usr/local/mysql/mysql.sock \
> --with-mysqli \
> --with-zlib \
> --with-curl \
> --with-gd \
> --with-jpeg-dir \
> --with-png-dir \
> --with-freetype-dir \
> --with-openssl \
> --enable-fpm \
> --enable-mbstring \
> --enable-xml \
> --enable-session \
> --enable-ftp \
> --enable-pdo \
> --enable-tokenizer \
> --enable-zip
[root@lnmp php-7.1.10]# make && make install
4.2.3: 修改PHP的三個組態檔
- php有三個組態檔 php.ini核心組態檔 ; php-fpm.conf進程服務組態檔; www.conf 擴充套件組態檔
'核心組態檔php.ini'
[root@lnmp php-7.1.10]# cp php.ini-development /usr/local/php/lib/php.ini
[root@lnmp php-7.1.10]# vim /usr/local/php/lib/php.ini
mysqli.default_socket =/usr/local/mysql/mysql.sock   #1170行
date.timezone = Asia/Shanghai                                       #修改時區
[root@lnmp php-7.1.10]# /usr/local/php/bin/php -m               #檢查哪些模組
'進程服務組態檔php-fpm.conf'
[root@lnmp php-7.1.10]# cd /usr/local/php/etc/
[root@lnmp etc]# cp php-fpm.conf.default php-fpm.conf
[root@lnmp etc]# vim php-fpm.conf
 17 pid = run/php-fpm.pid         //分號去掉,取消註釋
'www.conf 擴充套件組態檔'
[root@lnmp etc]# cd /usr/local/php/etc/php-fpm.d/
[root@lnmp php-fpm.d]# cp www.conf.default www.conf
[root@lnmp etc]# /usr/local/php/sbin/php-fpm -c /usr/local/php/lib/php.ini   //開啓php
[root@lnmp etc]# netstat -anpt | grep 9000
tcp        0      0 127.0.0.1:9000          0.0.0.0:*               LISTEN      33066/php-fpm: mast
[root@lnmp etc]# ln -s /usr/local/php/bin/* /usr/local/bin/
[root@lnmp etc]# ps aux|grep -c "php-fpm"
4
'新增啓動服務'
[root@lnmp fpm]# cp /opt/php-7.1.10/sapi/fpm/init.d.php-fpm /etc/init.d/php-fpm
[root@lnmp fpm]# chmod +x /etc/init.d/php-fpm
[root@lnmp fpm]# chkconfig --add php-fpm
[root@lnmp fpm]# service php-fpm status
php-fpm (pid 10290) is running...
[root@lnmp fpm]# netstat -anpt |grep 9000
tcp        0      0 127.0.0.1:9000          0.0.0.0:*               LISTEN      10290/php-fpm: mast
[root@lnmp fpm]# service php-fpm stop
Gracefully shutting down php-fpm . done
[root@lnmp fpm]# netstat -anpt |grep 9000
[root@lnmp fpm]# service php-fpm start
Starting php-fpm  done
[root@lnmp fpm]# netstat -anpt |grep 9000
tcp        0      0 127.0.0.1:9000          0.0.0.0:*               LISTEN      15451/php-fpm: mast
'讓Nginx支援PHP功能'
[root@lnmp etc]# vi /usr/local/nginx/conf/nginx.conf
......
          location ~ \.php$ {
            root           html;
            fastcgi_pass   127.0.0.1:9000;
            fastcgi_index  index.php;
            fastcgi_param  SCRIPT_FILENAME  /usr/local/nginx/html$fastcgi_script_name;
            include        fastcgi_params;
        }
[root@lnmp html]# mv /usr/local/nginx/html/index.html /usr/local/nginx/html/index.html.bak                             '改後綴讓系統無法識別'
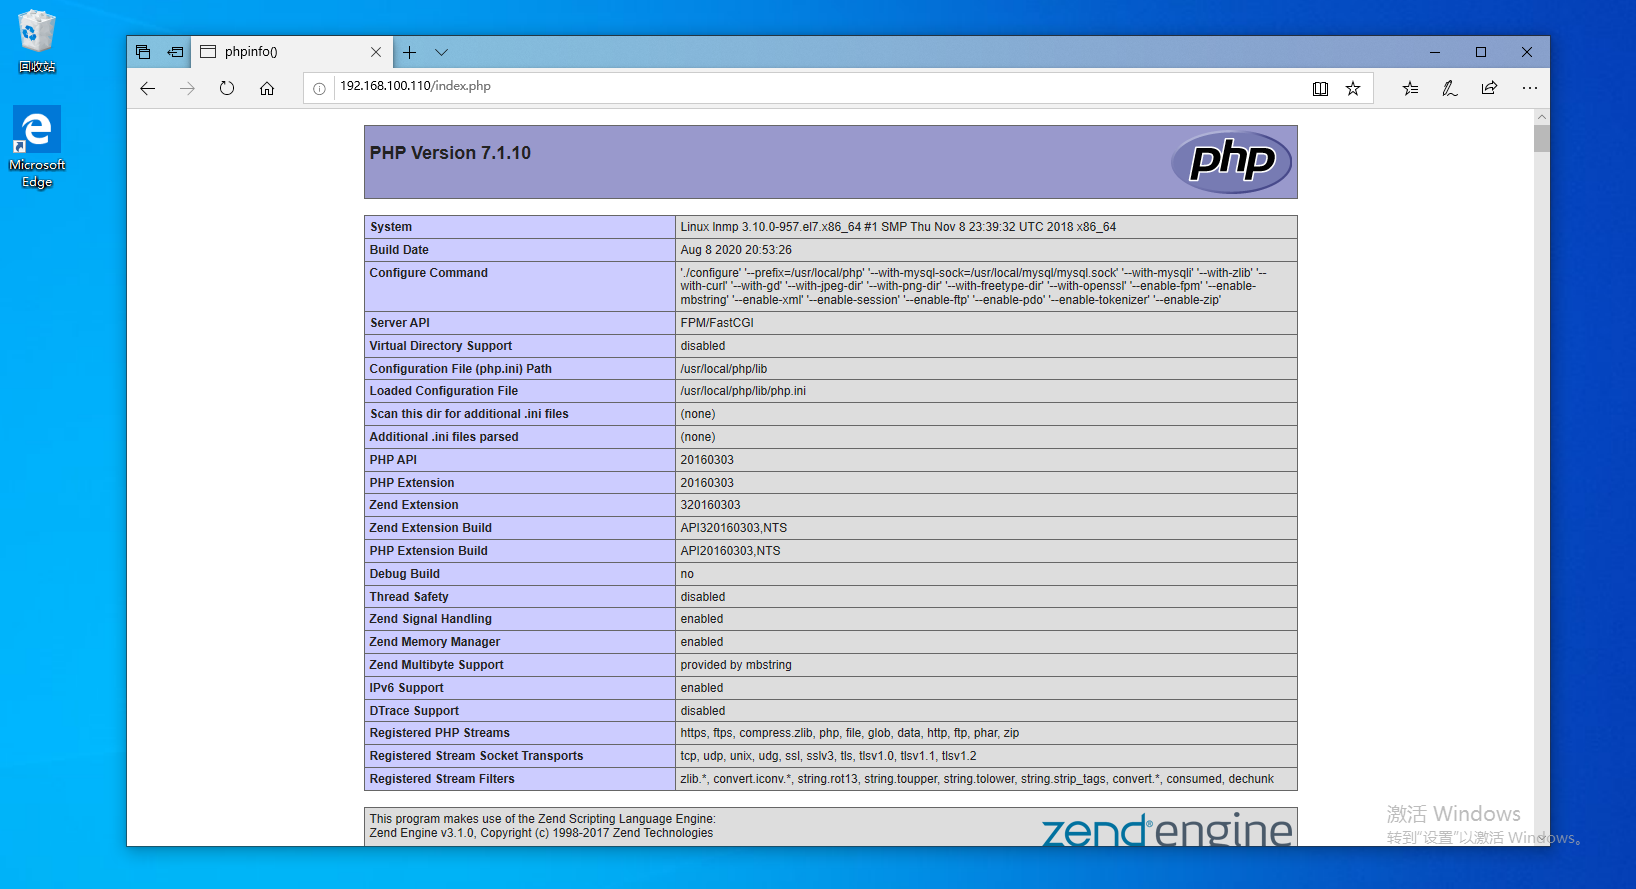
[root@lnmp etc]# vim /usr/local/nginx/html/index.php
<?php
phpinfo()
?>
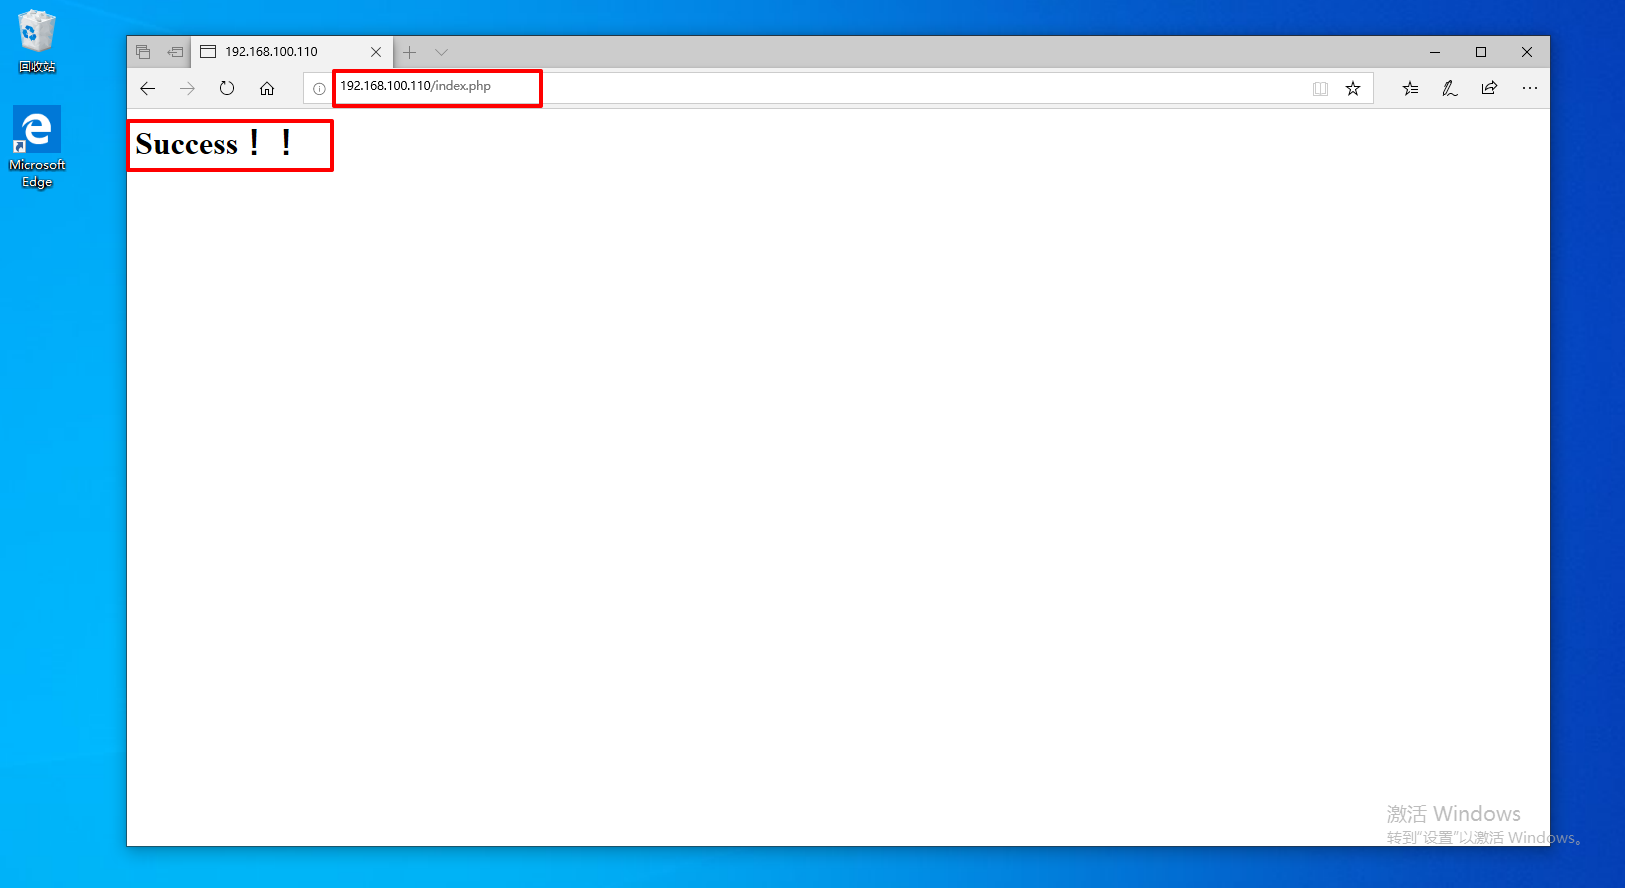
4.2.4:測試數據庫工作是否正常
[root@lnmp html]# mysql -u root -p
Enter password:                                        '輸入上文設定的密碼abc123'
mysql> CREATE DATABASE bbs;
mysql> GRANT all ON bbs.* To 'bbsuser'@'%' IDENTIFIED BY 'admin123';
mysql> GRANT all ON bbs.* To 'bbsuser'@'localhost' IDENTIFIED BY 'admin123';
mysql> flush privileges;
[root@lnmp html]# vi /usr/local/nginx/html/index.php
<?php
$link=mysqli_connect('192.168.100.110','bbsuser','admin123');
if($link) echo"<h1>Success!!</h1>";
else echo "Fail!!";
?>
五: 搭建Discuz論壇
5.1:解壓論壇安裝包
[root@lnmp LNMP]# cd /opt/LNMP
[root@lnmp LNMP]# unzip Discuz_X3.4_SC_UTF8.zip -d /tmp
[root@lnmp LNMP]# cd /tmp/dir_SC_UTF8/
[root@lnmp dir_SC_UTF8]# ls
readme  upload  utility
5.2:設定論壇許可權
[root@lnmp dir_SC_UTF8]# cp -r upload /usr/local/nginx/html/bbs
[root@lnmp dir_SC_UTF8]# cd /usr/local/nginx/html/bbs/
[root@lnmp bbs]# chown -R root:nginx ./config/
[root@lnmp bbs]# chown -R root:nginx ./data/
[root@lnmp bbs]# chown -R root:nginx ./uc_client/
[root@lnmp bbs]# chown -R root:nginx ./uc_server/
[root@lnmp bbs]# chmod -R 777 ./config/
[root@lnmp bbs]# chmod -R 777 ./data/
[root@lnmp bbs]# chmod -R 777 ./uc_client/
[root@lnmp bbs]# chmod -R 777 ./uc_server/
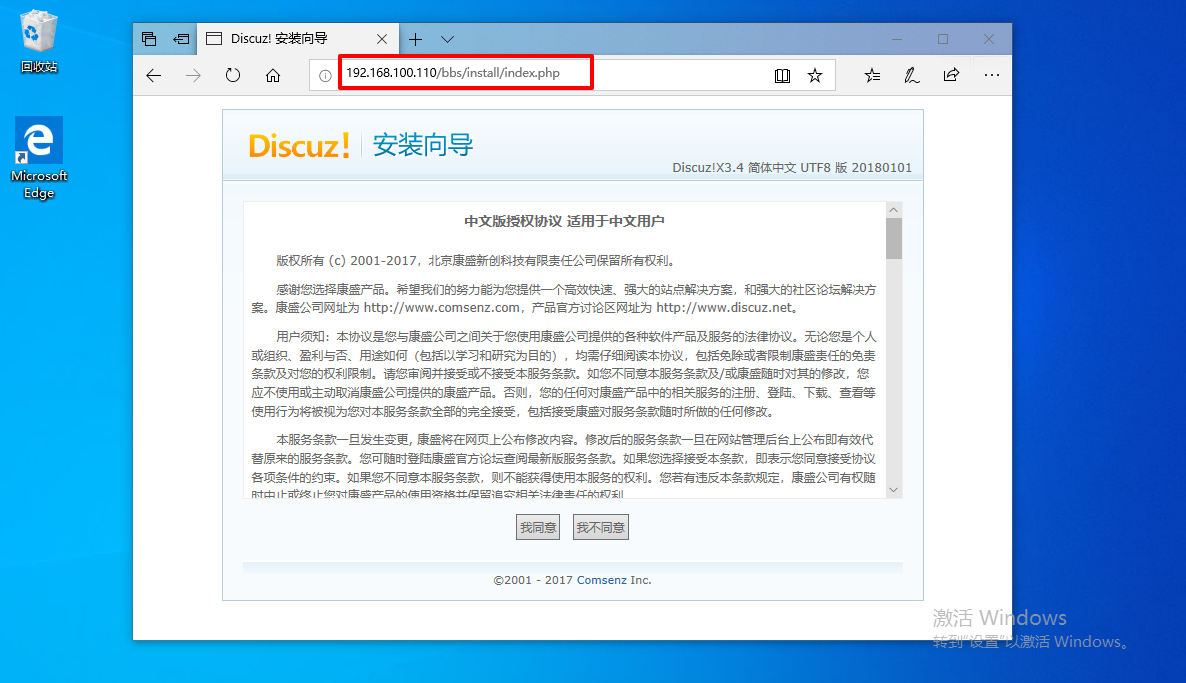
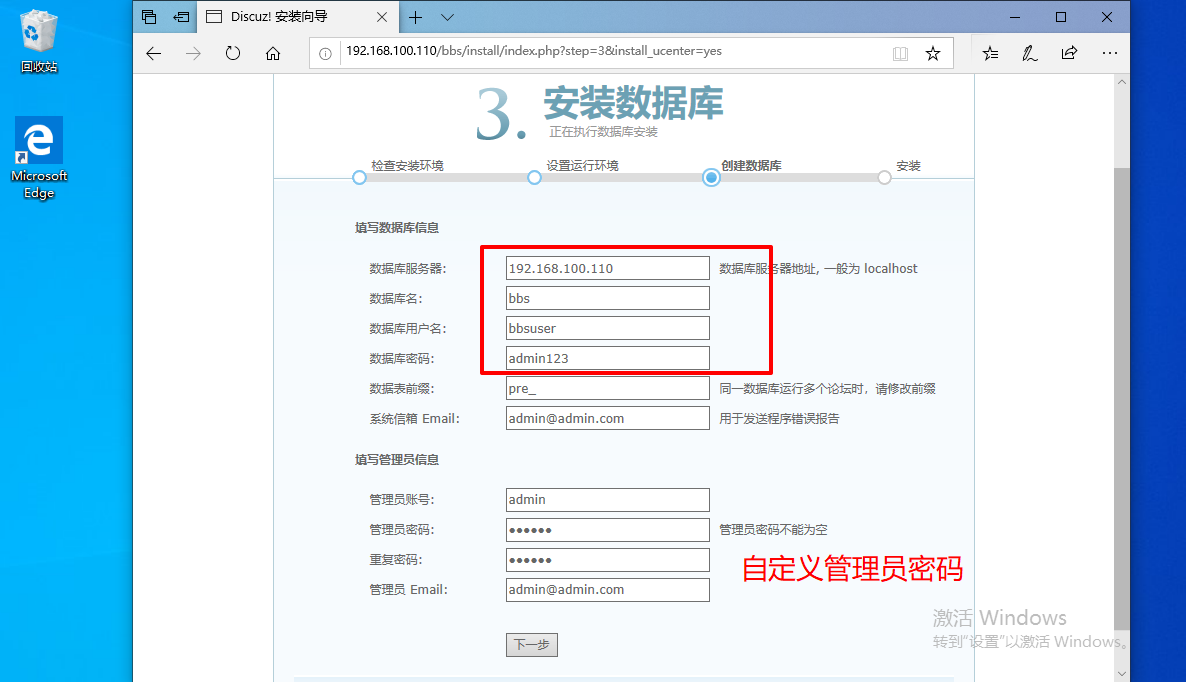
5.3:存取論壇
http://192.168.100.110/bbs/install/index.php

數據庫伺服器:localhost   #本地架設就用 localhost,如果不是在本機上就要填寫IP地址和埠
數據庫名字戶名:bbsuser
管理員賬號:admin
密碼:admin123


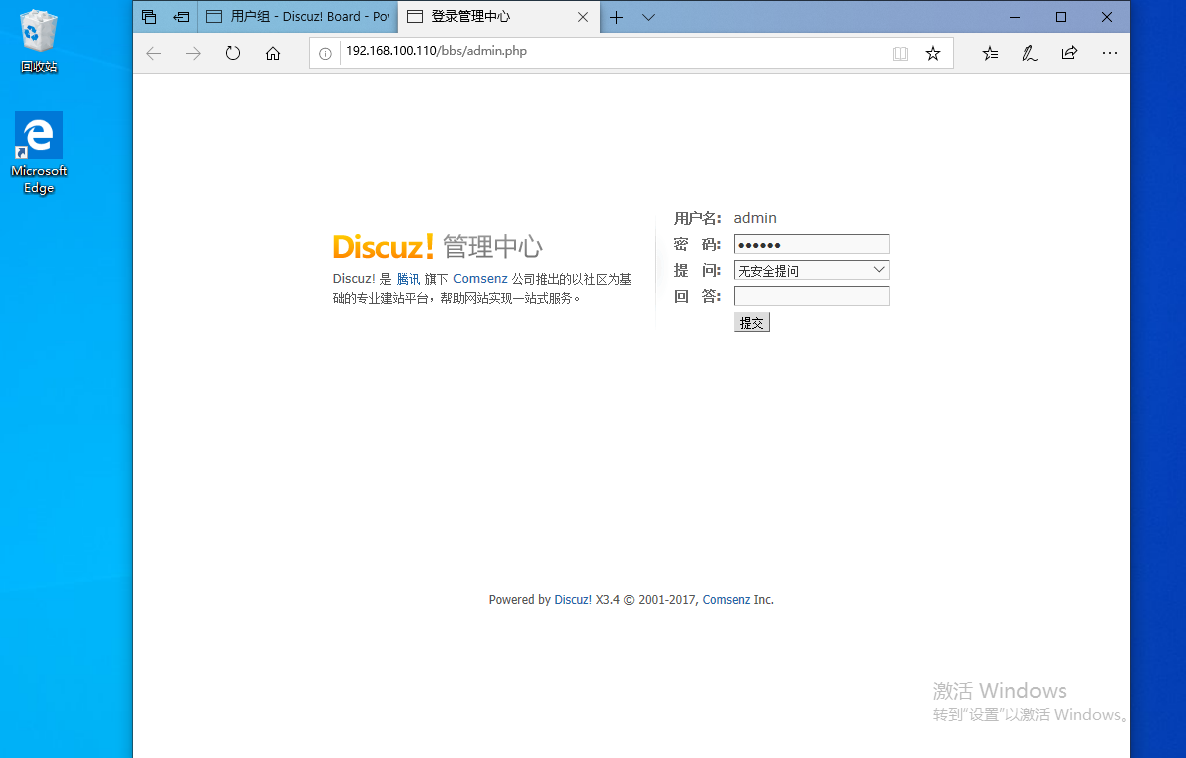
http://IP/bbs/admin.php//管理後臺
賬戶:admin
密碼:admin123

存取論壇  http://192.168.100.110/bbs/index.php
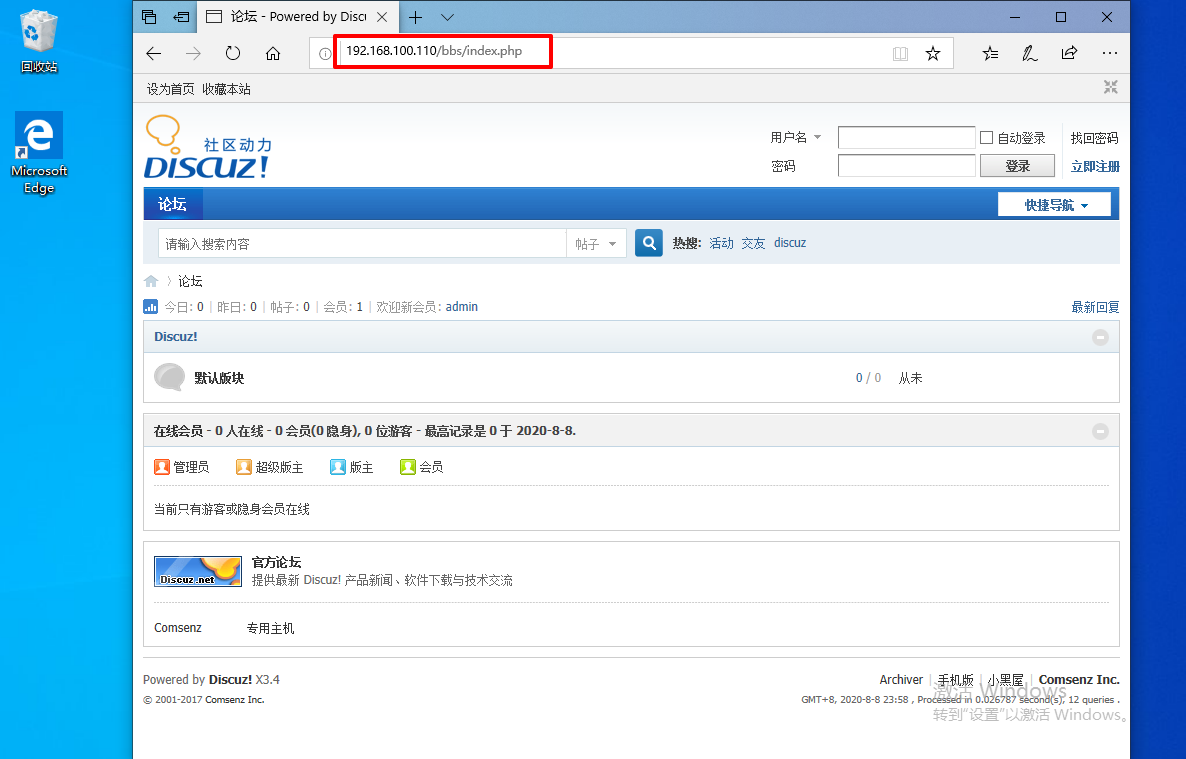

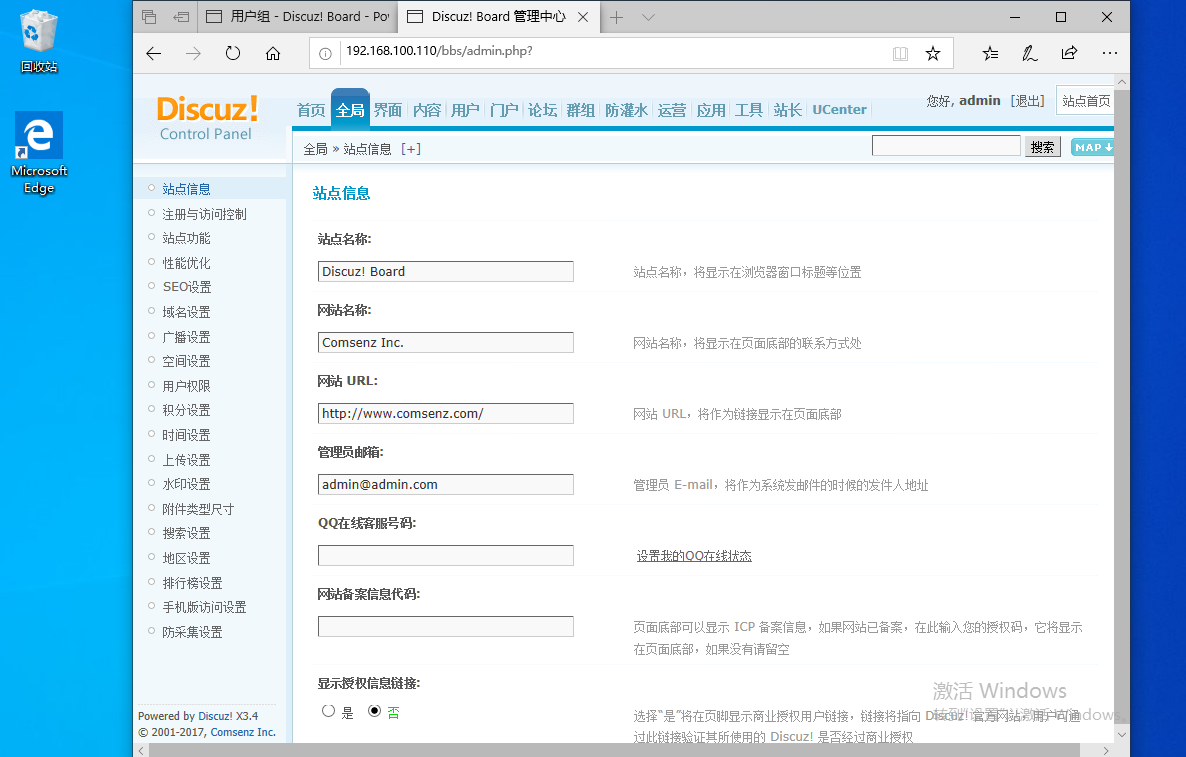
可以自己寫貼文,自由發揮,LNMP搭建完畢