Vite4+Typescript+Vue3+Pinia 從零搭建(7)
專案程式碼同步至碼雲 weiz-vue3-template
基於axios封裝請求,支援多域名請求地址
安裝
npm i axios
封裝
utils 目錄下新建 request 資料夾,並新建 index.ts、request.ts 和 status.ts 檔案。
1. status.ts 檔案主要是封裝狀態碼
export const ErrMessage = (status: number | string): string => {
  let message: string = ''
  switch (status) {
    case 400:
      message = '請求錯誤!請您稍後重試'
      break
    case 401:
      message = '未授權!請您重新登入'
      break
    case 403:
      message = '當前賬號無存取許可權!'
      break
    case 404:
      message = '存取的資源不存在!請您稍後重試'
      break
    case 405:
      message = '請求方式錯誤!請您稍後重試'
      break
    case 408:
      message = '請求超時!請您稍後重試'
      break
    case 500:
      message = '服務異常!請您稍後重試'
      break
    case 501:
      message = '不支援此請求!請您稍後重試'
      break
    case 502:
      message = '閘道器錯誤!請您稍後重試'
      break
    case 503:
      message = '服務不可用!請您稍後重試'
      break
    case 504:
      message = '閘道器超時!請您稍後重試'
      break
    default:
      message = '請求失敗!請您稍後重試'
  }
  return message
}
此時,eslint會報 switch 前面的空格錯誤,需要修改 .eslintrc.cjs 裡的 indent,修改後,錯誤消失。
rules: {
  // Switch語句 https://zh-hans.eslint.org/docs/latest/rules/indent#switchcase
  indent: ['error', 2, { SwitchCase: 1 }]
}
2. request.ts 主要是封裝 axios
/**
 * 封裝axios
 * axios 範例的型別為 AxiosInstance,請求需要傳入的引數型別為 AxiosRequestConfig,響應的資料型別為 AxiosResponse,InternalAxiosRequestConfig 繼承於 AxiosRequestConfig
 */
import axios, { AxiosInstance, AxiosRequestConfig, InternalAxiosRequestConfig, AxiosResponse } from 'axios'
import { ErrMessage } from './status'

// 自定義請求返回資料的型別
interface Data<T> {
  data: T
  code: string
  success: boolean
}

// 擴充套件 InternalAxiosRequestConfig,讓每個請求都可以控制是否要loading
interface RequestInternalAxiosRequestConfig extends InternalAxiosRequestConfig {
  showLoading?: boolean
}

// 攔截器
interface InterceptorHooks {
  requestInterceptor?: (config: RequestInternalAxiosRequestConfig) => RequestInternalAxiosRequestConfig
  requestInterceptorCatch?: (error: any) => any
  responseInterceptor?: (response: AxiosResponse) => AxiosResponse
  responseInterceptorCatch?: (error: any) => any
}
// 擴充套件 AxiosRequestConfig,showLoading 給範例預設增加loading,interceptorHooks 攔截
interface RequestConfig extends AxiosRequestConfig {
  showLoading?: boolean
  interceptorHooks?: InterceptorHooks
}

class Request {
  config: RequestConfig
  instance: AxiosInstance
  loading?: boolean // 用loading指代載入動畫狀態

  constructor(options: RequestConfig) {
    this.config = options
    this.instance = axios.create(options)
    this.setupInterceptor()
  }

  // 型別引數的作用,T決定AxiosResponse範例中data的型別
  request<T = any>(config: RequestConfig): Promise<T> {
    return new Promise((resolve, reject) => {
      this.instance
        .request<any, Data<T>>(config)
        .then((res) => {
          resolve(res.data)
        })
        .catch((err) => {
          reject(err)
        })
    })
  }

  // 封裝常用方法
  get<T = any>(url: string, params?: object, _object = {}): Promise<T> {
    return this.request({ url, params, ..._object, method: 'GET' })
  }

  post<T = any>(url: string, params?: object, _object = {}): Promise<T> {
    return this.request({ url, params, ..._object, method: 'POST' })
  }

  delete<T = any>(url: string, params?: object, _object = {}): Promise<T> {
    return this.request({ url, params, ..._object, method: 'DELETE' })
  }

  patch<T = any>(url: string, params?: object, _object = {}): Promise<T> {
    return this.request({ url, params, ..._object, method: 'PATCH' })
  }

  put<T = any>(url: string, params?: object, _object = {}): Promise<T> {
    return this.request({ url, params, ..._object, method: 'PUT' })
  }

  // 自定義攔截器 https://axios-http.com/zh/docs/interceptors
  setupInterceptor(): void {
    /**
     * 通用攔截
     */
    this.instance.interceptors.request.use((config: RequestInternalAxiosRequestConfig) => {
      if (config.showLoading) {
        // 載入loading動畫
        this.loading = true
      }
      return config
    })
    // 響應後關閉loading
    this.instance.interceptors.response.use(
      (res) => {
        if (this.loading) this.loading = false
        return res
      },
      (err) => {
        const { response, message } = err
        if (this.loading) this.loading = false
        // 根據不同狀態碼,返回不同資訊
        const messageStr = response ? ErrMessage(response.status) : message || '請求失敗,請重試'
        window.alert(messageStr)
        return Promise.reject(err)
      }
    )
    /**
     * 使用通用範例裡的攔截,兩個攔截都會生效,返回值以後一個執行的為準
     */
    // 請求攔截
    this.instance.interceptors.request.use(
      this.config?.interceptorHooks?.requestInterceptor,
      this.config?.interceptorHooks?.requestInterceptorCatch
    )
    // 響應攔截
    this.instance.interceptors.response.use(
      this.config?.interceptorHooks?.responseInterceptor,
      this.config?.interceptorHooks?.responseInterceptorCatch
    )
  }
}

export default Request
3. index.ts 主要是建立 Request 範例
/**
 * 建立範例,可以多個,當你需要請求多個不同域名的介面時
 */
import Request from './request'
import { getToken } from '@/utils/auth'

const defRequest = new Request({
  // 這裡用 Easy Mock 模擬了真實介面
  baseURL: 'https://mock.mengxuegu.com/mock/65421527a6dde808a695e96d/official/',
  timeout: 5000,
  showLoading: true,
  interceptorHooks: {
    requestInterceptor: (config) => {
      const token = getToken()
      if (token) {
        config.headers.Authorization = token
      }
      return config
    },
    requestInterceptorCatch: (err) => {
      return err
    },
    responseInterceptor: (res) => {
      return res.data
    },
    responseInterceptorCatch: (err) => {
      return Promise.reject(err)
    }
  }
})

// 建立其他範例,然後匯出
// const otherRequest = new Request({...})

export { defRequest }
使用
src 目錄下新建 api 資料夾,並新建 login.ts
1. login.ts
import { defRequest } from '../utils/request'

export const loginApi = (params: any) => {
  // 設定 showLoading,timeout 會覆蓋index.ts裡的預設值
  return defRequest.post<any>('/login', params, { showLoading: false, timeout: 1000 })
}
2. 修改 login.vue
<script setup lang="ts">
import { ref } from 'vue'
import { storeToRefs } from 'pinia'
import { useUserStore } from '@store/user'
import { loginApi } from '@/api/login'

defineOptions({
  name: 'V-login'
})

const userStore = useUserStore()
const { userInfo, token } = storeToRefs(userStore)
let userName = ref(userInfo.value.name)
let userToken = ref(token)

const updateUserName = () => {
  userStore.setUserInfo({
    name: userName.value
  })
}
const updateUserToken = () => {
  userStore.setToken(userToken.value)
}

const login = () => {
  loginApi({
    name: userName.value
  })
    .then((res) => {
      userName.value = res.name
      userToken.value = res.token
      updateUserToken()
    })
    .catch((err) => {
      console.log(err)
    })
}
</script>

<template>
  <div>login page</div>
  name:
  <input type="text" v-model="userName" @input="updateUserName" />
  <br />
  token:
  <input type="text" v-model="userToken" />
  <hr />
  <button @click="login">login</button>
</template>

<style scoped></style>
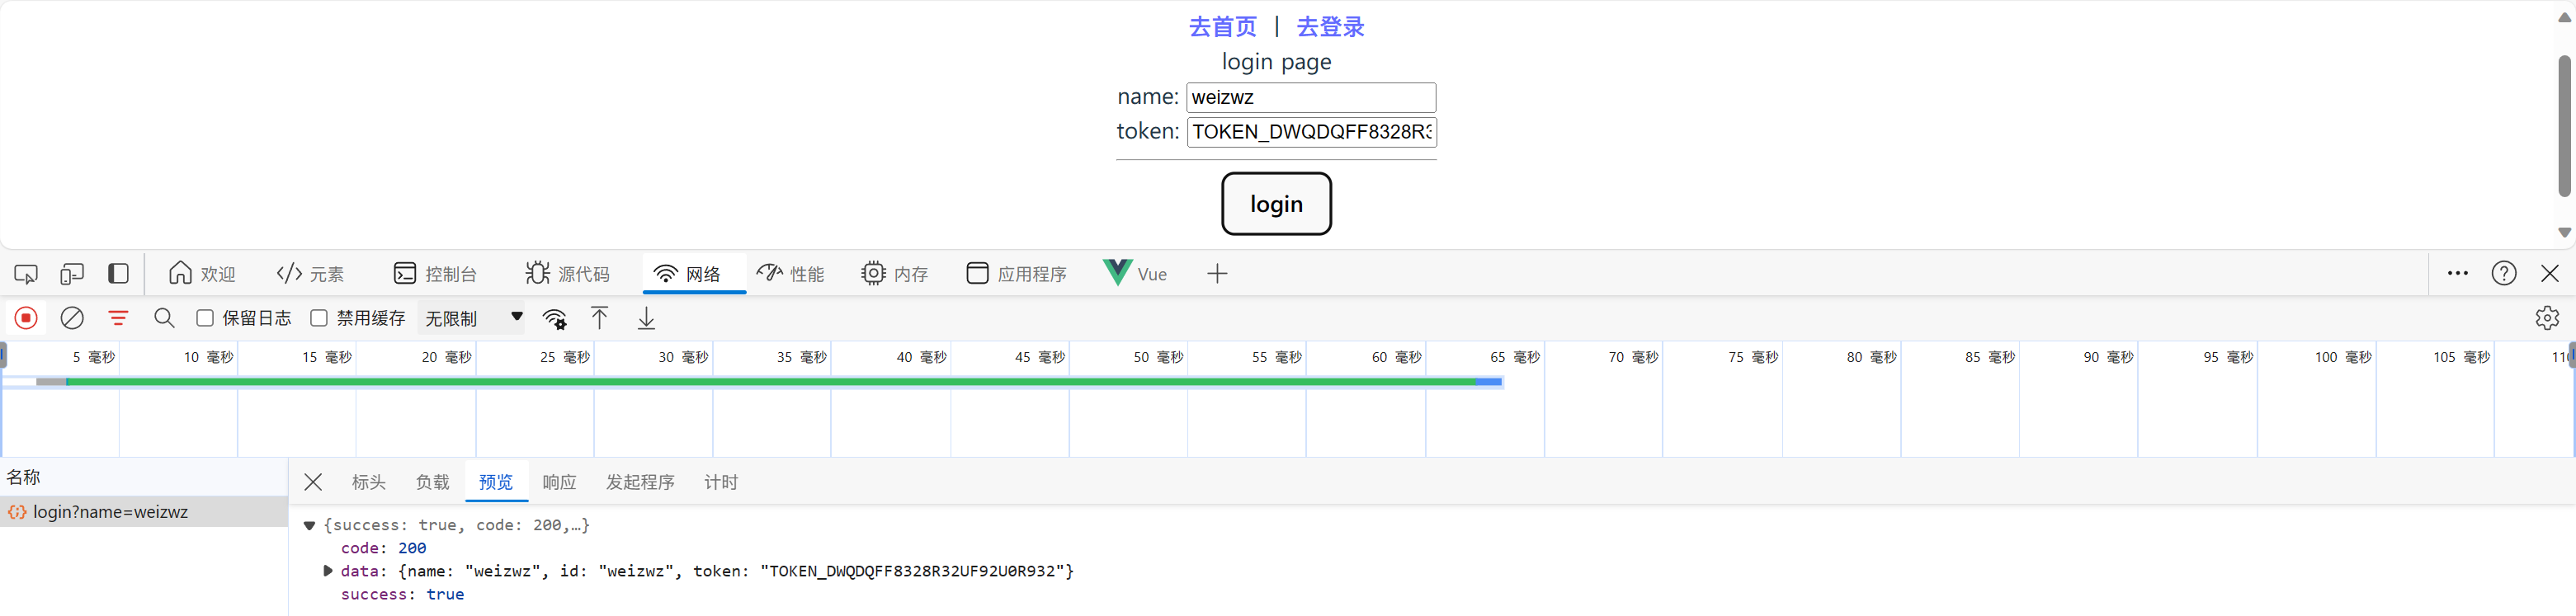
點選 login 按鈕,即可看到請求。
說明
對於 axios 的封裝和使用,這裡要說明幾點:
1. 為什麼要使用 InternalAxiosRequestConfig
axios 原始碼有修改,攔截器傳入和返回的引數不再是 AxiosRequestConfig,而是這個新型別 InternalAxiosRequestConfig
想要具體瞭解,可以檢視這篇博文 https://blog.csdn.net/huangfengnt/article/details/131490913
2. Request 裡的 config 引數
constructor 裡的 this.config 會接受所有範例引數,所以通用範例攔截裡使用的是 this.config?.xxx
通用攔截裡使用的是 config.showLoading,而不是 this.config.showLoading,是為了我們在實際的 api/login.ts 裡可以再傳入 showLoading,以滿足我們單個請求的要求。而通過 this.config 裡獲取的設定是 request/index.ts 裡傳入的設定。在 config.showLoading 之前我們可以列印下這兩個 config ,console.log(this.config, config) 結果如下:

如果在 login.ts 裡不傳入 showLoading,那麼 config.showLoading 會去拿通用範例 request/index.ts 裡的 showLoading。
** 當然如果不需要全域性載入動畫,整個 loading 也都可以去掉 **
3. 總結下 request/index.ts 和 api/login.ts 裡的引數有什麼不同
request/index.ts 裡可以建多個範例,一般以 baseURL 來判斷是否要多個,它的引數是當前url下的通用引數,攔截規則也是;
api/login.ts 是具體的請求,它的大部分引數是url和請求傳參。同一個 baseURL 下有的請求有特殊的要求,那你就可以去加一些引數。
總的來說,request/index.ts 是對 baseURL 一樣的請求的封裝,request/request.ts 是對所有請求的封裝
4. 優化
- 因為 Easy Mock 的介面支援跨域,所以沒有配到代理裡去,如果是正常開發介面,還需要修改
vite.config.ts裡的proxy。不過我們之前的教學裡已有代理設定說明,這裡便不再贅述 baseURL還可以放在env變數裡,以便區分開發環境和生產環境- ** 刪除
loading,這裡只是為了提供一種思路