如何在 CentOS 8/RHEL 8 上安裝和設定 Nagios Core
Nagios 是一個自由開源的網路和警報引擎,它用於監控各種裝置,例如網路裝置和網路中的伺服器。它支援 Linux 和 Windows,並提供了直觀的 Web 介面,可讓你輕鬆監控網路資源。經過專業設定後,它可以在伺服器或網路裝置下線或者故障時向你發出郵件警報。在本文中,我們說明了如何在 RHEL 8/CentOS 8 上安裝和設定 Nagios Core。
Nagios Core 的先決條件
在開始之前,請先檢查並確保有以下各項:
- RHEL 8/CentOS 8 環境
- 能通過 SSH 存取該環境
- 快速穩定的網際網路連線
滿足上述要求後,我們開始吧!
步驟 1:安裝 LAMP
為了使 Nagios 能夠按預期工作,你需要安裝 LAMP 或其他 Web 軟體,因為它們將在瀏覽器上執行。為此,請執行以下命令:
# dnf install httpd mariadb-server php-mysqlnd php-fpm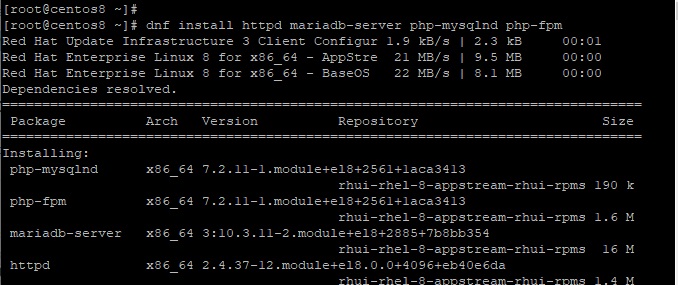
你需要確保 Apache Web 伺服器已啟動並正在執行。為此,請使用以下命令啟用並啟動 Apache 伺服器:
# systemctl start httpd# systemctl enable httpd
檢查 Apache 伺服器執行狀態:
# systemctl status httpd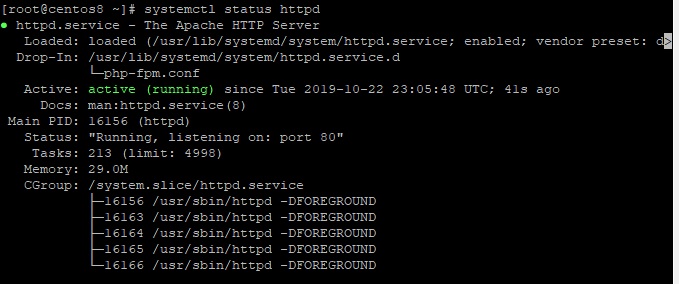
接下來,我們需要啟用並啟動 MariaDB 伺服器,執行以下命令:
# systemctl start mariadb# systemctl enable mariadb
要檢查 MariaDB 狀態,請執行:
# systemctl status mariadb
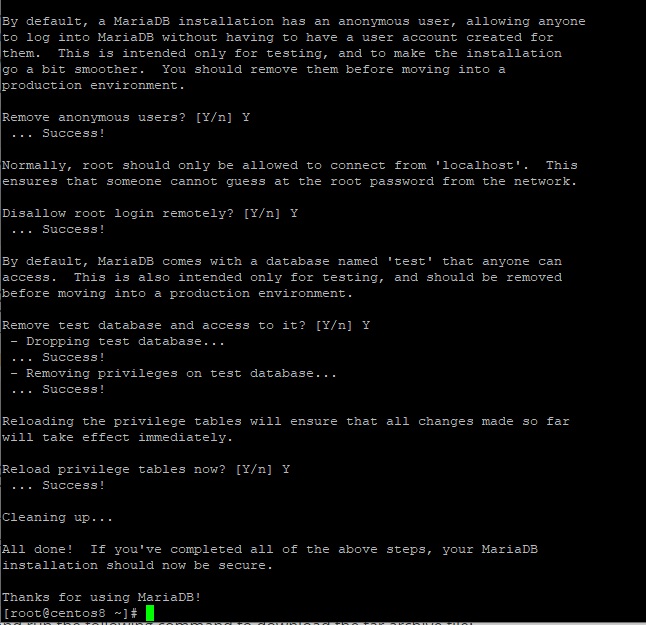
另外,你可能會考慮加強或保護伺服器,使其不容易受到未經授權的存取。要保護伺服器,請執行以下命令:
# mysql_secure_installation確保為你的 MySQL 範例設定一個強密碼。對於後續提示,請輸入 “Y” 並按回車。
步驟 2:安裝必需的軟體包
除了安裝 LAMP 外,還需要一些其他軟體包來安裝和正確設定 Nagios。因此,如下所示安裝軟體包:
# dnf install gcc glibc glibc-common wget gd gd-devel perl postfix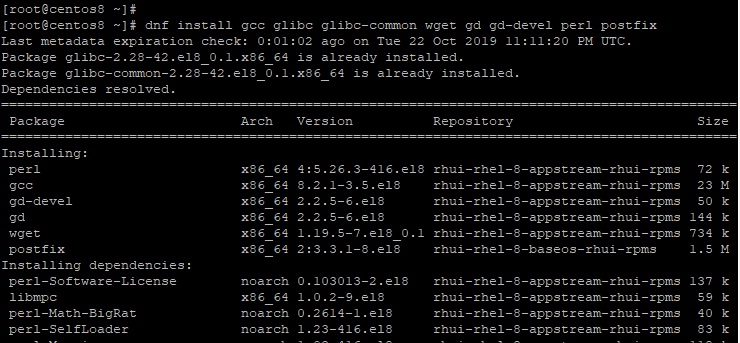
步驟 3:建立 Nagios 使用者帳戶
接下來,我們需要為 Nagios 使用者建立一個使用者帳戶。為此,請執行以下命令:
# adduser nagios# passwd nagios
現在,我們需要為 Nagios 建立一個組,並將 Nagios 使用者新增到該組中。
# groupadd nagiosxi現在新增 Nagios 使用者到組中:
# usermod -aG nagiosxi nagios另外,將 Apache 使用者新增到 Nagios 組:
# usermod -aG nagiosxi apache
步驟 4:下載並安裝 Nagios Core
現在,我們可以繼續安裝 Nagios Core。Nagios 4.4.5 的最新穩定版本於 2019 年 8 月 19 日發布。但首先,請從它的官方網站下載 Nagios tarball 檔案。
要下載 Nagios Core,請首進入 /tmp 目錄:
# cd /tmp接下來下載 tarball 檔案:
# wget https://assets.nagios.com/downloads/nagioscore/releases/nagios-4.4.5.tar.gz
下載完 tarball 檔案後,使用以下命令將其解壓縮:
# tar -xvf nagios-4.4.5.tar.gz接下來,進入未壓縮的資料夾:
# cd nagios-4.4.5按此順序執行以下命令:
# ./configure --with-command-group=nagcmd# make all# make install# make install-init# make install-daemoninit# make install-config# make install-commandmode# make install-exfoliation要設定 Apache,請執行以下命令:
# make install-webconf步驟 5:設定 Apache Web 伺服器身份驗證
接下來,我們將為使用者 nagiosadmin 設定身份驗證。請注意不要更改該使用者名稱,否則,可能會要求你進一步的設定,這可能很繁瑣。
要設定身份驗證,請執行以下命令:
# htpasswd -c /usr/local/nagios/etc/htpasswd.users nagiosadmin
系統將提示你輸入 nagiosadmin 使用者的密碼。輸入並按要求確認密碼。在本教學結束時,你將使用該使用者登入 Nagios。
為使更改生效,請重新啟動 Web 伺服器:
# systemctl restart httpd步驟 6:下載並安裝 Nagios 外掛
外掛可以擴充套件 Nagios 伺服器的功能。它們將幫助你監控各種服務、網路裝置和應用。要下載外掛的 tarball 檔案,請執行以下命令:
# wget https://nagios-plugins.org/download/nagios-plugins-2.2.1.tar.gz接下來,解壓 tarball 檔案並進入到未壓縮的外掛資料夾:
# tar -xvf nagios-plugins-2.2.1.tar.gz# cd nagios-plugins-2.2.1要安裝外掛,請編譯原始碼,如下所示:
# ./configure --with-nagios-user=nagios --with-nagios-group=nagiosxi# make# make install步驟 7:驗證和啟動 Nagios
成功安裝 Nagios 外掛後,驗證 Nagios 設定以確保一切良好,並且設定中沒有錯誤:
# /usr/local/nagios/bin/nagios -v /usr/local/nagios/etc/nagios.cfg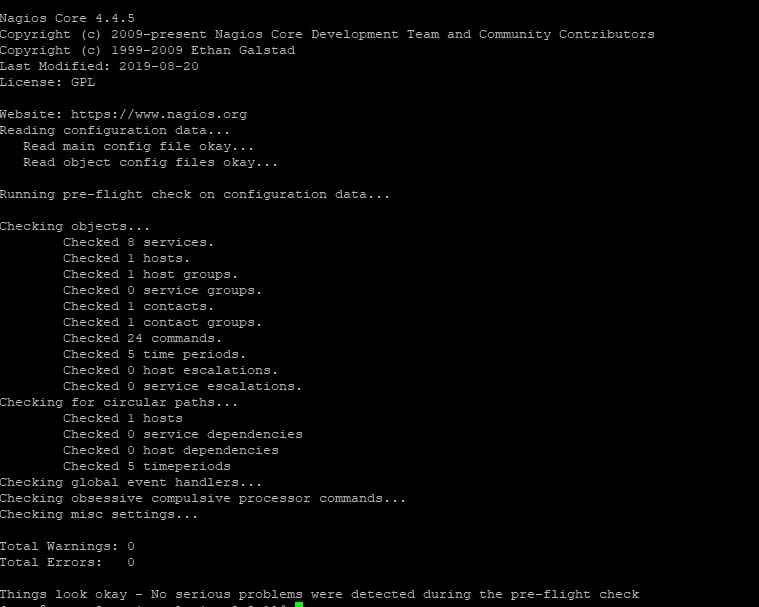
接下來,啟動 Nagios 並驗證其狀態:
# systemctl start nagios# systemctl status nagios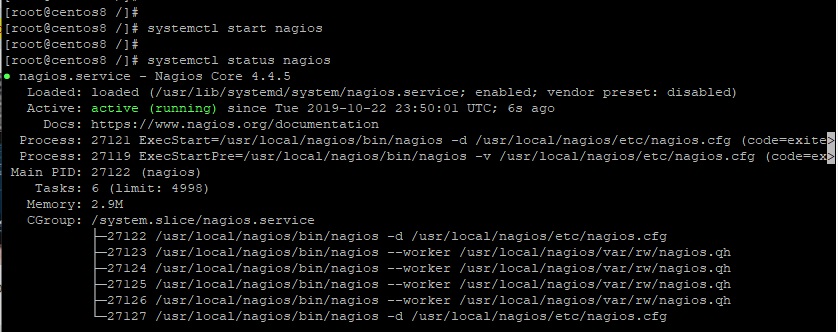
如果系統中有防火牆,那麼使用以下命令允許 ”80“ 埠:
# firewall-cmd --permanent --add-port=80/tcp# firewall-cmd --reload步驟 8:通過 Web 瀏覽器存取 Nagios 面板
要存取 Nagios,請開啟伺服器的 IP 地址,如下所示:http://server-ip/nagios 。
這將出現一個彈出視窗,提示輸入我們在步驟 5 建立的使用者名稱和密碼。輸入憑據並點選“Sign In”。
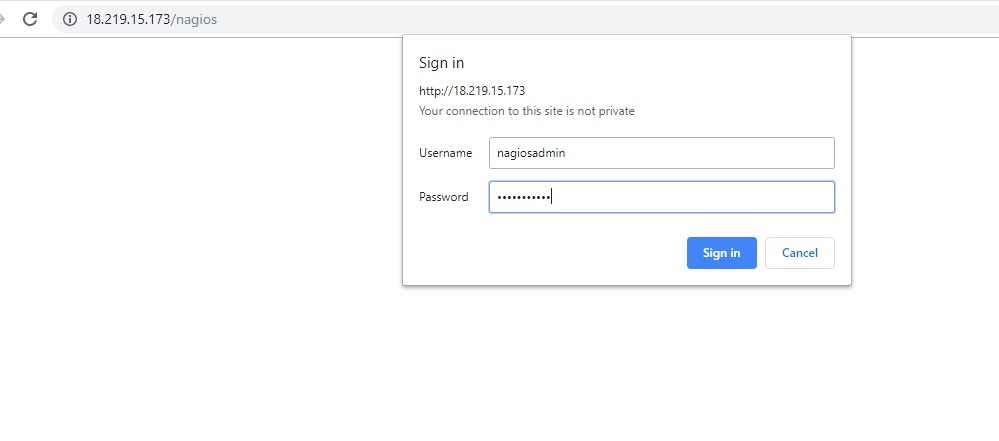
這將引導你到 Nagios 面板,如下所示:
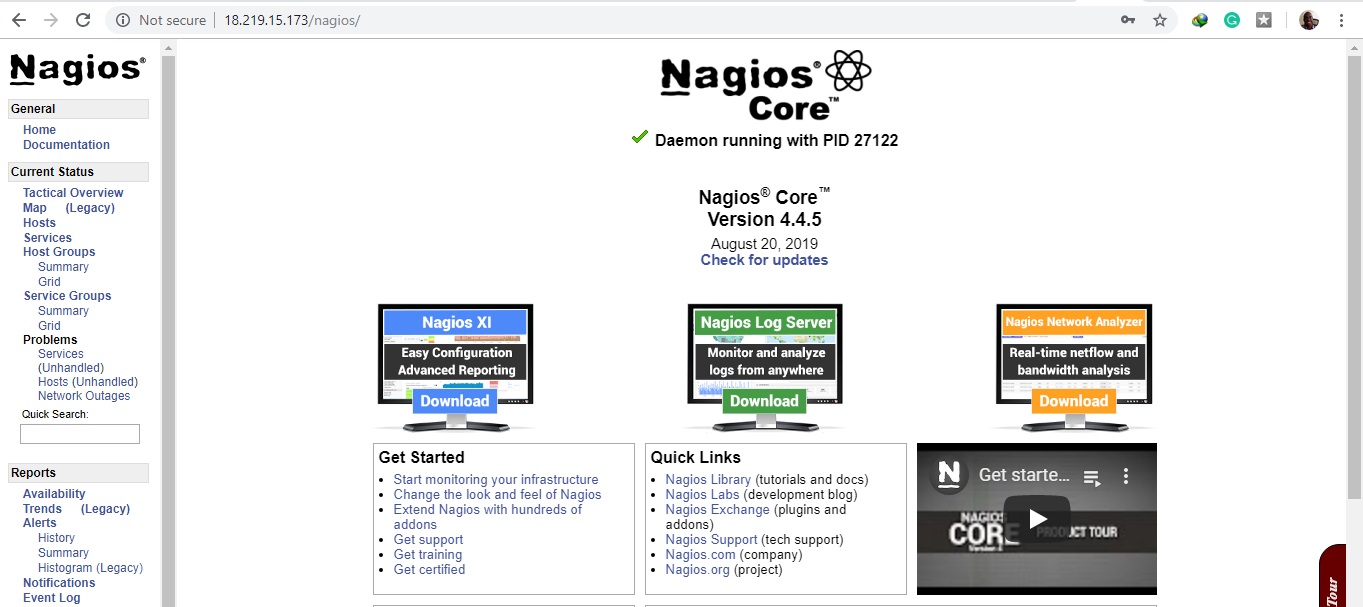
我們終於成功地在 CentOS 8 / RHEL 8 上安裝和設定了 Nagios Core。歡迎你的反饋。