26. 乾貨系列從零用Rust編寫正反向代理,如何釋出Rust專案到Docker
wmproxy
wmproxy已用Rust實現http/https代理, socks5代理, 反向代理, 靜態檔案伺服器,四層TCP/UDP轉發,內網穿透,後續將實現websocket代理等,會將實現過程分享出來,感興趣的可以一起造個輪子
專案地址
國內: https://gitee.com/tickbh/wmproxy
github: https://github.com/tickbh/wmproxy
容器化
現在伺服器環境已經大部分轉為了docker這類容器類的部署方式,因為容器化可以與宿主機隔離,又可以虛擬出統一的環境,保證程式在任何系統上表現是一樣的。
我們需要將當前的Rust程式打包成docker的image然後釋出到部署的整個過程。
初始化
- 將專案的原始碼clone下來
git clone https://github.com/tickbh/wmproxy.git
- 安裝
docker desktop版本,需要比較新的版本 - 進入到當前的目錄下執行
docker init,如果提示沒有init則表示docker版本過低,建議升級
docker init
Welcome to the Docker Init CLI!

This utility will walk you through creating the following files with sensible defaults for your project:
  - .dockerignore
  - Dockerfile
  - compose.yaml

Let's get started!

? What application platform does your project use? Rust
? What version of Rust do you want to use? 1.71.1
? What port does your server listen on? 82
- 執行完畢後將會建立三個檔案,我們來分析
Dockerfile處理了什麼
# 拉取了可以編譯的RUST版本
FROM rust:${RUST_VERSION}-slim-bullseye AS build
ARG APP_NAME
WORKDIR /app

# 掛載相應的檔案目錄結構
RUN --mount=type=bind,source=src,target=src \
    --mount=type=bind,source=Cargo.toml,target=Cargo.toml \
    --mount=type=bind,source=.cargo,target=.cargo \
    --mount=type=bind,source=Cargo.lock,target=Cargo.lock \
    --mount=type=cache,target=/app/target/ \
    --mount=type=cache,target=/usr/local/cargo/registry/ \
    <<EOF
set -e
cargo build --locked --release
cp ./target/release/$APP_NAME /bin/wmproxy
EOF

# 用較小的發行版本做載體,保證較小的image
# 目標image中不包含Rust環境
FROM debian:bullseye-slim AS final

ARG UID=10001
RUN adduser \
    --disabled-password \
    --gecos "" \
    --home "/nonexistent" \
    --shell "/sbin/nologin" \
    --no-create-home \
    --uid "${UID}" \
    appuser
USER root

# 拷貝編譯好的可執行檔案到目標系統,到時可直接執行目標程式
COPY --from=build /bin/wmproxy /bin/
# 拷貝相應的組態檔
COPY config /etc/config

EXPOSE 82:82 8837:8837 8090:8090
- 接下來編譯映象
docker build --tag wmproxy .
按照正常情況將會像正常環境編譯Rust專案編譯成image,但是在國內的環境下,下載crates.io資料可能有頻繁失敗的可能,此時應該把Cargo設定成國內源,Cargo的設定是和git類似的分層結構,即當前目錄會優先尋找當前,然後再往上級推,最終找使用者目錄下的。例如/projects/foo/bar/baz呼叫Cargo
/projects/foo/bar/baz/.cargo/config
/projects/foo/bar/.cargo/config
/projects/foo/.cargo/config
/projects/.cargo/config
/.cargo/config
$HOME/.cargo/config
所以此時我們在專案下建立.cargo/config.toml的檔案,其中的內容為
[source.crates-io]
replace-with = 'ustc'
[source.ustc]
registry = "git://mirrors.ustc.edu.cn/crates.io-index"
[http]
check-revoke = false
如此我們在重新編譯一次,將顯示錶示成功
...
 => exporting to image                                                             0.1s
 => => exporting layers                                                            0.1s
 => => writing image sha256:ca62d7bf9c2684912b27994c2d09917a4836c0fd63867cc9765bf  0.0s
 => => naming to docker.io/library/wmproxy                                         0.0s
- 查詢image
此時可以利用docker images查詢當前的images
REPOSITORY                        TAG                                        IMAGE ID       CREATED         SIZE
wmproxy                           latest                                     ca62d7bf9c26   2 minutes ago   101MB
- 執行docker
因為代理端有監聽82(http反向),8090代理,8837控制端,並且需要將原生的組態檔對映到容器中。
docker run -p 82:82 -p 8090:8090 -p 127.0.0.1:8837:8837 --name proxy_bash -v $PWD/reverse.toml:/etc/config/reverse.toml:rw wmproxy /bin/./wmproxy -c /etc/config/reverse.toml
通過netstat可以檢視到
TCP    0.0.0.0:82             0.0.0.0:0              LISTENING
TCP    0.0.0.0:8090           0.0.0.0:0              LISTENING
TCP    127.0.0.1:8837         0.0.0.0:0              LISTENING
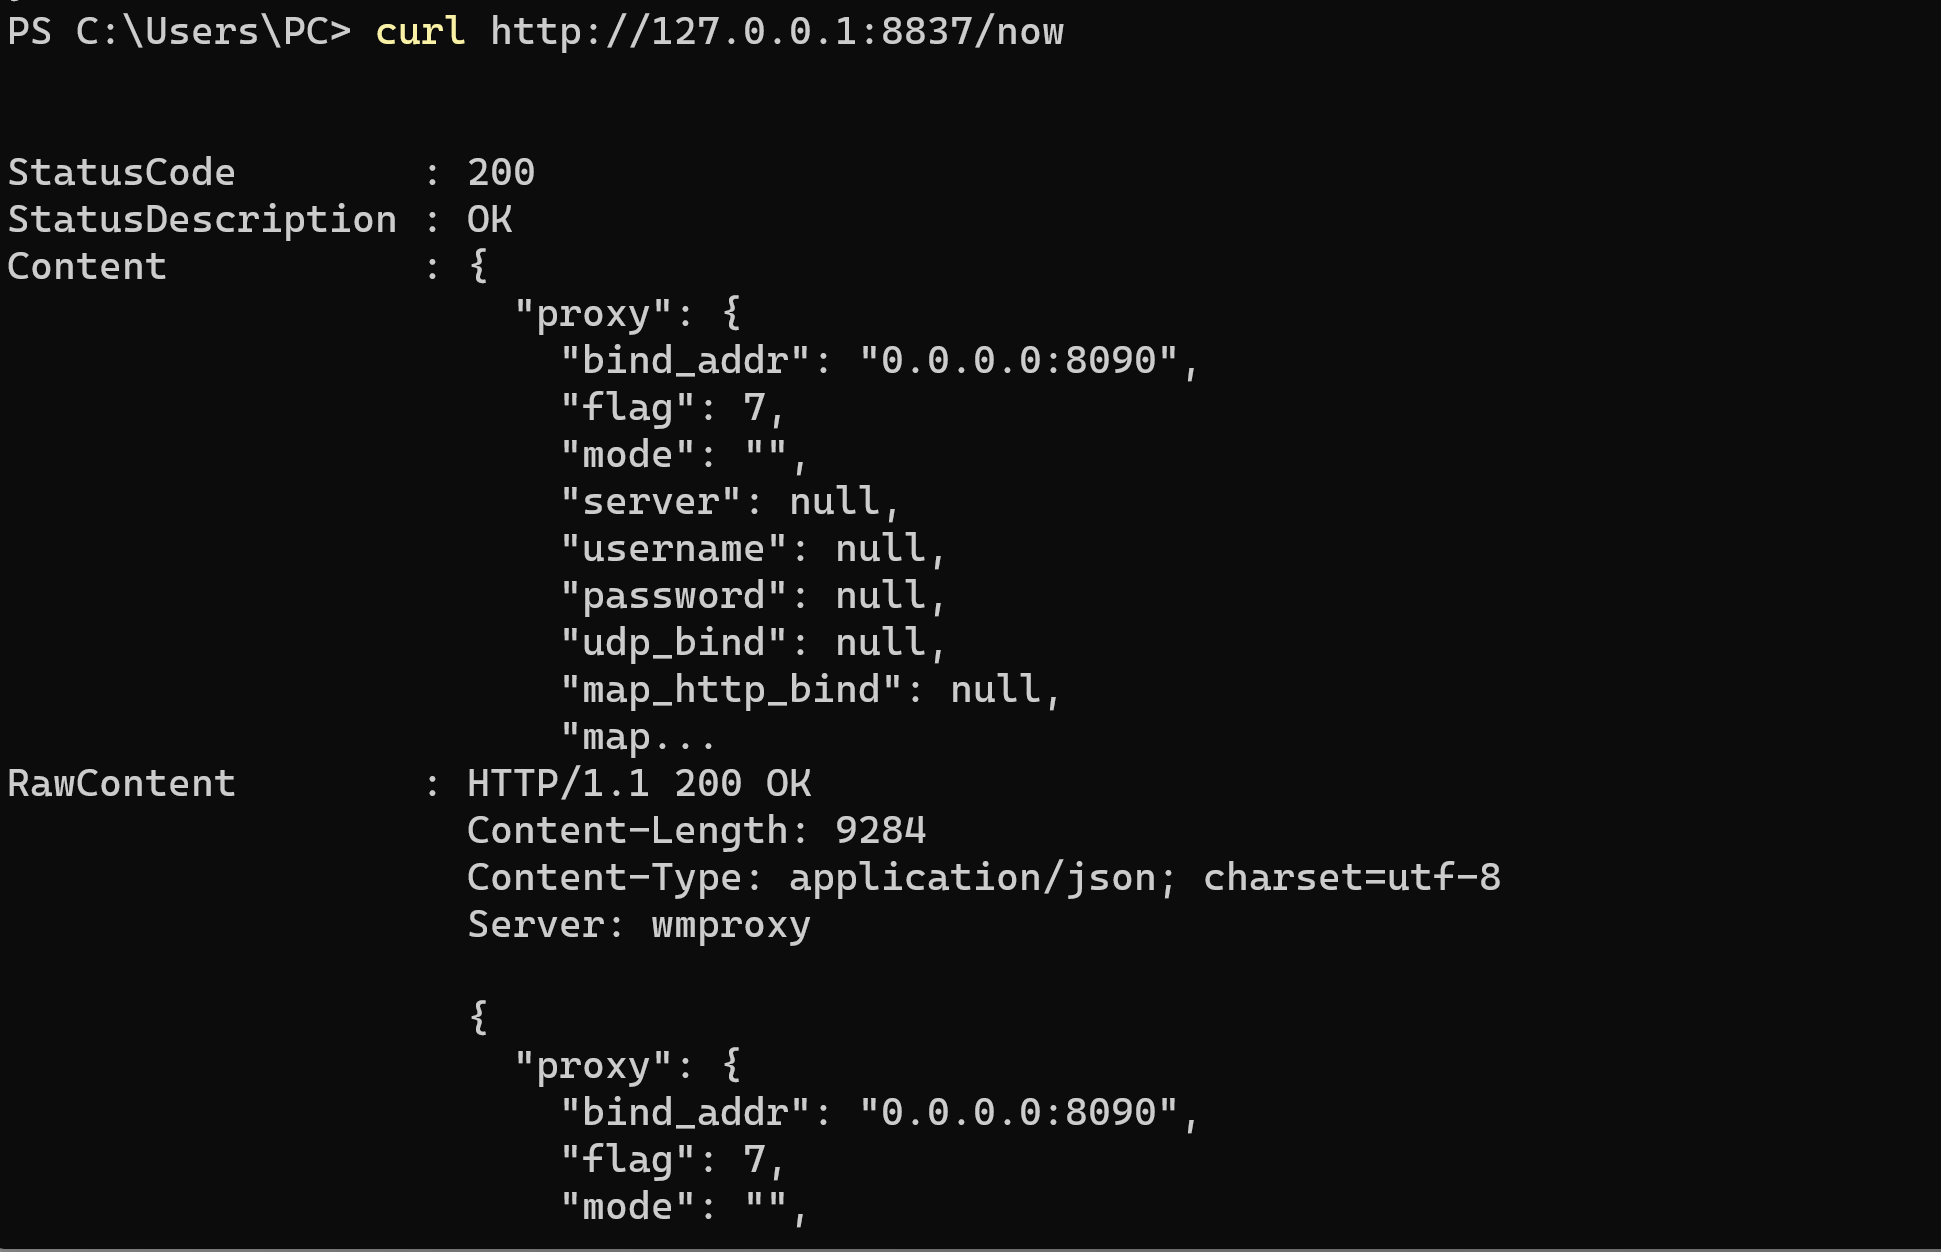
檢視當前伺服器狀態curl http://127.0.0.1:8837/now

可以正常的獲取當前設定
8090為http代理,接下來測試代理是否工作
export http_proxy=http://127.0.0.1:8090/
接下來進行curl測試

可以通過代理正常存取,關掉docker就會返回錯誤。
釋出image
-
在
https://hub.docker.com/註冊登陸你的賬號 -
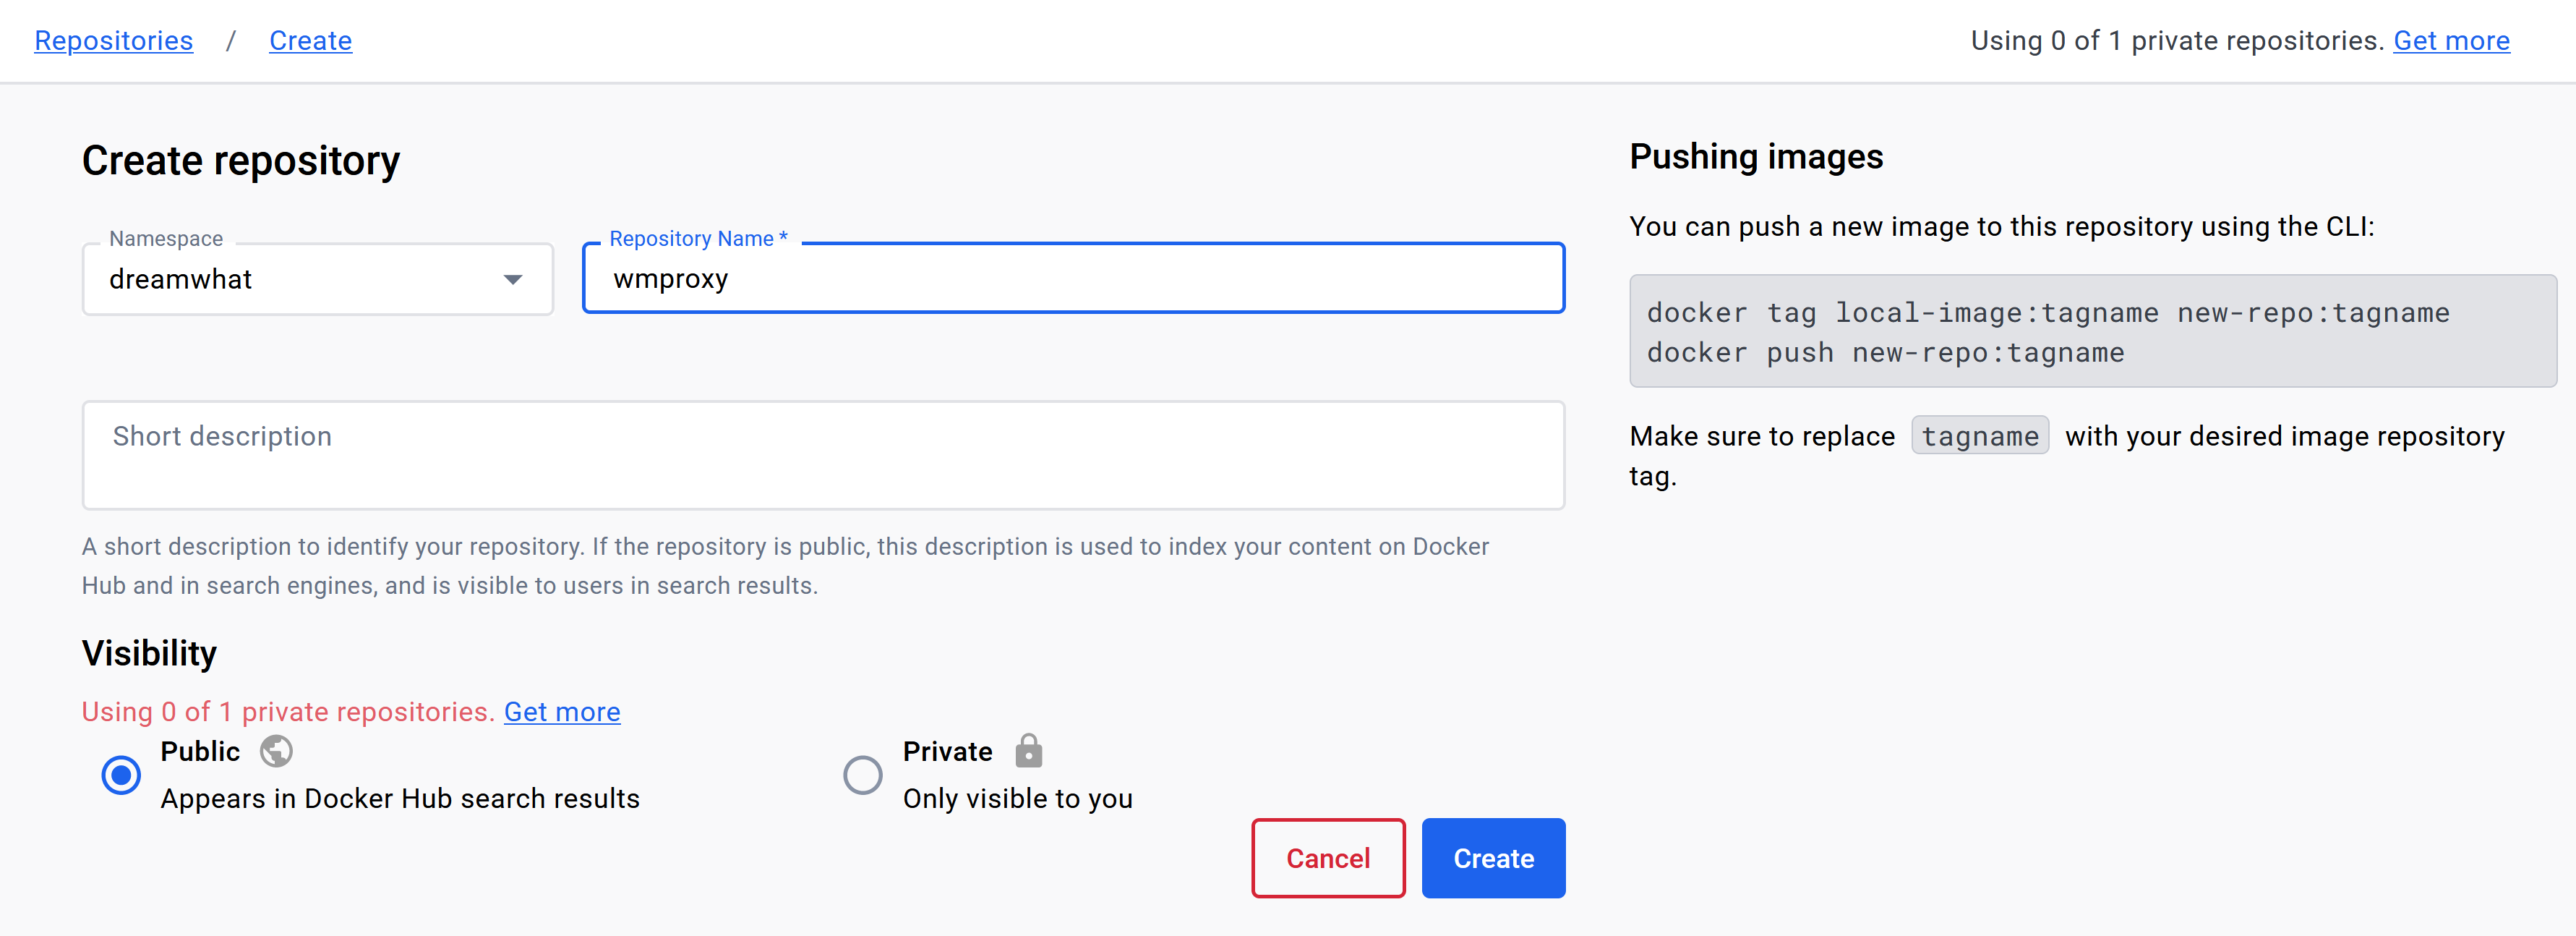
建立
respository

-
建立成功後,本地images打標籤
docker tag wmproxy dreamwhat/wmporxy
- 登陸seesion到docker hub
docker login
如果安裝desktop版會自動讀取token
5. 接下來直接把目標映象push
docker push dreamwhat/wmproxy
此時後臺上可以檢視到,表示已發表成功

-
此時可以在別的機器拉取遠端庫
docker pull dreamwhat/wmproxy

-
直接執行docker,可以檢視已經可以執行成功
docker run -p 82:82 -p 8090:8090 -p 127.0.0.1:8837:8837 --name proxy_bash -v $PWD/reverse.toml:/etc/config/reverse.toml:rw dreamwhat/wmproxy /bin/./wmproxy -c /etc/config/reverse.toml
至此已經可以執行完畢
結語
容器化已經在伺服器中屬於密不可分的一環,包括k8s等編排技術也是基於容器化的基本上去大規模部署的,保證不會因為系統的差別而帶來不一致的體驗。
點選 [關注],[在看],[點贊] 是對作者最大的支援