python+appium自動化測試-pytest+allure測試報告【建議收藏】
來自APP Android端自動化測試初學者的筆記,寫的不對的地方大家多多指教哦 之前釋出的python+appium自動化測試-pytest+allure測試報告有不懂的朋友可以加軟體測試群:175317069 ,群裡大牛分享經驗,還有海量免費的軟體測試資源。
一、Allure安裝
1、pytest和allure外掛安裝
pip install allure-pytest
pip install pytest
複製程式碼
2、Allure幫助檔案
https://docs.qameta.io/allure/#_about
複製程式碼
3、Allure安裝
a.scoop install allure b.使用安裝包安裝
- allure官網下載:[github.com/allure-fram…]
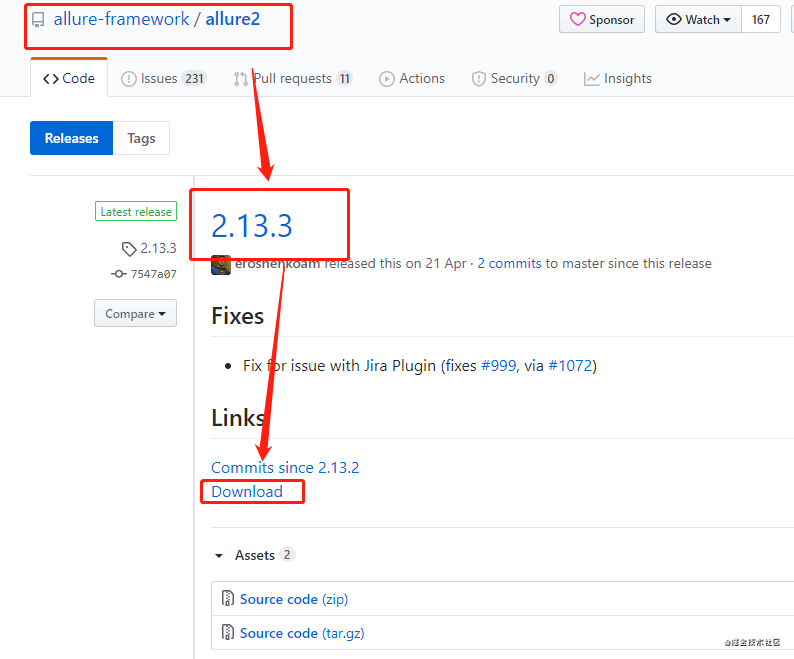
- allure2下載下來是一個zip的壓縮包,我們要解壓至自己的檔案目錄下(可解壓放至專案的測試用例下或python安裝目錄下),自己可找到檔案即可。
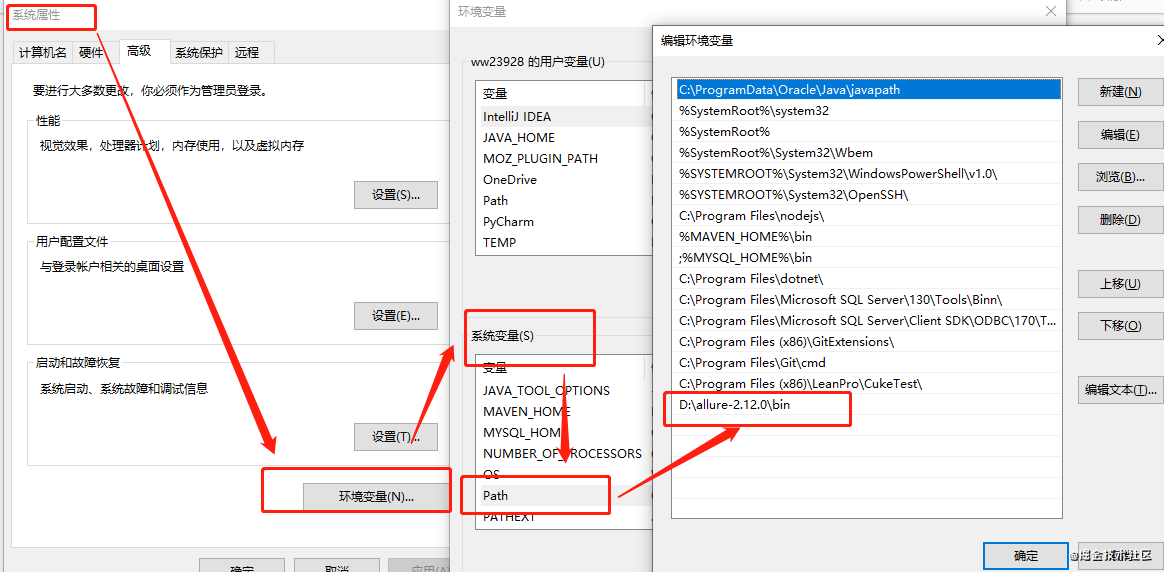
- 開啟allure2目錄,找到bin目錄,複製bin檔案目錄, 然後進行環境變數的設定,設定環境變數的目的就是讓系統無論在哪個目錄下都可以執行allure2。
- 環境變數設定:(桌面——我的電腦——右鍵屬性——高階系統設定——環境變數——系統變數——Path——編輯環境變數——把我們上面複製的目錄路徑新增至環境變數中即可)
- 設定好後,開啟cmd終端,輸入allure,出現以下幫助檔案,就說明設定成功了。
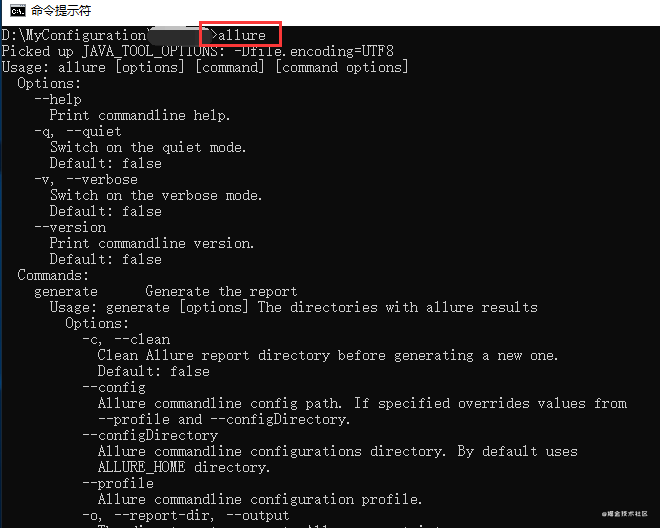
若後續有新版本,建議使用最新的版本
二、生成json格式的測試報告
執行環境:
- 裝置:U4AIUKFAL7W4MJLR
- 測試app:微博APP(V10.12.0)Andriod版
- 測試功能:賬號密碼登入
方法一:在終端(terminal),生成json格式測試報告
終端(terminal)輸入以下內容,執行
pytest 執行的py檔案 --alluredir=測試報告存放地址
例如:
pytest add_weibo_test.py --alluredir=../report/json
複製程式碼
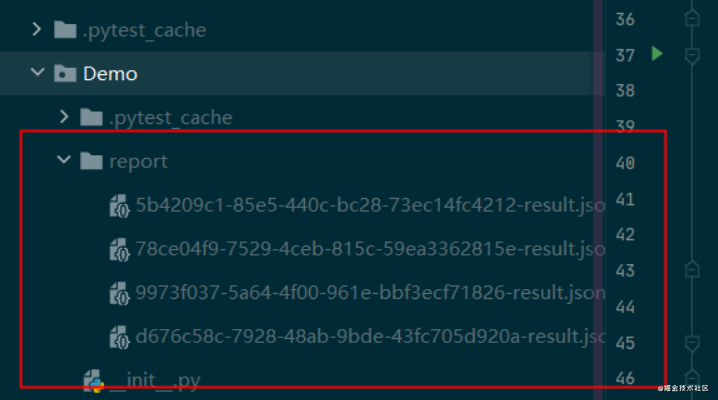
執行測試用例,在測試報告存放位置會生成一份或多份json或xml格式的測試報告
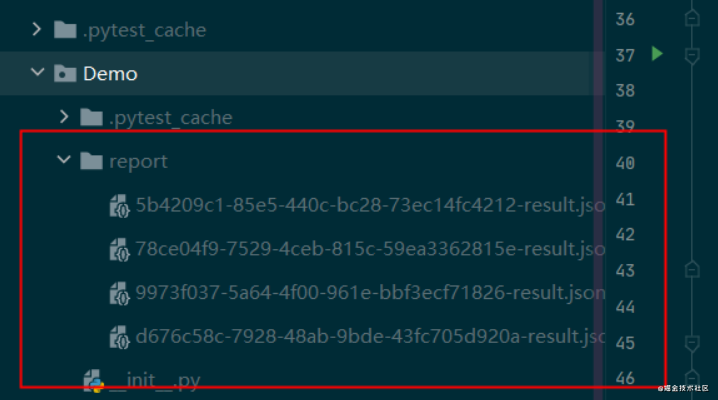
方法二:在測試用例設定Additional Arguments,生成json格式測試報告
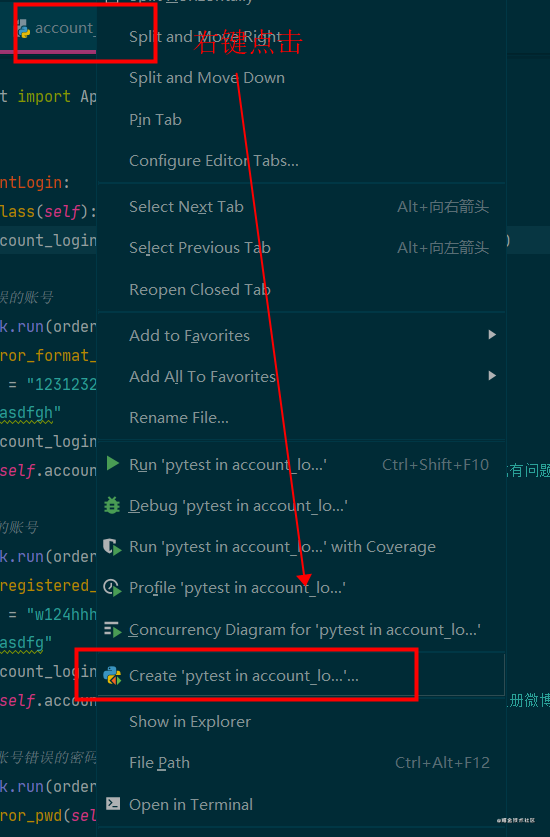
1.選擇需要執行的測試用例,右鍵點選Create Run Configuration:"測試用例檔名「
2.進入後在Additional Arguments輸入:- -alluredir=生成的json格式測試報告存放的位置
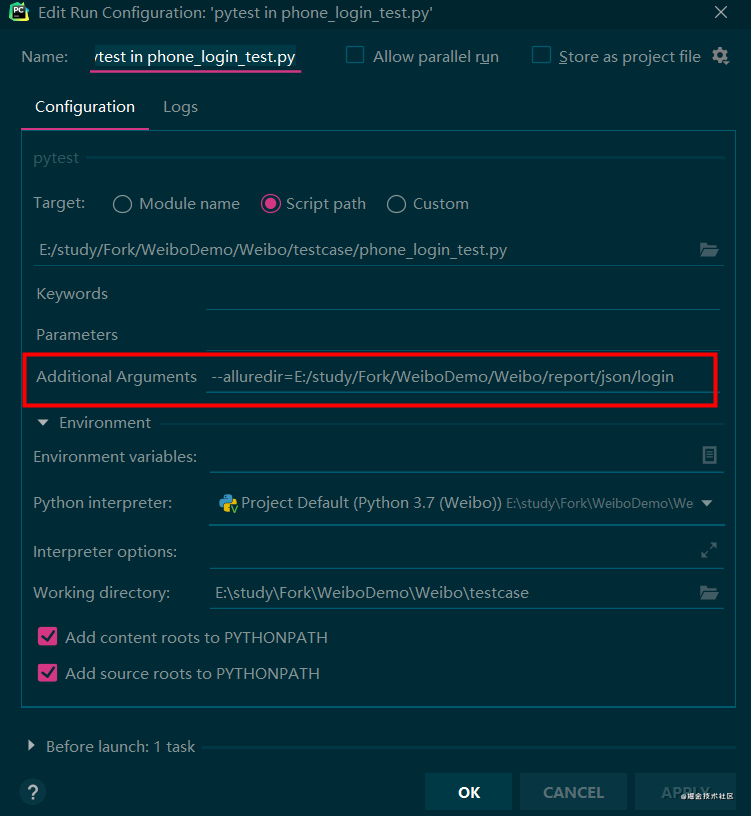
3.設定完後,點選APPLY→OK,在測試函數中執行測試檔案
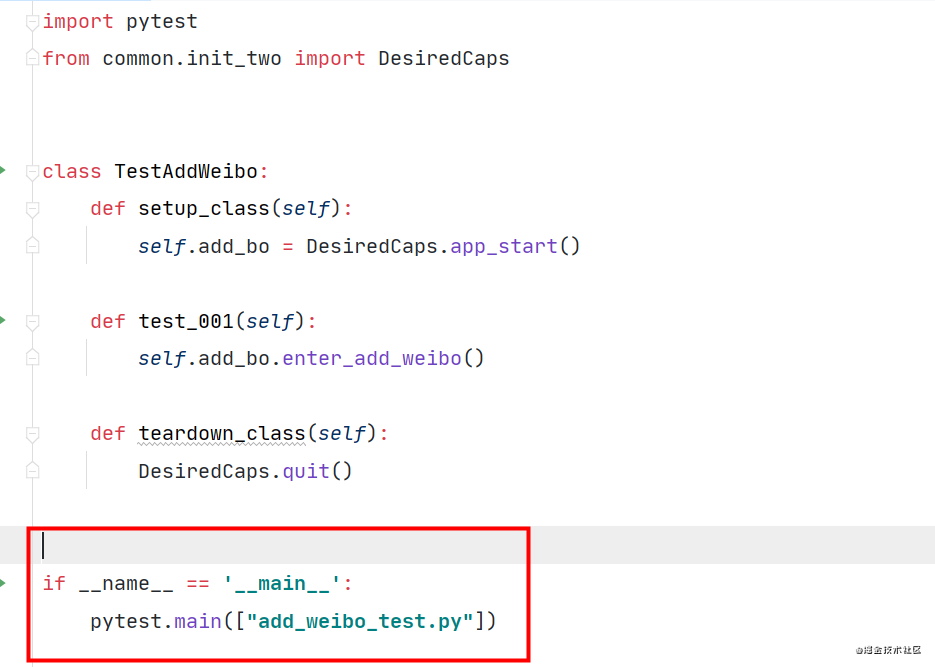
執行後在測試報告存放位置會生成一份或多份json或xml格式的測試報告
三、測試報告由json格式轉換為html格式
在終端(terminal)轉換
1.測試用例執行完成生成json格式的測試報告後,開啟terminal,輸入命令:
allure generate ./report/ -o ./report/html --clean

./report/:表示執行需要轉換的檔案所在的位置,需要轉換的檔案在report資料夾中
./report/html:表示轉換成功的html檔案存放的位置,即存放在report下的html資料夾中
--clean:表示清除之前的測試報告,因為重複生成相同的測試報告會報錯
複製程式碼
注意:在terminal可以通過cd返回上一級或進入其它檔案
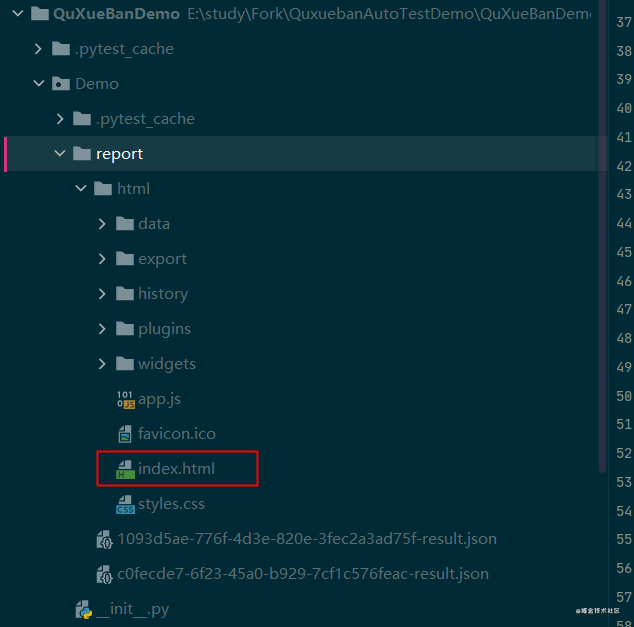
2.執行完成後,在report資料夾下會生成一個html檔案,在html目錄下會生成index.html檔案,即為視覺化報告,如下圖所示
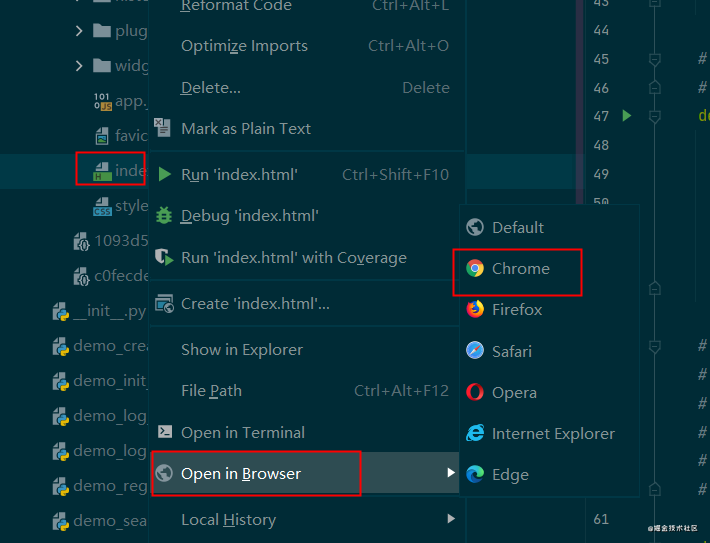
3.開啟html檔案,右鍵點選index.html檔案,選擇open in Broswer,選擇Chrome瀏覽器,如下圖
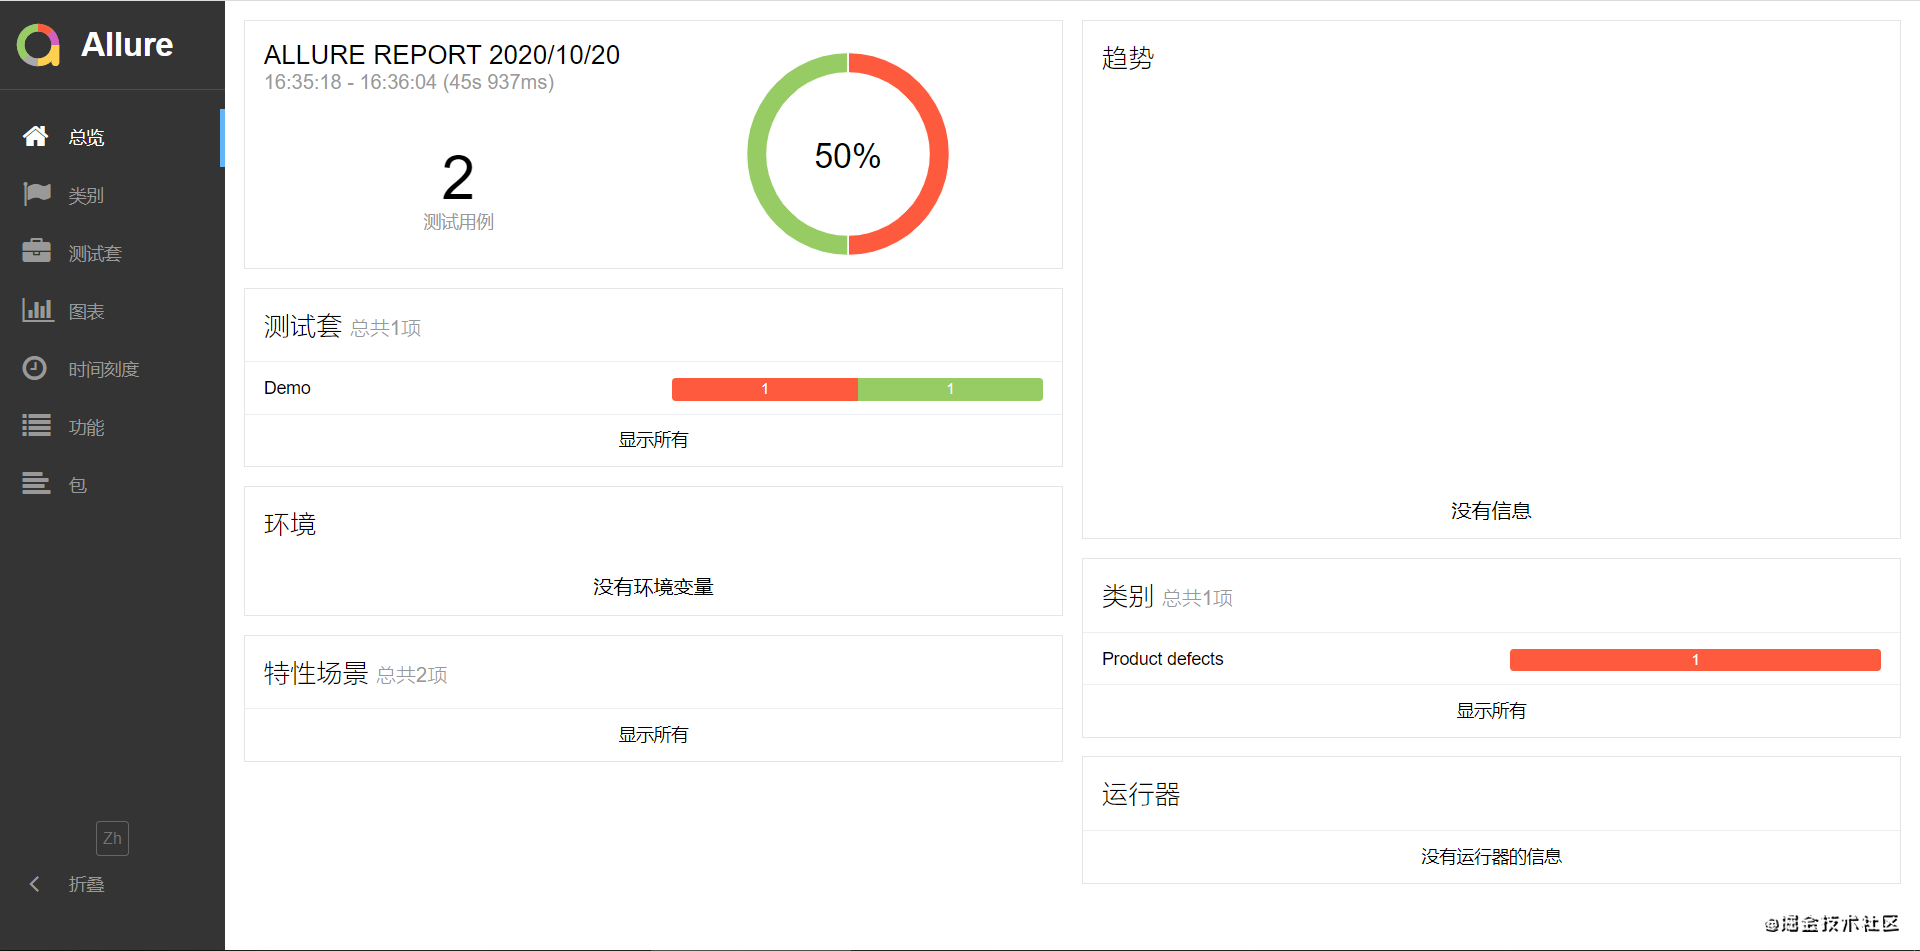
4.谷歌瀏覽器開啟後的測試報告圖片呈現為下圖:
四、Allure相關注解
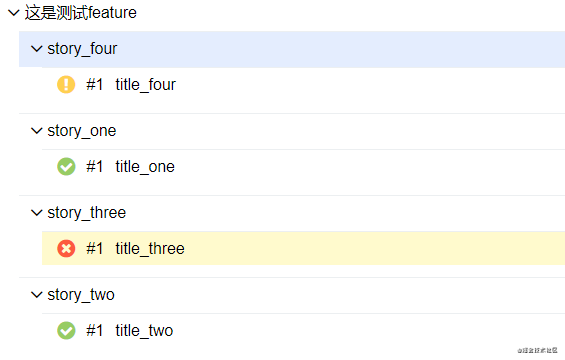
1. @allure.feature:用於描述被測試產品需求
2. @allure.story:用於描述feature的使用者場景,即測試需求,與feature是父子關係
3. @allure.title:使用者描述測試用例的標題,不設定預設為用例名稱
4. @allure.description:用於對測試用例的一些附加描述
5. @allure.step:用於將一些通用的函數作為測試步驟輸出到報告,呼叫此函數的地方會向報告中輸出步驟
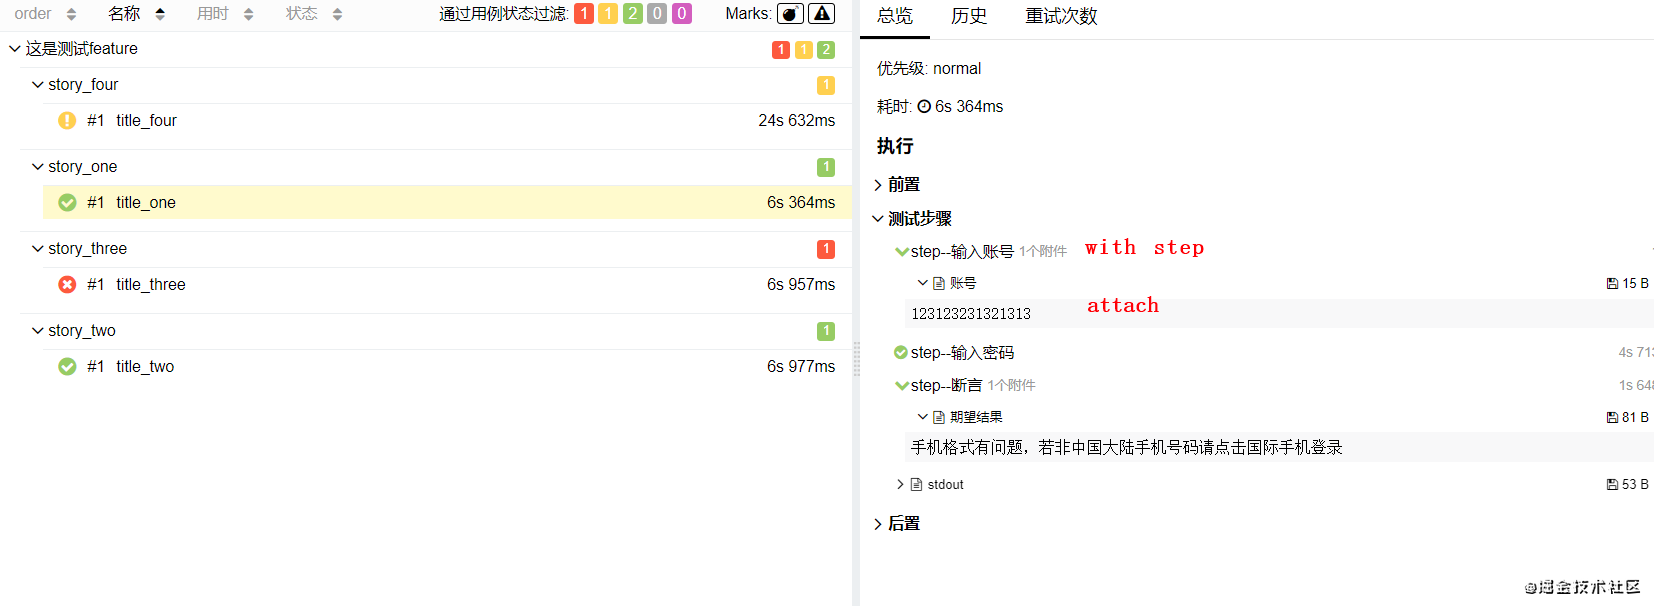
- with allure.step:用於描述測試步驟,將會輸出到報告中
- allure.attach:用於向測試報告中輸入一些附加的資訊,通常是一些測試資料,截圖等
程式碼如下:
# 手機賬號密碼登入測試用例
import allure
import pytest
from common.init import AppStart

@allure.feature("這是測試feature")
class TestAccountPwd:
    def setup_class(self):
        self.account_login_page = AppStart.start().enter_account_login()

    @allure.story("story_one")
    @allure.title("title_one")
    def test_one(self):
        with allure.step("step--輸入賬號"):
            allure.attach("123123231321313", "賬號")
            account = "123123231321313"
        with allure.step("step--輸入密碼"):
            pwd = "asdfgh"
            self.account_login_page.input_account_pwd(account, pwd)
        with allure.step("step--斷言"):
            allure.attach("手機格式有問題,若非中國大陸手機號碼請點選國際手機登入", "期望結果")
            assert self.account_login_page.get_bounced_context() == "手機格式有問題,若非中國大陸手機號碼請點選國際手機登入"
            print("\naccount的值:", account, "\npwd的值:", pwd)

    @allure.story("story_two")
    @allure.title("title_two")
    @allure.step("這是測試step")
    def test_two(self):
        account = "w124hhh77"
        pwd = "asdfg"
        self.account_login_page.input_account_pwd(account, pwd)
        assert self.account_login_page.get_bounced_context() == "你尚未註冊微博,是否立即註冊"
        print("\naccount的值:", account, "\npwd的值:", pwd)

    @allure.story("story_three")
    @allure.title("title_three")
    def test_three(self):
        account = "hhhhhhhhh"
        pwd = "asdfg"
        self.account_login_page.input_account_pwd(account, pwd)
        assert self.account_login_page.get_bounced_context() == "你尚未註冊微博,是否立即註冊"
        print("\naccount的值:", account, "\npwd的值:", pwd)

    @allure.story("story_four")
    @allure.title("title_four")
    @allure.description("description")
    def test_four(self):
        account = "15059941156"
        pwd = "123123"
        self.account_login_page.input_account_pwd(account, pwd)
        assert self.account_login_page.get_account_pwd_tips() == "帳號或密碼錯誤"
        print("\naccount的值:", account, "\npwd的值:", pwd)

    def teardown_class(self):
        AppStart.quit()

if __name__ == '__main__':
    pytest.main(["account_pwd_test.py"])
複製程式碼1.@allure.feature、@allure.story、@allure.title結果如下:

3.@allure.step結果如下:

4.with allure.step和allure.attach結果如下:
