Sublime Text 3設定C/C++編譯執行環境
2021-05-23 08:00:07
- 之前一直使用的VC++ 6.0來編譯執行C語言程式,但是因為每次打中文的註釋,總是會出現亂碼,加上也不能自動補全符號的另一半,所以一直都是用的Sublime Text 3來寫C語言程式碼,再賦值貼上到VC中執行,比較麻煩。本篇教學是對於Sublime Text 3中C/c++環境的設定。
下載安裝MinGW
- 首先下載MinGW,進行安裝,安裝位置可以自定義,我的安裝位置是
D:\MinGW - 安裝完成後,選擇
mingw32-base-bin和mingw32-gcc-g++-bin,右鍵選擇Mark for Installation
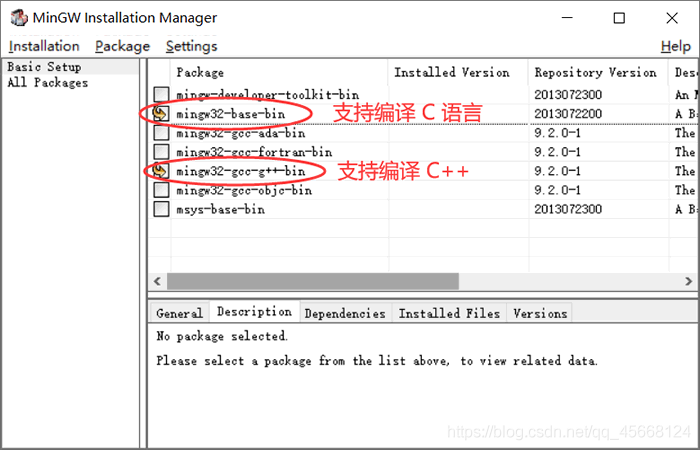
- 左上角選擇
Installation-Apply Changes
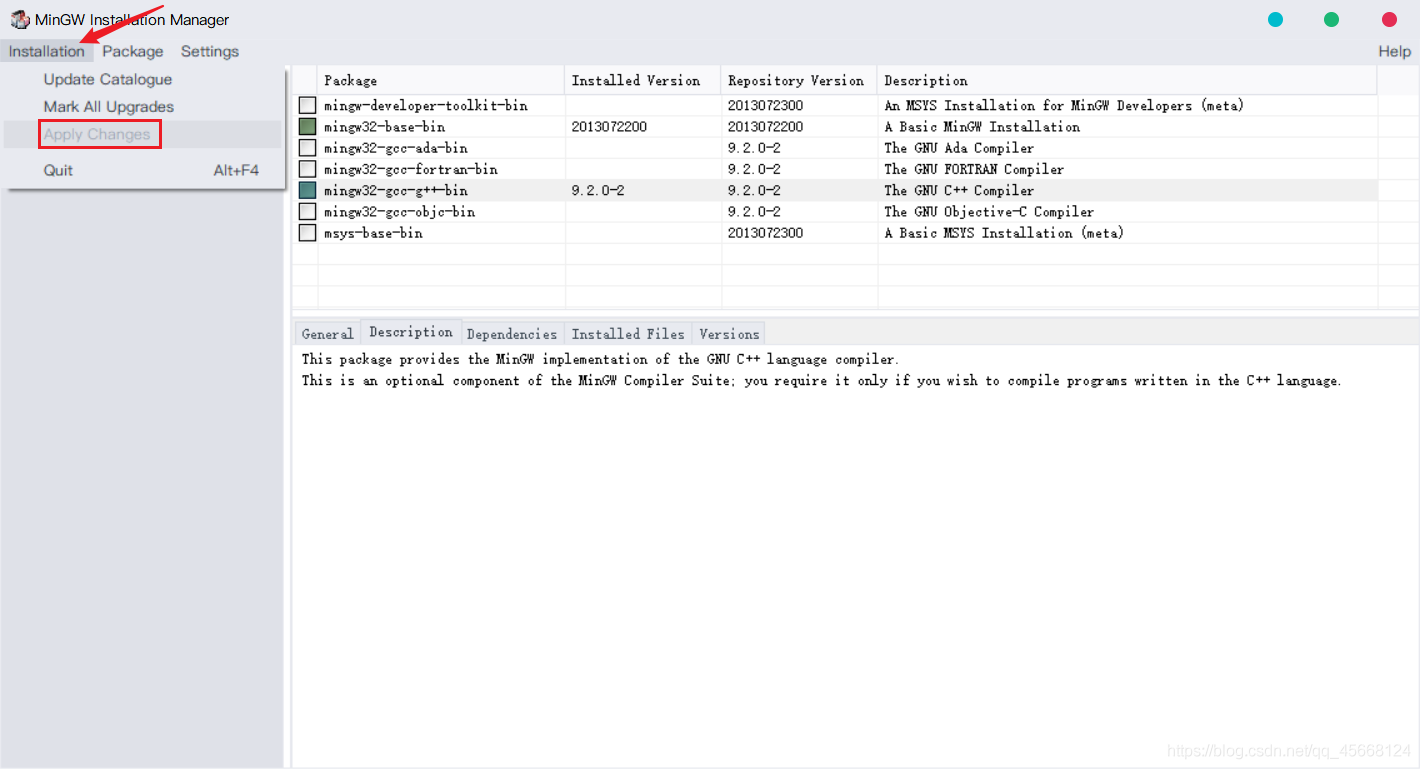
- 再選擇
Apply,安裝完成後,選擇Close
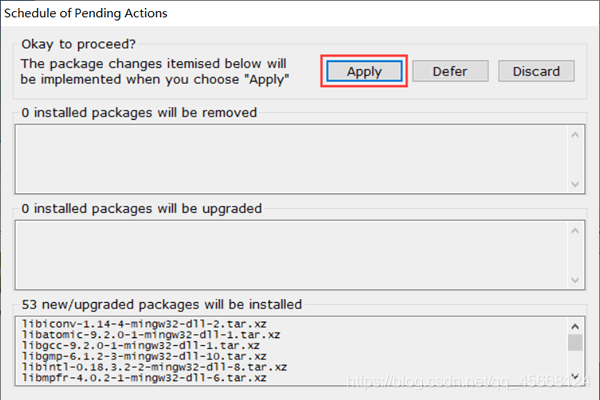
設定環境變數
-
安裝完成後,設定系統環境變數,依次右擊
計算機(我的電腦) -> 屬性 -> 高階系統設定 -> 環境變數- 將
D:\MinGW\bin加入Path--------------尋找gcc編譯器的路徑 - 將
D:\MinGW\include加入include------Include查詢標頭檔案的路徑 - 將
D:\MinGW\lib加入lib------------------標準庫存放的路徑
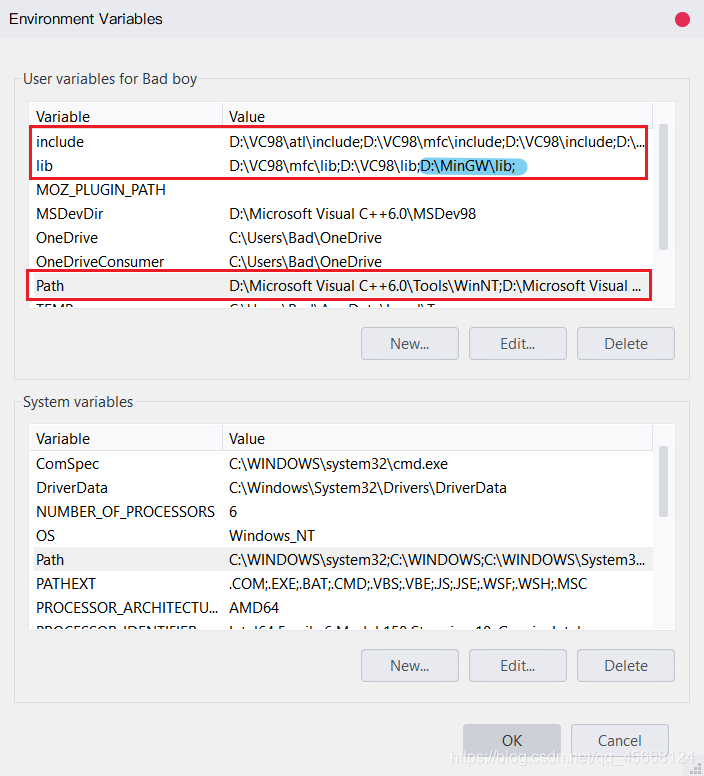
- 將
-
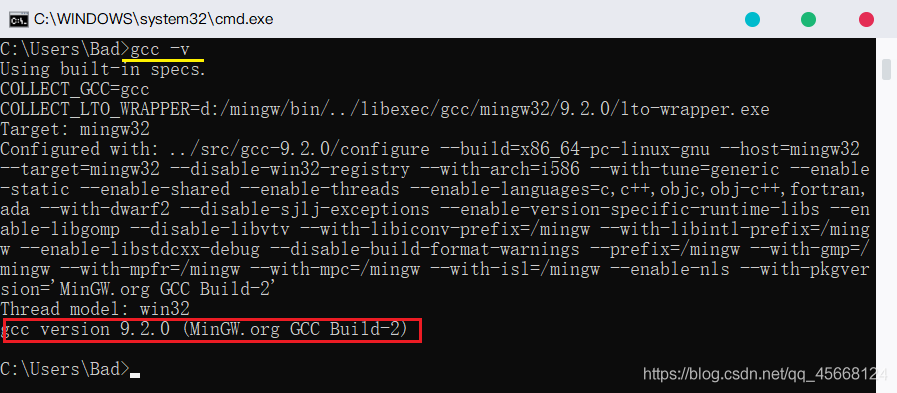
驗證是否設定成功。使用管理員身份執行CMD,輸入gcc -v指令,如果輸出 GCC 編譯器的具體資訊,則表示安裝成功
-
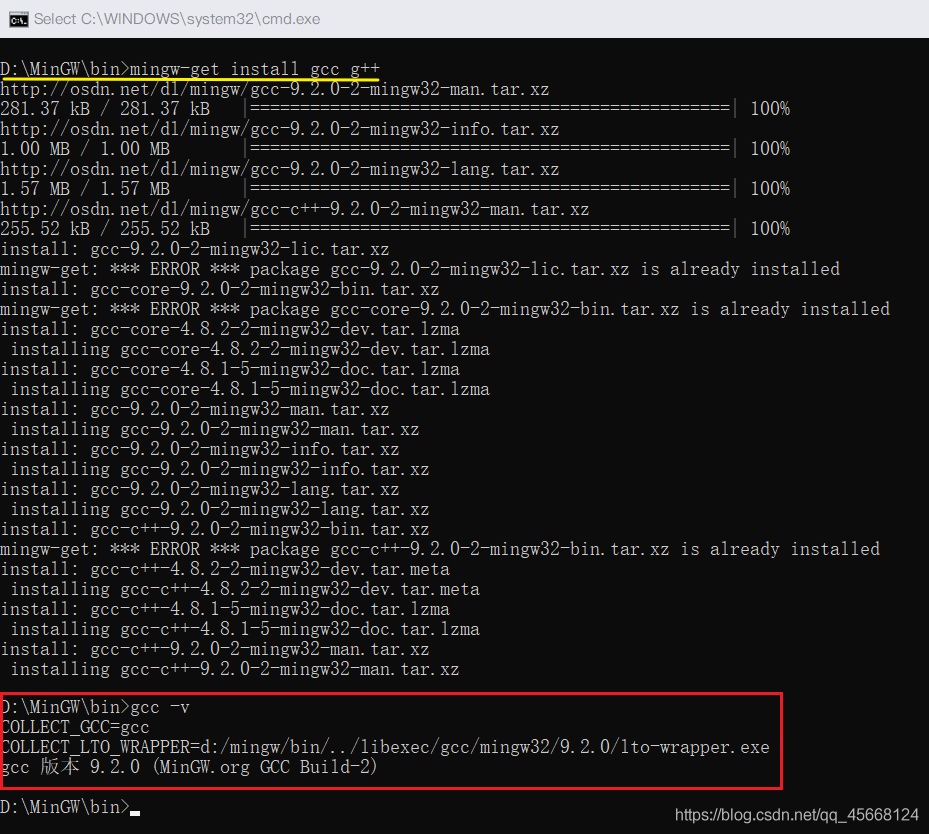
也可能出現
gcc不是內部命令的情況,可能是沒有以管理員身份執行CMD可以做以下嘗試- 以管理員身份執行CMD,再次輸入
gcc -v - 在MinGW的安裝目錄中開啟CMD,輸入
mingw-get install gcc g++執行後,在次檢視gcc的版本

- 以管理員身份執行CMD,再次輸入
設定執行環境
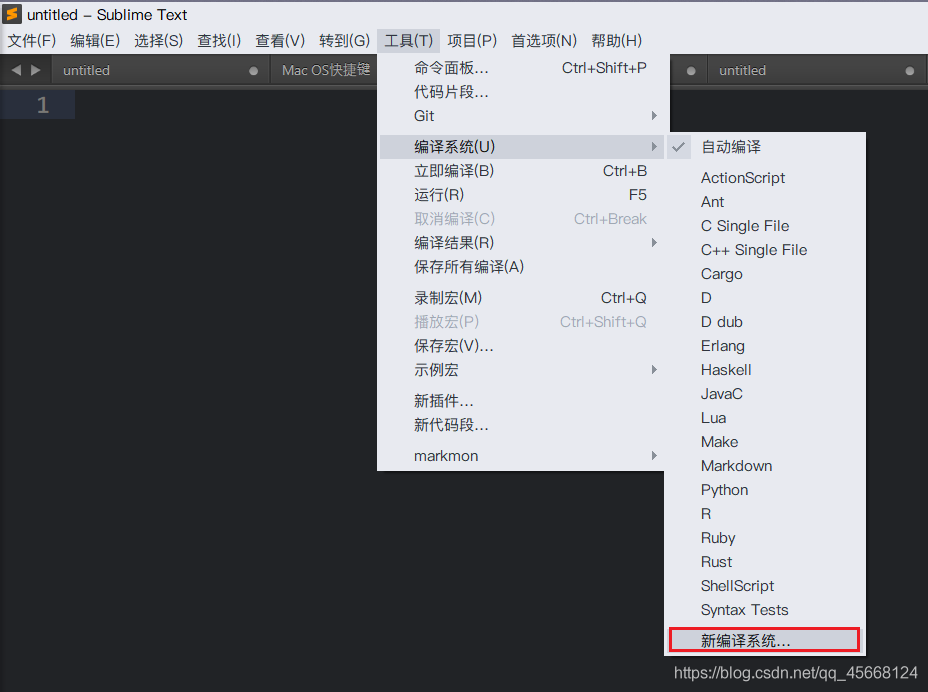
- 開啟sublime,依次點選
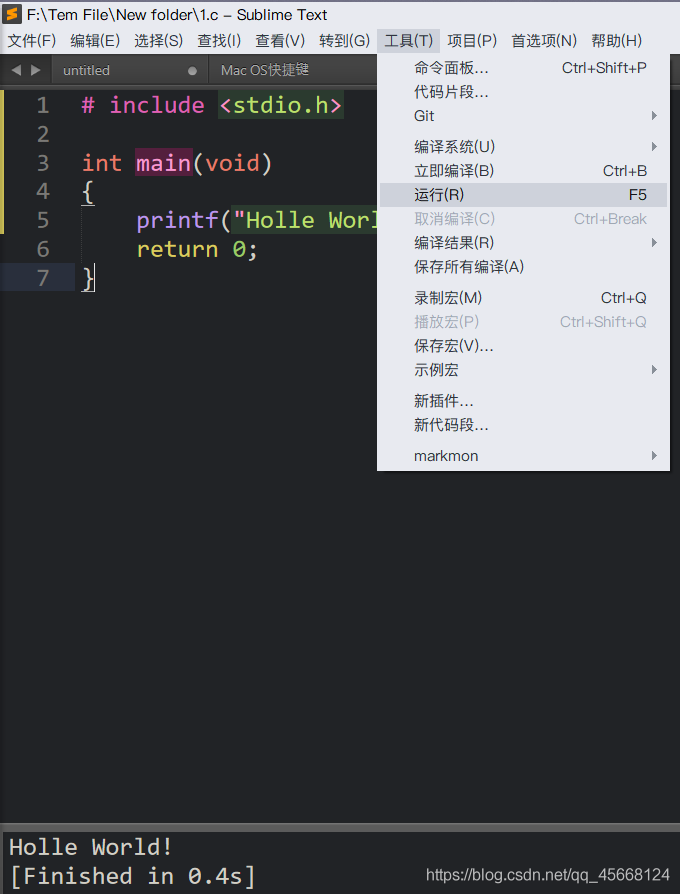
Tools -> Build System -> New Build System(英文版),中文版本如下圖所示
- 開啟之後刪除其中的所有內容,將以下內容複製貼上到檔案中,然後
Ctrl + S儲存檔案,檔名修改為myC.sublime-build(可以自定義),儲存的預設位置不會被更改,如果被更改了,重新儲存到D:\Sublime Text\Data\Packages\User(我的是在這裡),如果沒有這個資料夾,則儲存到C:\Users\你的使用者名稱\AppData\Roaming\Sublime Text 3\Packages\User下
{
    //"shell_cmd": "make"
    "working_dir": "$file_path",
    "cmd": "gcc -Wall \"$file_name\" -o \"$file_base_name\"",
    "file_regex": "^(..[^:]*):([0-9]+):?([0-9]+)?:? (.*)$",
    "selector": "source.c",

    "variants":
    [
        {
        "name": "Run",
            "shell_cmd": "gcc -Wall \"$file\" -o \"$file_base_name\" && \"${file_path}/${file_base_name}\""
        }
    ]
}
- 同樣的方法再建立C++的編譯環境,因為Sublime Text自身的控制檯不能輸入,所以需要需要呼叫CMD。將以下內容複製到檔案中,儲存為
myC++.sublime-build
{
    // "shell_cmd": "make"
    "encoding": "utf-8",
    "working_dir": "$file_path",
    "shell_cmd": "g++ -Wall -std=c++0x \"$file_name\" -o \"$file_base_name\"",
    "file_regex": "^(..[^:]*):([0-9]+):?([0-9]+)?:? (.*)$",
    "selector": "source.cpp",

    "variants":
    [
        {
        "name": "Run",
            "shell_cmd": "g++ -Wall -std=c++0x  \"$file\" -o \"$file_base_name\" && \"${file_path}/${file_base_name}\""
        },
        {
        "name": "RunInCmd",
            "shell_cmd": "g++ -Wall -std=c++0x  \"$file\" -o \"$file_base_name\" && start cmd /c \"\"${file_path}/${file_base_name}\" & pause \""
        }
    ]
}
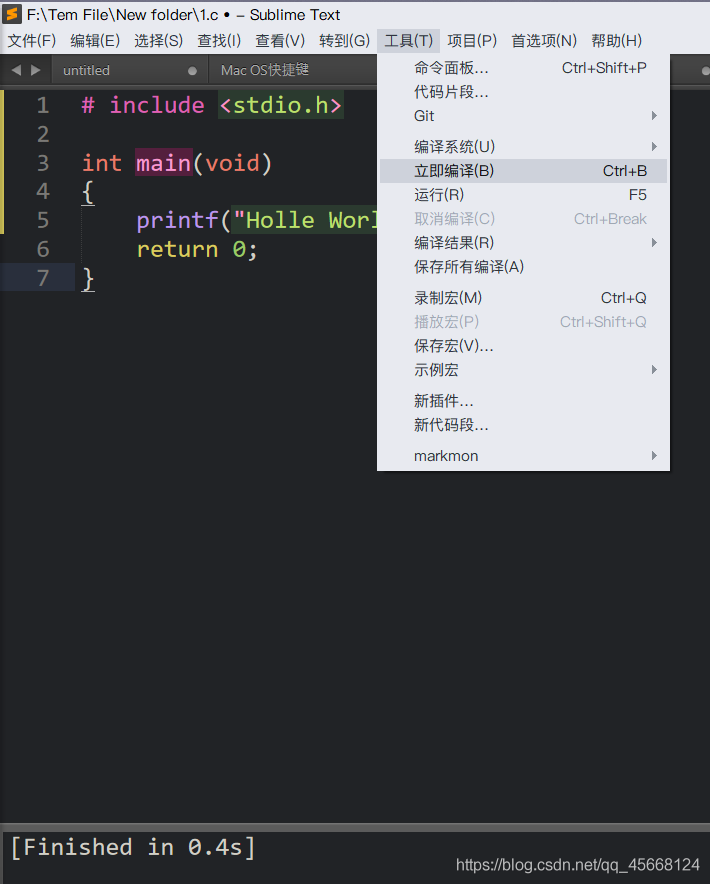
- 儲存後重新以管理員身份執行Sublime Text 3,寫一個基本的輸出語句,Ctrl+S儲存後,然後選擇
工具 -> 立即編譯、工具 -> 執行(修改後的程式碼必須儲存後再執行)
# include <stdio.h>

int main(void)
{
	printf("Holle World!\n");
	return 0;
}
設定Sublime Text的快捷鍵
- 每次都需要點工具編譯執行,就很麻煩,可以自定義快捷鍵,來快速編譯執行
- 依次點選
偏好設定 -> 按鍵繫結-使用者,將一下程式碼複製貼上到檔案中,下次執行只需要按F5就可以了,也可以根據自己的需要更改前面的快捷鍵
[
	{ "keys":["f5"], "command":"build", "args": {"variant": "Run"} },
]
- 依次點選
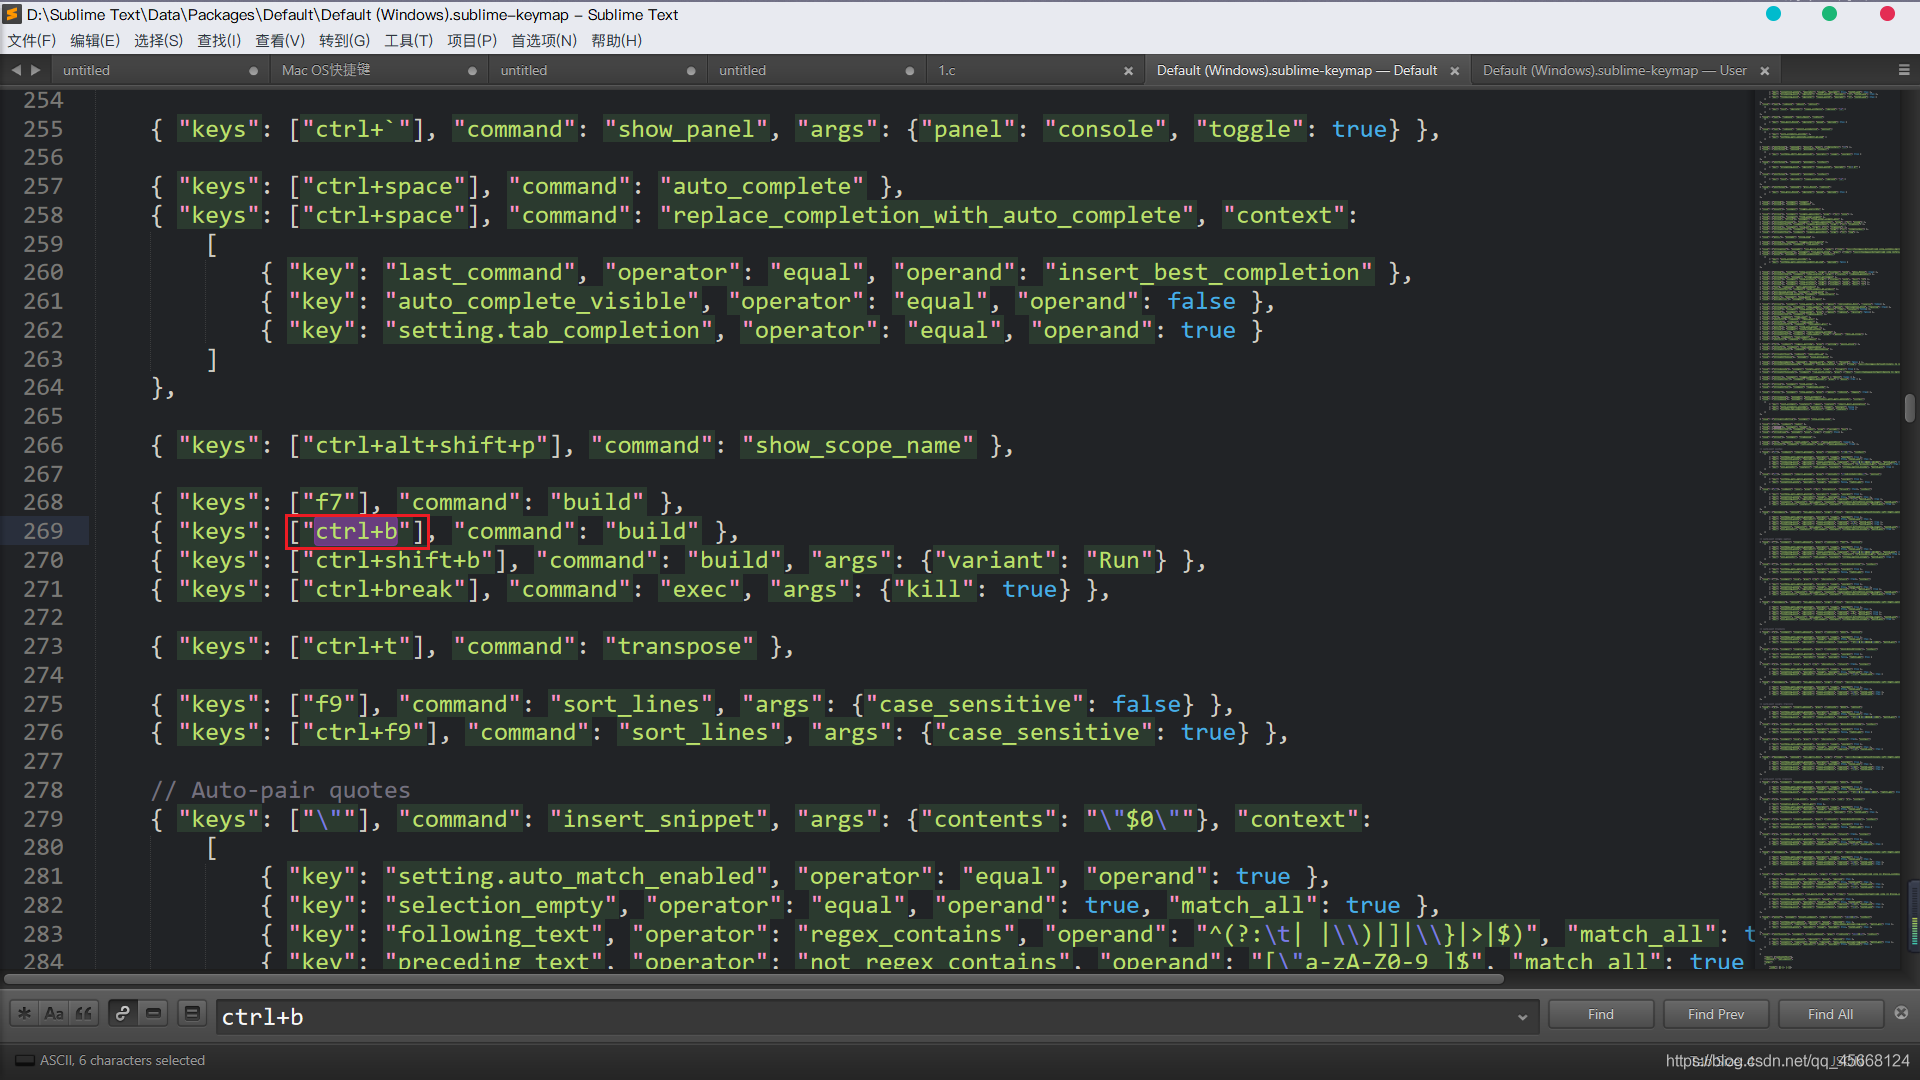
偏好設定 -> 按鍵繫結-預設,Ctrl+F搜尋ctrl+b,將ctrl+b替換成其他快捷鍵,即可進行編譯
無法正常識別錯誤
- Sublime Text 報錯
[Decode error - output not utf-8]- 在Sublime Text的安裝目錄下的
Packages\目錄下找到Default.sublime-package,將這個複製出來,將字尾改名為zip(只有修改為zip才能開啟)解壓縮後將其中的exec.py檔案放到Sublime Text的Data\Packages\User\目錄下 - 開啟
exec.py使用 Ctrl + F 搜尋ExecCommand,在其中新增以下程式碼,然後儲存
- 在Sublime Text的安裝目錄下的
   def append_data(self, proc, data):
        if proc != self.proc:
            # a second call to exec has been made before the first one
            # finished, ignore it instead of intermingling the output.
            if proc:
                proc.kill()
            return

        #add start
        is_decode_ok = True;
        try:
            str = data.decode(self.encoding)
        except:
            is_decode_ok = False
        if is_decode_ok==False:
            try:
                str = data.decode("gbk")
            except:
                str = "[Decode error - output not " + self.encoding + " and gbk]\n"
                proc = None

        # Normalize newlines, Sublime Text always uses a single \n separator
        # in memory.
        str = str.replace('\r\n', '\n').replace('\r', '\n')

        self.output_view.run_command('append', {'characters': str, 'force': True, 'scroll_to_end': True})
到此,Sublime Text 3中對C/C++的環境部署就完成了,之後就可以使用Sublime Text來進行C語言程式的程式設計了
以上內容均屬原創,如有不詳或錯誤,敬請指出。
本文連結: https://blog.csdn.net/qq_45668124/article/details/117160162
版權宣告: 本部落格所有文章除特別宣告外,均採用
CC BY-NC-SA 4.0 許可協定。轉載請聯絡作者註明出處並附帶本文連結!