教你基於Laravel+Vue元件實現文章釋出、編輯和瀏覽功能

我們將基於 Laravel 提供後端介面,基於 Vue.js 作為前端 JavaScript 元件開發框架,基於 Bootstrap 作為 CSS 框架。
Laravel 後端介面
首先,我們基於上篇教學建立的資源控制器 PostController 快速編寫後端增刪改查介面實現程式碼:
<?php

namespace App\Http\Controllers;

use App\Models\Post;
use Exception;
use Illuminate\Contracts\Foundation\Application;
use Illuminate\Contracts\View\Factory;
use Illuminate\Contracts\View\View;
use Illuminate\Http\Request;
use Illuminate\Http\Response;
use Illuminate\Support\Collection;
use Illuminate\Support\Facades\Auth;

class PostController extends Controller
{
    public function __construct()
    {
        $this->middleware('auth')->except('index', 'all', 'show', 'data');
    }

    /**
     * Display a listing of the resource.
     *
     * @return Application|Factory|View|Response|\Illuminate\View\View
     */
    public function index()
    {
        return view('posts.index', ['pageTitle' => '文章列表頁']);
    }

    /**
     * Show the form for creating a new resource.
     *
     * @return Application|Factory|View|Response|\Illuminate\View\View
     */
    public function create()
    {
        return view('posts.create', ['pageTitle' => '釋出新文章']);
    }

    /**
     * Store a newly created resource in storage.
     *
     * @param Request $request
     * @return array
     */
    public function store(Request $request)
    {
        $data = $request->validate([
            'title' => 'required|max:128',
            'content' => 'required'
        ]);

        $post = new Post($data);
        $post->status = 1;
        $post->user_id = Auth::user()->id;
        if ($post->save()) {
            return ['success' => true, 'message' => '文章釋出成功'];
        }
        return ['success' => false, 'message' => '儲存文章資料失敗'];
    }

    /**
     * Display the specified resource.
     *
     * @param Post $post
     * @return Application|Factory|View|Response|\Illuminate\View\View
     */
    public function show(Post $post)
    {
        return view('posts.show', ['id' => $post->id, 'pageTitle' => $post->title]);
    }

    /**
     * Show the form for editing the specified resource.
     *
     * @param Post $post
     * @return Application|Factory|View|Response|\Illuminate\View\View
     */
    public function edit(Post $post)
    {
        return view('posts.edit', ['pageTitle' => '編輯文章', 'id' => $post->id]);
    }

    /**
     * Update the specified resource in storage.
     *
     * @param Request $request
     * @param Post $post
     * @return array
     */
    public function update(Request $request, Post $post)
    {
        $data = $request->validate([
            'title' => 'required|max:128',
            'content' => 'required'
        ]);

        $post->fill($data);
        $post->status = 1;
        if ($post->save()) {
            return ['success' => true, 'message' => '文章更新成功'];
        }
        return ['success' => false, 'message' => '更新文章資料失敗!'];
    }

    /**
     * Remove the specified resource from storage.
     *
     * @param Post $post
     * @return array
     * @throws Exception
     */
    public function destroy(Post $post)
    {
        if ($post->delete()) {
            return ['success' => true, 'message' => '文章刪除成功'];
        }
        return ['success' => false, 'message' => '刪除文章失敗'];
    }

    /**
     * 獲取所有文章資料
     *
     * @return Collection
     */
    public function all()
    {
        return Post::orderByDesc('created_at')->get();
    }

    /**
     * 獲取單個文章資料
     *
     * @param Post $post
     * @return Post
     */
    public function data(Post $post)
    {
        $post->author_name = $post->author->name;
        return $post;
    }
}
除了 Laravel 資源控制器自帶的方法之外,我們額外提供了 all 和 data 兩個方法,分別用於在 Vue 元件中通過 AJAX 請求獲取文章列表資料和文章詳情資料。因此,需要在路由檔案 routes/web.php 中註冊資源路由之前新增這兩個方法對應的路由:
use App\Http\Controllers\PostController;

Route::get('posts/all', [PostController::class, 'all']);
Route::get('posts/{post}/data', [PostController::class, 'data']);
Route::resource('posts', PostController::class);
注意這裡我們使用了 Laravel 路由提供的隱式模型繫結功能快速獲取模型範例。此外,相應的檢視模板路徑也做了調整,我們馬上會介紹這些檢視模板檔案。
通過填充器填充測試資料
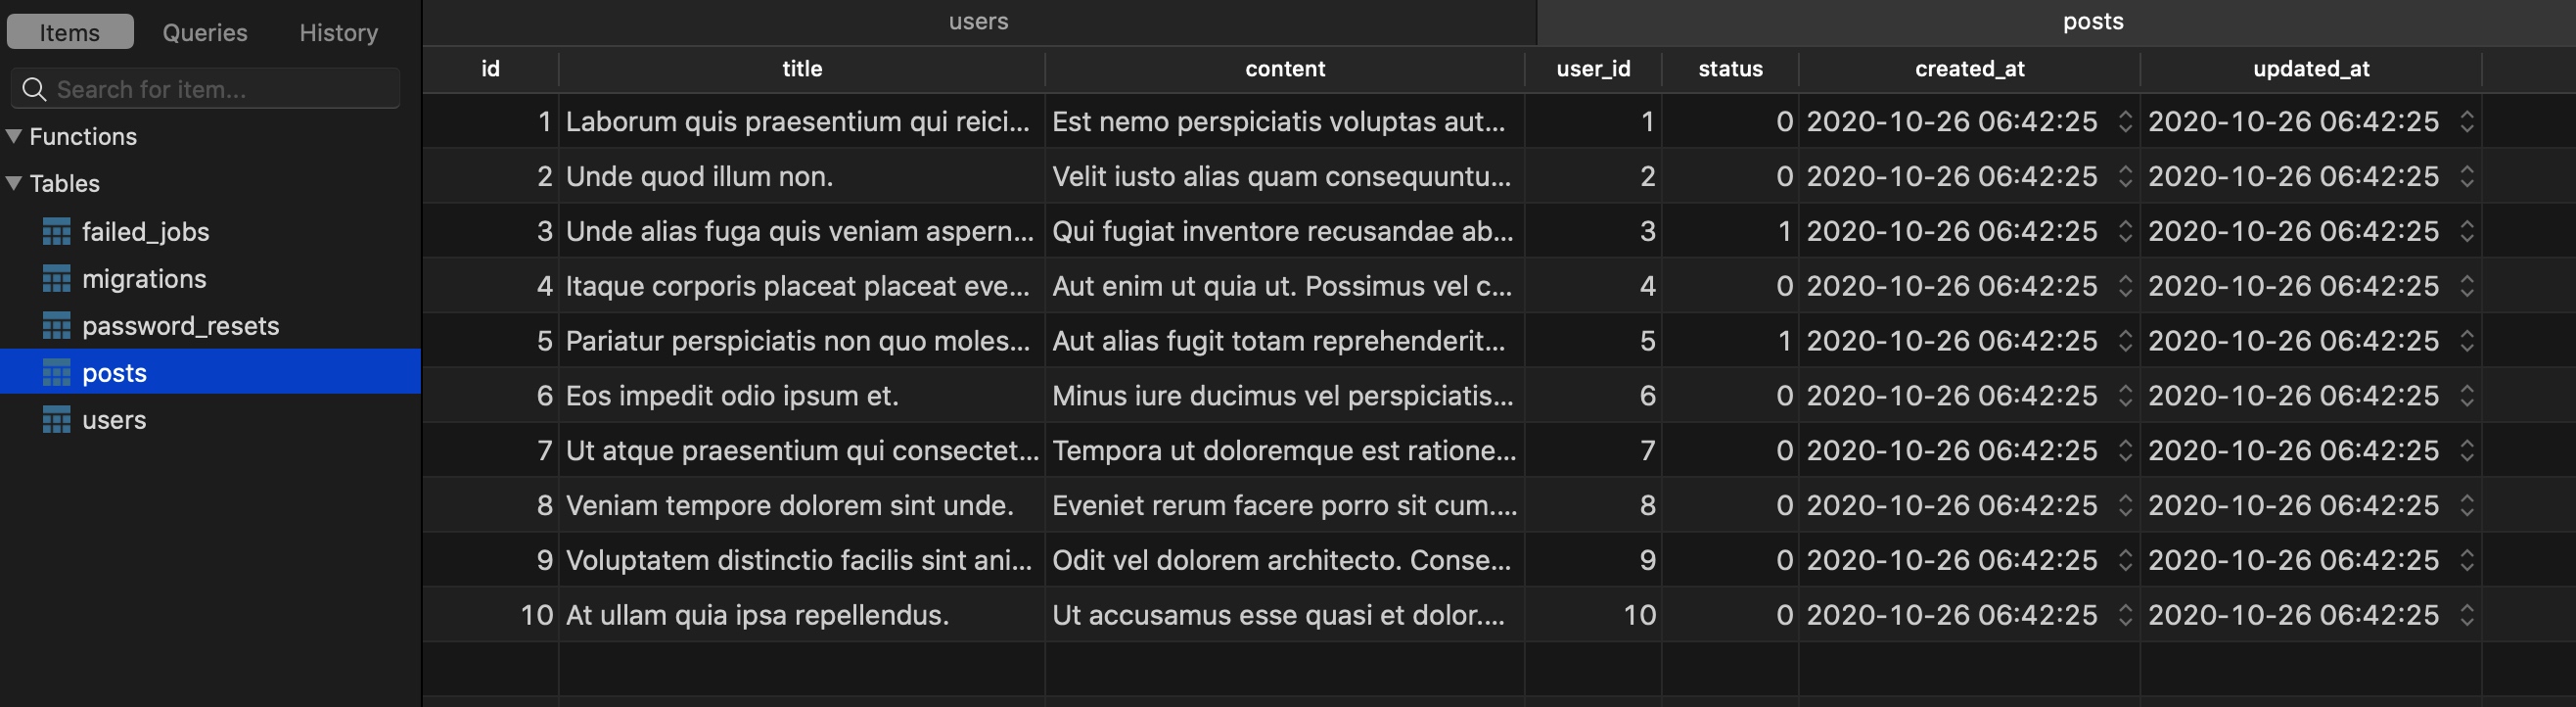
如果你在上篇教學填充的測試資料基礎上新增過其他資料,可以執行 php artisan migrate:refresh 命令重建資料表快速清空已有資料並重新填充。
如果你不想檢視返回範例資料格式的細節,可以在自帶填充器 database/seeders/DatabaseSeeder.php 中定義填充程式碼:
<?php

namespace Database\Seeders;

use App\Models\Post;
use Illuminate\Database\Seeder;

class DatabaseSeeder extends Seeder
{
    /**
     * Seed the application's database.
     *
     * @return void
     */
    public function run()
    {
        // \App\Models\User::factory(10)->create();
        Post::factory(10)->create();
    }
}
然後執行 php artisan migrate:refresh --seed 命令即可一步到位完成資料表重建、測試資料清空和重新填充:

通過模板繼承重構檢視模板
由於我們使用的是 Laravel 提供的 laravel/ui 擴充套件包提供的 Bootstrap 和 Vue 前端腳手架程式碼,該擴充套件包還提供了使用者認證相關腳手架程式碼實現,並且提供了一個檢視模板佈局檔案 resources/views/layouts/app.blade.php,我們將通過模板繼承基於這個佈局檔案來重構文章列表、表單、詳情頁相關檢視模板檔案,讓整體 UI 統一。
不同頁面設定不同標題
我們前面在 PostController 中,為所有 GET 路由渲染的檢視檔案傳遞了 pageTitle 值作為不同頁面的標題,要實現該功能,需要修改 resources/views/layouts/app.blade.php 佈局檔案中 title 標籤對應的標籤文字值:
<title>{{ $pageTitle ?? config('app.name', 'Laravel') }}</title>文章列表檢視
接下來,將原來的文章相關檢視檔案都移動到 resources/views/posts 目錄下,改寫文章列表檢視檔案模板程式碼如下(將原來的 posts.blade.php 重新命名為 index.blade.php):
@extends('layouts.app')

@section('content')
    <p class="container">
        <post-list></post-list>
    </p>
@endsection
文章釋出檢視
將原來的 form.blade.php 重新命名為 create.blade.php,並編寫文章釋出表單頁面檢視檔案模板程式碼如下:
@extends('layouts.app')

@section('content')
    <p class="container">
        <p class="row justify-content-center">
            <post-form title="釋出新文章" action="create" url="{{ route('posts.store') }}">
            </post-form>
        </p>
    </p>
@endsection
由於文章釋出和編輯表單共用一個 Vue 表單元件,所以我們這裡額外傳遞了一些 props 屬性到元件模板,包括表單標題(title)、操作型別(action)、表單提交 URL(url),後面馬上會介紹表單元件的調整。
文章編輯檢視
在 resources/views/posts 目錄下新建一個 edit.blade.php 作為檔案編輯頁面檢視檔案,並編寫模板程式碼如下:
@extends('layouts.app')

@section('content')
    <p class="container">
        <p class="row justify-content-center">
            <post-form title="編輯文章" action="update" id="{{ $id }}" url="{{ route('posts.update', ['post' => $id]) }}">
            </post-form>
        </p>
    </p>
@endsection
同樣也使用 post-form 模板渲染文章編輯表單,只不過額外傳遞了一個 id 屬性,用於在表單元件初始化待編輯的文章資料。
文章詳情頁檢視後面單獨介紹。
重構 Vue 表單元件程式碼
為了適配文章編輯表單,以及後端介面返回資料格式的調整,我們需要修改 Vue 表單元件實現程式碼:
<template>
    <FormSection @store="store">
        <template slot="title">{{ title }}</template>
        <template slot="input-group">
            <p class="form-group">
                <Label name="title" label="標題"></Label>
                <InputText name="title" v-model="form.title" @keyup="clear('title')"></InputText>
                <ErrorMsg :error="form.errors.get('title')"></ErrorMsg>
            </p>

            <p class="form-group">
                <Label name="content" label="內容"></Label>
                <TextArea name="content" v-model="form.content" @keyup="clear('content')"></TextArea>
                <ErrorMsg :error="form.errors.get('content')"></ErrorMsg>
            </p>
        </template>
        <template slot="action">
            <Button type="submit">立即釋出</Button>
        </template>
        <template slot="toast">
            <ToastMsg :success="form.success" :validated="form.validated">
                {{ form.message }}
            </ToastMsg>
        </template>
    </FormSection>
</template>

<script>
import FormSection from './form/FormSection';
import InputText from './form/InputText';
import TextArea from './form/TextArea';
import Button from './form/Button';
import ToastMsg from './form/ToastMsg';
import Label from "./form/Label";
import ErrorMsg from "./form/ErrorMsg";

export default {

    components: {FormSection, InputText, TextArea, Label, ErrorMsg, Button, ToastMsg},

    props: ['title', 'url', 'action', 'id'],

    data() {
        return {
            form: new Form({
                title: '',
                content: ''
            })
        }
    },

    mounted() {
        let post_id = Number(this.id);
        if (this.action === 'update' && post_id > 0) {
            this.load(post_id);
        }
    },

    methods: {
        load(id) {
            this.form.title = '載入中...';
            this.form.content = '載入中...';
            let url = '/posts/' + id + '/data';
            axios.get(url).then(resp => {
                this.form.title = resp.data.title;
                this.form.content = resp.data.content;
            }).catch(error => {
                alert('從伺服器端初始化表單資料失敗');
            });
        },
        store() {
            if (this.action === 'create') {
                this.form.post(this.url)
                    .then(data => {
                        // 釋出成功後跳轉到列表頁
                        window.location.href = '/posts';
                    })
                    .catch(data => console.log(data)); // 自定義表單提交失敗處理邏輯
            } else {
                this.form.put(this.url)
                    .then(data => {
                        // 更新成功後跳轉到詳情頁
                        window.location.href = '/posts/' + this.id;
                    })
                    .catch(data => console.log(data)); // 自定義表單提交失敗處理邏輯
            }
        },
        clear(field) {
            this.form.errors.clear(field);
        }
    }
}
</script>
文章釋出和編輯頁面需要通過標題予以區分,所以我們通過 title 屬性從父級作用域傳遞該標題值。
對於文章編輯表單,首先,我們會根據父級作用域傳遞的 id 屬性值在 mounted 勾點函數中呼叫新增的 load 方法從後端介面 /posts/{post}/data 載入對應文章資料填充表單。
現在後端介面可以自動獲取當前認證使用者的 ID,所以 author 欄位就沒有必要填寫了,直接將其移除。
文章建立和編輯對應的請求方式是不一樣的,操作成功後處理邏輯也是不一樣的(前者重定向到列表頁,後者重定向到詳情頁),所以根據 action 屬性值分別進行了處理。
此外,由於後端對錶單資料進行驗證後,儲存資料階段依然可能失敗,所以前端提交表單後返回的響應狀態碼為 200 並不表示表單提交處理成功,還需要藉助響應實體(JSON 格式)中的 success 欄位進一步判斷,進而通過 ToastMsg 子元件渲染成功或失敗的提示文字。
ToastMsg 是從之前的 SuccessMsg 元件升級而來,直接將 SuccessMsg 元件重新命名為 ToastMsg 並改寫元件程式碼如下:
<style scoped>
.alert {
    margin-top: 10px;
}
</style>

<template>
    <p class="alert" :class="{'alert-success': success, 'alert-danger': !success}" role="alert" v-show="validated">
        <slot></slot>
    </p>
</template>

<script>
export default {
    props: ['validated', 'success']
}
</script>
可以看到,如果表單提交處理成功(依然基於父級作用域傳遞的 form.success 屬性)則顯示成功提示樣式及文案,否則顯示失敗提示樣式和文案,而是否渲染該元件取決於表單驗證是否成功,該欄位基於父級作用域傳遞的 form.validated 屬性,之前是沒有這個屬性的,所以我們需要額外新增,在 resources/js/form.js 中,調整相關程式碼實現如下:
class Form {
    constructor(data) {
        ...
        this.validated = false;
    }

    ...

    /**
     * 表單提交處理
     *
     * @param {string} url
     * @param {string} method
     */
    submit(url, method) {
        return new Promise((resolve, reject) => {
            axios[method](url, this.data())
                .then(response => {
                    this.onSuccess(response.data);
                    this.validated = true;
                    if (this.success === true) {
                        resolve(response.data);
                    } else {
                        reject(response.data);
                    }
                })
                .catch(error => {
                    this.onFail(error.response.data.errors);
                    reject(error.response.data);
                });
        });
    }


    /**
     * 處理表單提交成功
     *
     * @param {object} data
     */
    onSuccess(data) {
        this.success = data.success;
        this.message = data.message;
        this.reset();
    }

    ...

}
這樣一來,文章釋出和編輯共用的 Vue 表單元件就重構好了。
文章詳情頁檢視和 Vue 元件實現
我們接著來實現文章詳情頁。
PostDetail 元件
在 component-practice/resources/js/components 目錄下新建一個 PostDetail.vue 檔案作為渲染文章詳情的 Vue 單檔案元件,並編寫元件程式碼如下:
<style scoped>
.post-detail {
    width: 100%;
}
.post-title {
    margin-bottom: .25rem;
    font-size: 2.5rem;
}
.post-meta {
    margin-bottom: 1.25rem;
    color: #999;
}
.post-content {
    font-size: 1.1rem;
    font-weight: 400;
    line-height: 1.5;
    color: #212529;
}
</style>

<template>
    <p class="spinner-border" role="status" v-if="!loaded">
        <span class="sr-only">Loading...</span>
    </p>
    <p class="post-detail" v-else>
        <h2 class="post-title">{{ title }}</h2>
        <p class="post-meta">
            Created at {{ created_at | diff_for_human }} by <a href="#">{{ author_name }}</a>,
            Status: {{ status | post_status_readable }},
            Action: <a :href="'/posts/' + id + '/edit'">編輯</a>
        </p>
        <p class="post-content">
            {{ content }}
        </p>
    </p>
</template>

<script>
export default {
    props: ['post_id'],
    data() {
        return {
            id: this.post_id,
            title: '',
            content: '',
            status: '',
            author_name: '',
            created_at: '',
            loaded: false
        }
    },

    mounted() {
        if (!this.loaded) {
            this.load(Number(this.id));
        }
    },

    methods: {
        load(id) {
            axios.get('/posts/' + this.id + '/data').then(resp => {
                this.title = resp.data.title;
                this.content = resp.data.content;
                this.status = resp.data.status;
                this.author_name = resp.data.author_name;
                this.created_at = resp.data.created_at;
                this.loaded = true;
            }).catch(err => {
                alert('載入文章資料失敗');
            });
        }
    }
}
</script>
這個元件功能比較簡單,在 mounted 勾點函數中通過父級作用域傳遞的 id 屬性值呼叫 load 函數載入後端介面返回的文章資料,並通過資料繫結將其渲染到模板程式碼中,在載入過程中,會有一個動態的載入狀態提示使用者文章資料正在載入。
這裡我們還使用了過濾器對資料進行格式化,日期過濾器已經是全域性的了,狀態過濾器之前是原生的,這裡我們將其從文章列表卡片元件 CardItem 中將其遷移到 app.js 中作為全域性過濾器:
Vue.filter('post_status_readable', status => {
    switch(status) {
        case 0:
            return '草稿';
        case 1:
            return '已釋出';
        default:
            return '未知狀態';
    }
});
然後就可以在任何 Vue 元件中呼叫它了(CardItem 中過濾器呼叫程式碼做一下相應調整)。
在 app.js 中註冊這個元件:
Vue.component('post-detail', require('./components/PostDetail.vue').default);文章詳情頁檢視檔案
再到 component-practice/resources/views/posts 目錄下新建 show.blade.php 檢視檔案參照 post-detail 元件即可:
@extends('layouts.app')

@section('content')
<p class="container">
    <post-detail post_id="{{ $id }}"></post-detail>
</p>
@endsection
優化文章列表元件
最後,我們到文章列表元件中新增一個釋出文章入口。
開啟子元件 ListSection,在檢視模式切換按鈕右側新增一個插槽,用於從父級作用域傳遞更多額外操作按鈕:
<style scoped>
.card-header h5 {
    margin-top: 0.5em;
    display: inline-block;
}
.card-header .float-right {
    float: right;
}
</style>

<template>
<p class="card">
    <p class="card-header">
        <h5><slot name="title"></slot></h5>
        <p class="float-right">
            <button class="btn btn-success view-mode" @click.prevent="switch_view_mode">
                {{ view.switch_to }}
            </button>
            <slot name="more-actions"></slot>
        </p>
    </p>

    ...
然後在 PostList 中將釋出文章按鈕放到這個插槽中(樣式程式碼也做了微調):
<style scoped>
.post-list {
    width: 100%;
}
</style>

<template>
    <p class="post-list">
    <ListSection :view_mode="view_mode" @view-mode-changed="change_view_mode">
        <template #title>文章列表</template>
        <template #more-actions>
            <a href="/posts/create" class="btn btn-primary">新文章</a>
        </template>
        <template v-if="view_mode === 'list'">
            <ListItem v-for="post in posts" :key="post.id" :url="'/posts/' + post.id">
                {{ post.title }}
            </ListItem>
        </template>
...順便也為文章列表所有文章設定詳情頁連結,ListItem 連結是從 PostList 通過 props 屬性傳遞的,CardItem 需要去子元件中設定:
<a :href="'/posts/' + post.id" class="btn btn-primary"><slot name="action-label"></slot></a>
至此,我們就完成了文章列表、釋出、編輯和詳情頁的所有前後端功能程式碼編寫。
整體測試
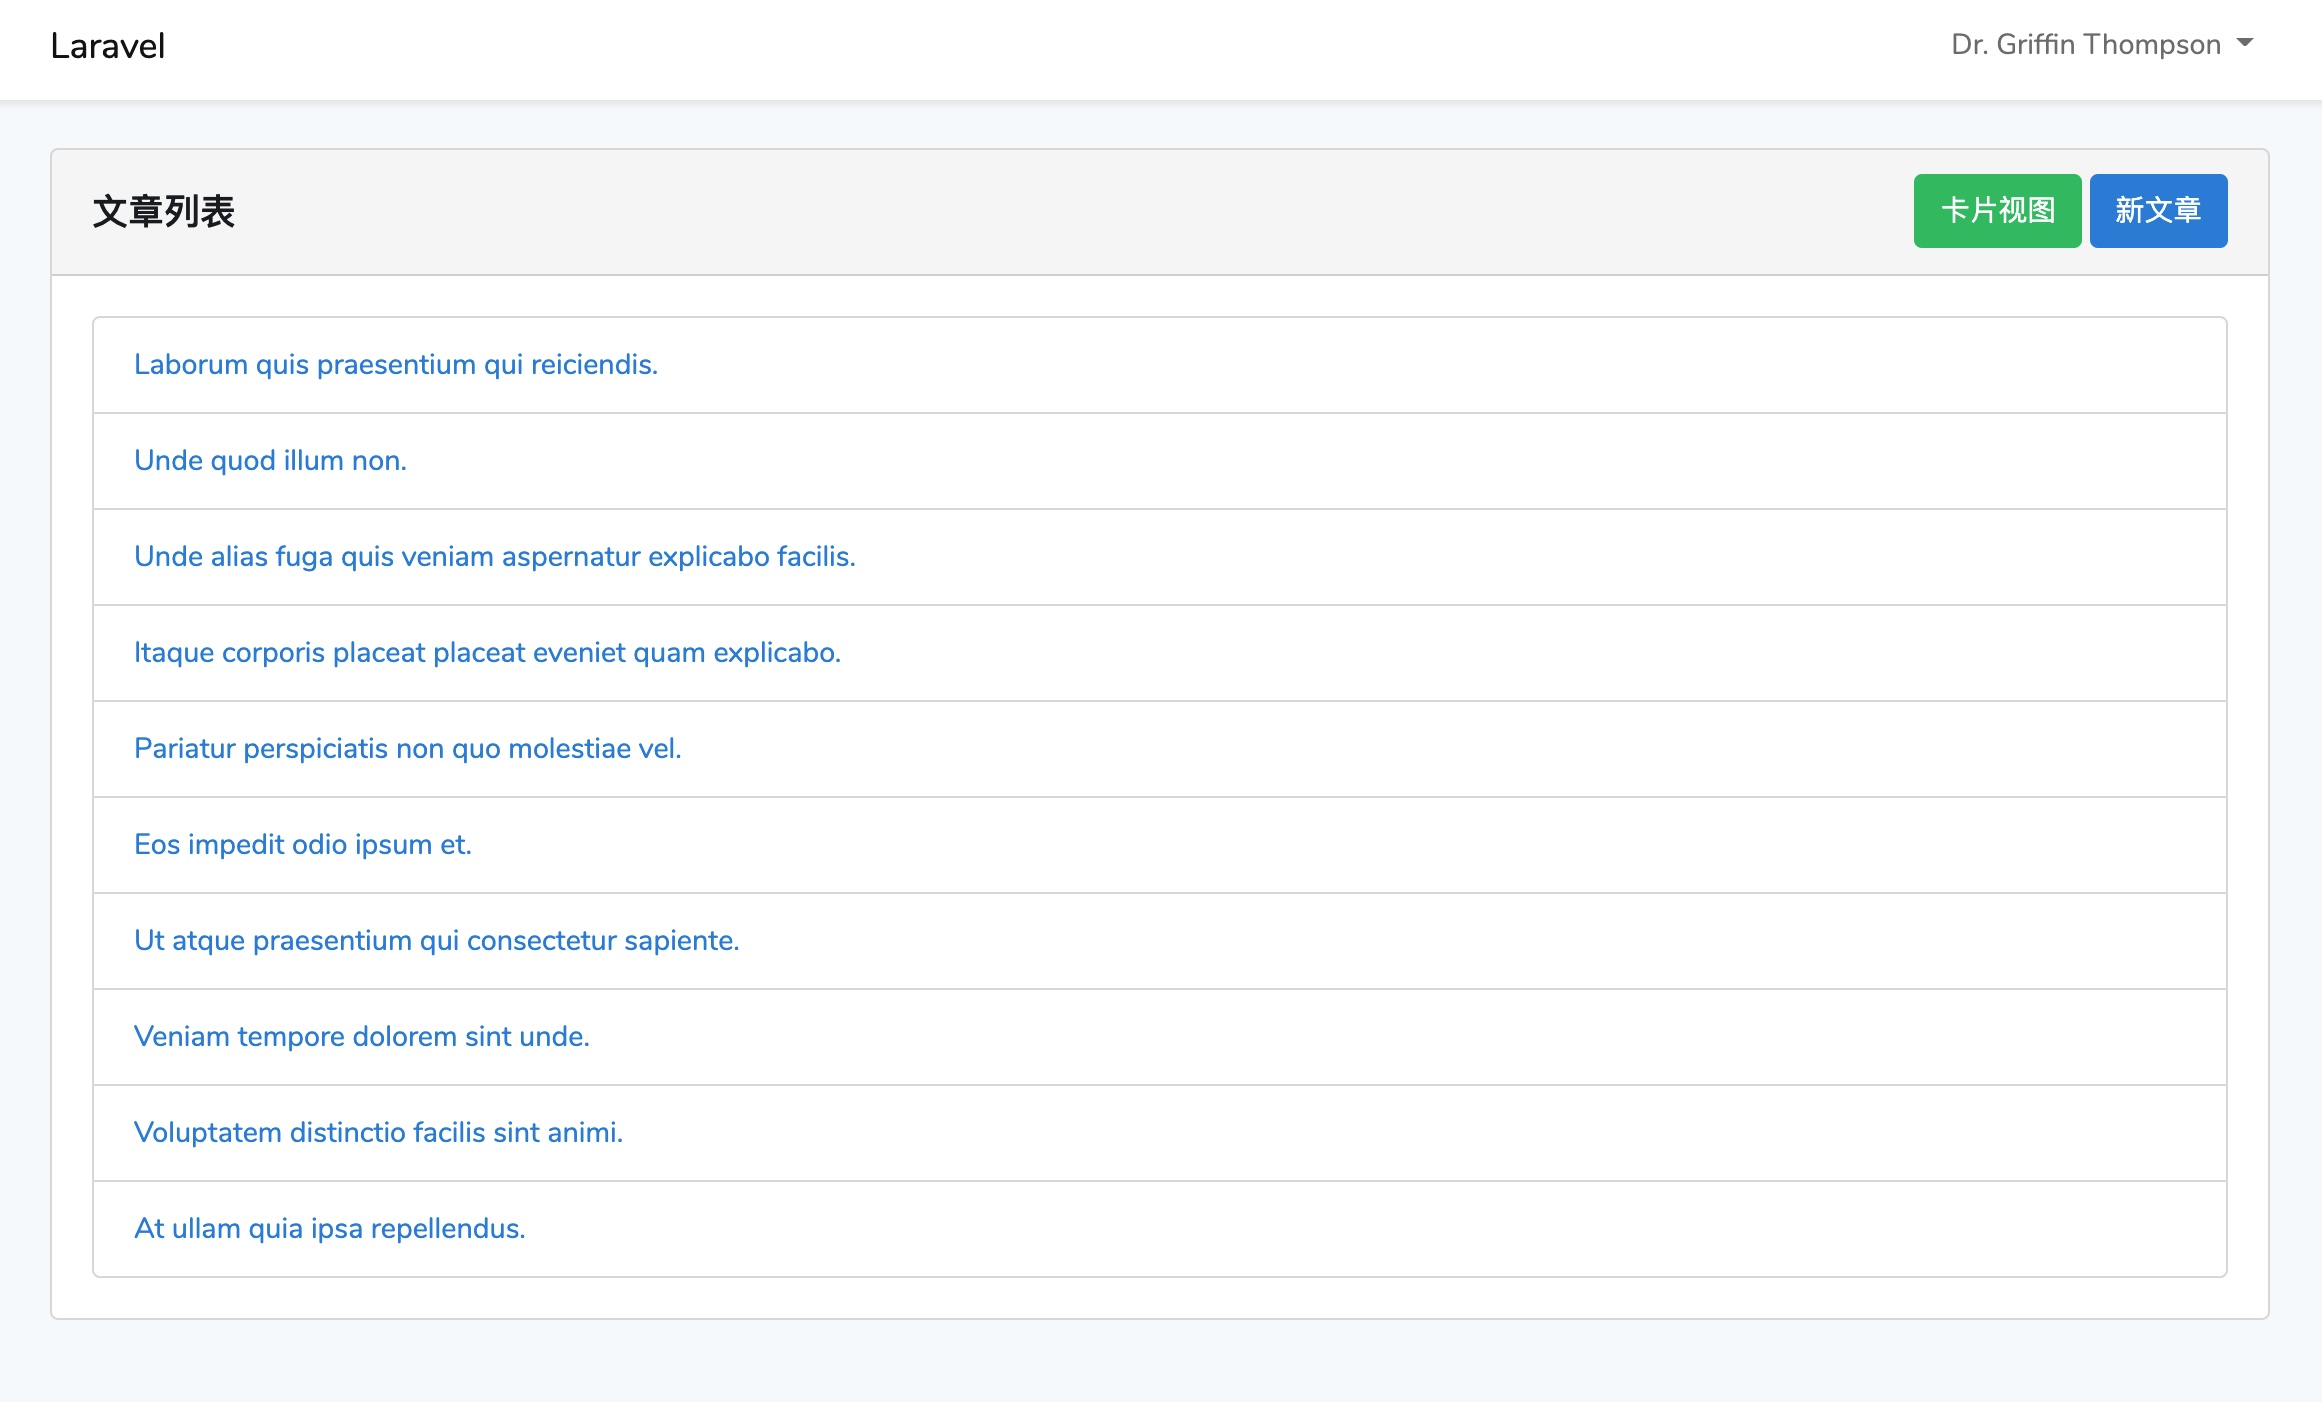
如果你已經在本地執行了 npm run watch 並且通過 php arstisan serve 啟動 PHP 內建 Web 伺服器的話,就可以在瀏覽器通過 http://127.0.0.1:3002/posts (啟用了 BrowserSync 代理)存取新的文章列表頁了:
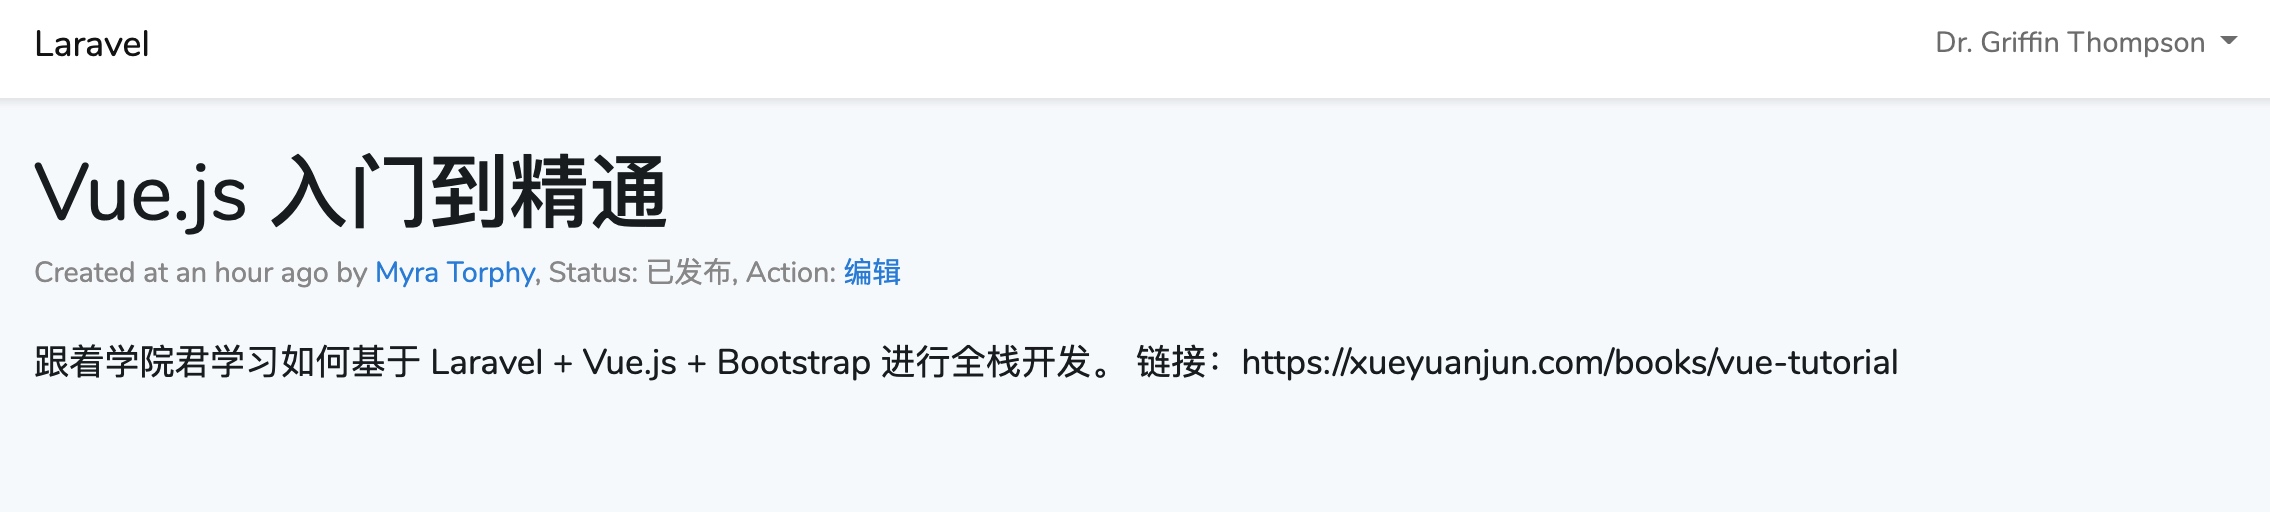
點選任意文章連結,即可進入文章詳情頁,載入資料成功之前,會有如下動態載入效果:

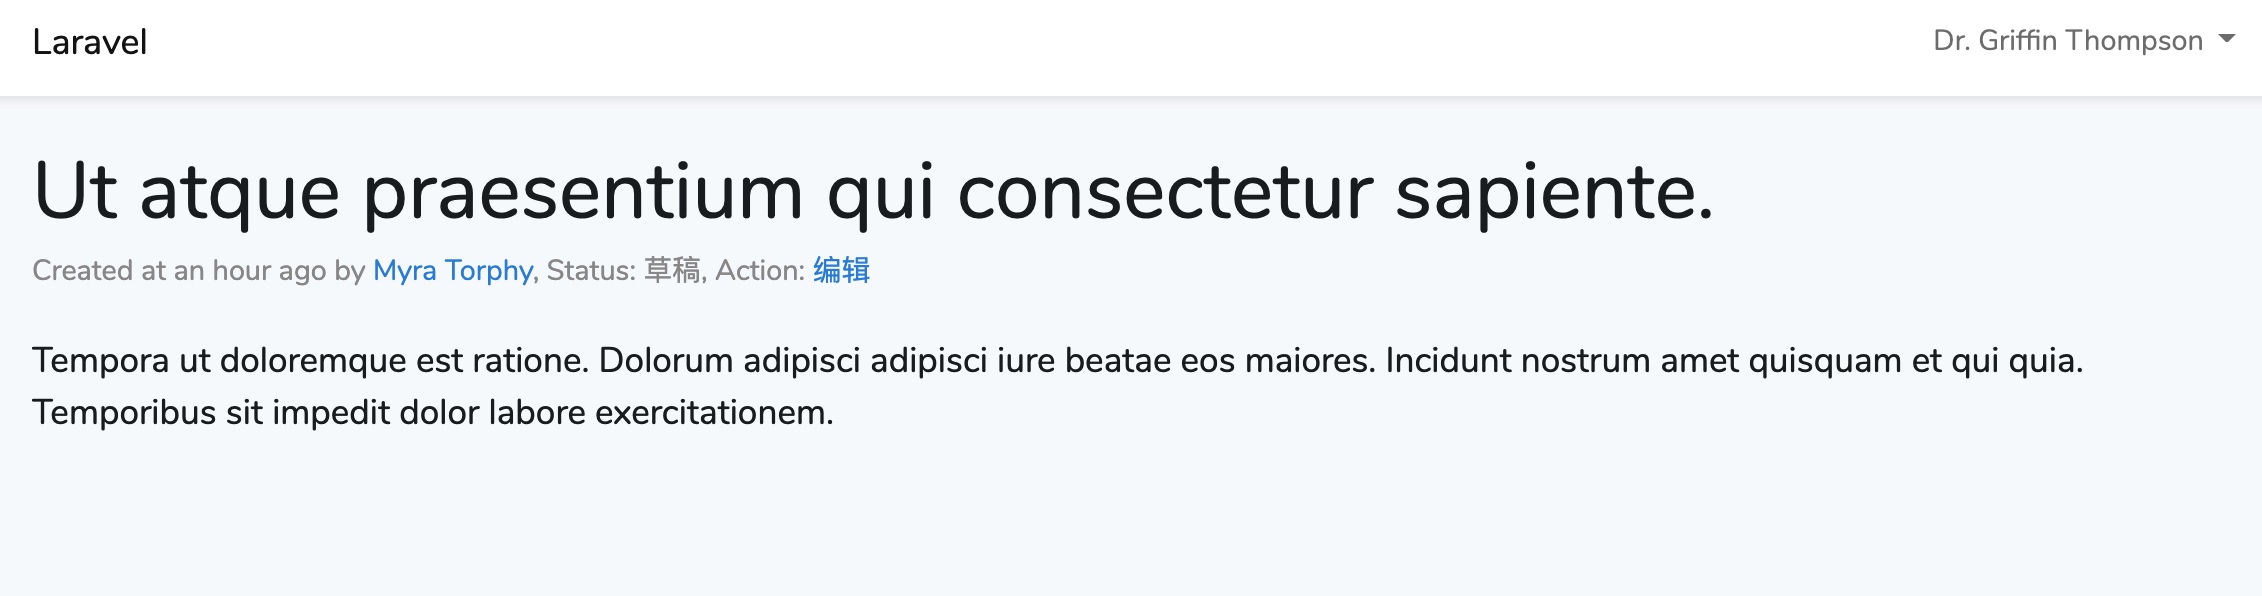
你可以點選「編輯」連結對這篇文章進行編輯:
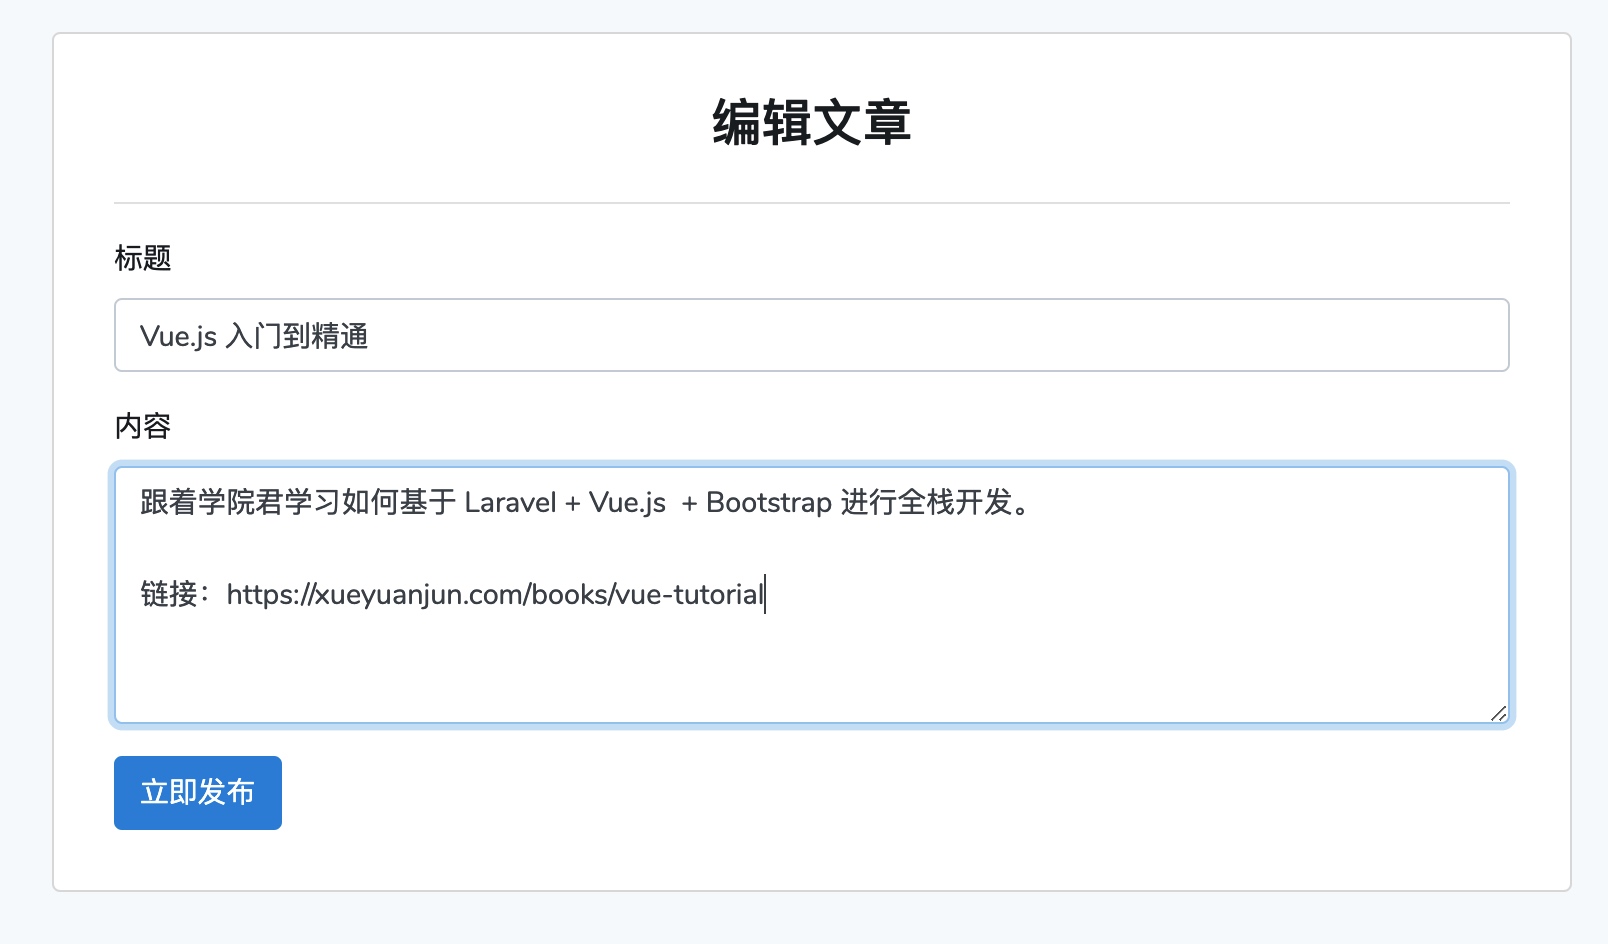
更新成功後,會跳轉到文章詳情頁,對應欄位均已更新,並且狀態也從草稿變成了已釋出:
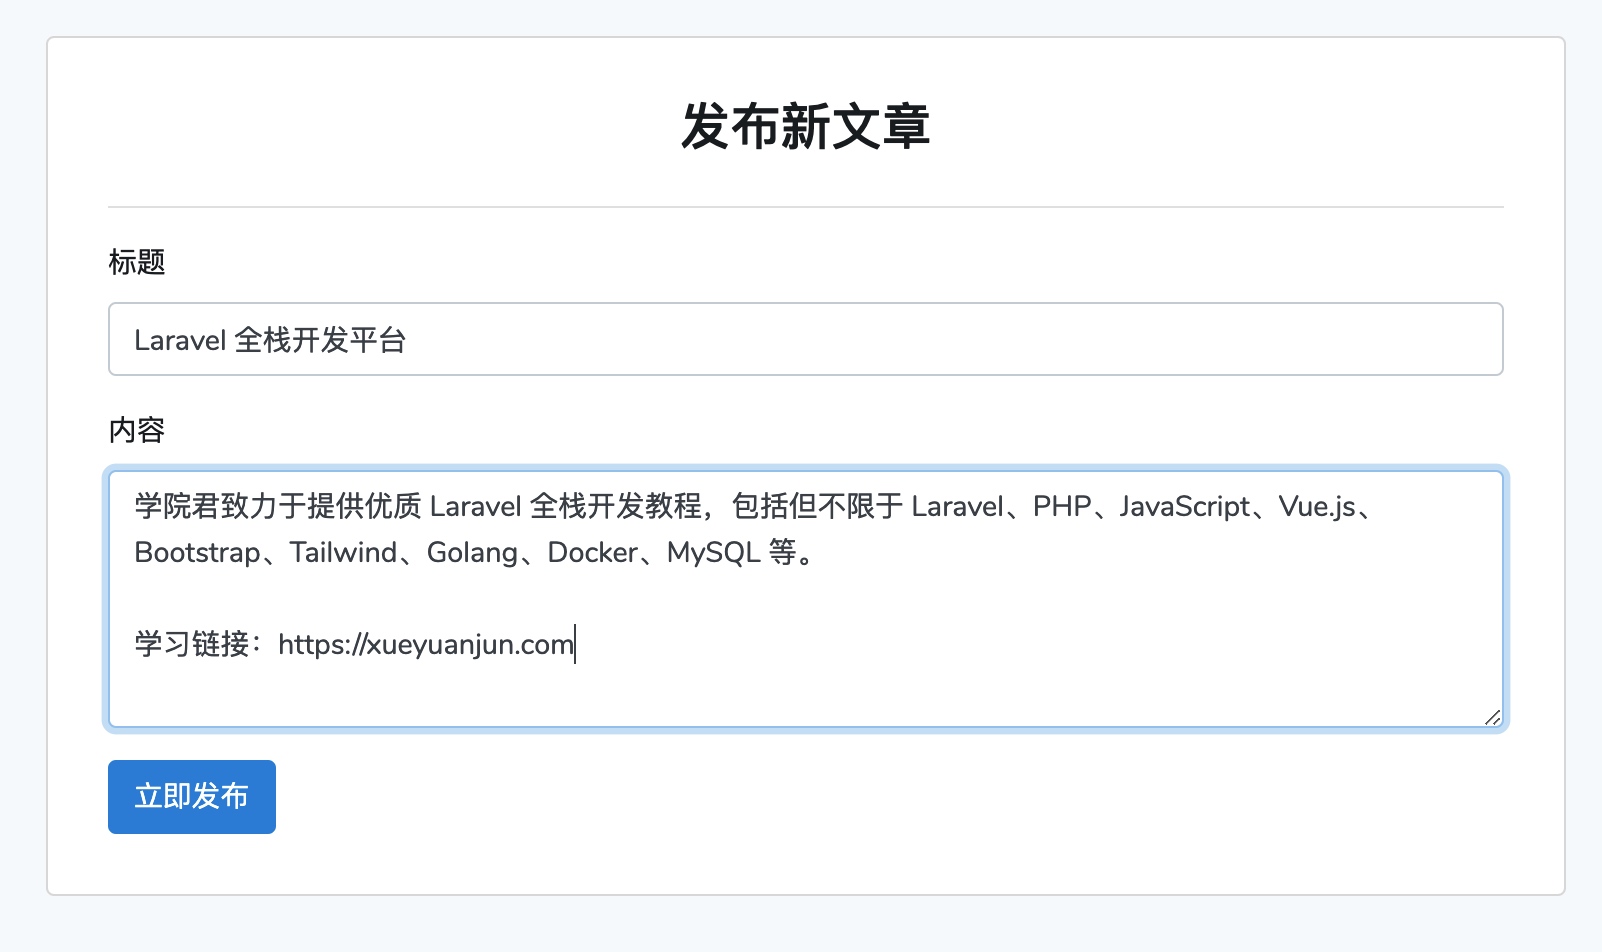
當然,文章釋出和編輯功能需要使用者處於已登入狀態(目前未做許可權驗證),如果未登入的話,點選編輯和新文章按鈕會先跳轉到登入頁面(該功能由 PostController 控制器建構函式中定義的中介軟體方法實現),我們在已登入情況下在文章列表頁點選右上角的「新文章」按鈕進入文章釋出頁面:
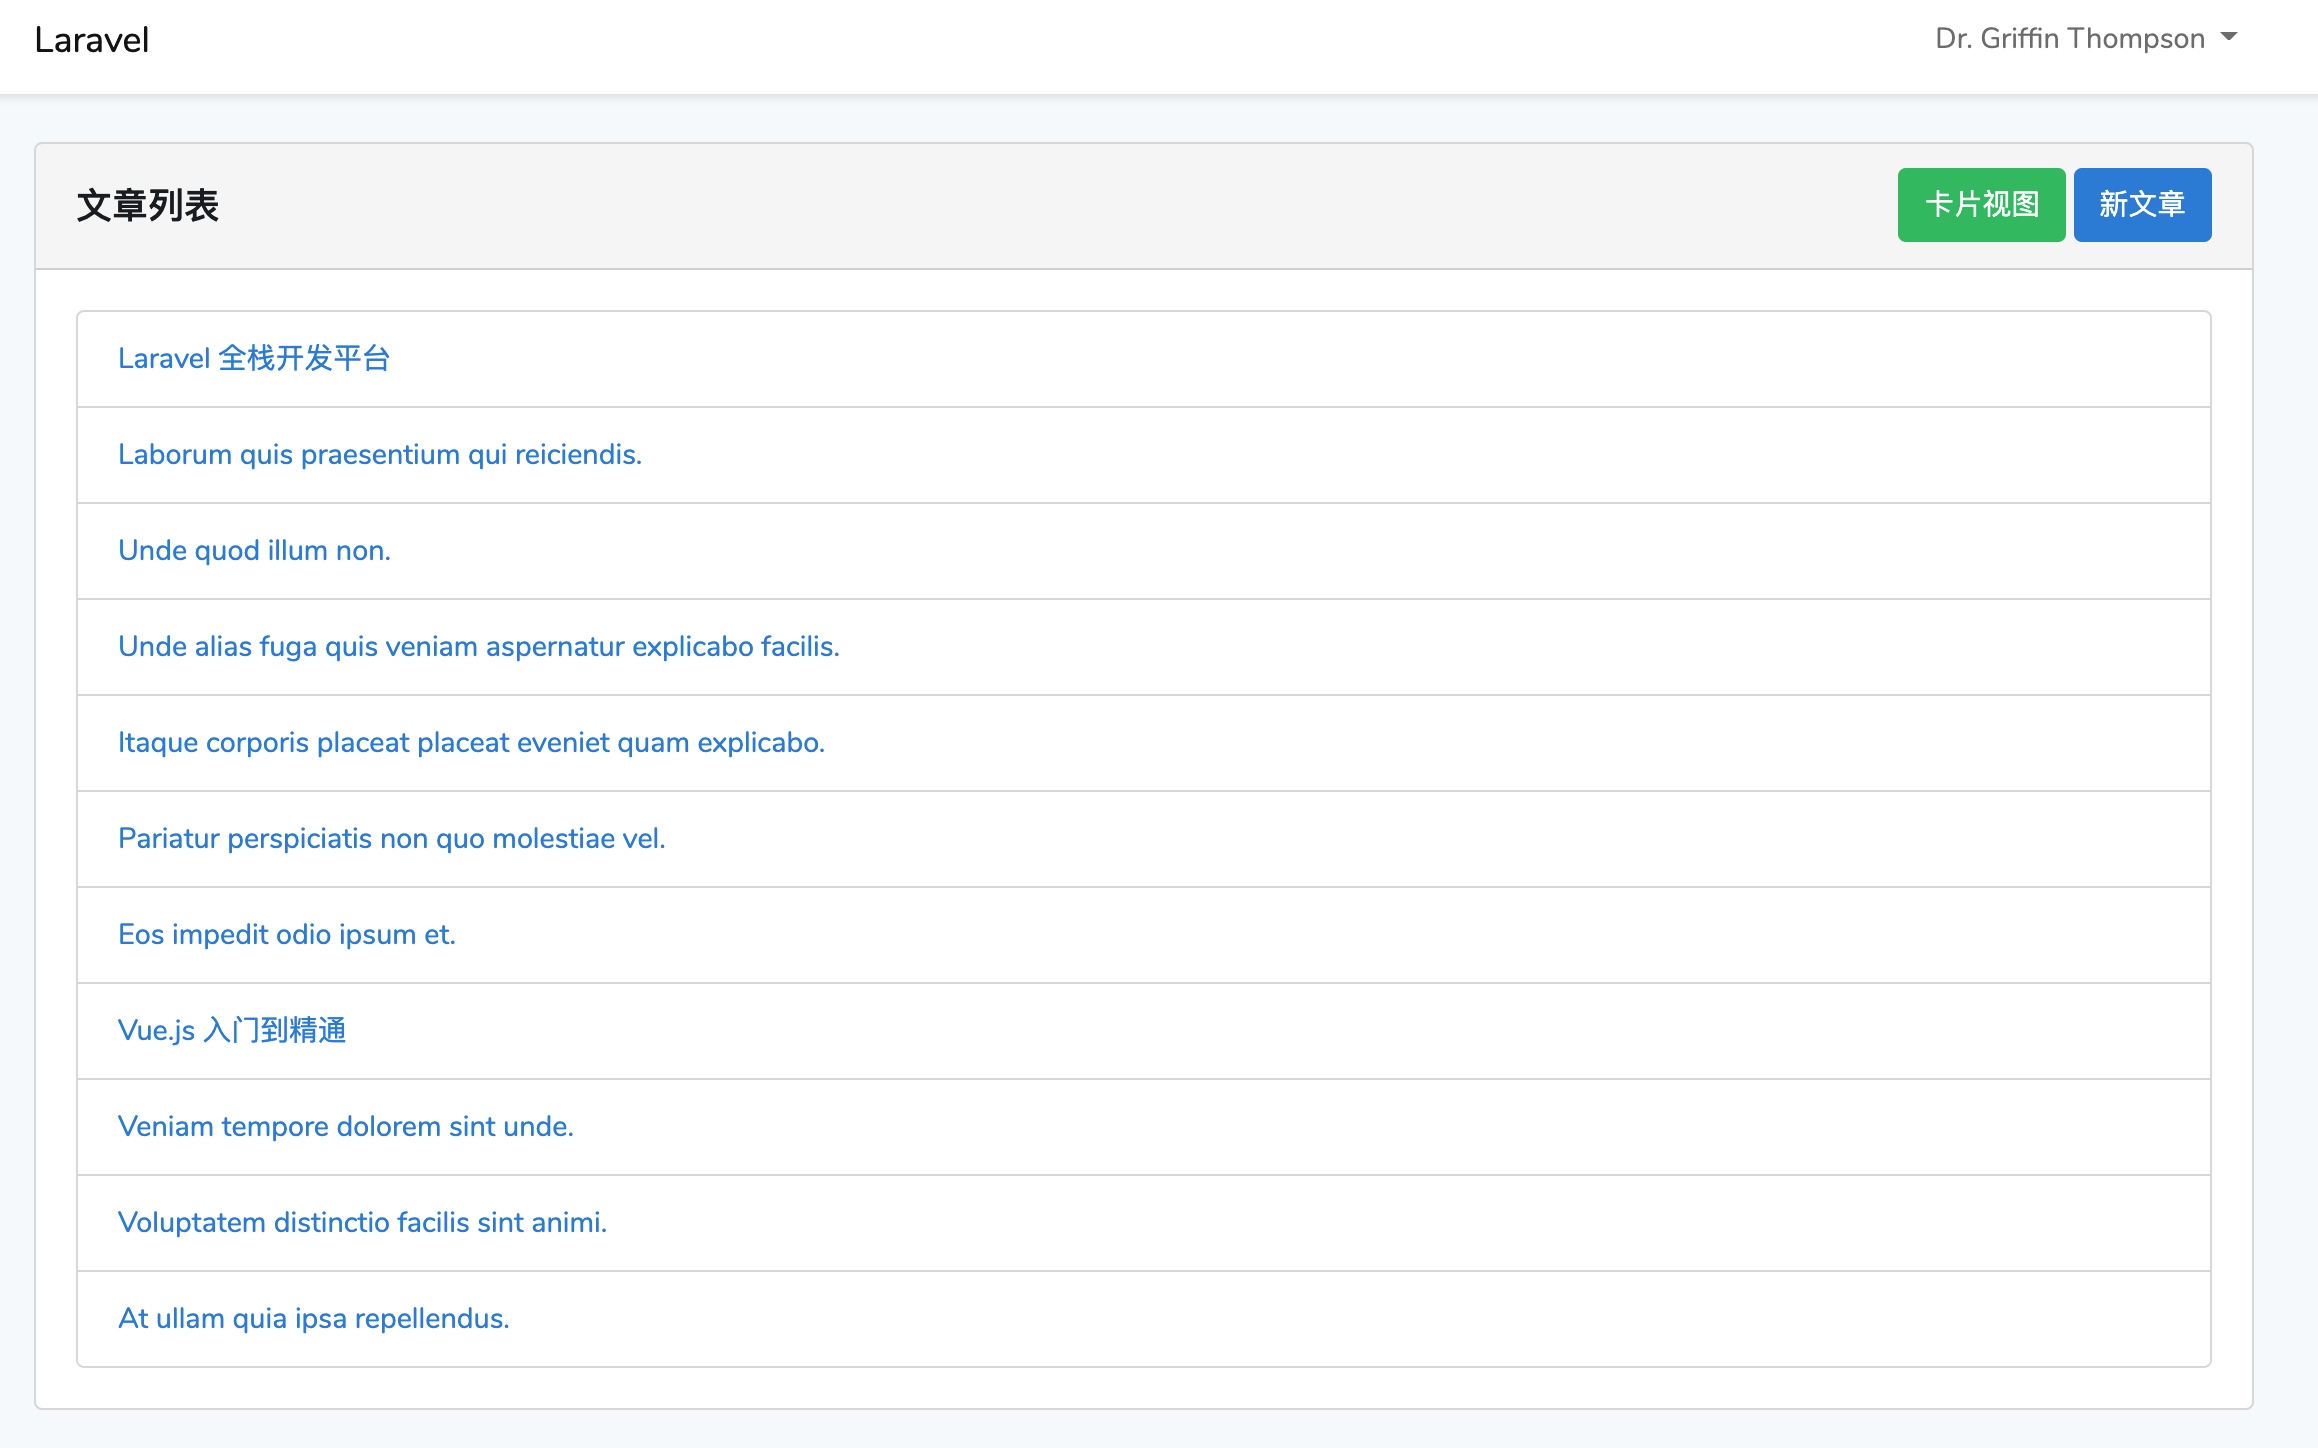
釋出成功後,頁面會跳轉到文章列表頁,並在列表中出現剛剛建立的文章:
增刪改查還剩下一個「刪」,下篇教學,就來給大家演示文章刪除功能實現,為什麼單獨介紹呢,因為我想結合刪除功能演示基於 Vue 元件的模態框、對話方塊以及過渡效果的實現。
以上就是教你基於Laravel+Vue元件實現文章釋出、編輯和瀏覽功能的詳細內容,更多請關注TW511.COM其它相關文章!