SpringBoot如何獲取當前專案全部Controller介面的兩種方式
2020-10-29 11:01:25
業務場景自己想,只分享技術實現。下面的演示由於我為了方便,直接在公司專案中寫的,所以一些敏感資訊專有名詞我要註釋,望諒解。
首先我們都知道,Spring的IOC機制,所有的介面和service都存在一個map容器,通過BeanFactory和ApplicationContext可以拿。那麼我們可以從這個開刀.
方案一
(1)想想有什麼方法或者介面是能夠獲取到ApplicationContext的,答案當然是有,Aware介面嘛,找到一個ApplicationContextAware,理論上就能獲取到ApplicationContext容器本身。
關於Aware介面的詳細描述:SpringBoot中的Aware介面

(2)ApplicationContext拿到了,剩下的其實就是從裡面拿到介面而已,這裡貪圖方便,就直接重寫啟動之後的run方法裡面做了。
CommandLineRunner:通過實現這個介面,重寫run方法,可以在啟動類完成後執行要做的事情,如果多個方法都繼承了CommandLineRunner介面,多個run方法都要執行,同時要有先後順序,加@Order(value = )配權重就可以了。
@Component
@Order(value = 2)
public class A implements CommandLineRunner{
@Override
public void run(String... strings) throws Exception {

    }
}

@Component
@Order(value = 1)
public class B implements CommandLineRunner {
@Override
public void run(String... strings) throws Exception {

    }
}
這樣,B一定會啟動成功後先於A先執行。
扯遠了,說回來,為方便直接寫:

@Override
    public void run(String... args) throws Exception {
        //獲取使用RestController註解標註的的所有controller類
        Map<String, Object> controllers = applicationContext.getBeansWithAnnotation(RestController.class);
        //遍歷每個controller層
        for (Map.Entry<String, Object> entry : controllers.entrySet()) {
            Object value = entry.getValue();
            System.out.println("拿到controller:"+entry.getKey()+",拿到value:"+value);
            Class<?> aClass = AopUtils.getTargetClass(value);
            System.out.println("拿到Class:"+aClass);
            }
            }
啟動,直接看輸出結果:

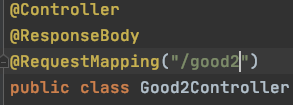
可以看到找到了GoodController 和AnalysisController,但是卻沒有找到我特意舉例的一個Good2Controller
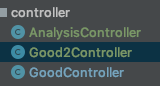
原因就是Good2我沒有使用RestController註解,而是使用了 @Controller + @ResponseBody,這是個小坑,不要以為RestController複合註解裡面包含了@Controller 就會理所當然被發現,結果是並不會。因為這裡是根據介面型別找的,它不關心你介面裡面包著什麼,只要不是RestController.class,統一發現不了。

(3)我們已經成功拿到了全部controller,但是我們都知道介面指的是controller下面的一個個public方法,於是繼續往下找。在上面的程式碼繼續加入這一行。

執行結果:

成功列印出來~
(4)如果我們不想發現全部的方法,而是有選擇性的發現Get,Post,Put之類的方法,也很簡單
    // 首先拿到所有的方法
	List<Method> declaredMethods = Arrays.asList(aClass.getDeclaredMethods());
            for (int i = 0; i < declaredMethods.size() ; i++) {
                // 下面開始根據註解型別進行輸出統計
                GetMapping getMapping = declaredMethods.get(i).getAnnotation(GetMapping.class);
                PostMapping postMapping = declaredMethods.get(i).getDeclaredAnnotation(PostMapping.class);
                System.out.println("Get相關的:"+JSON.toJSONString(getMapping));
                System.out.println("Post相關的:"+JSON.toJSONString(postMapping));
            }
成功~!

(5)總體程式碼提供,要做統計或者其他一些什麼介面的話,就自己用Map,SET 實現一下:
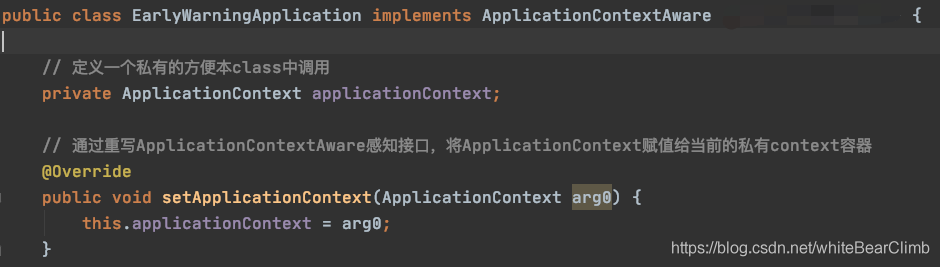
public class EarlyWarningApplication implements ApplicationContextAware ,CommandLineRunner {

    // 定義一個私有的方便本class中呼叫
    private ApplicationContext applicationContext;

    // 通過重寫ApplicationContextAware感知介面,將ApplicationContext賦值給當前的私有context容器
    @Override
    public void setApplicationContext(ApplicationContext arg0) {
        this.applicationContext = arg0;
    }

    public static void main(String[] args) {
        SpringApplication application = new SpringApplication(EarlyWarningApplication.class);
        application.run(args);
    }


    @Override
    public void run(String... args) throws Exception {

        Map<String, Object> controllers = applicationContext.getBeansWithAnnotation(RestController.class);

        for (Map.Entry<String, Object> entry : controllers.entrySet()) {
            Object value = entry.getValue();
            System.out.println("拿到controller:"+entry.getKey()+",拿到value:"+value);
            Class<?> aClass = AopUtils.getTargetClass(value);
            System.out.println("拿到Class:"+aClass);
            RequestMapping annotation = aClass.getAnnotation(RequestMapping.class);
            RequestMapping declaredAnnotation = aClass.getDeclaredAnnotation(RequestMapping.class);

            List<Method> methods = Arrays.asList(aClass.getMethods());
            System.out.println("Public Methods:" + methods);
            List<Method> declaredMethods = Arrays.asList(aClass.getDeclaredMethods());
            for (int i = 0; i < declaredMethods.size() ; i++) {
                GetMapping getMapping = declaredMethods.get(i).getAnnotation(GetMapping.class);
                PostMapping postMapping = declaredMethods.get(i).getDeclaredAnnotation(PostMapping.class);
                System.out.println("Get相關的:"+JSON.toJSONString(getMapping));
                System.out.println("Post相關的:"+JSON.toJSONString(postMapping));
            }
        }
    }
}
方案二
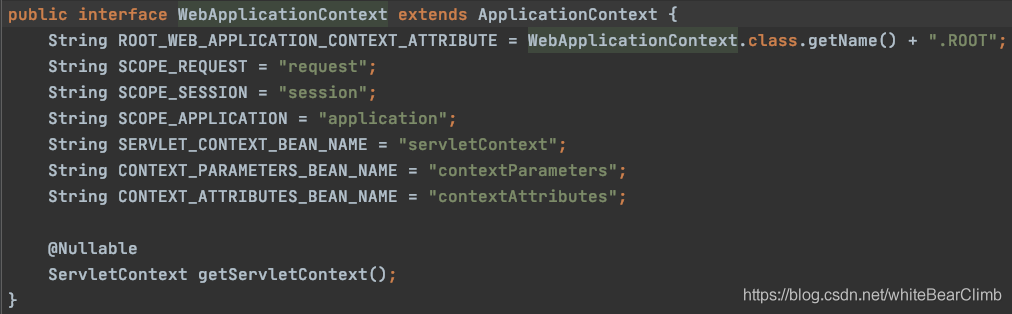
(1)隆重介紹WebApplicationContext 全域性介面,屬於ApplicationContext的一個兒子,它的作用很多,但是今天!在這裡!它只用來獲取每個Controller裡面的全部public介面~
(2)直接上程式碼,直接寫在某個Service或者Controller都行,寫在哪都行:
@Autowired
WebApplicationContext applicationContext;
@GetMapping("/getParam")
public String getParam(){
RequestMappingHandlerMapping mapping = applicationContext.getBean(RequestMappingHandlerMapping.class);
// 拿到Handler介面卡中的全部方法
Map<RequestMappingInfo, HandlerMethod> methodMap = mapping.getHandlerMethods();
List<String> urlList = new ArrayList<>();
for (RequestMappingInfo info : methodMap.keySet()){
Set<String> urlSet = info.getPatternsCondition().getPatterns();
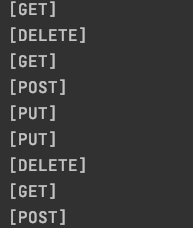
// 獲取全部請求方式
Set<RequestMethod> Methods = info.getMethodsCondition().getMethods();
System.out.println(Methods.toString());
for (String url : urlSet){
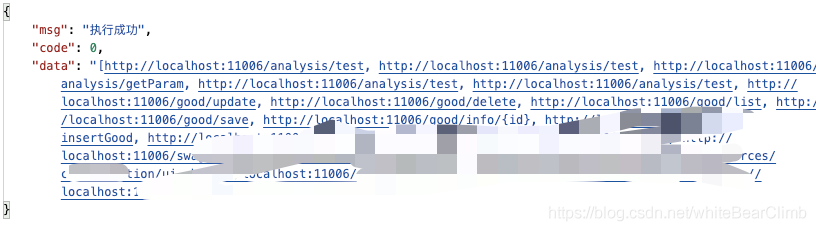
// 加上自己的域名和埠號,就可以直接呼叫
urlList.add("http://localhost:XXXX"+url);
}
}
return urlList.toString();
}
看下結果: