使用nginx搭建Spring Boot專案的負載均衡
2020-08-12 11:14:44
1、安裝nginx
- 準備工作
nginx1.8.1壓縮包下載nginx1.8.1版本的地址
兩臺機器之間能互相ping通
sh指令碼,內容如下
#/bin/bash
#安裝根路徑
path=/home/
#Nginx安裝包
Nginx='nginx-1.8.0.tar.gz'
###解壓後的nginx資料夾名字(壓縮包去除所有後綴)
NginxFile='nginx-1.8.0'
###過渡資料夾
file='middle'
echo "開始安裝Nginx"
echo "開始安裝Nginx相關依賴!"
yum install gcc-c++
yum install -y pcre pcre-devel
yum install -y zlib zlib-devel
yum install -y openssl openssl-devel
yum install -y lrzsz
echo "檢查Nginx是否已經開啓"
kill -9 `ps -ef |grep nginx |grep -v "grep" |awk '{print $2}'`
echo "檢查是否存在Nginx殘留並清理---------"
rm -rf $(find / -name "*nginx*")
cd ${path}
mkdir ${file}
cd ${file}
echo "請上傳${Nginx}"
rz
while (true)
do
if [ -e ${Nginx} ]; then
 break
else
 echo '傳輸的壓縮包錯誤!'
 rm -rf *
 echo "請重新傳輸${Nginx}壓縮包"
 rz
fi
done
mv ${Nginx} ${path}
cd ${path}
rm -rf ${file}
tar -zxvf ${Nginx}
cd ${path}${NginxFile}
#######可支援 Https 請求
./configure --user=nobody --group=nobody --prefix=/usr/local/nginx --with-http_stub_status_module --with-http_gzip_static_module --with-http_realip_module --with-http_sub_module --with-http_ssl_module
make && make install
echo "${NginxFile}安裝完成!"
echo "啓動Nginx-------------"
#關閉防火牆
systemctl stop firewalld
/usr/local/nginx/sbin/nginx
以上檔案複製到nginx.sh指令碼檔案中然後上傳到linux伺服器上執行即可
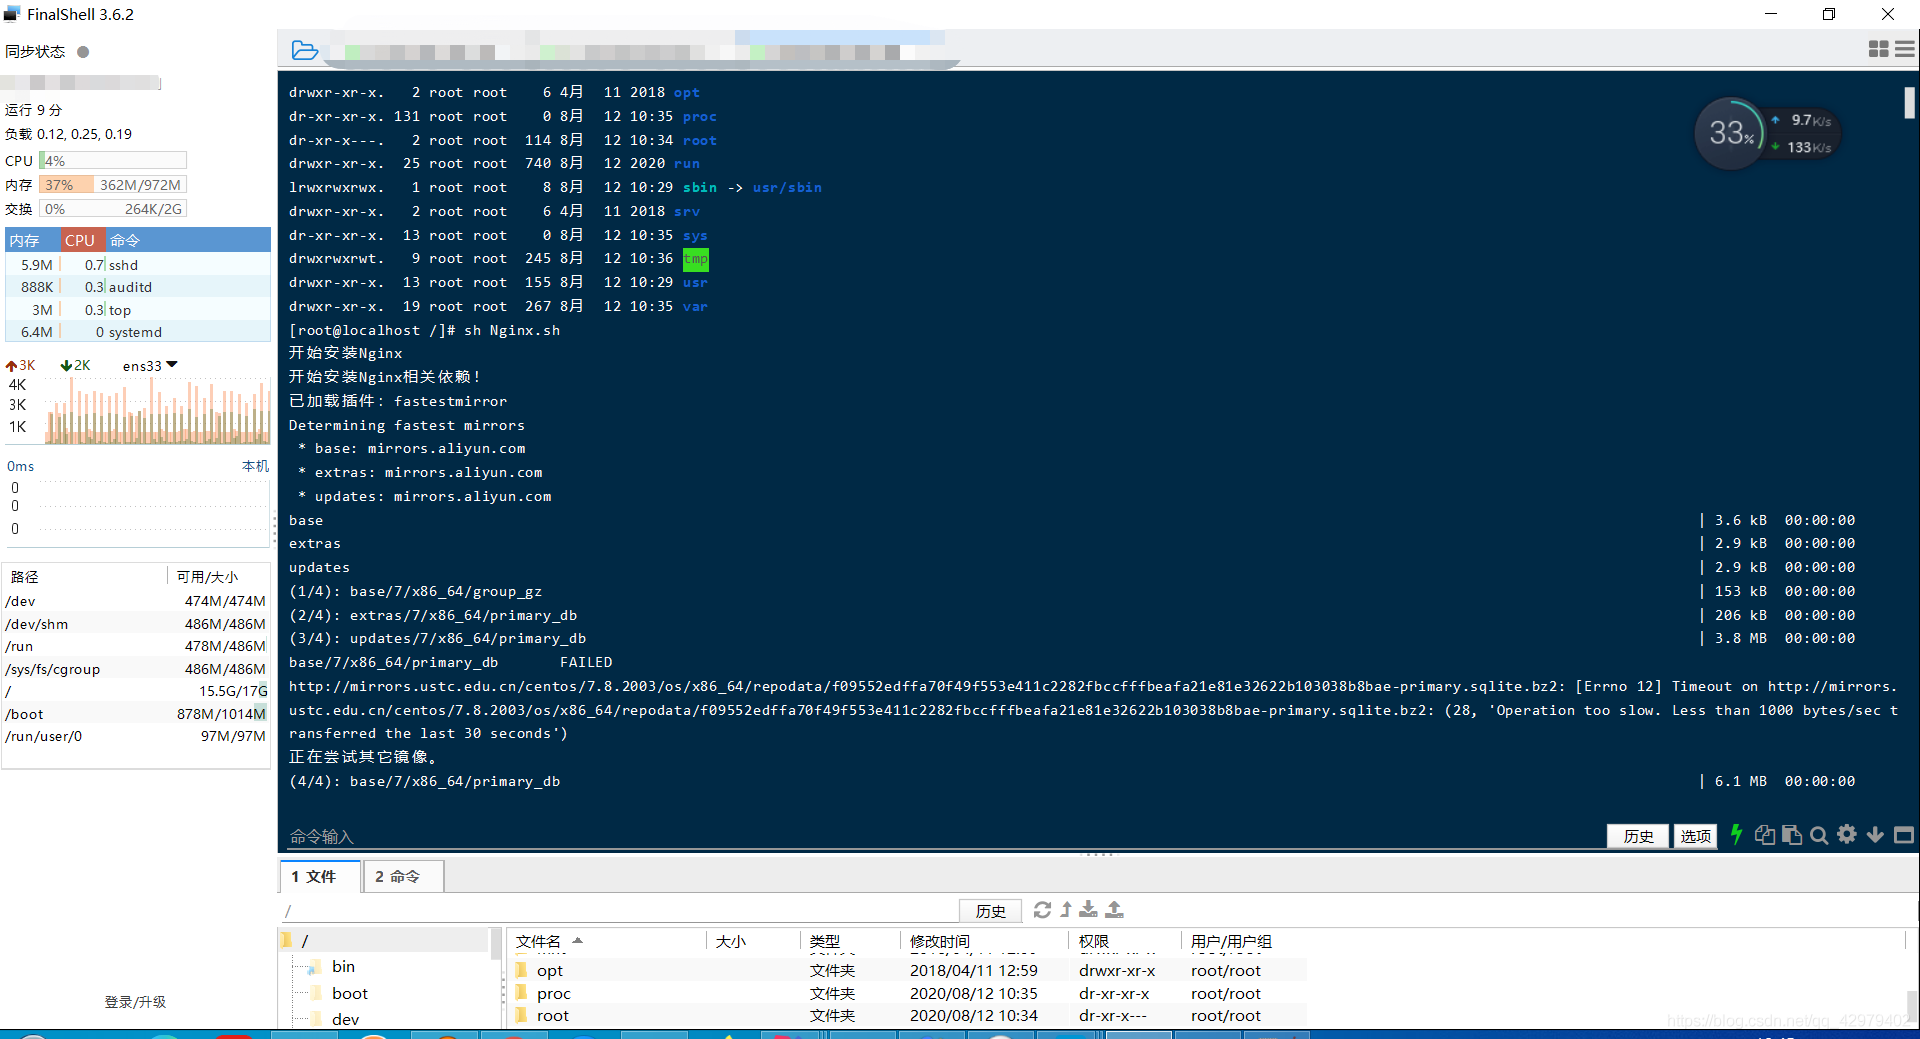
執行時只需要選擇y就好,指令碼會自動幫我們把依賴和相關外掛安裝上

編譯完成之後出現這種即代表安裝成功

我們還可以使用ps -ef | grep nginx命令來檢視nginx進程是否存在

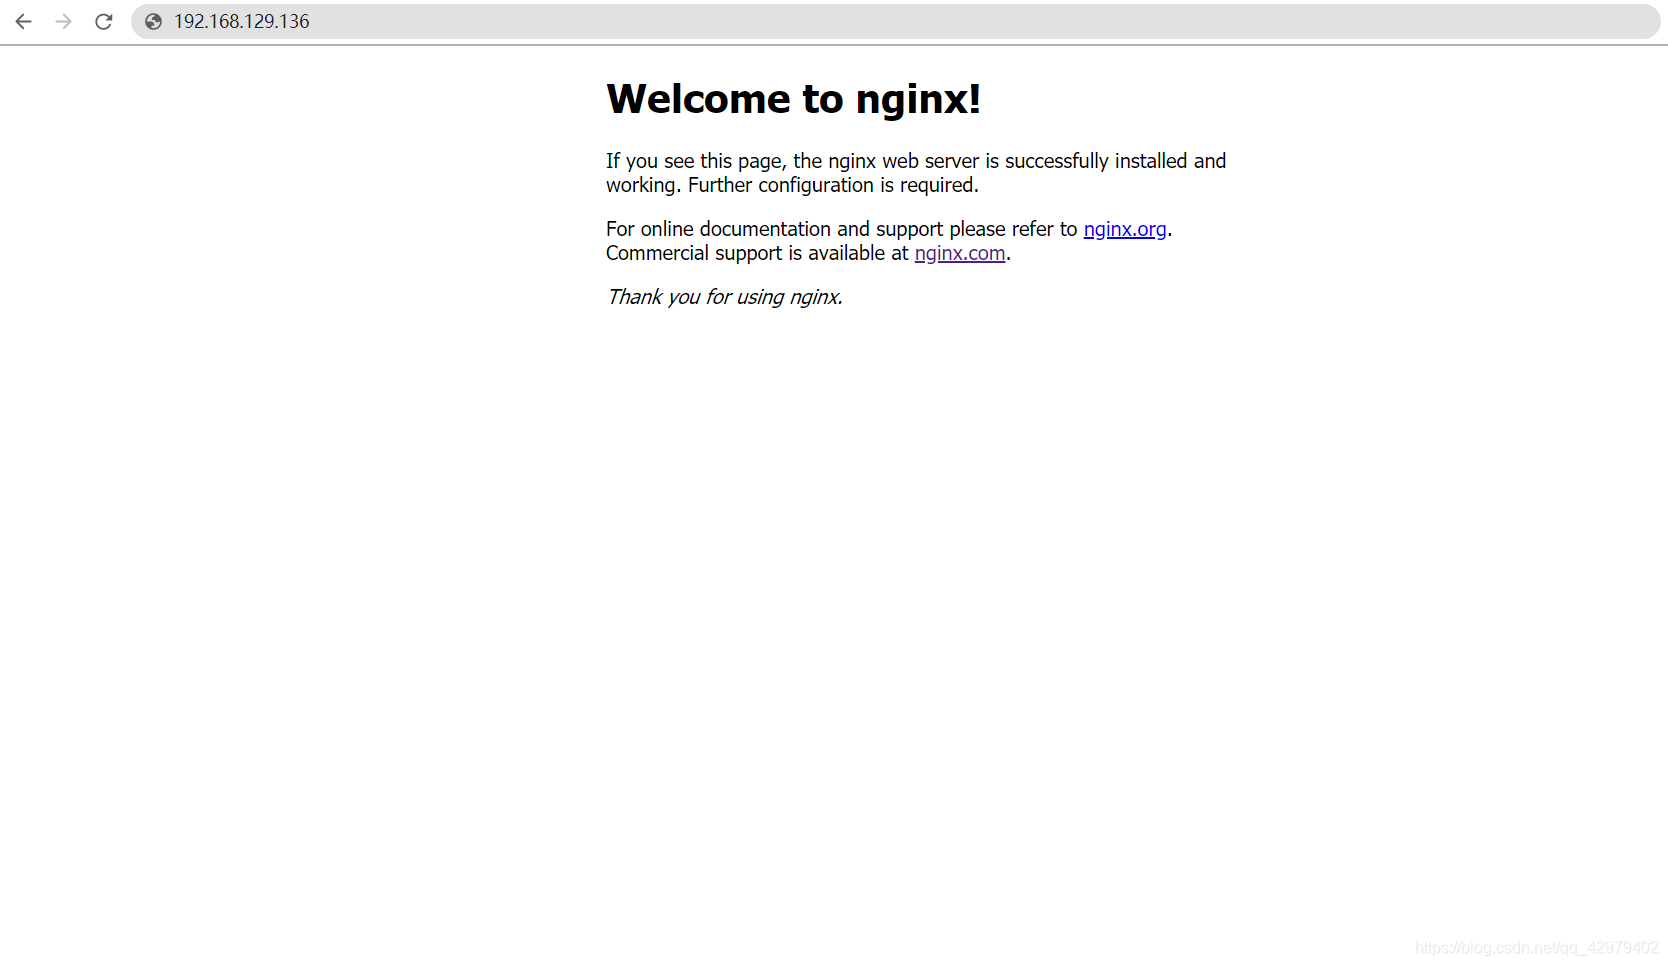
指令碼預設幫我們把防火牆關閉了,我們在瀏覽器上輸出虛擬機器的ip即可存取到我們的nginx

至此nginx的安裝就完成了
2.設定負載均衡
現在我們在兩臺虛擬機器執行我們相同的兩個Spring Boot專案


3.編寫nginx的組態檔
修改nginx.conf檔案裏面的內容,用上面指令碼安裝的預設會在/usr/local/nginx/conf裏面,如果安裝的時候設定了其他目錄可以自行尋找,也可以使用find / -name nginx.conf 命令查詢,找到之後修改裏面內容爲
user  root;
#全域性錯誤日誌
error_log  /usr/local/nginx/logs/nginx_error.log crit;
#pid檔案存放路徑
pid        /usr/local/nginx/nginx.pid;
#單進程開啓的最大檔案數
worker_rlimit_nofile 5000;
#工作模式及連線數上限
events {
	use epoll;
	#每個進程最大連線數(最大連線=連線數x進程數)
	worker_connections  5120;
}

http {
    #設定mime型別
    include       mime.types;
    default_type  application/octet-stream;

#日誌格式爲json
log_format json '{"@timestamp":"$time_iso8601",'
'"host":"$server_addr",'
'"clientip":"$remote_addr",'
'"size":$body_bytes_sent,'
'"responsetime":$request_time,'
'"upstreamtime":"$upstream_response_time",'
'"upstreamhost":"$upstream_addr",'
'"http_host":"$host",'
'"url":"$uri",'
'"referer":"$http_referer",'
'"agent":"$http_user_agent",'
'"status":"$status"}';
#反向代理組態檔 (由於此設定單純用來負載均衡,所以預留反向代理的檔案設定,實際上需要用到在conf目錄下建立proxy.conf並且寫入設定取消當前註釋,即可使用)
#include proxy.conf;
#虛擬主機組態檔   如果是1.81版本必須爲全路徑
include /usr/local/nginx/vhosts/*.conf;
#預設編碼
charset utf8;
#關閉nginx版本號
server_tokens off;
#伺服器名字的雜湊儲存大小
server_names_hash_bucket_size 128;
#設定請求緩衝,nginx預設會用client_header_buffer_size這個buffer來讀取header值,如果header過大,它會使用large_client_header_buffers來讀取
client_header_buffer_size 32k;
large_client_header_buffers 4 32k;
#sendfile 指令指定 nginx 是否呼叫 sendfile 函數(zero copy 方式)來輸出檔案,對於普通應用,必須設爲 on。如果用來進行下載等應用磁碟IO重負載應用,可設定爲 off,以平衡磁碟與網路IO處理速度,降低系統 uptime。
sendfile on;
#用戶端發送內容超時
send_timeout 60;
#網路連線選擇
tcp_nopush on;
#指定用戶端保活超時時間
keepalive_timeout 60;
#網路連線選擇
tcp_nodelay on;
#設定gzip
gzip on;
#最小壓縮檔案大小
gzip_min_length 1k;
#壓縮緩衝區
gzip_buffers 4 16k;
#壓縮版本
gzip_http_version 1.0;
#壓縮比率
gzip_comp_level 7;
#壓縮型別
gzip_types text/plain application/json application/x-javascript text/css application/xml;
#vary header支援
gzip_vary on;
#目錄限速
#limit_zone crawler $binary_remote_addr 10m;
access_log /usr/local/nginx/logs/access_json.log json;
#設定負載均衡 xuan可以自行修改
upstream kanavi{
    #ip_hash; 負載均衡演算法,可以百度,預設不填爲輪詢
    #這個代表你要分發的伺服器網站ip地址  如果有兩個
    server 192.168.129.136:81;
    #可以設定多個看效果
    #server 192.168.129.137:81;
}
}
在另外引入的組態檔裏面寫入我們的另外一個設定(include /usr/local/nginx/vhosts/*.conf;)
檔名隨意起,只要後綴是.conf即可
寫入以下設定
server
{
#監聽80
listen 85;
#這裏設定的是域名 我這裏就暫時用當前伺服器ip (nginx伺服器ip地址+埠) 實際中用域名即可 當有人存取你設定的這個域名,則自動到下面 下麪的location,然後location再代理到upstream,upstream則分發到我們設定的baidu.com
#假設這裏設定的server_name是xuan.com 那麼域名解析到你這個nginx的伺服器時,當別人通過xuan.com存取的時候,nginx則會讀取這個檔案的設定,從而再到下面 下麪的location,然後location再代理到nginx主設定當中的upstream
#然後upstream 裏面是可以設定多個ip或者域名的,比方說我有兩個你好的jsp的java專案,兩個tomcat在不同的埠,但是在同一個伺服器,比方說這個伺服器ip爲123.456.78.0,那麼upstream的設定就是123.456.78.0
#但是123.456.78.0裝了兩個tomcat埠號分別爲8081以及8082,那麼upstream裏面的server設定項就可以弄兩個,一個是123.456.78.0:8081,另一個就是123.456.67.0:8082了
#當別人來存取的時候,upstream就會自動分發到8081或者8082,減輕tomcat伺服器壓力,實現負載均衡
server_name 192.168.129.136;
#代表預設存取index.jsp檔案,這裏跳轉的是baidu所以註釋掉了
#index index.jsp;
#日誌存取記錄檔案位置 記得修改爲自己的檔案路徑
#access_log  /app/logs/xuan_log.log json;
#error_log  /app/logs/xuan_error_log.log error;
#這是java的ROOT資料夾,也就是專案war包解壓後的資料夾 這裏可以暫時註釋,如果是java專案則可以啓用
#root /ROOT;

location /
{
limit_rate 500k;
proxy_read_timeout 600s;
proxy_next_upstream http_502 http_504 error timeout invalid_header;
#到這裏的時候會轉發到nginx主設定當中的upstream爲kanavi的設定的ip地址去
proxy_pass http://kanavi;
proxy_set_header Host $host;
proxy_set_header X-Real-IP $remote_addr;
proxy_set_header X-Forwarded-For $proxy_add_x_forwarded_for;
}
}
重新啓動nginx即可
使用 kill -9 ps -ef | grep nginx |awk '{print $2}'命令殺掉和nginx相關的所有進程然後再進入sbin/目錄下啓動nginx
第一次存取

第二次存取

至此關於nginx的負載均衡就已經搭建完畢