微服務系列-Spring Boot使用Open Feign 微服務通訊範例
公眾號「架構成長指南」,專注於生產實踐、雲原生、分散式系統、巨量資料技術分享。
前言
在前幾個教學中我們已經看到:
使用 RestTemplate 的 Spring Boot 微服務通訊範例
使用 WebClient 的 Spring Boot 微服務通訊範例
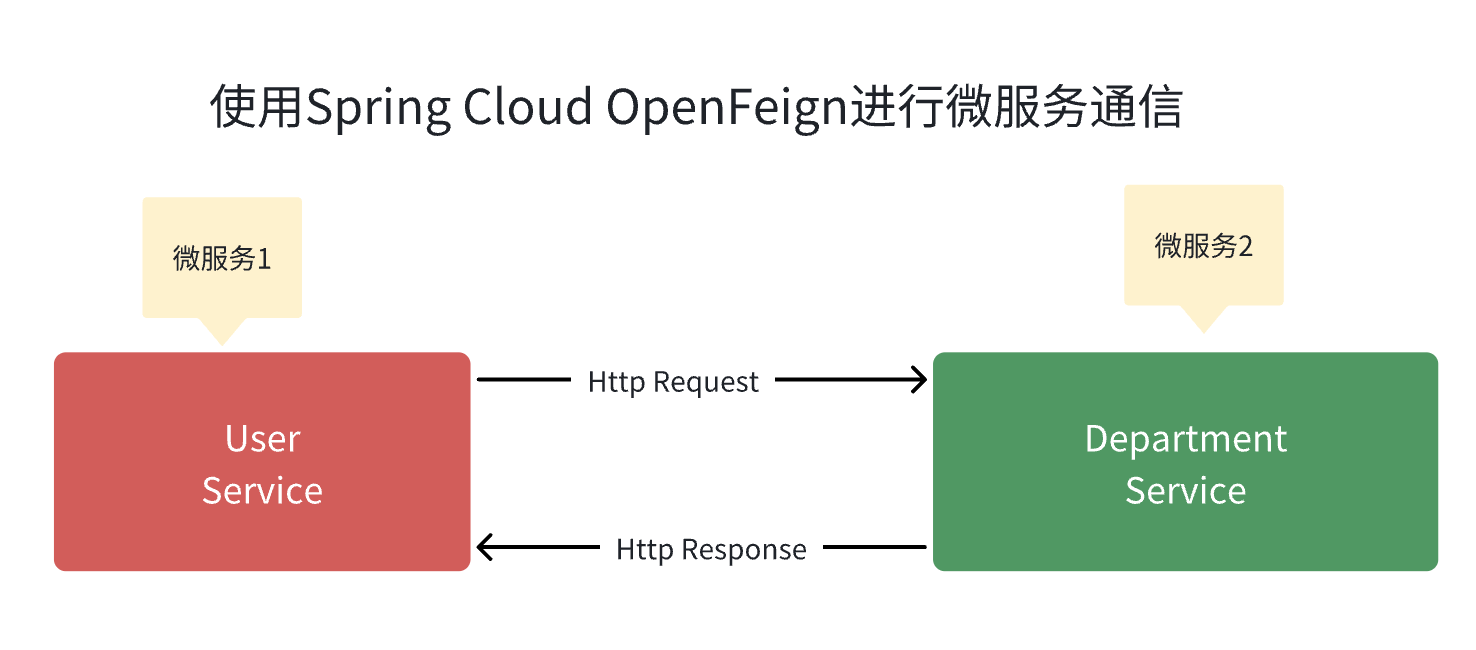
在本教學中,我們將學習如何使用 Spring Cloud Open Feign庫在多個微服務之間進行 REST API 呼叫(同步通訊)。
Spring Cloud Open Feign 概述
Feign通過可插拔的註解支援(包括Feign註解和JAX-RS註解)使編寫Web服務使用者端變得更加容易。此外,Spring Cloud還新增了對Spring MVC註解的支援,並使用與Spring Web中使用的相同的HttpMessageConverters。
使用Feign的一個很大的優點是,我們除了介面定義之外,不需要編寫任何呼叫服務的程式碼。
例如
package io.wz.userservice.service;

import io.wz.userservice.dto.DepartmentDto;
import org.springframework.cloud.openfeign.FeignClient;
import org.springframework.web.bind.annotation.GetMapping;
import org.springframework.web.bind.annotation.PathVariable;

@FeignClient(value = "DEPARTMENT-SERVICE", url = "http://localhost:8080")
public interface APIClient {
    @GetMapping(value = "/api/departments/{id}")
    DepartmentDto getDepartmentById(@PathVariable("id") String departmentId);
}
我們將構建什麼?
下面將建立兩個微服務,例如部門服務 和 使用者服務,並且我們將使用 Spring Cloud Open Feign從使用者服務到部門服務 進行 REST API 呼叫 ,以獲取特定的使用者部門。
基礎設定
參考以下教學建立 部門服務 和 使用者服務 微服務:
使用 RestTemplate 的 Spring Boot 微服務通訊範例。
第一步:將Spring cloud open feign Maven依賴新增到User-Service中
開啟 user-service專案 的 pom.xml檔案 並新增以下依賴項:
	<dependencyManagement>
		<dependencies>
			<dependency>
				<groupId>org.springframework.cloud</groupId>
				<artifactId>spring-cloud-dependencies</artifactId>
				<version>${spring-cloud.version}</version>
				<type>pom</type>
				<scope>import</scope>
			</dependency>
		</dependencies>
	</dependencyManagement>


<dependency>
			<groupId>org.springframework.cloud</groupId>
			<artifactId>spring-cloud-starter-openfeign</artifactId>
</dependency>
這是新增Spring cloud open feign依賴後的完整pom.xml檔案:
<?xml version="1.0" encoding="UTF-8"?>
<project xmlns="http://maven.apache.org/POM/4.0.0" xmlns:xsi="http://www.w3.org/2001/XMLSchema-instance"
	xsi:schemaLocation="http://maven.apache.org/POM/4.0.0 https://maven.apache.org/xsd/maven-4.0.0.xsd">
	<modelVersion>4.0.0</modelVersion>
	<parent>
		<groupId>org.springframework.boot</groupId>
		<artifactId>spring-boot-starter-parent</artifactId>
		<version>2.7.17</version>
		<relativePath/> <!-- lookup parent from repository -->
	</parent>
	<groupId>io.wz</groupId>
	<artifactId>user-service</artifactId>
	<version>0.0.1-SNAPSHOT</version>
	<name>user-service</name>
	<description>user-service</description>
	<properties>
		<java.version>1.8</java.version>
		<spring-cloud.version>2021.0.4</spring-cloud.version>
	</properties>
	<dependencyManagement>
		<dependencies>
			<dependency>
				<groupId>org.springframework.cloud</groupId>
				<artifactId>spring-cloud-dependencies</artifactId>
				<version>${spring-cloud.version}</version>
				<type>pom</type>
				<scope>import</scope>
			</dependency>
		</dependencies>
	</dependencyManagement>
	<dependencies>
		<dependency>
			<groupId>org.springframework.boot</groupId>
			<artifactId>spring-boot-starter-data-jpa</artifactId>
		</dependency>
		<dependency>
			<groupId>org.springframework.boot</groupId>
			<artifactId>spring-boot-starter-web</artifactId>
		</dependency>
		<dependency>
			<groupId>org.springframework.cloud</groupId>
			<artifactId>spring-cloud-starter-openfeign</artifactId>
		</dependency>
		<dependency>
			<groupId>com.mysql</groupId>
			<artifactId>mysql-connector-j</artifactId>
			<scope>runtime</scope>
		</dependency>
		<dependency>
			<groupId>org.projectlombok</groupId>
			<artifactId>lombok</artifactId>
			<optional>true</optional>
		</dependency>
		<dependency>
			<groupId>org.springframework.boot</groupId>
			<artifactId>spring-boot-starter-test</artifactId>
			<scope>test</scope>
		</dependency>
	</dependencies>
	<build>
		<plugins>
			<plugin>
				<groupId>org.springframework.boot</groupId>
				<artifactId>spring-boot-maven-plugin</artifactId>
				<configuration>
					<excludes>
						<exclude>
							<groupId>org.projectlombok</groupId>
							<artifactId>lombok</artifactId>
						</exclude>
					</excludes>
				</configuration>
			</plugin>
		</plugins>
	</build>

</project>
第2步:使用@EnableFeignClients啟用Feign Client
package io.wz.userservice;

import org.springframework.boot.SpringApplication;
import org.springframework.boot.autoconfigure.SpringBootApplication;
import org.springframework.cloud.openfeign.EnableFeignClients;

@SpringBootApplication
@EnableFeignClients
public class UserServiceApplication {

	public static void main(String[] args) {
		SpringApplication.run(UserServiceApplication.class, args);
	}
}
請注意,@EnableFeignClients 註解啟用元件掃描宣告它們是 Feign 使用者端的介面。
第3步:建立feign API使用者端
讓我們建立一個名為 APIClient的介面 並新增以下程式碼:
package io.wz.userservice.service;

import io.wz.userservice.dto.DepartmentDto;
import org.springframework.cloud.openfeign.FeignClient;
import org.springframework.web.bind.annotation.GetMapping;
import org.springframework.web.bind.annotation.PathVariable;

@FeignClient(value = "DEPARTMENT-SERVICE", url = "http://localhost:8080")
public interface APIClient {
    @GetMapping(value = "/api/departments/{id}")
    DepartmentDto getDepartmentById(@PathVariable("id") String departmentId);
}
我們使用@FeignClient註解宣告一個Feign使用者端
@FeignClient(value = "DEPARTMENT-SERVICE")
@FeignClient註解中傳遞的 value 引數是強制的,而使用 URL 引數時,我們指定了 API的URL。
@FeignClient(value = "DEPARTMENT-SERVICE", url = "http://localhost:8080")
此外,由於該介面是 Feign 使用者端,因此我們可以使用 Spring Web註解來宣告我們想要存取的 API。
第4步:更改getUser方法以呼叫APIClient
首先注入 APIClient 然後使用它:
DepartmentDto departmentDto = apiClient.getDepartmentById(user.getDepartmentId());
下面是使用Feign使用者端的UserServiceImpl的完整程式碼,供大家參考:
package io.wz.userservice.service.impl;

import lombok.AllArgsConstructor;
import io.wz.userservice.dto.DepartmentDto;
 import io.wz.userservice.dto.ResponseDto;
 import io.wz.userservice.dto.UserDto;
 import io.wz.userservice.entity.User;
 import io.wz.userservice.repository.UserRepository;
 import io.wz.userservice.service.APIClient;
 import io.wz.userservice.service.UserService;
import org.springframework.stereotype.Service;

@Service
@AllArgsConstructor
public class UserServiceImpl implements UserService {

    private UserRepository userRepository;

    private APIClient apiClient;

    @Override
    public User saveUser(User user) {
        return userRepository.save(user);
    }

    @Override
    public ResponseDto getUser(Long userId) {

        ResponseDto responseDto = new ResponseDto();
        User user = userRepository.findById(userId).get();
        UserDto userDto = mapToUser(user);

        DepartmentDto departmentDto = apiClient.getDepartmentById(user.getDepartmentId());
        responseDto.setUser(userDto);
        responseDto.setDepartment(departmentDto);

        return responseDto;
    }

    private UserDto mapToUser(User user){
        UserDto userDto = new UserDto();
        userDto.setId(user.getId());
        userDto.setFirstName(user.getFirstName());
        userDto.setLastName(user.getLastName());
        userDto.setEmail(user.getEmail());
        return userDto;
    }
}
現在執行兩個微服務並進行測試。
測試:啟動兩個微服務
首先啟動部門服務專案,然後啟動使用者服務專案。
一旦兩個專案都啟動並在不同的埠上執行。接下來,我們呼叫 Get User REST API 來測試 user-service REST API 對Department-service 的 呼叫 。
獲取使用者 REST API:

請注意,響應結果包含使用者的部門。 這表明我們已成功使用APIClient從使用者服務 到 部門服務進行 REST API 呼叫 。
結論
在本教學中,我們學習瞭如何使用 Spring Cloud Open Feign在多個微服務之間進行 REST API 呼叫(同步通訊)。