鉛華洗盡,粉黛不施,人工智慧AI基於ProPainter技術去除圖片以及視訊水印(Python3.10)
視訊以及圖片修復技術是一項具有挑戰性的AI視覺任務,它涉及在視訊或者圖片序列中填補缺失或損壞的區域,同時保持空間和時間的連貫性。該技術在視訊補全、物件移除、視訊恢復等領域有廣泛應用。近年來,兩種突出的方案在視訊修復中嶄露頭角:flow-based propagation和spatiotemporal Transformers。儘管兩套方案都還不錯,但它們也存在一些侷限性,如空間錯位、時間範圍有限和過高的成本。
說白了,你通過AI技術移除水印或者修復一段不清晰的視訊,但結果卻沒法保證連貫性,讓人一眼能看出來這個視訊或者圖片還是缺失狀態,與此同時,過高的算力成本也是普通人難以承受的。
本次,我們通過ProPainter框架來解決視訊去水印任務,該框架引入了一種稱為雙域傳播的新方法和一種高效的遮罩引導視訊Transformers。這些元件共同增強了視訊修復的效能,同時保持了計算效率,成本更低,讓普通人也能完成複雜的水印去除任務,正所謂:清水出芙蓉,天然去雕飾。
安裝設定ProPainter
老規矩,首先克隆專案:
git clone https://github.com/sczhou/ProPainter.git
該專案基於CUDA框架,請確保本地環境的CUDA版本大於9.2。
執行命令檢視原生的CUDA版本:
nvcc --version
輸出:
PS C:\Users\zcxey> nvcc --version
nvcc: NVIDIA (R) Cuda compiler driver
Copyright (c) 2005-2022 NVIDIA Corporation
Built on Tue_Mar__8_18:36:24_Pacific_Standard_Time_2022
Cuda compilation tools, release 11.6, V11.6.124
Build cuda_11.6.r11.6/compiler.31057947_0
截至本文釋出,筆者的版本是11.6,關於本機設定CUDA和cudnn,請移玉步至:聲音好聽,顏值能打,基於PaddleGAN給人工智慧AI語音模型配上動態畫面(Python3.10),囿於篇幅,這裡不再贅述。
隨後進入專案:
cd ProPainter
安裝依賴:
pip3 install -r requirements.txt
接著下載ProPainter的預訓練模型:https://github.com/sczhou/ProPainter/releases/tag/v0.1.0
將其放入專案的weights目錄中,模型放入之後的目錄結構如下:
weights
   |- ProPainter.pth
   |- recurrent_flow_completion.pth
   |- raft-things.pth
   |- i3d_rgb_imagenet.pt (for evaluating VFID metric)
   |- README.md
至此,ProPainter就設定好了。
物件移除
ProPainter很貼心地在專案中放入了一些範例,我們直接在專案的根目錄執行命令:
python3 inference_propainter.py
程式輸出:
E:\work\ProPainter>python inference_propainter.py
Pretrained flow completion model has loaded...
Pretrained ProPainter has loaded...
Network [InpaintGenerator] was created. Total number of parameters: 39.4 million. To see the architecture, do print(network).

Processing: bmx-trees [80 frames]...
100%|██████████████████████████████████████████████████████████████████████████████████| 16/16 [00:10<00:00,  1.52it/s]

All results are saved in results\bmx-trees
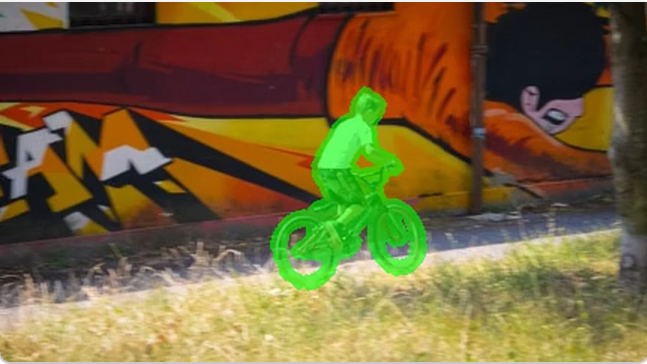
ProPainter就會自動演示一段80幀的視訊物件移除功能,輸出在專案的results資料夾中:

可以看到,指令碼將畫面裡騎自行車的小孩以及自行車給移除了。
具體操作就是將要移除的物體遮罩以及原畫面放入到專案的inputs資料夾中,隨後預訓練模型會根據遮罩完成移除和補全動作。
生成遮罩(mask)
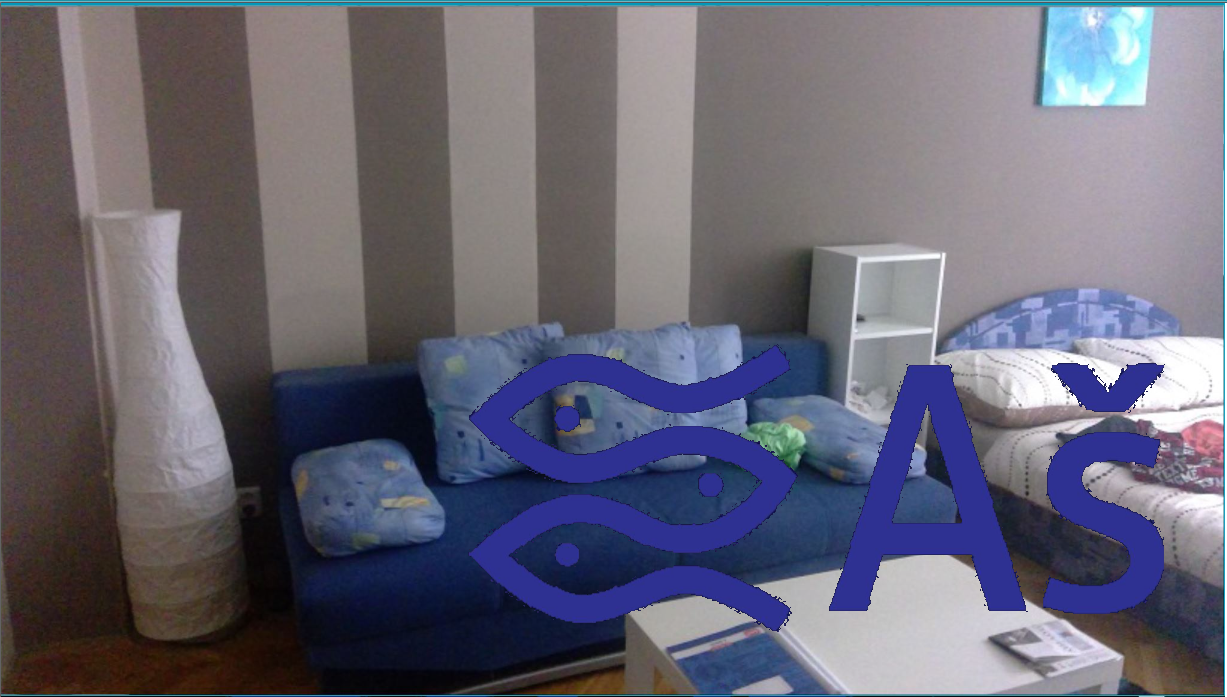
為了防止不法者的濫用,專案作者移除了水印的範例,現在我們來進行演示如何移除水印,首先我有一張帶水印的視訊或者圖片:

可以看到該水印十分巨大,將原始畫面的沙發,桌子以及床都遮住了一部分,那麼第一步我們需要生成水印的遮罩,讓程式可以容易的識別水印輪廓。
首先安裝Open-cv庫:
pip3 install opencv-python
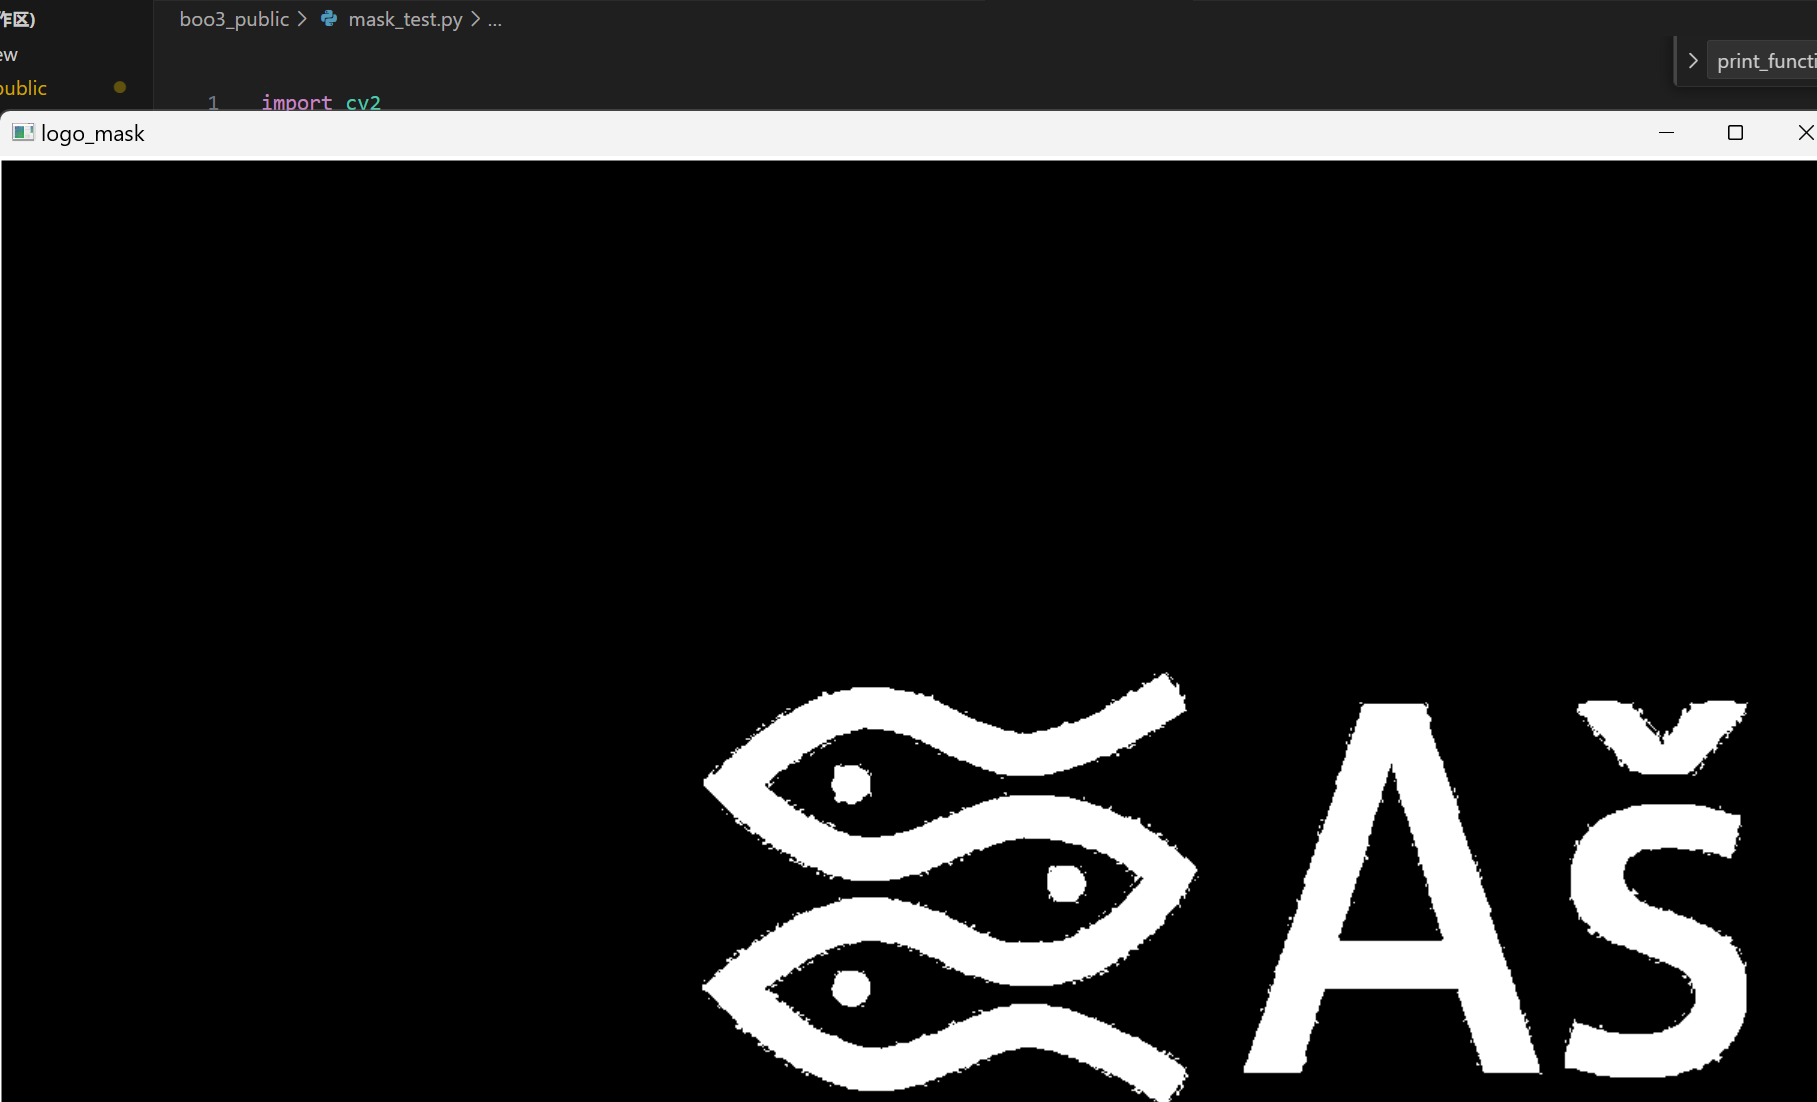
隨後編寫程式碼,將logo提取併產生遮罩:
import cv2
import numpy as np


room = cv2.imread('D:/Downloads/room.png' )
logo = cv2.imread('D:/Downloads/logo.png' )

#--- Resizing the logo to the shape of room image ---
logo = cv2.resize(logo, (room.shape[1], room.shape[0]))

#--- Apply Otsu threshold to blue channel of the logo image ---
ret, logo_mask = cv2.threshold(logo[:,:,0], 0, 255, cv2.THRESH_BINARY|cv2.THRESH_OTSU)
cv2.imshow('logo_mask', logo_mask)
cv2.waitKey()
cv2.imwrite('D:/Downloads/logo_mask.png', logo_mask)
執行效果:

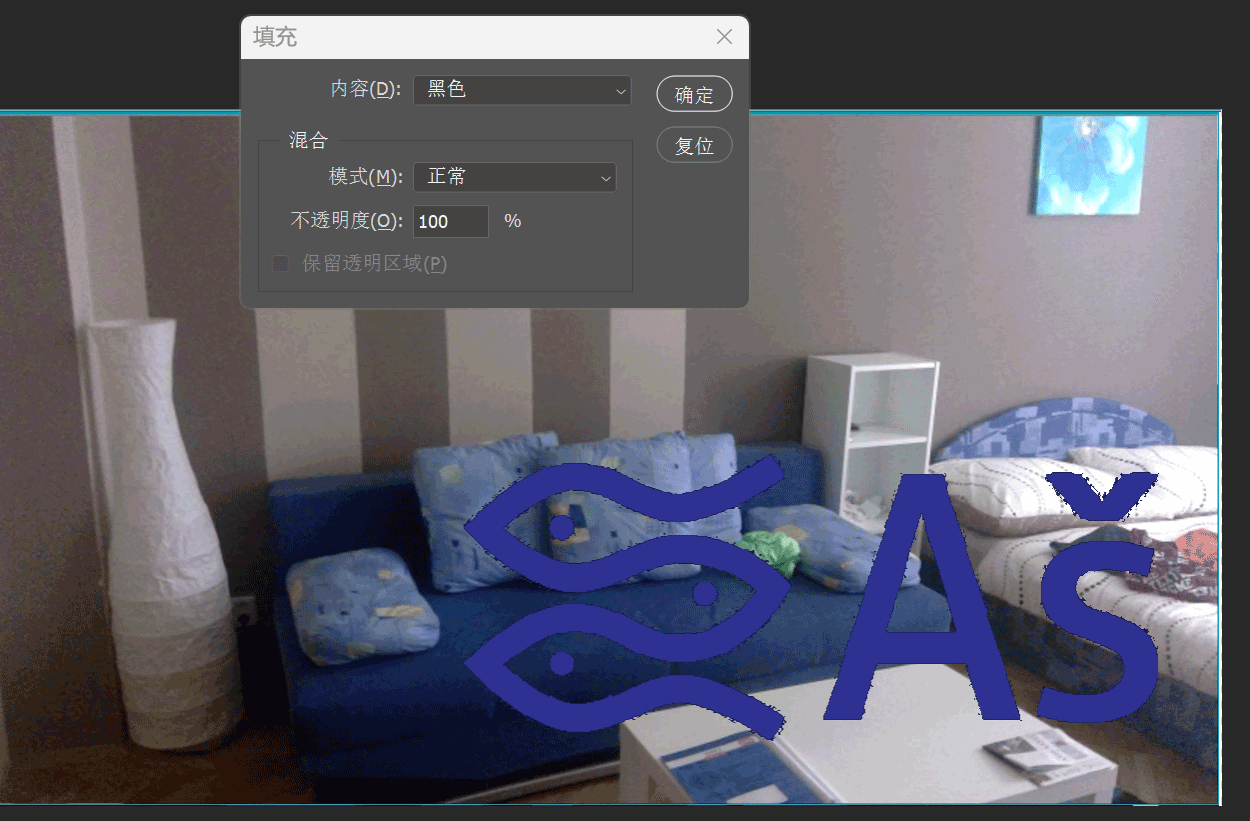
當然,如果不想通過程式碼來完成,也可以通過Photoshop來做,直接通過Photoshop的的內容選取-》反向選擇-》填充黑色-》隨後再次反向選擇-》填充白色,來完成:

最後效果和Open-cv的處理結果是一樣的。
去除水印
如此,我們得到了原畫面以及水印的遮罩,在專案的inputs目錄建立test目錄,隨後建立img和mask目錄,分別將原畫和水印遮罩放入目錄:
├─inputs
│  ├─test
│  │  ├─img
│  │  └─mask
注意,由於該專案是基於視訊的,所以最少也得有兩幀的畫面,如果只有1幀的畫面,會報錯。
執行命令:
python3 inference_propainter.py --video inputs/test/img --mask inputs/test/mask
程式返回:
E:\work\ProPainter>python inference_propainter.py --video inputs/test/img --mask inputs/test/mask
Pretrained flow completion model has loaded...
Pretrained ProPainter has loaded...
Network [InpaintGenerator] was created. Total number of parameters: 39.4 million. To see the architecture, do print(network).

Processing: img [2 frames]...
100%|████████████████████████████████████████████████████████████████████████████████████| 1/1 [00:54<00:00, 54.30s/it]
IMAGEIO FFMPEG_WRITER WARNING: input image is not divisible by macro_block_size=16, resizing from (1227, 697) to (1232, 704) to ensure video compatibility with most codecs and players. To prevent resizing, make your input image divisible by the macro_block_size or set the macro_block_size to 1 (risking incompatibility).
[swscaler @ 0000025d0a1b5900] Warning: data is not aligned! This can lead to a speed loss
IMAGEIO FFMPEG_WRITER WARNING: input image is not divisible by macro_block_size=16, resizing from (1227, 697) to (1232, 704) to ensure video compatibility with most codecs and players. To prevent resizing, make your input image divisible by the macro_block_size or set the macro_block_size to 1 (risking incompatibility).
[swscaler @ 000001b30eb858c0] Warning: data is not aligned! This can lead to a speed loss

All results are saved in results\img
可以看到,程式將處理後的兩幀視訊結果輸出到了專案的results/img目錄中,去除水印後的結果:

移除效果可謂是非常驚豔了。
當然,我們只處理了視訊的其中兩幀畫面,如果是10分鐘左右的視訊通常需要大量的GPU記憶體。通過下面的引數輸入,可以有效解決原生的「爆視訊記憶體」錯誤:
通過減少--neighbor_length(預設為10)來減少區域性長度的數量。
通過增加--ref_stride(預設為10)來減少全域性參考幀的數量。
通過設定--resize_ratio(預設為1.0)來調整處理視訊的大小。
通過指定--width和--height來設定較小的視訊尺寸。
設定--fp16,在推理過程中使用fp16(半精度)。
通過減少子視訊的幀數--subvideo_length(預設為80),有效地分離了GPU記憶體成本和視訊長度。
結語
ProPainter毫無疑問是偉大的專案,但需要注意的是,移除水印可能涉及侵犯版權或違反合同條款,具體是否違法取決於您所在的國家或地區的法律法規以及相關合同的規定。
在許多情況下,水印是版權保護的一種方式,用於標識作品的所有權歸屬或授權情況。如果您未經授權移除水印,可能會侵犯原創作者的版權權益,這可能違反了版權法。
此外,如果您在使用某個服務或軟體時同意了相關的使用條款和隱私政策,這些條款和政策通常會規定您不得移除或修改任何水印或版權資訊。違反這些合同條款可能導致法律責任。
因此,建議在涉及水印的情況下,您應該遵守適用的法律法規和合同條款,並尊重原始作品的版權和智慧財產權。