Skywalking APM監控系列(二、Mysql、Linux伺服器與前端JS接入Skywalking監聽)
上篇我們介紹了Skywalking的基本概念與如何接入.Net Core專案,感興趣可以去看看:
Skywalking APM監控系列(一丶.NET5.0+接入Skywalking監聽)
本篇我們主要講解一下Skywalking如何接入mysql資料庫監聽與Linux伺服器的監聽
其實從Skywalking設計之初 應該只是單獨的鏈路跟蹤,發展到現在 已經成為了一個成熟的APM框架了.
既然是APM那我們當然需要監聽到資料庫情況和伺服器的情況.
本篇就講講如何監聽這些資料
mysql接入Skywalking需要兩個工具:
pentelemetry-collector
他們一個負責資料庫的資料採集,一個負責將採集到的資料彙總後傳送給Skywalking的OAP服務,並最終通過UI展示在介面上.
所以,我們需要先安裝這兩個工具,當然,他們也是支援容器化的,所以這裡採用docker執行,如下:
1.部署mysqld-exporter
docker run -d -p 9104:9104 --name mysqld-exporte -e DATA_SOURCE_NAME=mysql_exporter:mysql_exporter@(mysql地址:3306)/ -e TZ=Asia/Shanghai prom/mysqld-exporter:v0.14.0
這裡,我們通過環境變數DATA_SOURCE_NAME,直接將資料庫連線給賦予mysqld-exporter
2.部署pentelemetry-collector
首先我們需要建立pentelemetry-collector的yaml組態檔,建立檔案otel-collector-config.yaml,輸入內容如下:
receivers:
  prometheus:
    config:
     scrape_configs:
       - job_name: 'mysql-monitoring'
         scrape_interval: 5s
         static_configs:
           - targets: ['mysqld-exporter:9104'] #這裡是mysqld-exporter的地址
             labels:
               host_name: showcase
processors:
  batch:

exporters:
  otlp:
    endpoint: SkyWalking OAP 地址:11800
    tls:
      insecure: true
service:
  pipelines:
    metrics:
      receivers:
      - prometheus
      processors:
      - batch
      exporters:
      - otlp
這裡解釋一下含義:
1)receivers 用於設定 Collector 的資料來源,這裡是從 prometheus 的 mysqld_exporter 抓取資料;
2)exporters 用於設定要將接收到的資料傳送到哪裡,這裡是傳送到 SkyWalking OAP ;
3)processors 指定如何處理接收到的資料;
4)service 設定將整個 pipelines 串起來。
然後我們執行pentelemetry-collector容器,命令如下:
docker run -d -p 55678:55678--name otel-collector -v /home/otel-collector-config.yaml:/etc/otel-collector-config.yaml -e TZ=Asia/Shanghai otel/opentelemetry-collector:0.86.0 --config=/etc/otel-collector-config.yaml
這裡將我們剛寫好的otel-collector-config.yaml檔案對映至容器內,並通過這個設定執行pentelemetry-collector.
這樣就完成了整個部署工作
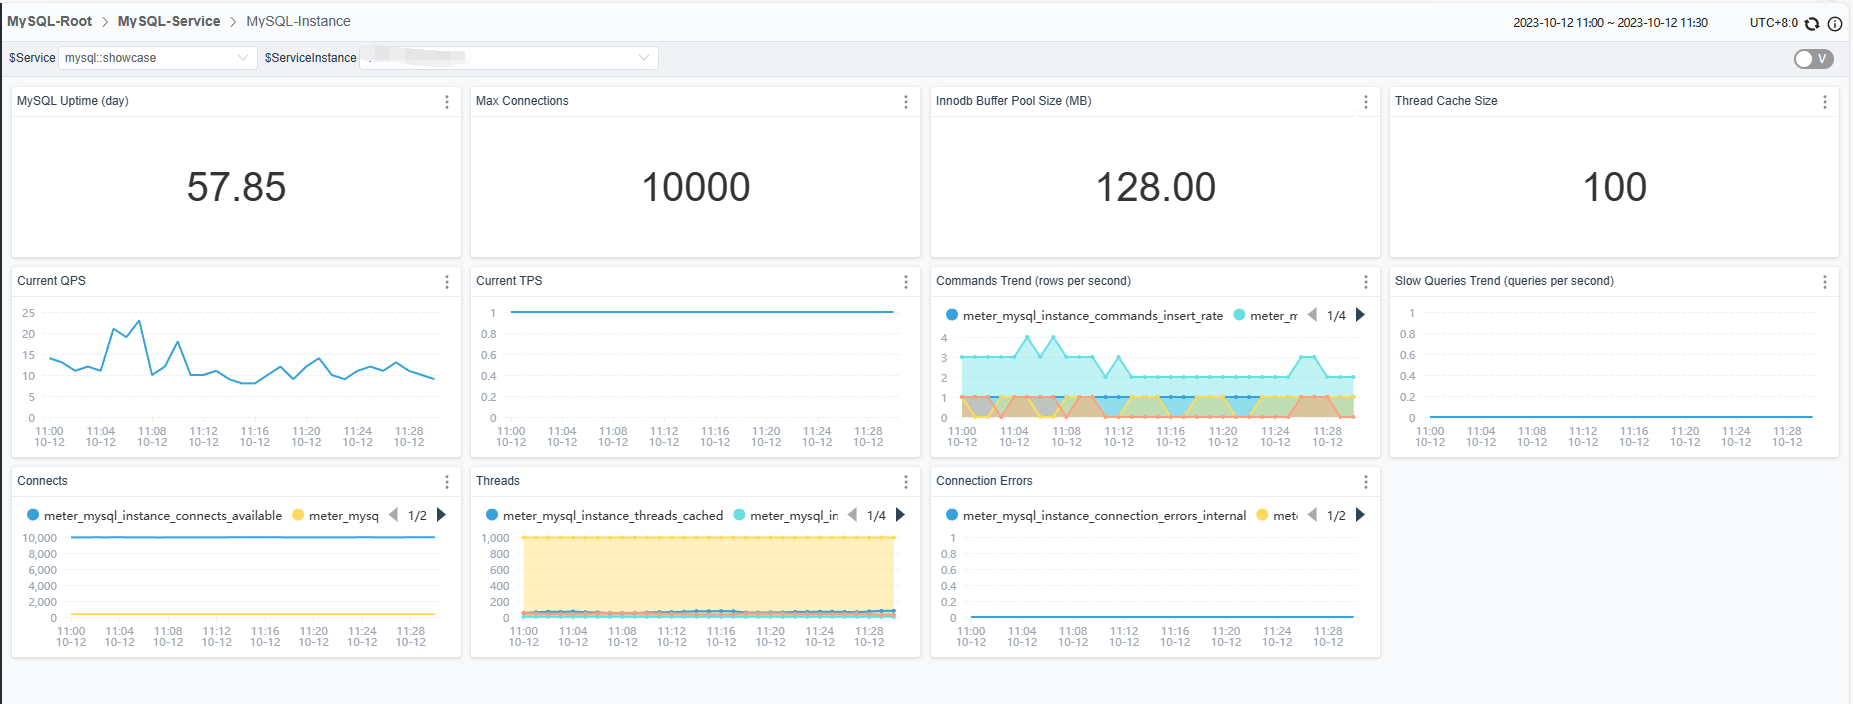
3.效果預覽

Linux伺服器接入Skywalking也需要兩個工具:
node_exporter
pentelemetry-collector
他們一個負責資料庫的資料採集,一個負責將採集到的資料彙總後傳送給Skywalking的OAP服務,並最終通過UI展示在介面上.
所以,我們需要先安裝這兩個工具,雖然node_exporter支援容器化執行,但是需要額外設定一些其他的東西,所以我們採取直接執行在linux主機上.(官網的最佳實踐也是建議直接跑在伺服器中)
1.我們需要先安裝node_exporter,下載地址如下:
Release 1.6.1 / 2023-06-17 · prometheus/node_exporter (github.com)
各位根據需要,自行下載,(需小技巧上網)
然後我們將下好的壓縮包複製到伺服器上
通過命令解壓,如下:
tar -xvf node_exporter-1.6.1.linux-amd64.tar.gz
然後,我們需要建立一個系統服務,讓node_exporter能夠開機自啟並通過系統管控,執行命令如下:
vim /etc/systemd/system/node_exporter.service
複製如下內容:
[Unit]
Description=node exporter service
Documentation=https://prometheus.io
After=network.target

[Service]
Type=simple
User=root
Group=root
ExecStart=/home/skywalking/node_exporter-1.6.1.linux-amd64/node_exporter #這裡是node_exporter的解壓地址
Restart=on-failure

[Install]
WantedBy=multi-user.target
執行命令刷新系統服務命令:
systemctl daemon-reload
開啟node_exporter服務命令:
systemctl start node_exporter
這裡服務預設監聽9100埠,請勿佔用,如需變更,可以自行百度...
這樣就完成了node_exporter的安裝
2.修改pentelemetry-collector的設定
我們直接修改otel-collector-config.yaml如下:
receivers:
  prometheus:
    config:
      scrape_configs:
        - job_name: "vm-monitoring" # make sure to use this in the vm.yaml to filter only VM metrics
          scrape_interval: 10s
          static_configs:
            - targets: ['gateway.docker.internal:9100'] # 這裡是主機伺服器的採集地址
  prometheus/2:
    config:
     scrape_configs:
       - job_name: 'mysql-monitoring'
         scrape_interval: 5s
         static_configs:
           - targets: ['gateway.docker.internal:9104']  # 這裡是主機mysql的採集地址
             labels:
               host_name: showcase

processors:
  batch:
  batch/2:

exporters:
  otlp:
    endpoint: gateway.docker.internal:11800 # 這裡是OAP Server address

    tls:
      insecure: true
  otlp/2:
    endpoint: gateway.docker.internal:11800  # 這裡是OAP Server address
    tls:
      insecure: true
    #insecure: true

service:
  pipelines:
    metrics:
      receivers: [prometheus]
      processors: [batch]
      exporters: [otlp]
    metrics/2:
      receivers: [prometheus/2]
      processors: [batch/2]
      exporters: [otlp/2]
改好設定後,我們重啟上面的pentelemetry-collector服務即可
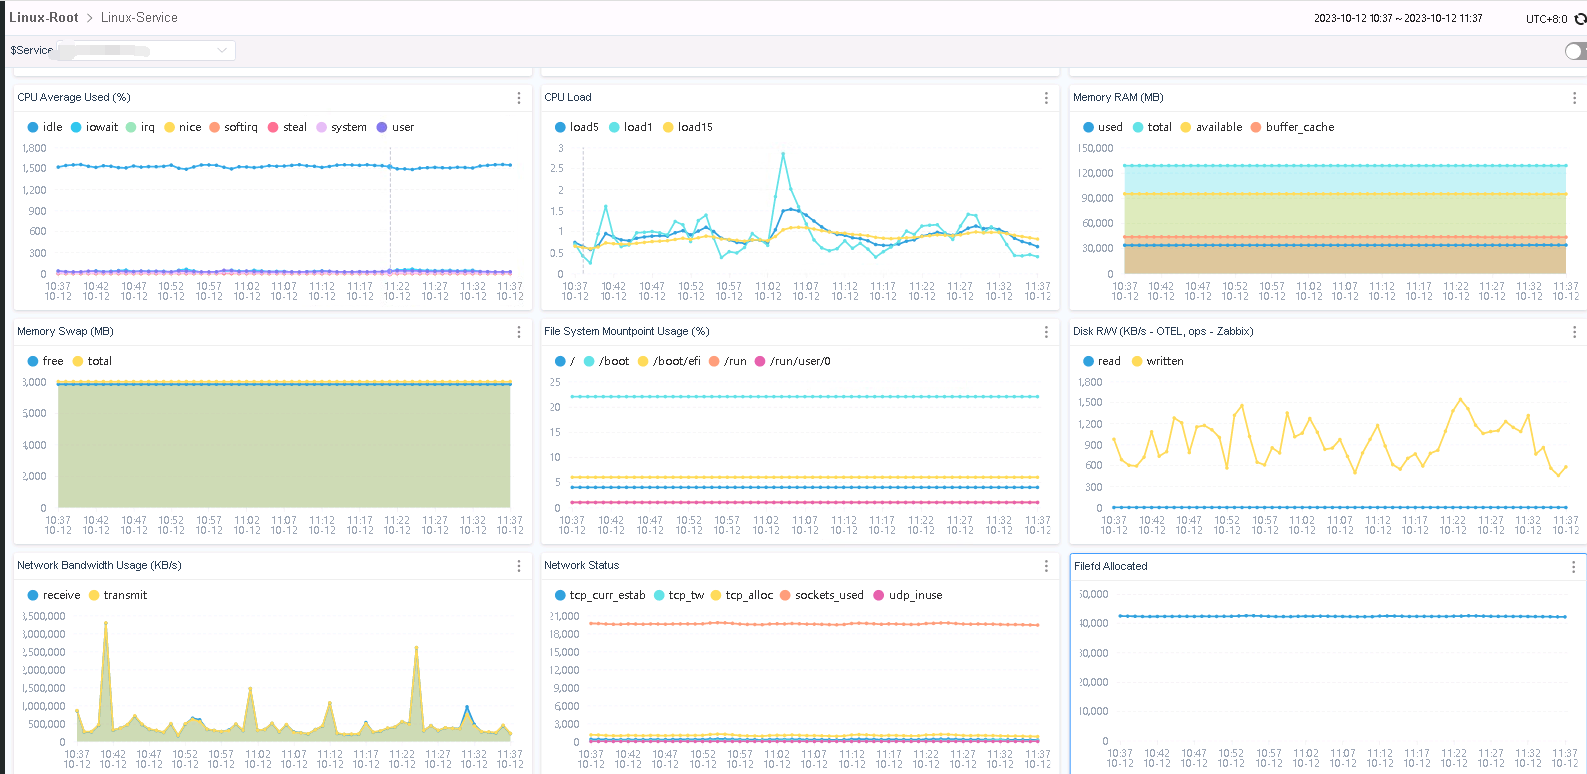
3.效果預覽

Skywalking同時是可以支援監聽整個前端的錯誤資訊與執行情況的
相對來說也比較簡單引入skywalking-client-js 這個包就可以了.
不過也要提一下,比如我們的前端可能託管在MVC.是通過檢視來實現的前端,而不是各種前端腳手架.
那就需要單獨引入一下.
我們通過npm引入skywalking-client-js 這個包
然後新增前端JS參照程式碼如下
<script src="~/scripts/skywalking-client-js/lib/index.js"></script>
直接在_Layout母版頁編寫JS程式碼如下:
 ClientMonitor.register({
     // 基礎設定
     collector: GetService("skyaop"), //這裡填寫skywalkingapo的地址
     service: 'SPD_Web',
     serviceVersion: '@JSConfig.Version',
     pagePath: window.location.href,
     useFmp: true
 })
這樣,我們所有參照了母版頁的前端介面 就都納入到監聽下了.