《最新出爐》系列初窺篇-Python+Playwright自動化測試-18-處理滑鼠拖拽-上篇
2023-10-11 15:00:29
1.簡介
本文主要介紹兩個在測試過程中可能會用到的功能:在selenium中宏哥介紹了Actions類中的拖拽操作和Actions類中的劃取欄位操作。例如:需要在一堆log字元中隨機劃取一段文字,然後右鍵選擇摘取功能。playwright同樣可以實現元素的拖拽和釋放的操作。
2.拖拽操作
滑鼠拖拽操作,顧名思義就是:就是滑鼠按住將一個元素拖拽到另一個元素上。拖拽是指將某個元素從一個位置拖動到另一個位置。為了模擬這種操作,Playwright 提供了 DragToAsync 方法,它可以幫助我們輕鬆地完成拖拽功能。
2.1基礎知識
1.按住元素從頁面的一個位置拖動到另外一個位置,有2種方式可以實現:
- locator.drag_to(target: locator) 先定位元素,呼叫drag_to方法到目標元素
- page.drag_and_drop(source: str, target: str) page物件直接呼叫
2.拖動和釋放操作
page.drag_and_drop可以實現通過page物件呼叫drag_and_drop ,部分原始碼如下:
    def drag_and_drop(
        self,
        source: str,
        target: str,
        *,
        source_position: typing.Optional[Position] = None,
        target_position: typing.Optional[Position] = None,
        force: typing.Optional[bool] = None,
        no_wait_after: typing.Optional[bool] = None,
        timeout: typing.Optional[float] = None,
        strict: typing.Optional[bool] = None,
        trial: typing.Optional[bool] = None
    ) -> None:
        """Page.drag_and_drop

        This method drags the source element to the target element. It will first move to the source element, perform a
        `mousedown`, then move to the target element and perform a `mouseup`.

        **Usage**

        ```py
        await page.drag_and_drop(\"#source\", \"#target\")
        # or specify exact positions relative to the top-left corners of the elements:
        await page.drag_and_drop(
          \"#source\",
          \"#target\",
          source_position={\"x\": 34, \"y\": 7},
          target_position={\"x\": 10, \"y\": 20}
        )
        ```

        ```py
        page.drag_and_drop(\"#source\", \"#target\")
        # or specify exact positions relative to the top-left corners of the elements:
        page.drag_and_drop(
          \"#source\",
          \"#target\",
          source_position={\"x\": 34, \"y\": 7},
          target_position={\"x\": 10, \"y\": 20}
        )
        ```
注:source 和 target 是字串格式,也就是傳selector 選擇器的方法
3.拖拽操作
locator.drag_to()可以實現拖放操作,該操作將:
- 將滑鼠懸停在要拖動的元素上
- 按滑鼠左鍵
- 將滑鼠移動到將接收放置的元素
- 鬆開滑鼠左鍵
語法範例:
page.locator("#item-to-be-dragged").drag_to(page.locator("#item-to-drop-at"))
手工拖拽:
- locator.hover()、mouse.down()、mouse.move()、mouse.up()
語法範例:
page.locator("#item-to-be-dragged").hover()
page.mouse.down()
page.locator("#item-to-drop-at").hover()
page.mouse.up()
3.牛刀小試
學習過Playwright的拖拽基礎知識後,我們趁熱打鐵將其實踐一下,以為我們更好的理解和記憶。宏哥這裡JqueryUI網站的一個拖拽demo實戰一下。
3.1拖拽操作
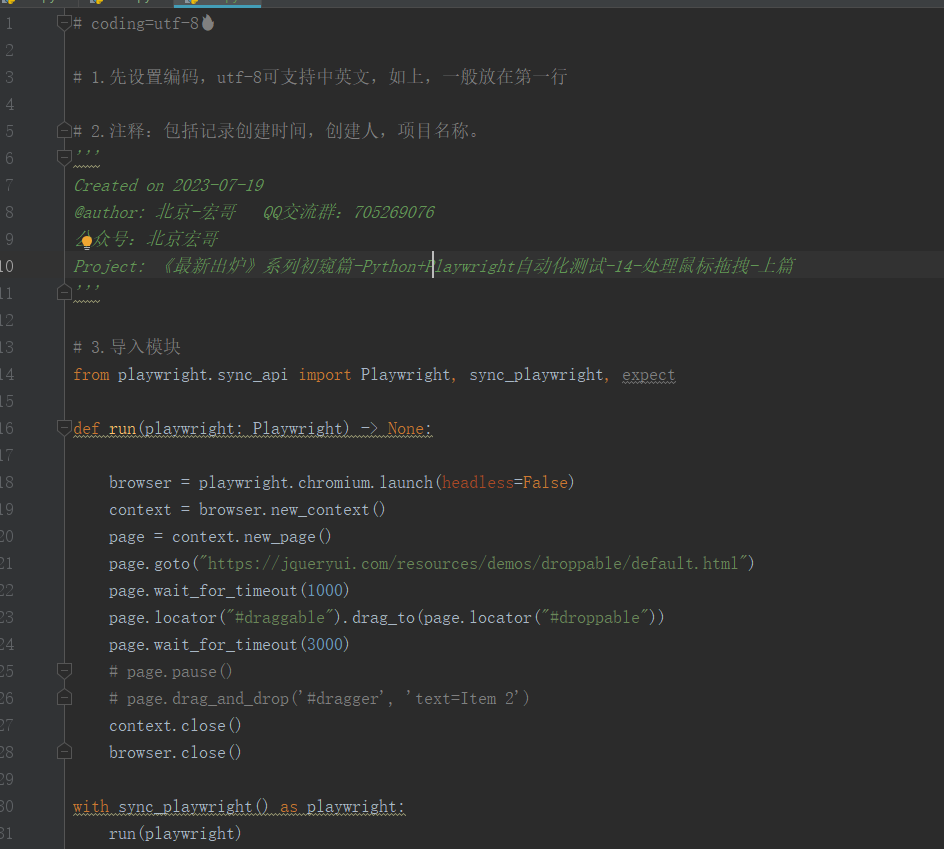
使用locator.drag_to()執行拖放操作,實現自動化測試。
3.1.1程式碼設計

3.1.2參考程式碼
# coding=utf-8