Unity 遊戲開發、01 基礎知識大全、簡單功能指令碼實現
2023-09-11 18:00:30
2.3 視窗佈局
-
Unity預設視窗佈局
- Hierarchy 層級視窗
- Scene 場景視窗,3D檢視視窗
- Game 遊戲播放視窗
- Inspector 檢查器視窗,屬性視窗
- Project 專案視窗
- Console 控制檯視窗
-
恢復預設佈局 Window | Layouts | Default
-
調大頁面字型 Preference | UI Scaling
3.1 場景
新專案預設建立了 SampleScene 場景 {攝像機,平行光}
3.2 遊戲物體
SampleScene 裡 {攝像機,平行光} 就是兩個遊戲物體
新增物體
- GameObject 下拉式選單
- Hierarchy 視窗 右鍵選單
選中物體(橙色輪廓)(Inspector顯示該物體元件屬性)
- Scene 視窗選中
- Hierarchy 視窗選中 (物體重疊時)
重新命名、刪除物體
- Hierarchy 視窗選中右鍵選單 Rename | Delete
移動物體
- Move Tool
3.3 ⭐3D檢視
檢視內容
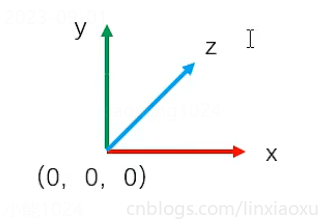
- Gizmo 導航器 :表示世界座標方向
- Grid 柵格 : 表示 XZ 座標平面(可隱藏、設定)
- 柵格1格長度代表1個單位,尺寸單位約定為1米
- Skybox 天空盒(可隱藏)
檢視操作
- 旋轉 ALT + LMB
- 縮放 滑鼠滾輪、ALT + RMB(精細)
- 平移 MMB
導航器操作 Gizmo
- 恢復y軸方向:SHIFT+點選小方塊
- 頂檢視:點選任意軸 (小方塊右鍵選單)
3.4 世界座標系

public GameObject bgmNode;
void Update()
{
    if (Input.GetMouseButtonDown(0))
        PlayMusic();
}
void PlayMusic()
{
    AudioSource audio = bgmNode.GetComponent<AudioSource>();
    if (audio.isPlaying)
        audio.Stop();
    else audio.Play();
}
常用方法:在檢查器裡設定元件參照,指令碼直接存取該元件

public AudioSource bgmComponent;
void Update()
{
    if (Input.GetMouseButtonDown(0))
        PlayMusic();
}
void PlayMusic()
{
    AudioSource audio = bgmComponent;
    if (audio.isPlaying)
        audio.Stop();
    else audio.Play();
}
- **this.GetComponent<T>() **獲取當前物體下的元件
- xxx.GetComponent<T>() 獲取其他物體下的元件
個人理解每個元件類都有 GetComponent<T> 泛型實體方法,用於獲取當前繫結的節點的各個元件
程式碼元件參照
情景:用一個指令碼元件控制另一個指令碼元件的公開欄位,如修改轉速
可以是API獲取,通過物體節點再獲取指令碼元件型別,也可以直接參照,下面是直接參照做法(Unity框架自動完成元件查詢過程)

官方建議不要獲取物件尤拉角再覆蓋尤拉角,涉及轉換的一些問題
而是固定用一個Vector3當做物件的尤拉角
private Vector3 _eulerAngles;
public float rotateSpeed = 30f;
public GameObject Canno;
void Update()
{
    float delta = rotateSpeed * Time.deltaTime;
    if (Input.GetKey(KeyCode.W))
        if (_eulerAngles.x > -60)
            _eulerAngles.x -= delta;
    if (Input.GetKey(KeyCode.S))
        if (_eulerAngles.x < 30)
            _eulerAngles.x += delta;
    if (Input.GetKey(KeyCode.A))
        _eulerAngles.y -= delta;
    if (Input.GetKey(KeyCode.D))
        _eulerAngles.y += delta;
    Canno.transform.localEulerAngles = _eulerAngles;
}
23.1⭐簡單物理
剛體與碰撞體
剛體 RigidBody
使物體具有物理學特性。新增剛體元件後由物理引擎負責剛體的運動
碰撞體元件 Collider
設定物體的碰撞體積範圍。也由物理引擎負責
預設新增的碰撞體一般情況下會根據網格自動設定尺寸,可以另外編輯
反彈與摩擦
通過物理材質,設定一些引數後將該物理材質賦給碰撞體元件的物理材質參照
運動學剛體
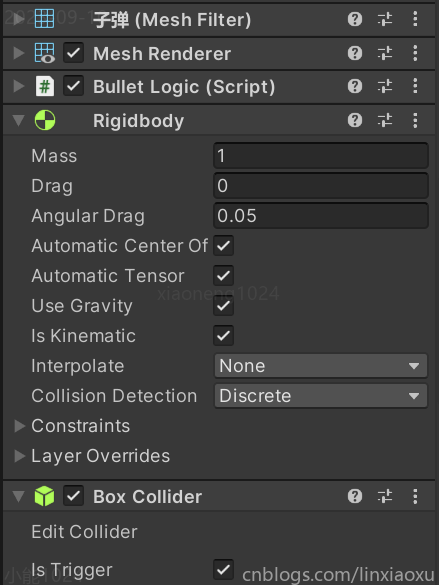
RigidBody 元件引數 Is Kinematic 打勾,此時為運動學剛體
⭐零質量,不會受重力影響,但可以設定速度來移動;這種運動剛體完全由指令碼控制
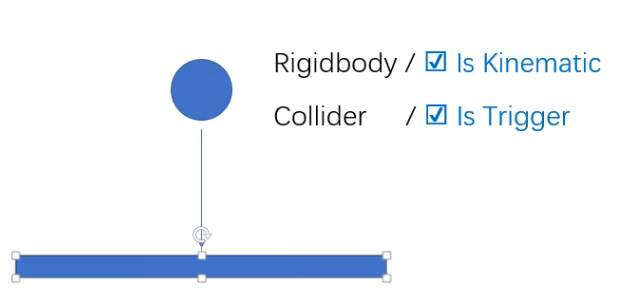
碰撞檢測 ⭐

需滿足以下兩個條件
- 物體是運動剛體
- 碰撞體開啟了 Is Trigger
- 物理引擎只負責探測(Trigger),不會阻止物體或者反彈
- 物理引擎計算的是 Collider 之間的碰撞,和物體自身形狀無關
- 當檢測到碰撞時,呼叫當前節點多個事件訊息函數,如 OnTriggerEnter
public Vector3 speed;
void Update() =>
    transform.Translate(speed * Time.deltaTime,Space.Self);

private void OnTriggerEnter(Collider other)
{
    Debug.Log("發生碰撞");
    Debug.Log(other.name);
}
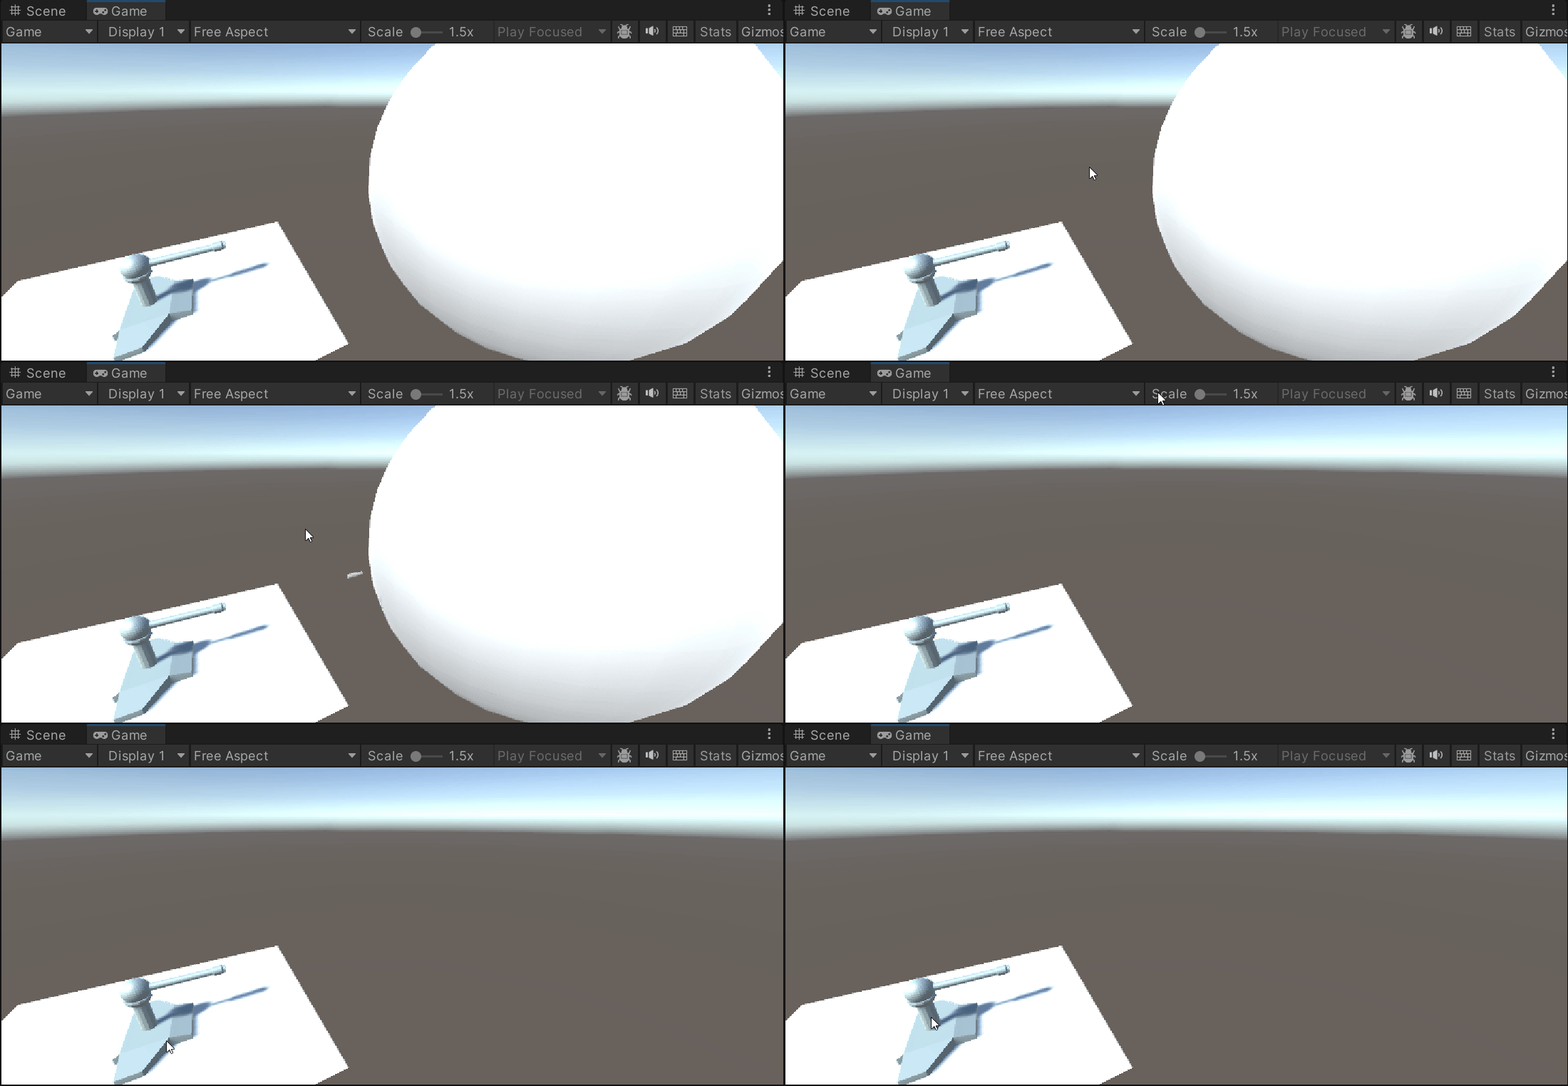
練習、子彈銷燬物體
給子彈新增如下程式碼
private void OnTriggerEnter(Collider other)
{
    Debug.Log(other.name);
    Destroy(other.gameObject);
    Destroy(gameObject);
}


25.1⭐射擊遊戲
天空盒
Window | Rendering | Lighting (CTRL + 9)

子彈
public class BulletLogic : MonoBehaviour
{
    public float speed = 1f;

    void Update()
    {
        transform.Translate(0,0,speed * Time.deltaTime,Space.Self);
    }
    private void OnTriggerEnter(Collider other)
    {
        if (!other.name.StartsWith("怪獸")) return;
        Destroy(other.gameObject);
        Destroy(gameObject);
    }
}
發射與移動
public class PlayerLogic : MonoBehaviour
{
    public GameObject bulletPrefeb;
    public GameObject bulletFolder;
    public Transform firePos;
    public Transform fireEulerAngles;
    public float speed = 15f;
    public float lifeTime = 3f;
    public float interval = 2f;
    private float _interval = 2f;
    public float moveSpeed = 15f;
    private void Update()
    {
        _interval += Time.deltaTime;
        if (Input.GetMouseButtonDown(0) && _interval > interval)
        {
            _interval = 0f;
            GameObject obj = Instantiate(bulletPrefeb, null);
            obj.transform.SetParent(bulletFolder.transform);
            obj.transform.position = firePos.position;
            obj.transform.eulerAngles = fireEulerAngles.eulerAngles;
            obj.GetComponent<BulletLogic>().speed = speed;
            obj.GetComponent<BulletLogic>().lifeTime = lifeTime;
        }
        if(Input.GetKey(KeyCode.A))
            transform.Translate(-Time.deltaTime * moveSpeed,0,0,Space.Self);
        if(Input.GetKey(KeyCode.D))
            transform.Translate(Time.deltaTime * moveSpeed,0,0,Space.Self);
    }
}
怪獸生成器
public class CreatorLogic : MonoBehaviour
{
    public GameObject enemyPrefeb;
    void Start()
    {
        InvokeRepeating("CreateEnemy",1f,1f);
    }

    void CreateEnemy()
    {
        GameObject obj = Instantiate(enemyPrefeb,transform);
        var pos = transform.position;
        pos.x += Random.Range(-30, 30);
        obj.transform.position = pos;
        obj.transform.eulerAngles = new Vector3(0, 180, 0);
    }
}
新增爆炸特效
public GameObject explosionPrefeb;
...
private void OnTriggerEnter(Collider other)
{
    if (!other.name.StartsWith("怪獸")) return;
    Destroy(other.gameObject);
    Destroy(gameObject);
    GameObject obj = Instantiate(explosionPrefeb, null); // 不要掛載子彈節點下面
    // 粒子特效播放完會自毀
    obj.transform.position = transform.position;
}
資源參考
Unity Documentation 、B站 阿發你好 入門視訊教學