[WPF]使用HLSL實現百葉窗動效
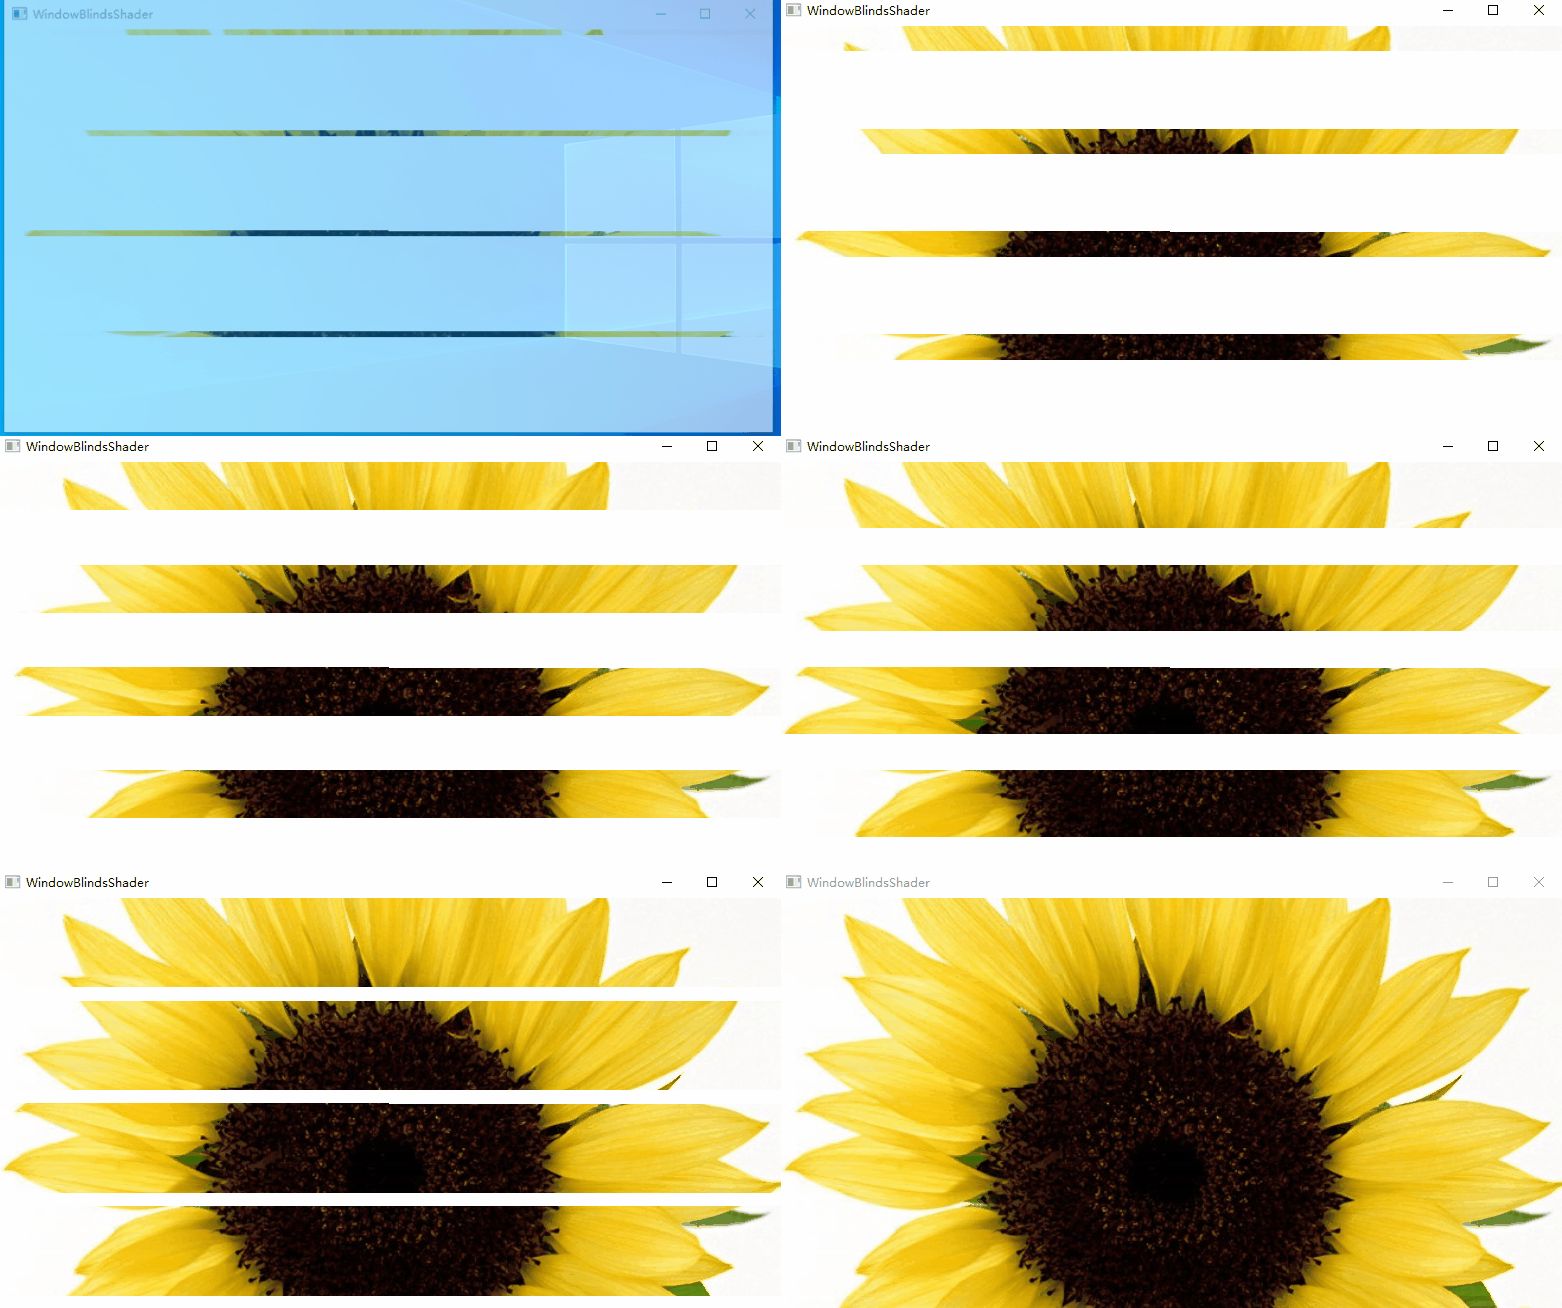
百葉窗動畫是製作PPT時常用的動畫之一,本文將通過實現百葉窗動畫效果的例子介紹在WPF中如何使用ShaderEffect。ShaderEffect是使用高階著色器語言(High Level Shading Language,HLSL)事先製作好並且已經編譯過的效果。先看下百葉窗動畫實現效果:

準備工作與實現
- 編寫和編譯HLSL程式碼,建立ShaderEffect。由於HLSL有自己的語言語法,本文不做討論。這裡使用一個已有的的HLSL檔案,也是後邊將介紹的一個HLSL編輯器工具Shazzam Shader Editor中的案例。
- 定義畫素著色器,在UI元素中使用畫素著色器,並通過動畫設定百葉窗動畫。
百葉窗效果的畫素著色器程式碼中:
public class BlindsShader : ShaderEffect
{
    public static readonly DependencyProperty InputProperty = ShaderEffect.RegisterPixelShaderSamplerProperty("Input", typeof(BlindsShader), 0);
    public static readonly DependencyProperty ProgressProperty = DependencyProperty.Register("Progress", typeof(double), typeof(BlindsShader), new UIPropertyMetadata(((double)(30D)), PixelShaderConstantCallback(0)));
    public static readonly DependencyProperty NumberOfBlindsProperty = DependencyProperty.Register("NumberOfBlinds", typeof(double), typeof(BlindsShader), new UIPropertyMetadata(((double)(5D)), PixelShaderConstantCallback(1)));
    public static readonly DependencyProperty Texture2Property = ShaderEffect.RegisterPixelShaderSamplerProperty("Texture2", typeof(BlindsShader), 1);
    public BlindsShader()
    {
        PixelShader pixelShader = new PixelShader();
        pixelShader.UriSource = new Uri("/WPFTest;component/Shader/ShaderSource/BlindsShader.ps", UriKind.Relative);
        this.PixelShader = pixelShader;

        this.UpdateShaderValue(InputProperty);
        this.UpdateShaderValue(ProgressProperty);
        this.UpdateShaderValue(NumberOfBlindsProperty);
        this.UpdateShaderValue(Texture2Property);
    }
    public Brush Input
    {
        get
        {
            return ((Brush)(this.GetValue(InputProperty)));
        }
        set
        {
            this.SetValue(InputProperty, value);
        }
    }
    /// <summary>The amount(%) of the transition from first texture to the second texture. </summary>
    public double Progress
    {
        get
        {
            return ((double)(this.GetValue(ProgressProperty)));
        }
        set
        {
            this.SetValue(ProgressProperty, value);
        }
    }
    /// <summary>The number of Blinds strips </summary>
    public double NumberOfBlinds
    {
        get
        {
            return ((double)(this.GetValue(NumberOfBlindsProperty)));
        }
        set
        {
            this.SetValue(NumberOfBlindsProperty, value);
        }
    }
    public Brush Texture2
    {
        get
        {
            return ((Brush)(this.GetValue(Texture2Property)));
        }
        set
        {
            this.SetValue(Texture2Property, value);
        }
    }
}
BlindsShader.ps是編譯好的HLSL檔案,Progress表示百葉窗葉片開啟的進度,NumberOfBlinds是百葉窗葉片的數量,Texture2是百葉窗葉片的紋理(通常使用一個純色的圖片)。
使用百葉窗效果時,只需在resources中新增著色器和動畫,並對目標UI元素的Effect設定為百葉窗動畫。為了展示效果,本例用圖片111.jpg作為grid的背景,用純色圖片blinds.jpg作為葉片紋理。在grid的載入時觸發動畫設定百葉窗葉片開啟的進度。
<Window.Resources>
    <ImageBrush x:Key="imageBrush" ImageSource="111.jpg" />
    <ImageBrush x:Key="blindsBrush" ImageSource="blinds.jpg" />
    <local:BlindsShader x:Key="BlindsShader"
                        NumberOfBlinds="4"
                        Progress="0"
                        Texture2="{StaticResource blindsBrush}" />
    <Storyboard x:Key="DefaultBlindsShaderStoryboard" FillBehavior="HoldEnd">
        <DoubleAnimation Storyboard.TargetProperty="(UIElement.Effect).(local:BlindsShader.Progress)"
                            From="0"
                            To="100"
                            Duration="00:00:1.5" />
        <ObjectAnimationUsingKeyFrames Storyboard.TargetProperty="(UIElement.Effect)">
            <DiscreteObjectKeyFrame KeyTime="00:00:1.5" Value="{x:Null}" />
        </ObjectAnimationUsingKeyFrames>
    </Storyboard>
</Window.Resources>
<Grid Background="{StaticResource imageBrush}" Effect="{StaticResource BlindsShader}">
    <Grid.Triggers>
        <EventTrigger RoutedEvent="FrameworkElement.Loaded">
            <BeginStoryboard x:Name="sbLoaded" Storyboard="{DynamicResource DefaultBlindsShaderStoryboard}" />
        </EventTrigger>
    </Grid.Triggers>
</Grid>
Shazzam Shader Editor
可以使用任何一款編輯器編寫HLSL,然後使用fxc.exe命令列工具編譯(visual studio 2022或者Windows SDK for Windows中含有該工具)。但是Shazzam Shader Editor是一個免費的專門為 WPF 實現畫素著色器而設計的一款編輯器,使用它來編寫畫素著色器,可以自動生成WPF中的ShaderEffect。
Shazzam Shader Editor已經好久沒有維護了,其官網似乎也沒了。原本開源在CodePlex上,而 CodePlex 已經關閉。但JohanLarsson 將其 Fork 到了 GitHub 上,https://github.com/JohanLarsson/Shazzam。
也可以通過百度網路硬碟獲取。
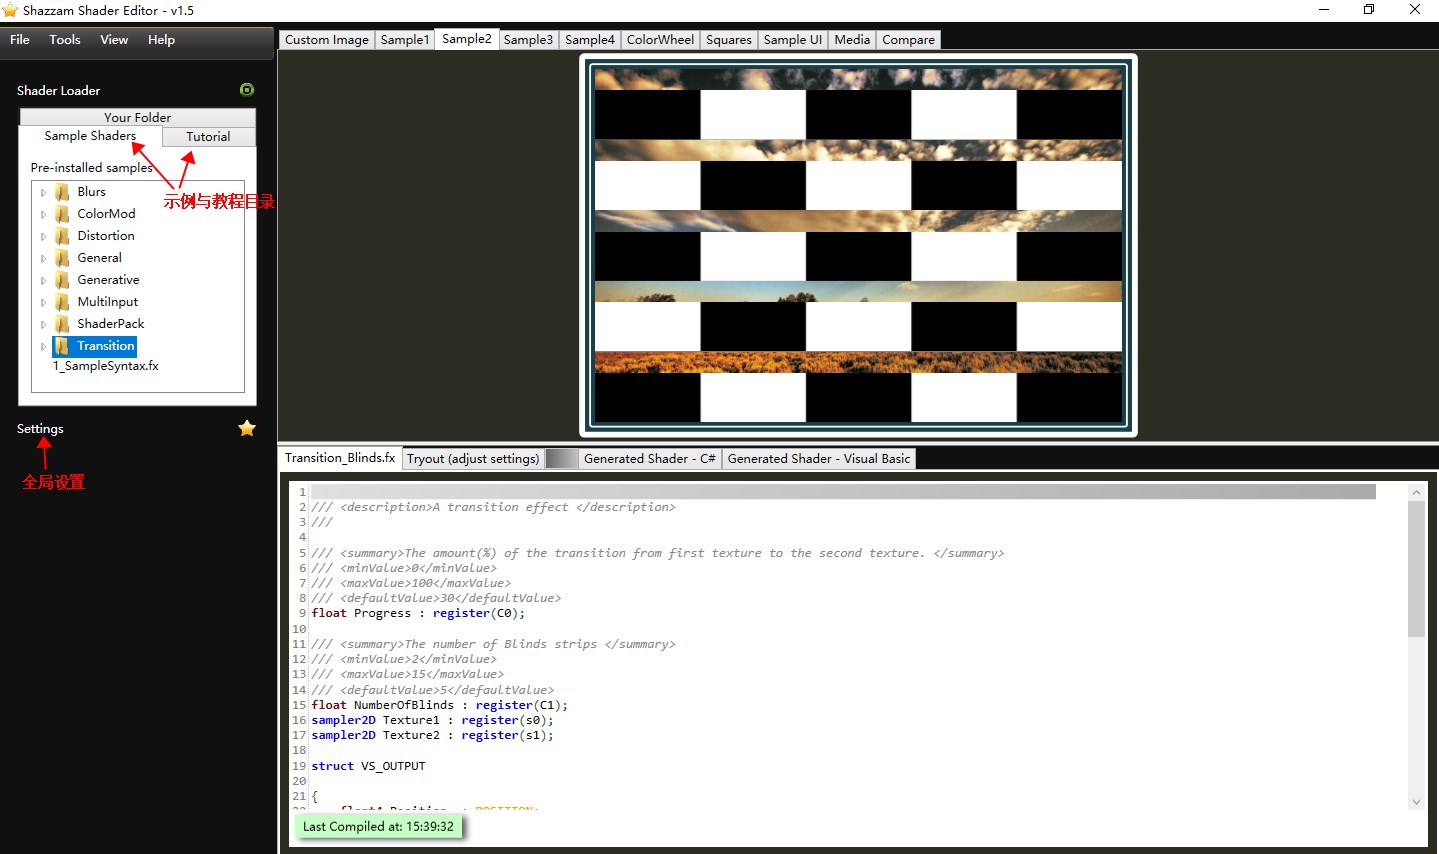
開啟Shazzam Shader Editor,左側顯示著色器範例和全域性設定(預設摺疊)。選中具體的著色器後,右側區域上方顯示著色其效果,下方索引標籤分別顯示HLSL程式碼編輯視窗、預覽調節視窗、生成的C#程式碼和生成的VB程式碼。

HLSL程式碼編輯視窗
HLSL程式碼檔案是以.fx作為字尾名。編譯後的檔案字尾名是.ps。編輯視窗中可以編輯修改程式碼,按下F5就可以編譯你的HLSL程式碼,並在介面上方預覽效果。編輯器中會高亮關鍵詞和方法,雙擊不要鬆開滑鼠會彈出相應的提示。如何編寫HLSL程式碼可以查閱HLSL and Pixel Shaders for XAML Developers這本書,Shazzam Shader Editor中左側範例中的Tutorial也是配合該書使用的。
預覽調節視窗
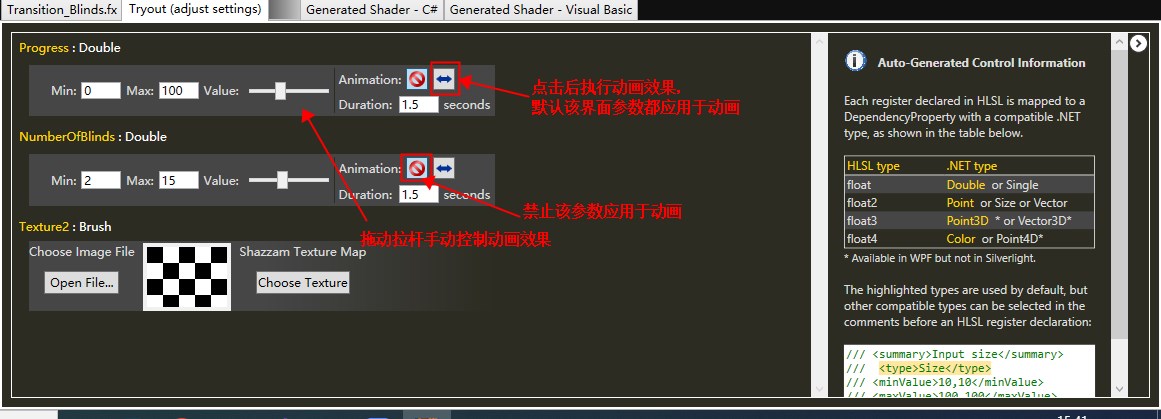
在這裡可以設定各種預覽引數,預覽HLSL程式碼的效果。

生成的C#程式碼
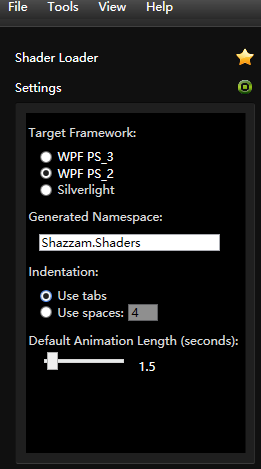
這裡是Shazzam Shader Editor自動生成的用C#編寫的ShaderEffect,本文前邊提到的百葉窗效果的畫素著色器程式碼也就是從這裡直接拷貝過去的。這裡的程式碼預設的名稱空間是Shazzam.Shaders,程式碼縮排是用Tab。可以在主表單左側的全域性設定中修改。

生成的VB程式碼
這裡和生成C#程式碼一樣,只是提供VB語言編寫的ShaderEffect。
在WPF中使用用HLSL
Shazzam Shader Editor編譯HLSL後會生成XXX.ps、XXX.cs、XXX.vb三個檔案,並儲存在%LocalAppData%\Shazzam\GeneratedShaders目錄下的XXXEffect目錄中。這裡的XXX就是你定義的HLSL的名稱。
在WPF中使用時,需把XXX.ps檔案以Resource的形式新增到工程中,然後把XXX.cs檔案新增到工程,並根據專案結構,修改XXX.cs中參照XXX.ps檔案的路徑即可。