詳情講解canvas實現電子簽名
2023-08-23 12:02:26
簽名的實現功能
我們要實現簽名:
1.我們首先要滑鼠按下,移動,擡起。經過這三個步驟。
我們可以實現一筆或者連筆。
按下的時候我們需要移動畫筆,可以使用 moveTo 來移動畫筆。
e.pageX,e.pageY來獲取座標位置
移動的時候我們進行繪製
ctx.lineTo(e.pageX,e.pageY)
ctx.stroke()
通過開關flag來判斷是否繪製

2.我們可以調整畫筆的粗細
3.當我們寫錯的時候,可以撤回上一步
4.重置整個畫板
5.點選儲存的時候,可以生成一張圖片
6.base64轉化為file
實現簽名
<!DOCTYPE html>
<html lang="en">
<head>
    <meta charset="UTF-8">
    <meta http-equiv="X-UA-Compatible" content="IE=edge">
    <meta name="viewport" content="width=device-width, initial-scale=1.0">
    <title>Document</title>
    <style>
      *{
        padding: 0;
        margin: 0;
      }
      #canvas {
        border: 2px dotted #ccc;
        background-repeat: no-repeat;
        background-size: 80px;
      }
    </style>
</head>
<body>
    <div class="con-box">
      <canvas id="canvas" width="600px" height="400px"></canvas>
      <button id="save-btn" onclick="saveHandler">儲存</button>
      <button id="reset-btn" onclick="resetHandler">重置</button>
    </div>
</body>
<script>
// 獲取canvas元素的DOM物件
const canvas=document.getElementById('canvas')
// 獲取渲染上下文和它的繪畫功能
const ctx= canvas.getContext('2d')
// 筆畫內容的顏色,一般為黑色
ctx.strokeStyle='#000'
let flag= false
// 註冊滑鼠按下事件
canvas.addEventListener('mousedown',e=>{
  console.log('按下',e.pageX,e.pageY)
  flag=true
  // 獲取按下的那一刻滑鼠的座標,同時移動畫筆
  ctx.moveTo(e.pageX,e.pageY)
})
// 註冊移動事件
canvas.addEventListener('mousemove',e=>{
  console.log('移動')
  if(flag){
    // 使用直線連線路徑的終點 x,y 座標的方法(並不會真正地繪製)
    ctx.lineTo(e.pageX,e.pageY)
    // 使用 stroke() 方法真正地畫線
    ctx.stroke()
  }
})
// 註冊擡起事件
canvas.addEventListener('mouseup',e=>{
  console.log('擡起')
  flag=false
})
</script>
</html>
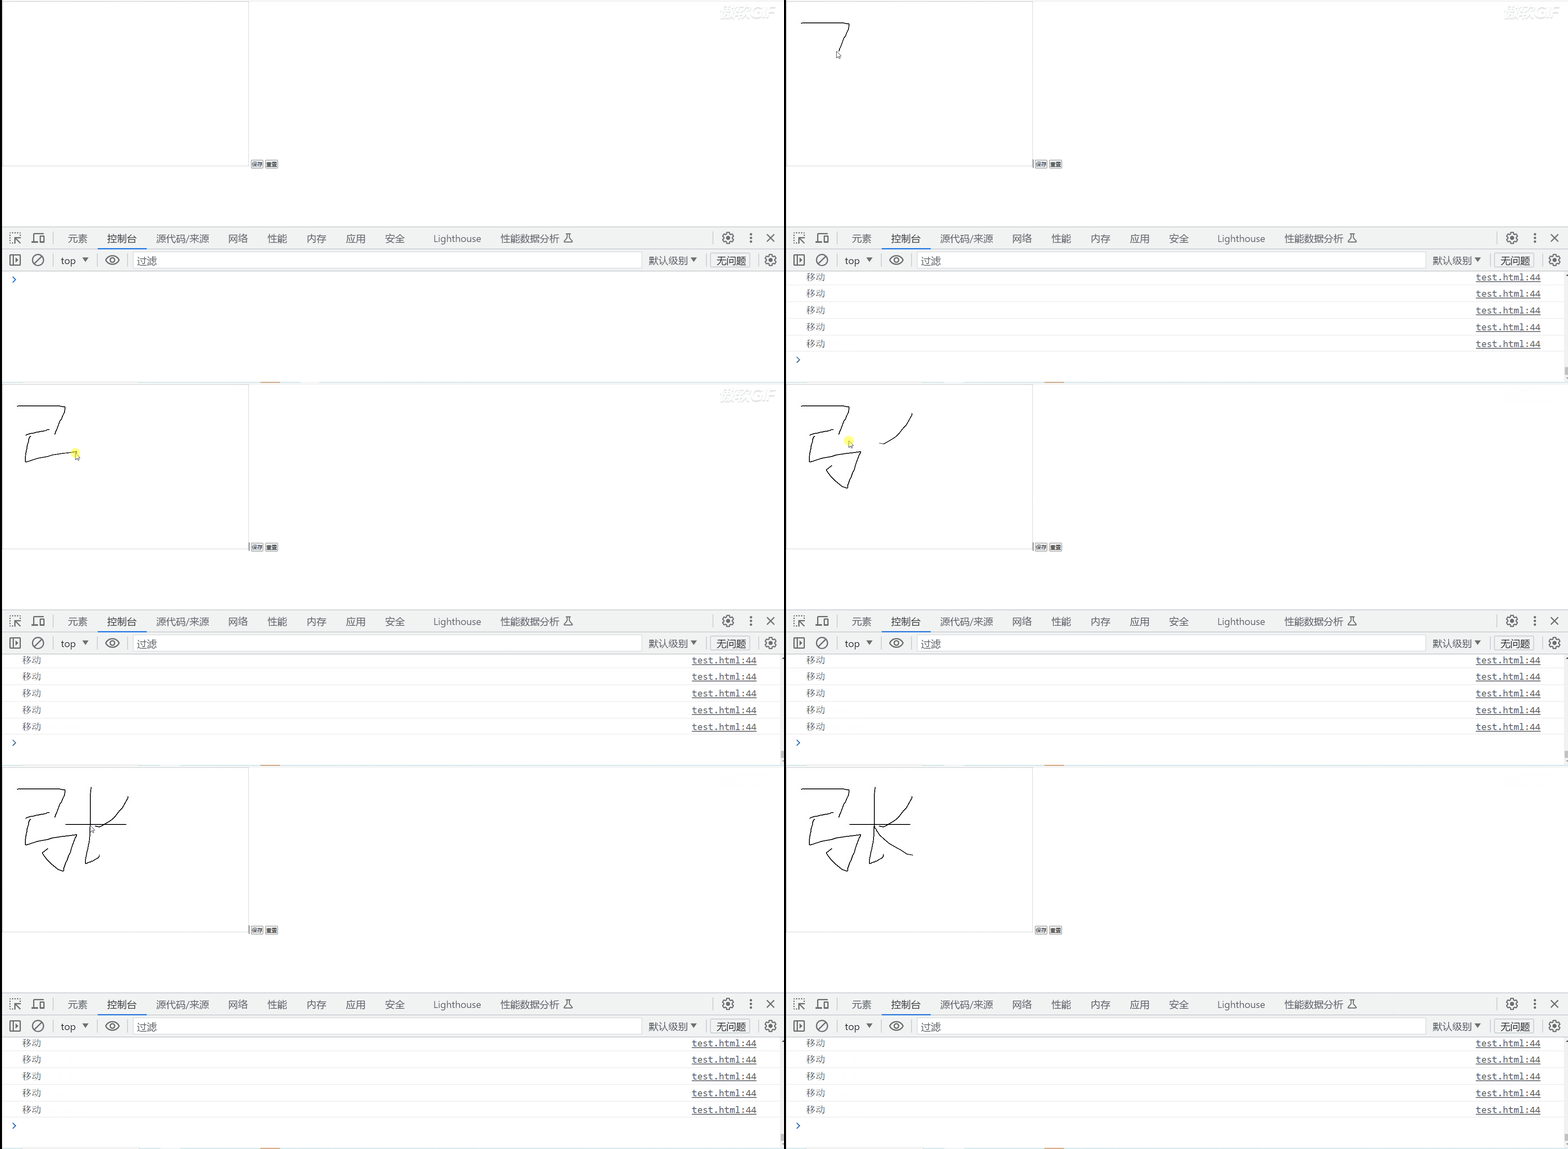
滑鼠移入canvas就會觸發事件
通過上面的圖,我們發現了一個點。
那就是滑鼠移入canvas所在的區域。
就會觸發移動事件的程式碼。
這是為什麼呢?
因為我們在移入的時候註冊了事件,因此就會觸發。
現在我們需要優化一下:將移動事件,擡起事件放在按下事件裡面
同時,當滑鼠擡起的時候,移除移動事件和擡起事件。【不移除按下事件】
這裡可能有的小夥伴會問?
為什麼擡起的時候不移除按下事件。
因為:程式碼從上往下執行,當我們移除擡起事件後,我們只能繪畫一次了。
當我們移除事件時,我們就不需要開關 flag 了。
刪除flag的相關程式碼
<script>
// 獲取canvas元素的DOM物件
const canvas=document.getElementById('canvas')
// 獲取渲染上下文和它的繪畫功能
const ctx= canvas.getContext('2d')
// 筆畫內容的顏色,一般為黑色
ctx.strokeStyle='#000'

// 註冊滑鼠按下事件
canvas.addEventListener('mousedown',mousedownFun)

// 按下事件
function mousedownFun(e){
  console.log('按下',e.pageX,e.pageY)
  // 獲取按下的那一刻滑鼠的座標,同時移動畫筆
  ctx.moveTo(e.pageX,e.pageY)
  // 註冊移動事件
  canvas.addEventListener('mousemove',mousemoveFun)
  // 註冊擡起事件
  canvas.addEventListener('mouseup',mouseupFun)
}

// 移動事件
function mousemoveFun(e){
  console.log('移動')
  // 使用直線連線路徑的終點 x,y 座標的方法(並不會真正地繪製)
  ctx.lineTo(e.pageX,e.pageY)
  // 使用 stroke() 方法真正地畫線
  ctx.stroke()
}

// 擡起事件
function mouseupFun(e){
  console.log('擡起')
  // 移除移動事件
  canvas.removeEventListener('mousemove', mousemoveFun)
  // 移除擡起事件
  canvas.removeEventListener('mouseup', mouseupFun)
}
</script>
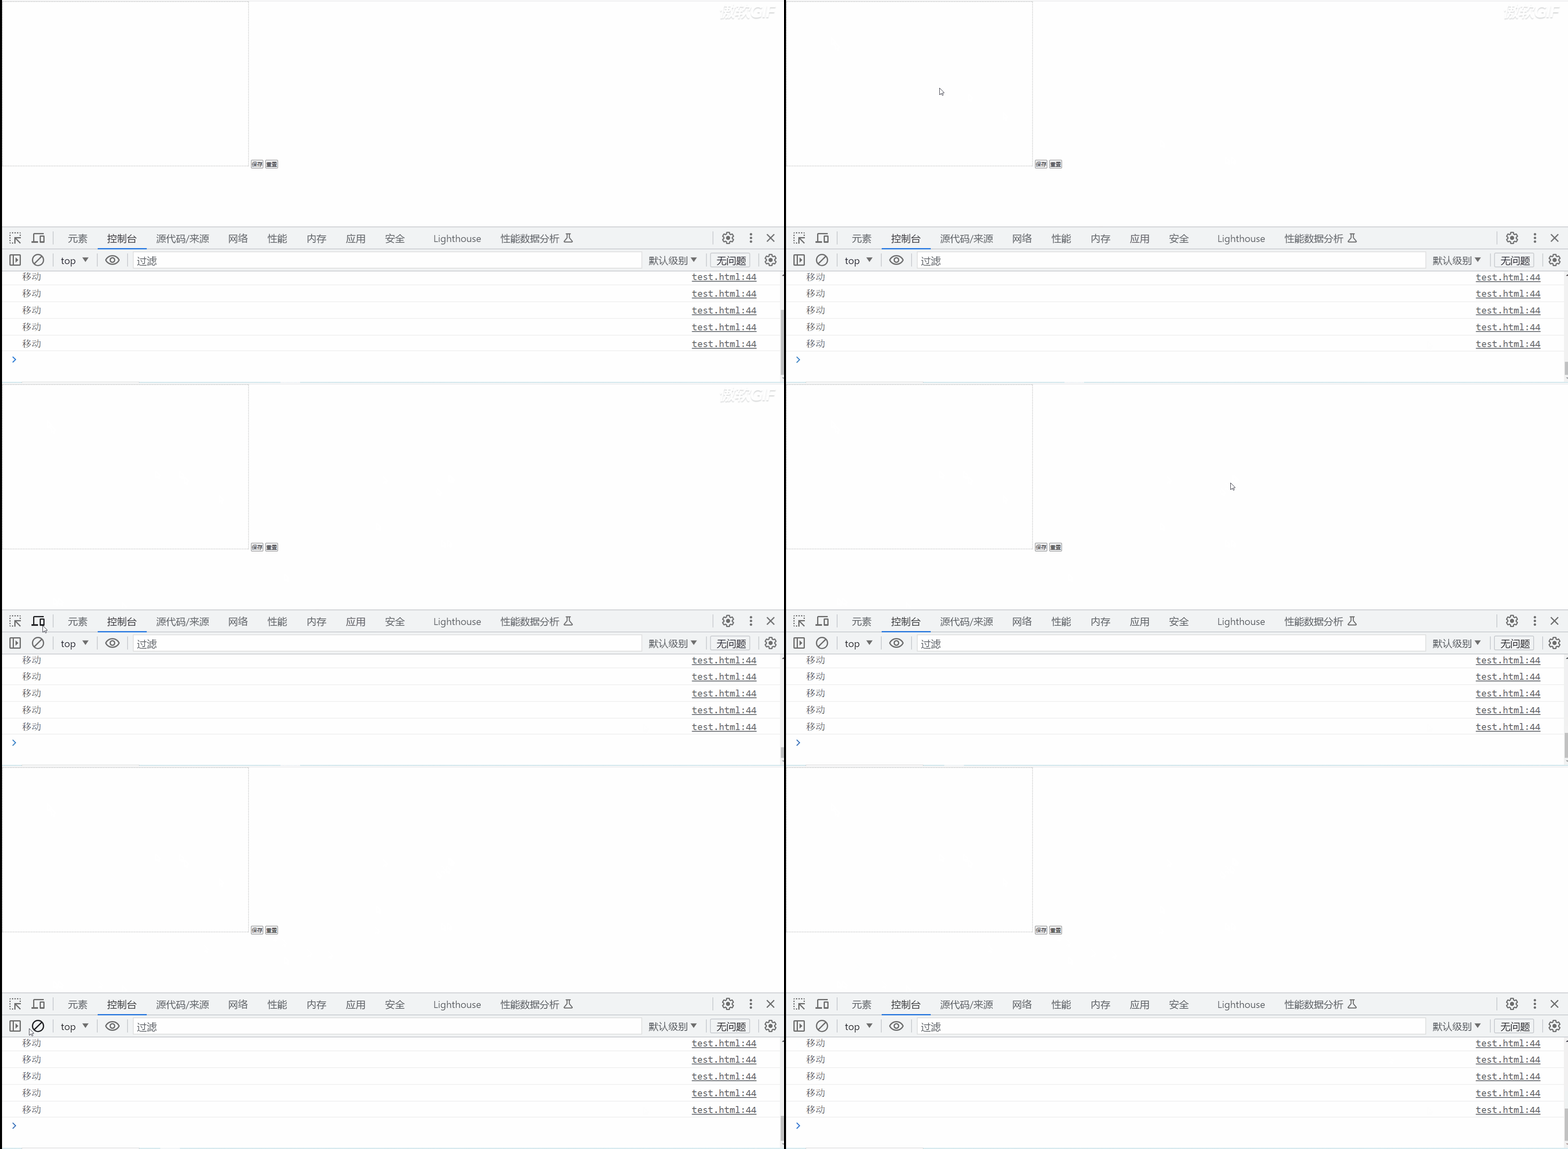
發現bug-滑鼠不按下也可以繪製筆畫
我們發現滑鼠移出canvas所在區域後。
然後在移入進來,滑鼠仍然可以進行繪製。(此時滑鼠已經是鬆開了)
這很明顯是一個bug。這個bug產生的原因在於:
滑鼠移出canvas所在區域後沒有移出移動事件
// 滑鼠移出canvas所在的區域事件-處理滑鼠移出canvas所在區域後
// 然後移入不按下滑鼠也可以繪製筆畫
canvas.addEventListener('mouseout',e=>{
  // 移除移動事件
  canvas.removeEventListener('mousemove', mousemoveFun)
})
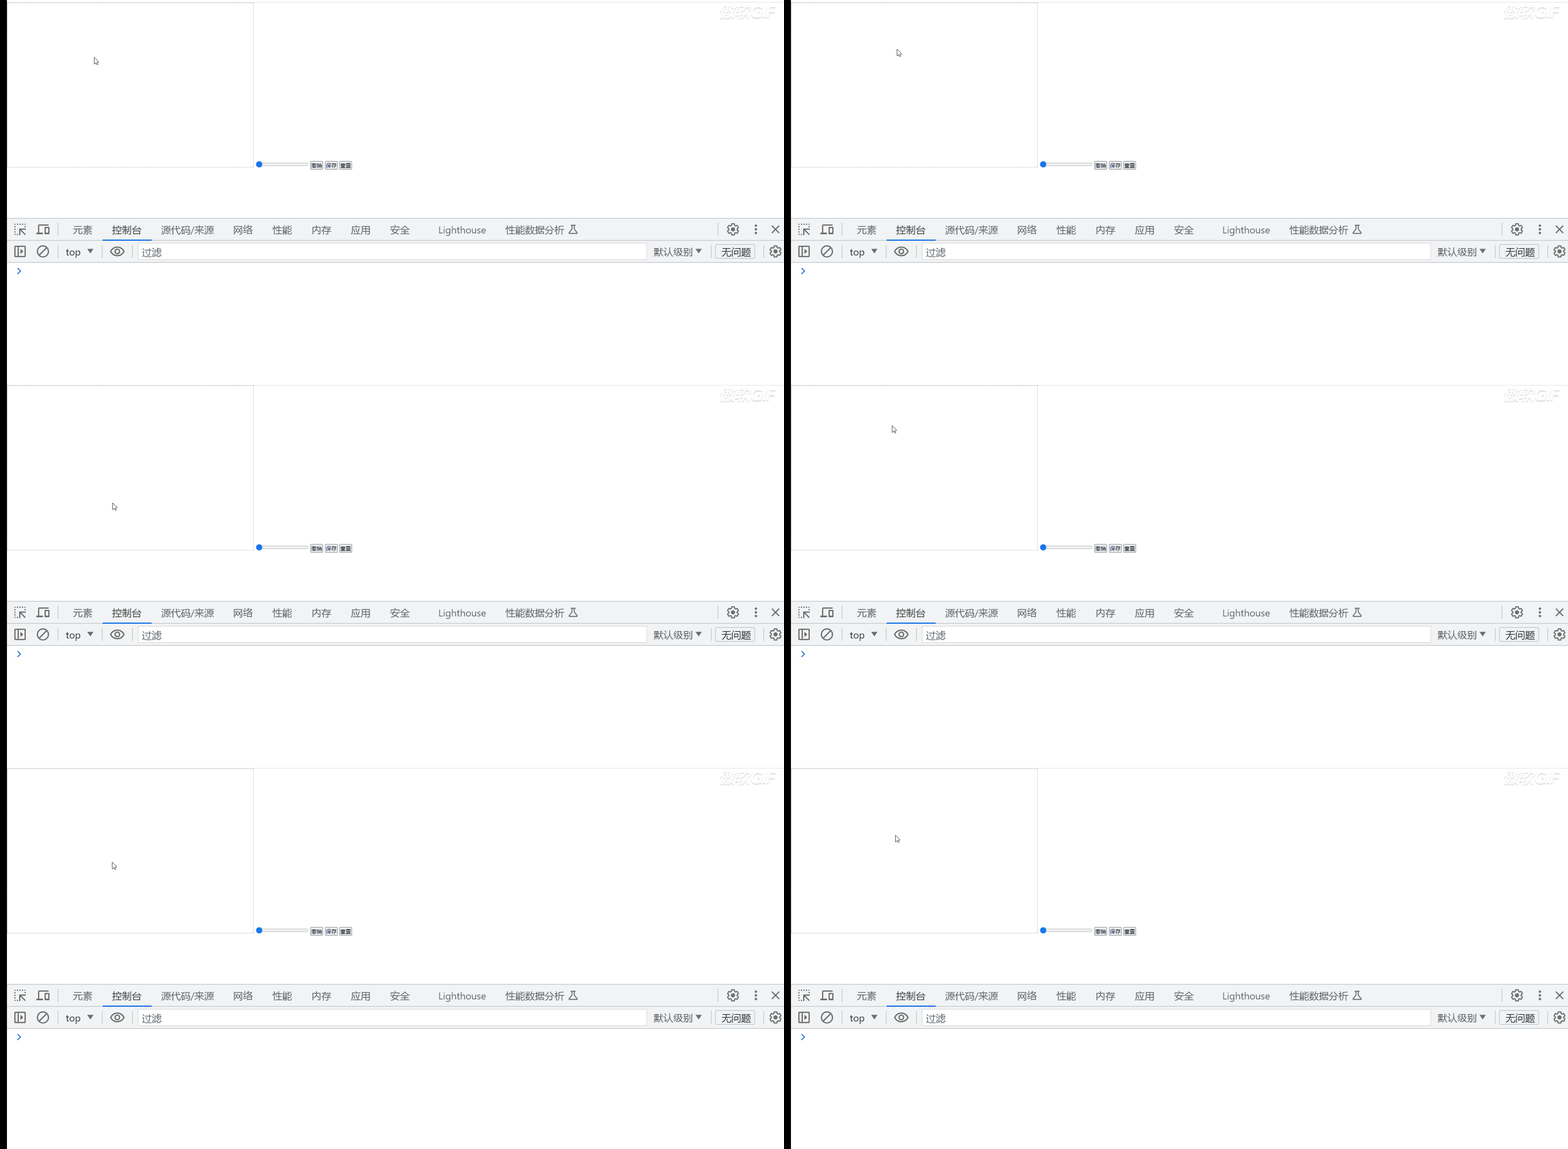
如何設定畫筆的粗細
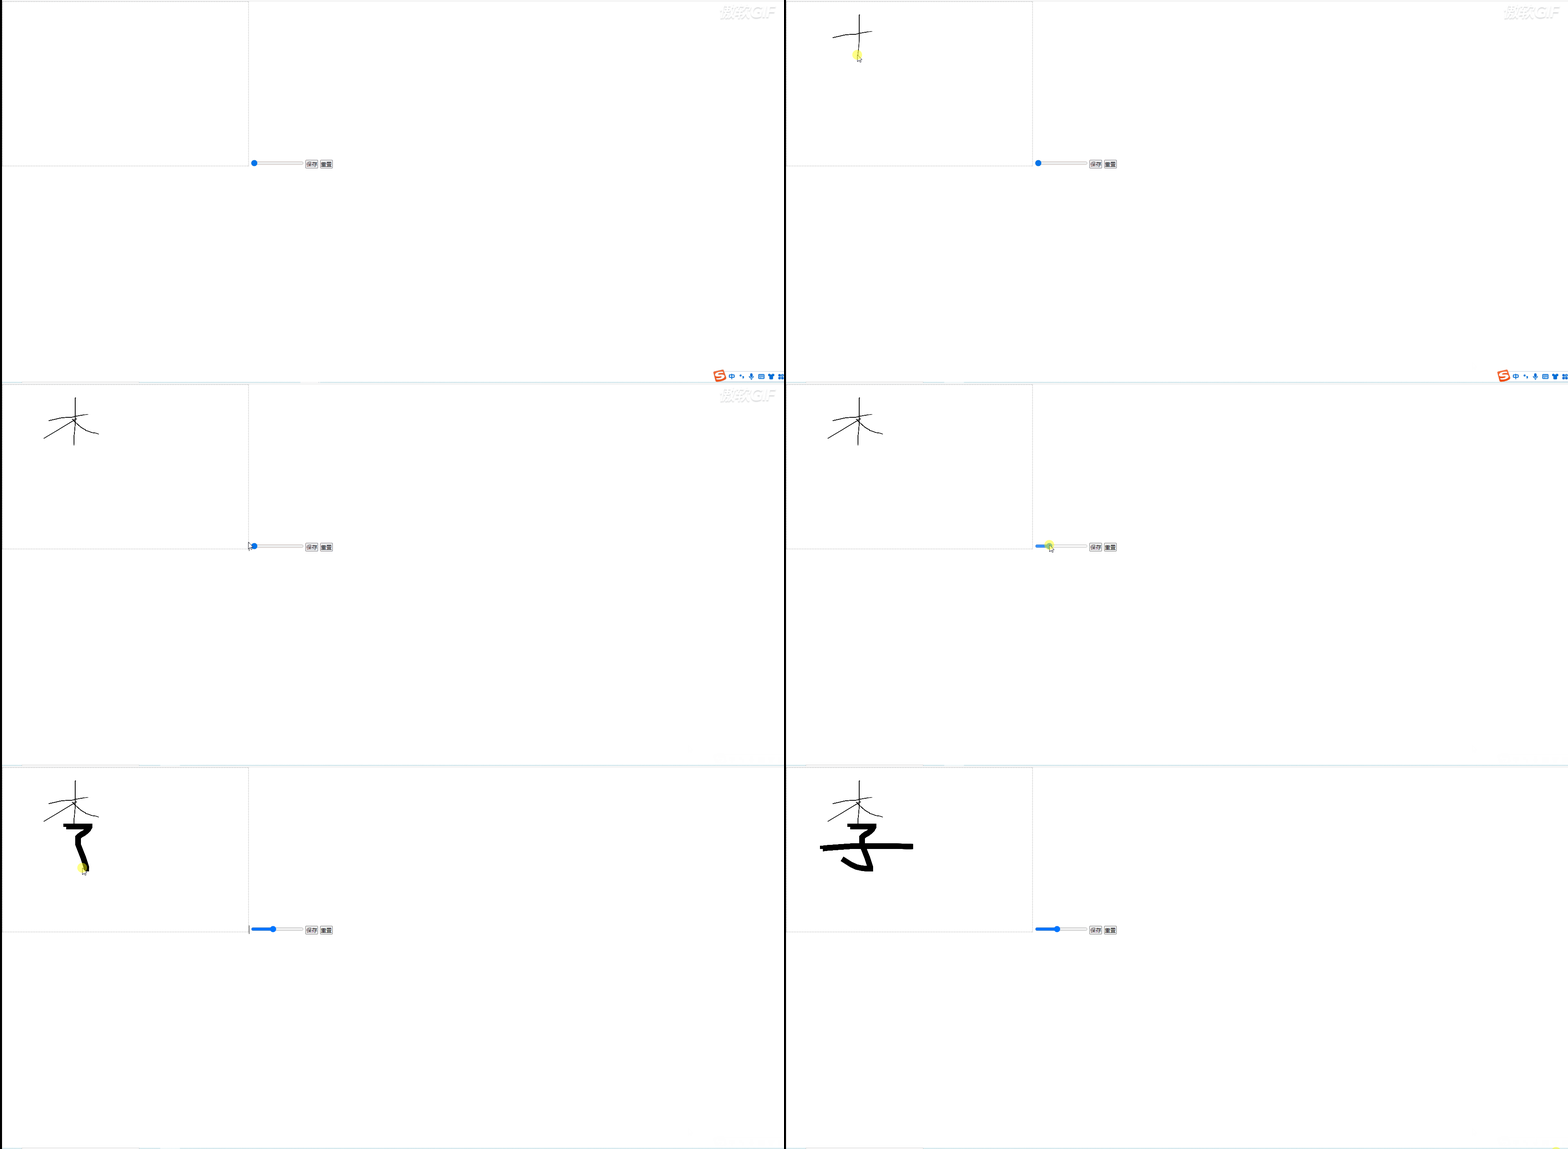
我們想要調整畫筆的粗細。
需要使用 ctx.lineWidth 屬性來設定畫筆的大小預設是1。
我們用   <input type="range" class="range" min="1" max="30" value="1" id="range">
來調整畫筆。
因為我們我們調整畫筆後,線條的大小就會發生改變。
因此我們在每次按下的時候都需要開始本次繪畫。
擡起的時候結束本次繪畫,
這樣才能讓不影響上一次畫筆的大小。
核心的程式碼
<input type="range" class="range" min="1" max="30" value="1" id="range">


// 獲取設定畫筆粗細的dom元素
let range = document.querySelector("#range");
// 獲取渲染上下文和它的繪畫功能
const ctx= canvas.getContext('2d')


// 按下事件
function mousedownFun(e){
  console.log('按下',e.pageX,e.pageY)
  // 開始本次繪畫(與畫筆大小設定有關)
  ctx.beginPath();
  // 設定畫筆的粗細
  ctx.lineWidth = range.value || 1
}

// 擡起事件
function mouseupFun(e){
  // 結束本次繪畫(與畫筆大小設定有關)
  ctx.closePath();
  console.log('擡起')
}
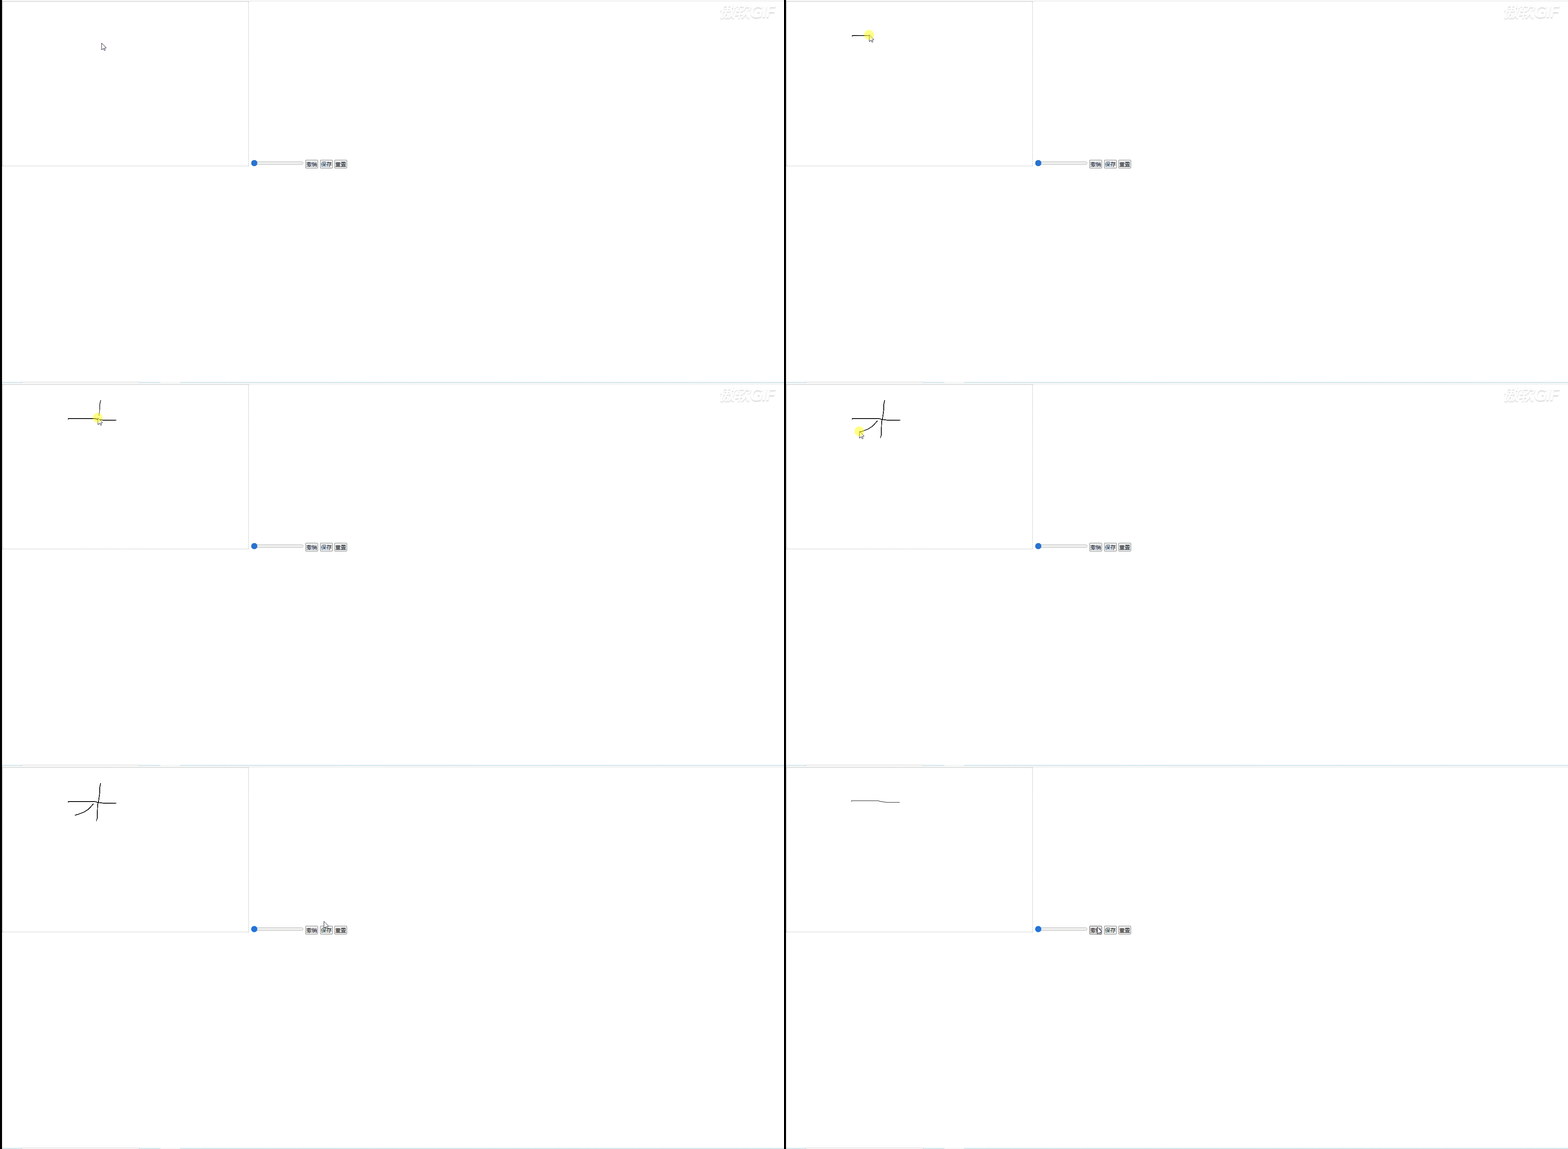
撤回上一步
1. 先宣告一個陣列. let historyArr=[]
  按下的時候記錄當前筆畫起始點的特徵(顏色 粗細 位置)
  currentPath = {
    color: ctx.strokeStyle,
    width: ctx.lineWidth,
    points: [{ x: e.offsetX, y: e.offsetY }]
  }

2.按下移動的時候記錄每一個座標點[點連成線]
currentPath.points.push({ x: e.offsetX, y: e.offsetY });

3.滑鼠擡起的時候說明完成了一筆(連筆)
  historyArr.push(currentPath);

4.點選復原按鈕的時候刪除最後一筆
5.然後重新繪製之前儲存的畫筆
<!-- 核心程式碼 -->
<button id="revoke">復原</button>

let historyArr = [] //儲存所有的操作
let currentPath = null;

let revoke=document.querySelector("#revoke");

// 按下事件
function mousedownFun(e){
  // 開始本次繪畫(與畫筆大小設定有關)
  ctx.beginPath();
  // 設定畫筆的粗細
  ctx.lineWidth = range.value || 1
  // 獲取按下的那一刻滑鼠的座標,同時移動畫筆
  ctx.moveTo(e.pageX,e.pageY)

  // 記錄當前筆畫起始點的特徵(顏色 粗細 位置)
  currentPath = {
    color: ctx.strokeStyle,
    width: ctx.lineWidth,
    points: [{ x: e.offsetX, y: e.offsetY }]
  }
}

// 移動事件
function mousemoveFun(e){
  ctx.lineTo(e.pageX,e.pageY)
  currentPath.points.push({ x: e.offsetX, y: e.offsetY });
  ctx.stroke()
}

// 擡起事件
function mouseupFun(e){
  historyArr.push(currentPath);
  ctx.closePath();
}

// 復原按鈕點選事件
revoke.addEventListener('click', e => {
  if (historyArr.length === 0) return;
  // 刪除最後一條的記錄
  historyArr.pop()
  ctx.clearRect(0, 0, canvas.width, canvas.height);
  drawPaths(historyArr);
});

// 畫所有的路徑
function drawPaths(paths) {
  paths.forEach(path => {
    ctx.beginPath();
    ctx.strokeStyle = path.color;
    ctx.lineWidth = path.width;
    ctx.moveTo(path.points[0].x, path.points[0].y);
    // path.points.slice(1) 少畫 與  path.points 區別是少畫一筆和正常筆數
    console.log('path',path)
    path.points.slice(1).forEach(point => {
      ctx.lineTo(point.x, point.y);
    });
    ctx.stroke();
  });
}
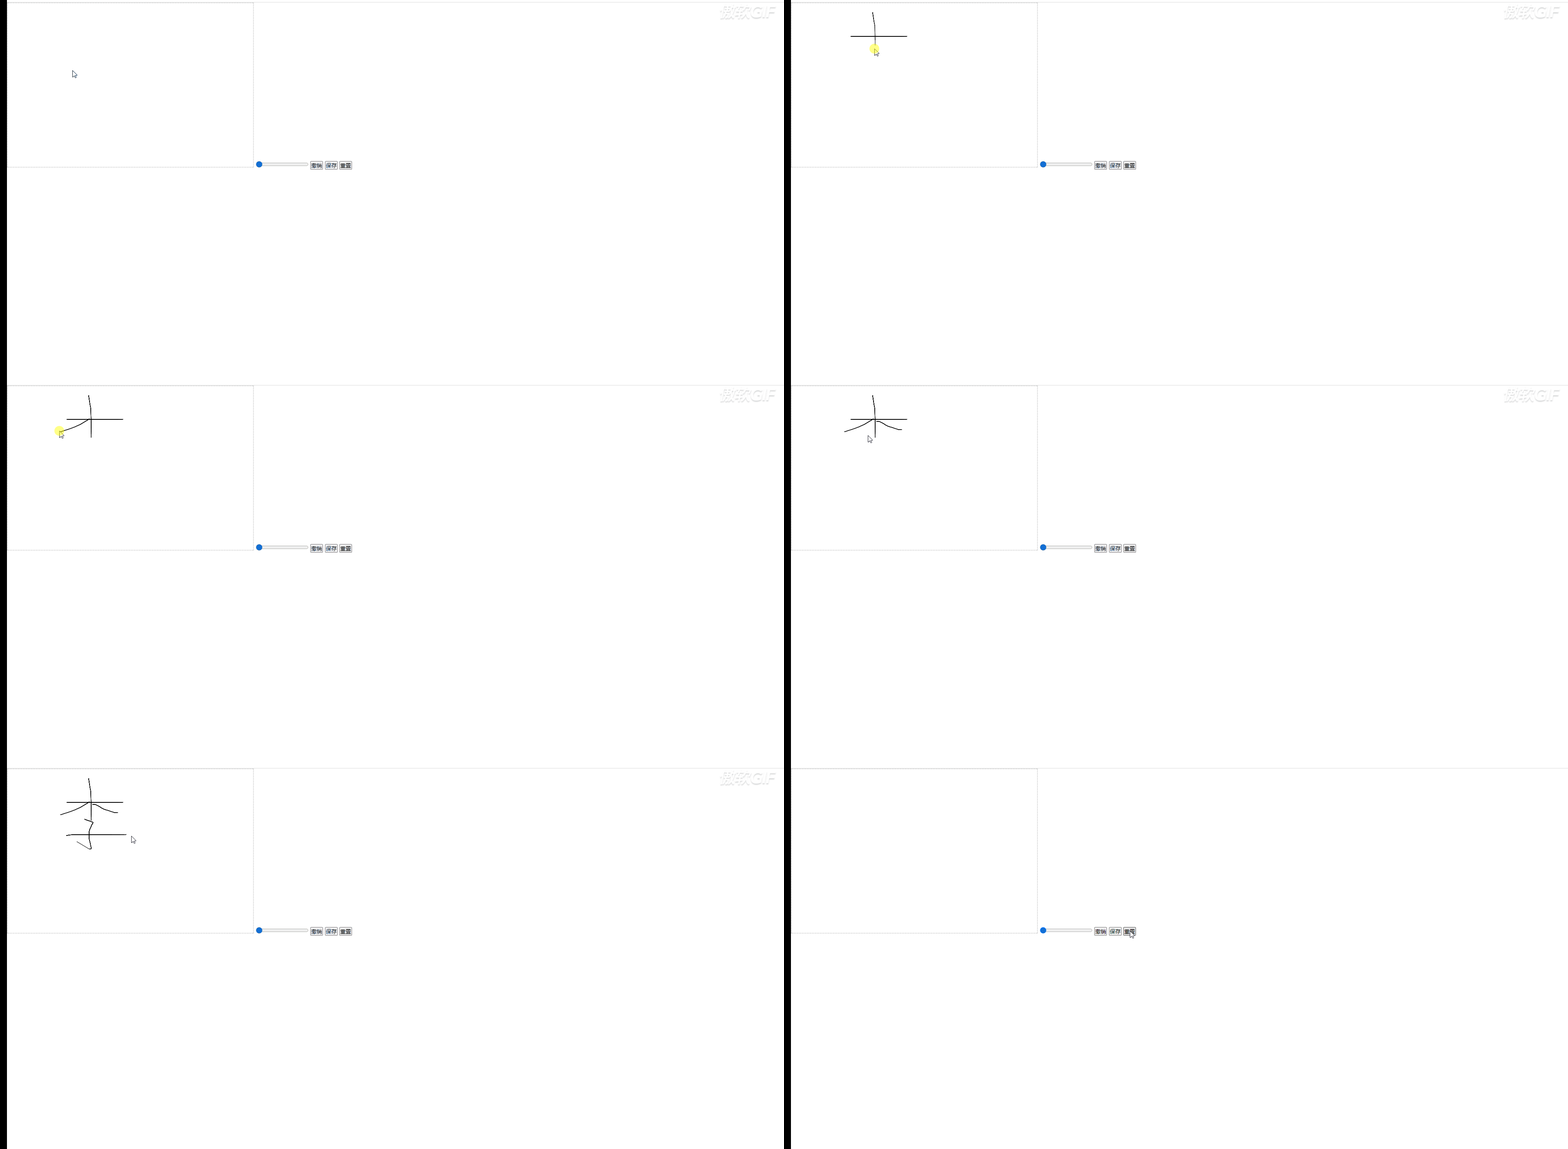
重置整個畫布
<button id="reset" >重置</button>

// 重置整個畫布
reset.addEventListener('click',e=>{
  //清空整個畫布
  ctx.clearRect(0, 0, canvas.width, canvas.height);
})

ps:清空畫布的主要運用了ctx.clearRect這個方法
儲存
儲存圖片主要是通過 canvas.toDataURL 生成的是base64
然後通過a標籤進行下載
saveBtn.addEventListener('click',()=>{
  let imgURL = canvas.toDataURL({format: "image/png", quality:1, width:600, height:400});
  let link = document.createElement('a');
  link.download = "tupian";
  link.href = imgURL;
  document.body.appendChild(link);
  link.click();
  document.body.removeChild(link);
})

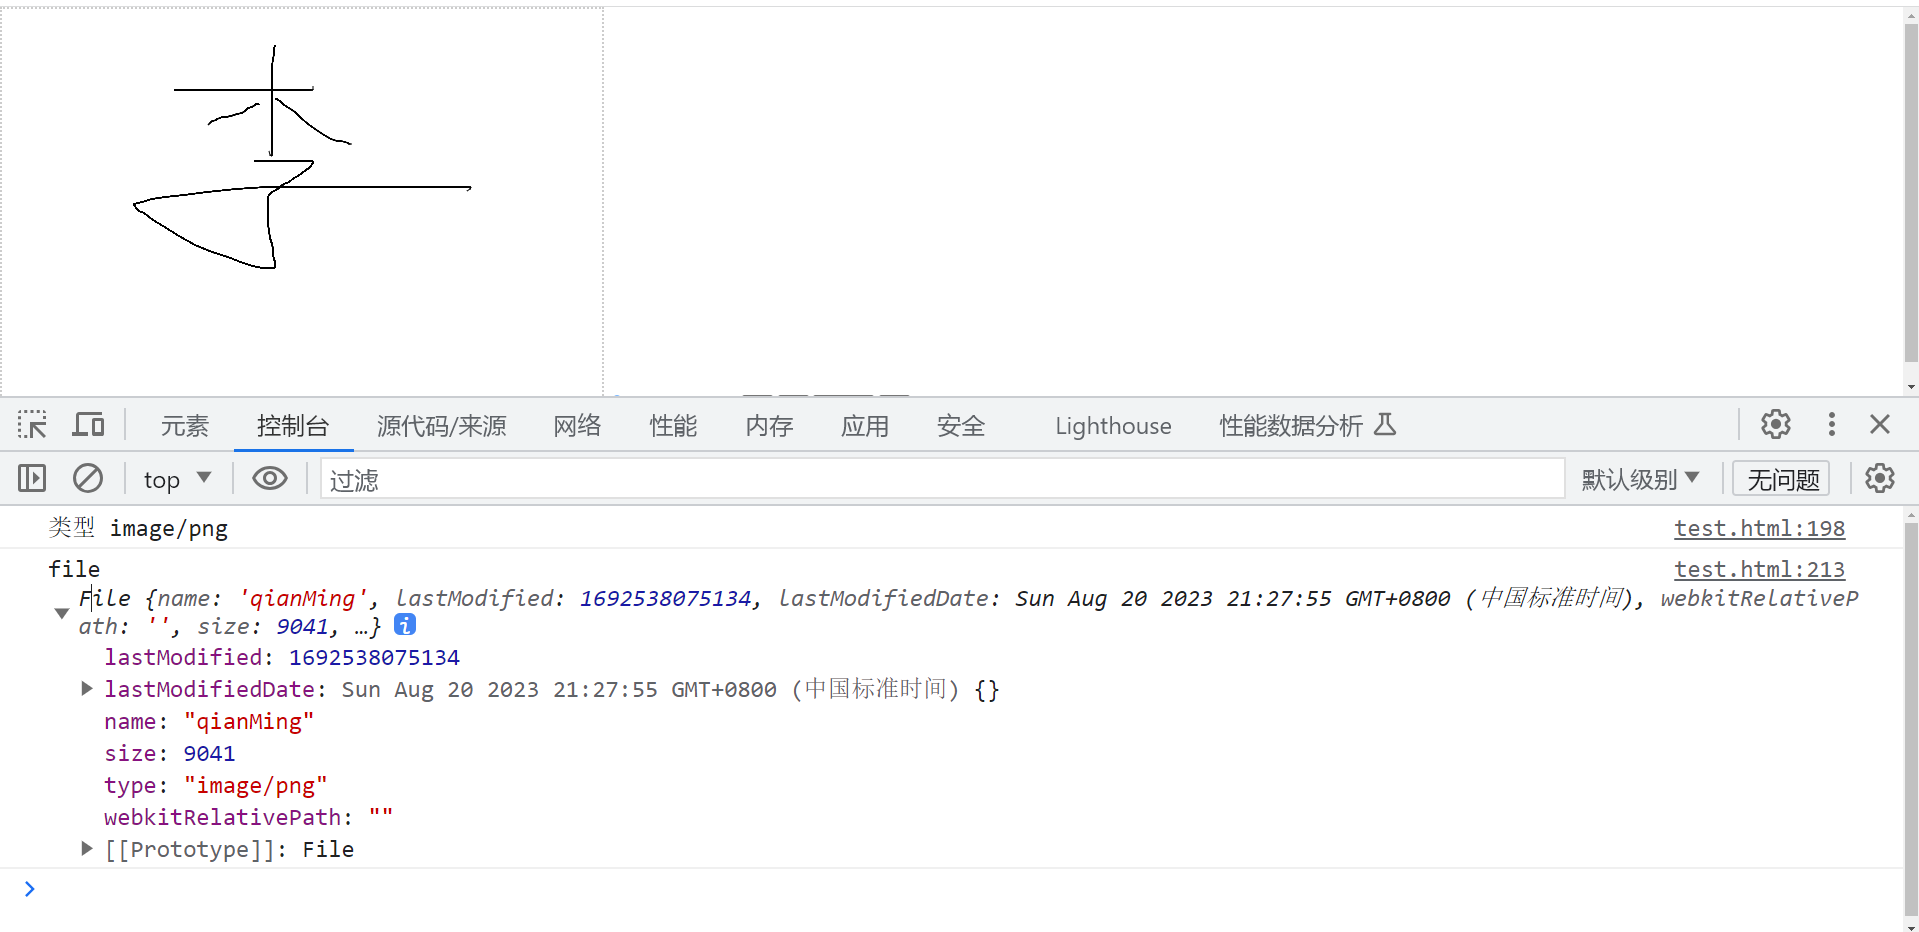
生成file檔案傳送給後端
// base64轉化為file檔案
function base64changeFile (urlData, fileName) {
  // split將按照','字串按照,分割成一個陣列,
  // 這個陣列通常包含了資料型別(MIME type)和實際的資料。
  // 陣列的第1項是型別 第2項是資料
  const arr = urlData.split(',')
  // data:image/png;base64
  const mimeType = arr[0].match(/:(.*?);/)[1]
  console.log('型別',mimeType)
  // 將base64編碼的資料轉換為普通字串
  const bytes = atob(arr[1])
  let n = bytes.length
  // 建立了一個新的Uint8Array物件,並將這些位元組複製到這個物件中。
  const fileFormat = new Uint8Array(n)
  while (n--) {
    fileFormat[n] = bytes.charCodeAt(n)
  }
  return new File([fileFormat], fileName, { type: mimeType })
}

fileBtn.addEventListener('click',()=>{
  let imgURL = canvas.toDataURL({format: "image/png", quality:1, width:600, height:400});
  let file = base64changeFile(imgURL,'qianMing')
  console.log('file',file)
})
全部程式碼
<!DOCTYPE html>
<html lang="en">
<head>
    <meta charset="UTF-8">
    <meta http-equiv="X-UA-Compatible" content="IE=edge">
    <meta name="viewport" content="width=device-width, initial-scale=1.0">
    <title>Document</title>
    <style>
      *{
        padding: 0;
        margin: 0;
      }
      #canvas {
        border: 2px dotted #ccc;
      }
    </style>
</head>
<body>
    <div class="con-box">
      <canvas id="canvas" width="600px" height="400px"></canvas>
      <input type="range" class="range" min="1" max="30" value="1" id="range">
      <button id="revoke">復原</button>
      <button id="save-btn">儲存</button>
      <button id="file">轉化為file</button>
      <button id="reset" >重置</button>
    </div>
</body>
<script>
// 獲取canvas元素的DOM物件
const canvas=document.getElementById('canvas')
// 獲取設定畫筆粗細的dom元素
let range = document.querySelector("#range");
let revoke=document.querySelector("#revoke");
let reset=document.querySelector("#reset");
let saveBtn=document.querySelector("#save-btn");
let fileBtn=document.querySelector("#file");


// 獲取渲染上下文和它的繪畫功能
const ctx= canvas.getContext('2d')
// 筆畫內容的顏色,一般為黑色
ctx.strokeStyle='#000'

let historyArr = [] //儲存所有的操作
let currentPath = null;

// 註冊滑鼠按下事件
canvas.addEventListener('mousedown',mousedownFun)

// 按下事件
function mousedownFun(e){
  console.log('按下',e.pageX,e.pageY)
  // 開始本次繪畫(與畫筆大小設定有關)
  ctx.beginPath();
  // 設定畫筆的粗細
  ctx.lineWidth = range.value || 1
  // 獲取按下的那一刻滑鼠的座標,同時移動畫筆
  ctx.moveTo(e.pageX,e.pageY)

  // 記錄當前筆畫起始點的特徵(顏色 粗細 位置)
  currentPath = {
    color: ctx.strokeStyle,
    width: ctx.lineWidth,
    points: [{ x: e.offsetX, y: e.offsetY }]
  }

  // 註冊移動事件
  canvas.addEventListener('mousemove',mousemoveFun)
  // 註冊擡起事件
  canvas.addEventListener('mouseup',mouseupFun)
}

// 移動事件
function mousemoveFun(e){
  console.log('移動')
  // 使用直線連線路徑的終點 x,y 座標的方法(並不會真正地繪製)
  ctx.lineTo(e.pageX,e.pageY)
  // 記錄畫筆的移動的每一個座標位置
  currentPath.points.push({ x: e.offsetX, y: e.offsetY });
  // 使用 stroke() 方法真正地畫線
  ctx.stroke()
}

// 擡起事件
function mouseupFun(e){
  // 一筆結束後儲存起來
  historyArr.push(currentPath);
  console.log('historyArr',historyArr)
  // 結束本次繪畫(與畫筆大小設定有關)
  ctx.closePath();
  console.log('擡起')
  // 移除移動事件
  canvas.removeEventListener('mousemove', mousemoveFun)
  // 移除擡起事件
  canvas.removeEventListener('mouseup', mouseupFun)
}

// 滑鼠移出canvas所在的區域事件-處理滑鼠移出canvas所在區域後,然後移入不按下滑鼠也可以繪製筆畫
canvas.addEventListener('mouseout',e=>{
  // 移除移動事件
  canvas.removeEventListener('mousemove', mousemoveFun)
})


  // 復原按鈕點選事件
revoke.addEventListener('click', e => {
  if (historyArr.length === 0) return;
  // 刪除最後一條的記錄
  historyArr.pop()
  ctx.clearRect(0, 0, canvas.width, canvas.height);
  drawPaths(historyArr);
});

// 重置整個畫布
reset.addEventListener('click',e=>{
  //清空整個畫布
  ctx.clearRect(0, 0, canvas.width, canvas.height);
})

// 儲存為圖片
saveBtn.addEventListener('click',()=>{
  let imgURL = canvas.toDataURL({format: "image/png", quality:1, width:600, height:400});
  console.log('imgURL',imgURL)
  let link = document.createElement('a');
  link.download = "tupian";
  link.href = imgURL;
  document.body.appendChild(link);
  link.click();
  document.body.removeChild(link);
})

// 畫所有的路徑
function drawPaths(paths) {
  console.log(11,paths)
  paths.forEach(path => {
    ctx.beginPath();
    ctx.strokeStyle = path.color;
    ctx.lineWidth = path.width;
    ctx.moveTo(path.points[0].x, path.points[0].y);
    // path.points.slice(1) 少畫 與  path.points 區別是少畫一筆和正常筆數
    console.log('path',path)
    path.points.slice(1).forEach(point => {
      ctx.lineTo(point.x, point.y);
    });
    ctx.stroke();
  });
}

// base64轉化為file檔案
function base64changeFile (urlData, fileName) {
  // split將按照','字串按照,分割成一個陣列,
  // 這個陣列通常包含了資料型別(MIME type)和實際的資料。
  // 陣列的第1項是型別 第2項是資料
  const arr = urlData.split(',')
  // data:image/png;base64
  const mimeType = arr[0].match(/:(.*?);/)[1]
  console.log('型別',mimeType)
  // 將base64編碼的資料轉換為普通字串
  const bytes = atob(arr[1])
  let n = bytes.length
  // 建立了一個新的Uint8Array物件,並將這些位元組複製到這個物件中。
  const fileFormat = new Uint8Array(n)
  while (n--) {
    fileFormat[n] = bytes.charCodeAt(n)
  }
  return new File([fileFormat], fileName, { type: mimeType })
}

fileBtn.addEventListener('click',()=>{
  let imgURL = canvas.toDataURL({format: "image/png", quality:1, width:600, height:400});
  let file = base64changeFile(imgURL,'qianMing')
  console.log('file',file)
})
</script>
</html>
遇見問題,這是你成長的機會,如果你能夠解決,這就是收穫。
作者:晚來南風晚相識
出處:https://www.cnblogs.com/IwishIcould/

 本文版權歸作者所有,歡迎轉載,未經作者同意須保留此段宣告,在文章頁面明顯位置給出原文連線
如果文中有什麼錯誤,歡迎指出。以免更多的人被誤導。
出處:https://www.cnblogs.com/IwishIcould/
想問問題,打賞了卑微的博主,求求你備註一下的扣扣或者微信;這樣我好聯絡你;(っ•̀ω•́)っ✎⁾⁾!
如果覺得這篇文章對你有小小的幫助的話,記得在右下角點個「推薦」哦,或者關注博主,在此感謝!
萬水千山總是情,打賞5毛買辣條行不行,所以如果你心情還比較高興,也是可以掃碼打賞博主(っ•̀ω•́)っ✎⁾⁾!
想問問題,打賞了卑微的博主,求求你備註一下的扣扣或者微信;這樣我好聯絡你;(っ•̀ω•́)っ✎⁾⁾!

支付寶

微信
如果文中有什麼錯誤,歡迎指出。以免更多的人被誤導。