Prometheus-4:服務自動發現Service Discovery
2023-07-14 21:00:33
自動發現
Prometheus的服務發現的幾種型別:
- 基於檔案的服務發現;
- 基於DNS的服務發現;
- 基於API的服務發現:Kubernetes、Consul、Azure......
Prometheus為什麼需要自動發現?
Prometheus Server的資料抓取工作於Pull模型,因而,它必需要事先知道各Target的位置,然後才能從相應的Exporter或Instrumentation中抓取資料,
對於小型系統來說,通過static_configs就可以解決此問題,這也是最簡單的設定方法;
對於中大型系統環境或具有較強動態性的雲端計算環境來說,靜態設定顯然難以適用,因此,Prometheus為此專門設計了一組服務發現機制,以便能夠通過服務註冊中心自動發現、檢測、分類可被檢測的各target,以及更新發生了變動的target。
Prometheus指標抓取的生命週期
發現 -> 設定 -> relabel -> 指標資料抓取 -> metrics relabel
- 在每個scrape_interval期間,Prometheus都會檢查執行的作業(Job);
- 這些作業首先會根據Job上指定的發現設定生成target列表,此即服務發現過程;
- 服務發現會返回一個Target列表,其中包含一組稱為後設資料的標籤,這些標籤都以「__meta_」為字首;
- 服務發現還會根據目標設定來設定其它標籤,這些標籤帶有「__」字首和字尾,包括「__scheme__」、 「__address__」和「__metrics_path__」,分別儲存有target支援使用協定(http或https,預設為http)、target的地址及指標的URI路徑(預設為/metrics);
- 若URI路徑中存在任何引數,則它們的字首會設定為「__param_;
- 設定標籤會在抓取的生命週期中被重複利用以生成其他標籤,例如,指標上的instance標籤的預設值就來自於__address__標籤的值;
- 抓取而來的指標在儲存之前,還允許使用者對指標重新打標並過濾,在job段metric_relabel_configs設定,通常用來刪除不需要的指標、刪除敏感或不必要的標籤和新增修改標籤格式等。
自動發現的幾種方式演示
基於檔案的自動發現
此種型別也是最簡單的服務發現方式,主要是通過Prometheus Server定期從檔案中載入target的資訊。
檔案可以是json或者yaml格式,它含有定義的target列表,以及可選的標籤資訊。
vi prometheus.yml
# static config nodes
  - job_name: 'nodes'
    file_sd_configs:
    - files:
      - targets/nodes-*.yaml
      refresh_interval: 2m
    scrape_interval: 15s
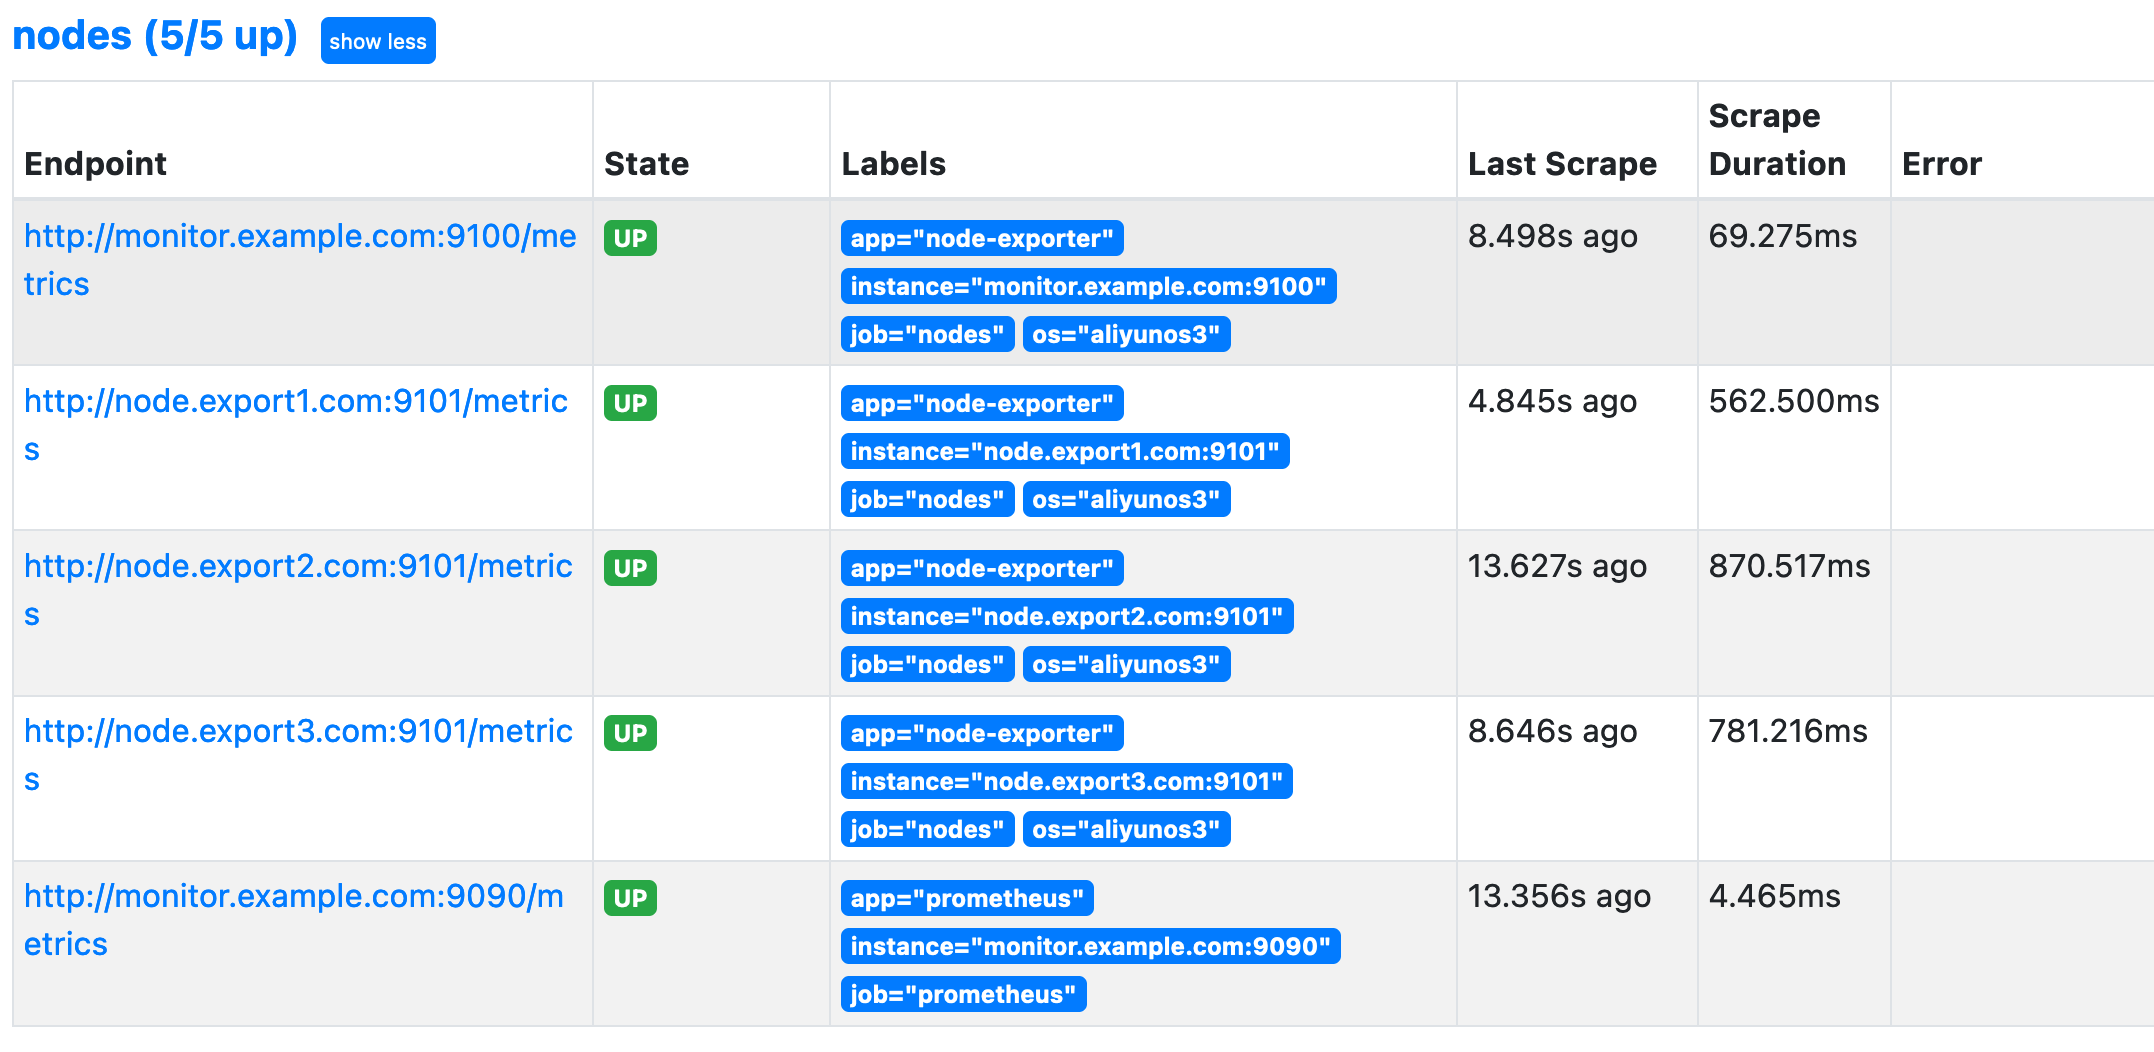
然後將所有要發現的target全部放在targets/目錄下即可,例如
cat targets/nodes-linux.yaml
- targets:
  - monitor.example.com:9100
  - node.export1.com:9101
  - node.export2.com:9101
  - node.export3.com:9101
  labels:
    app: node-exporter
    os: aliyunos3

cat targets/nodes-prometheus.yaml
- targets:
  - monitor.example.com:9090
  labels:
    app: prometheus
    job:  prometheus
重新載入Prometheus設定即可:
curl -XPOST monitor.example.com:9090/-/reload
基於consul註冊中心自動發現
consul是一款基於golang開發的開源工具,主要面向分散式,服務化的系統提供服務註冊、服務發現和設定管理的服務,提供服務註冊/發現、健康檢查、Key/Value儲存、多資料中心和分散式一致性保證等功能。
服務部署
多種部署方式,這裡僅是使用consul的功能,並不考慮高可用或其他問題,採用docker-compose方式部署。
vi docker-compose.yml
version: '3.6'

volumes:
  consul_data: {}

networks:
  monitoring:
    driver: bridge

services:
  consul:
    image: consul:1.14
    volumes:
      - ./consul_configs:/consul/config
      - consul_data:/consul/data/
    networks:
      - monitoring
    ports:
      - 8500:8500
    command: ["consul","agent","-dev","-bootstrap","-config-dir","/consul/config","-data-dir","/consul/data","-ui","-log-level","INFO","-bind","127.0.0.1","-client","0.0.0.0"]

  consul-exporter:
    image: prom/consul-exporter:v0.8.0
    networks:
      - monitoring
    ports:
      - 9107:9107
    command:
      - "--consul.server=consul:8500"
    depends_on:
      - consul
這裡順便把consul-exporter也部署了
直接啟動:
# docker-compose up -d

# docker-compose ps
NAME                                    IMAGE                         COMMAND                  SERVICE             CREATED             STATUS              PORTS
consul-and-exporter-consul-1            consul:1.14                   "docker-entrypoint.s…"   consul              24 hours ago        Up 24 hours         8300-8302/tcp, 8301-8302/udp, 8600/tcp, 8600/udp, 0.0.0.0:8500->8500/tcp, :::8500->8500/tcp
consul-and-exporter-consul-exporter-1   prom/consul-exporter:v0.8.0   "/bin/consul_exporte…"   consul-exporter     24 hours ago        Up 24 hours         0.0.0.0:9107->9107/tcp, :::9107->9107/tcp
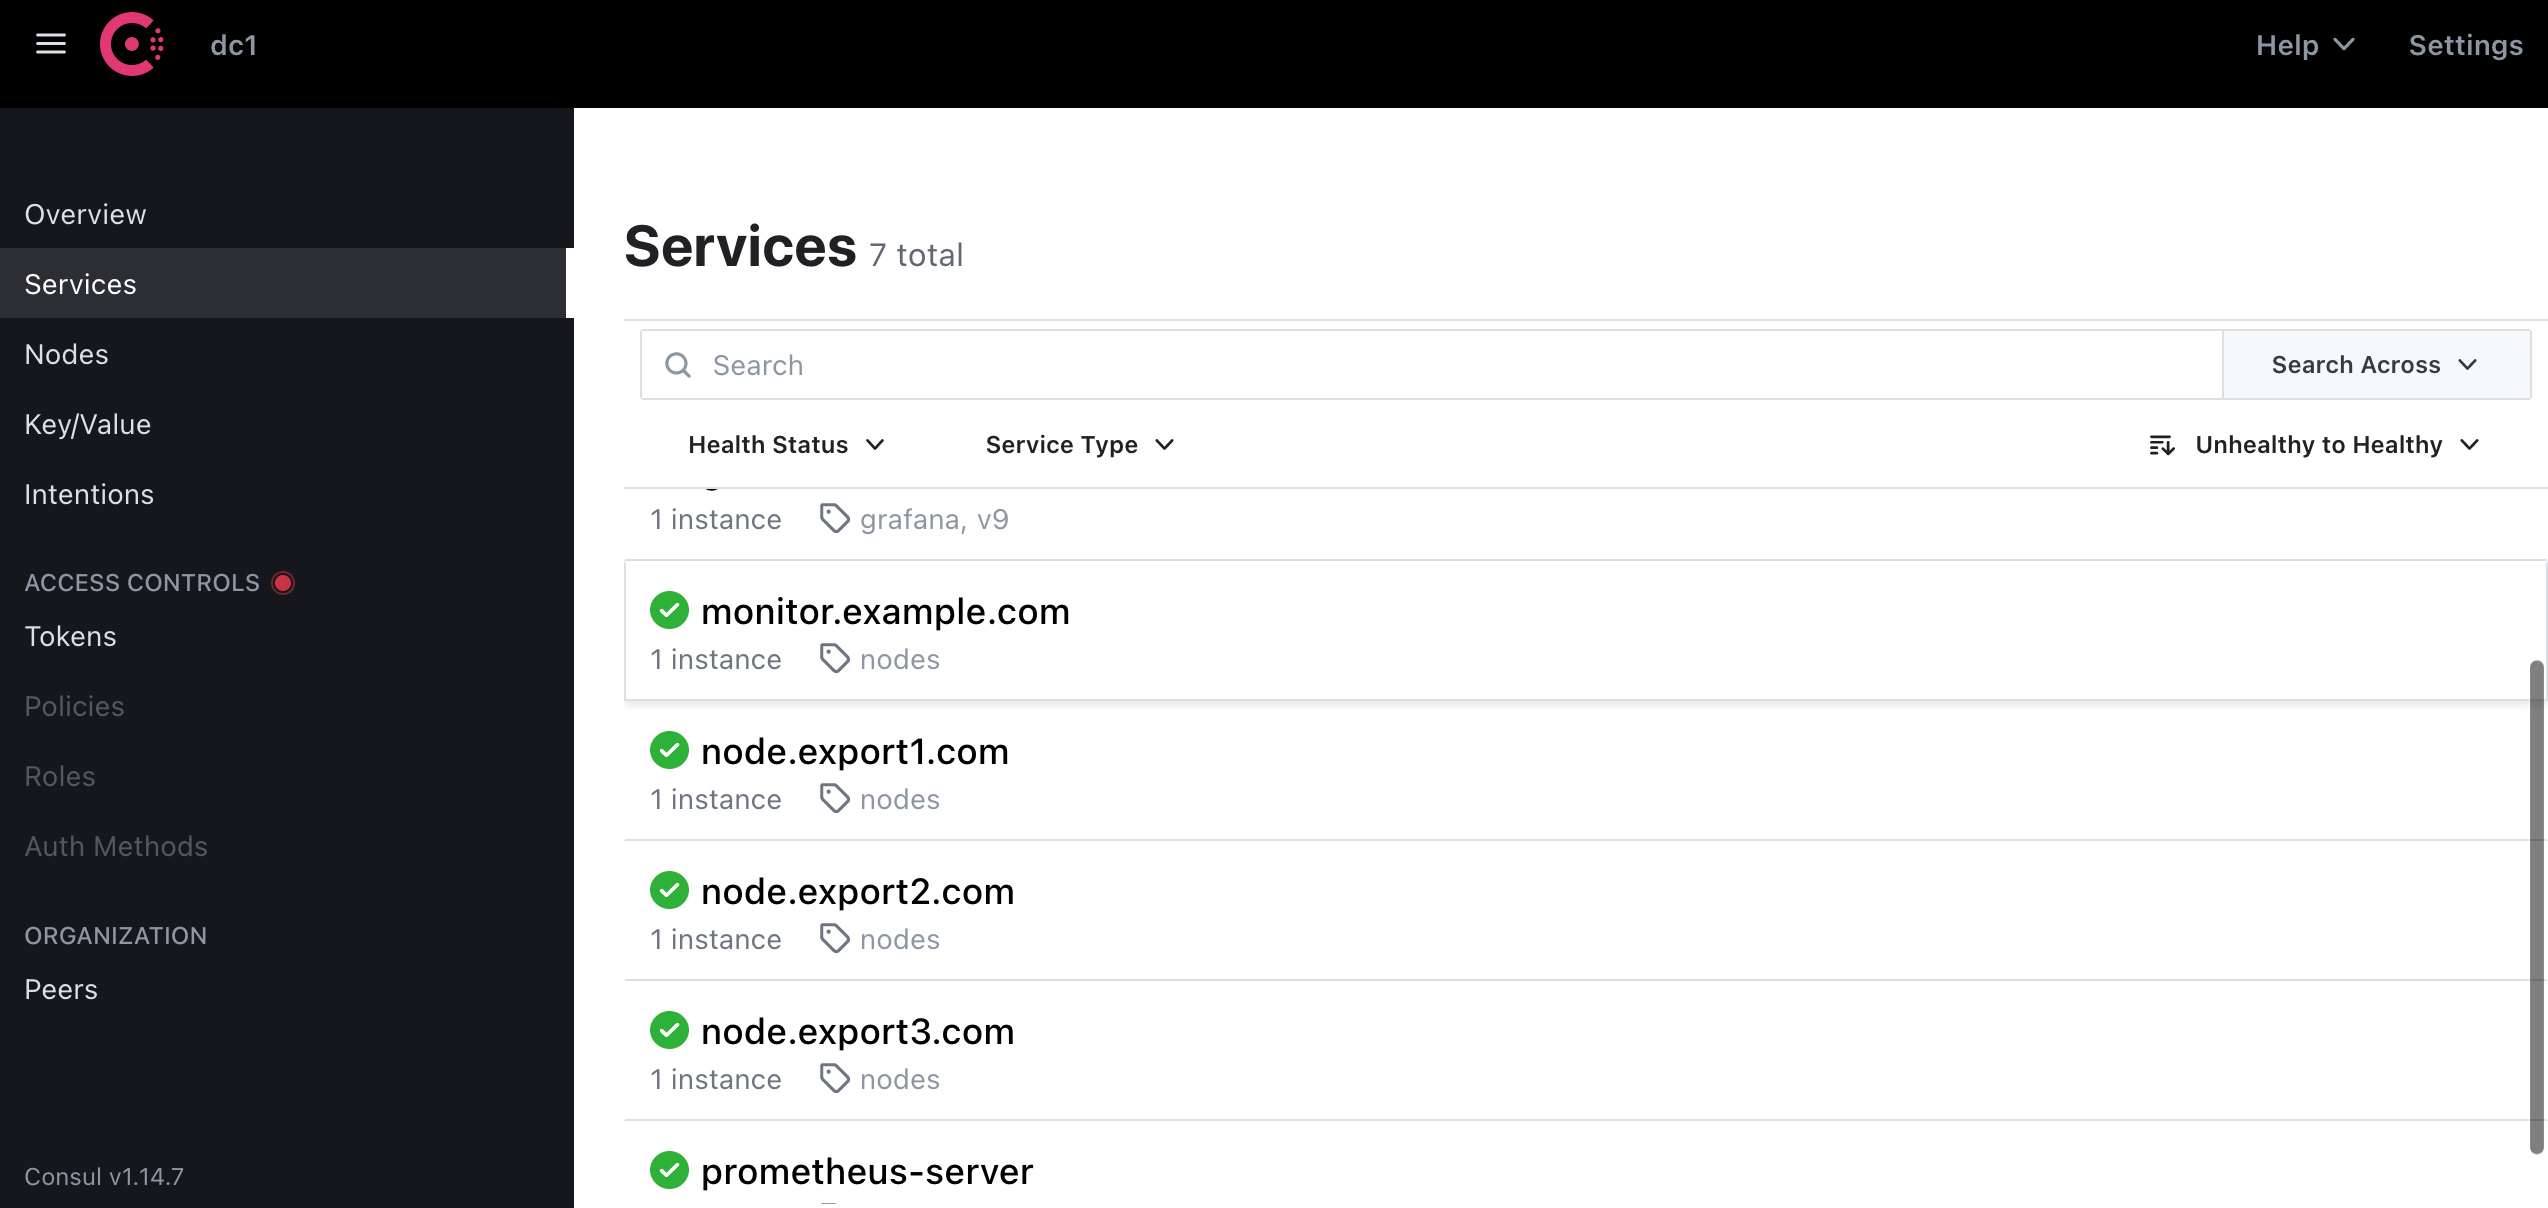
可以通過ip:8500直接存取consul,這裡範例並沒有設定token,正常生產環境需要token來進行身份驗證:

編輯Prometheus.yml
需要注意,使用consul自動發現時,需要在job中通過標籤來匹配對應的target,例如:
vi prometheus.yml
  # consul_service_discovery
  - job_name: 'nodes'
    consul_sd_configs:
    - server: "monitor.example.com:8500"
      tags:
      - "nodes"    # 匹配在consul註冊的服務中帶有nodes標籤的service
      refresh_interval: 2m
    scrape_interval: 15s

  - job_name: 'grafana'
    consul_sd_configs:
    - server: "monitor.example.com:8500"
      tags:
      - "grafana"    # 匹配在consul註冊的服務中帶有grafana標籤的service
      refresh_interval: 2m
    scrape_interval: 15s
重新載入:
curl -XPOST monitor.example.com:9090/-/reload服務註冊到consul
服務註冊到consul有兩種方式,一種是使用consul使用者端命令進行操作,另一種是通過api操作。
api方式註冊演示
準備json檔案
vi grafana.json
{
  "ID": "grafana",
  "Name": "grafana",
  "Tags": ["grafana", "v9"],    # 包含的標籤
  "Address": "monitor.example.com",
  "Port": 3000,
  "Meta": {
    "grafana_version": "9"    # 後設資料,可自定義
  },
  "EnableTagOverride": false,
  "Check": {    # 檢查健康狀態的方法
    "http": "http://monitor.example.com:3000/metrics",
    "interval": "5s",
    "Timeout": "5s"
  },
  "Weights": {
    "Passing": 1,
    "Warning": 1
  }
}
健康檢查方法也可以是執行指令碼,例如:
  "Check": {
    "DeregisterCriticalServiceAfter": "90m",
    "Args": ["/usr/local/bin/check_redis.py"],
    "Interval": "10s",
    "Timeout": "5s"
  },
註冊服務:
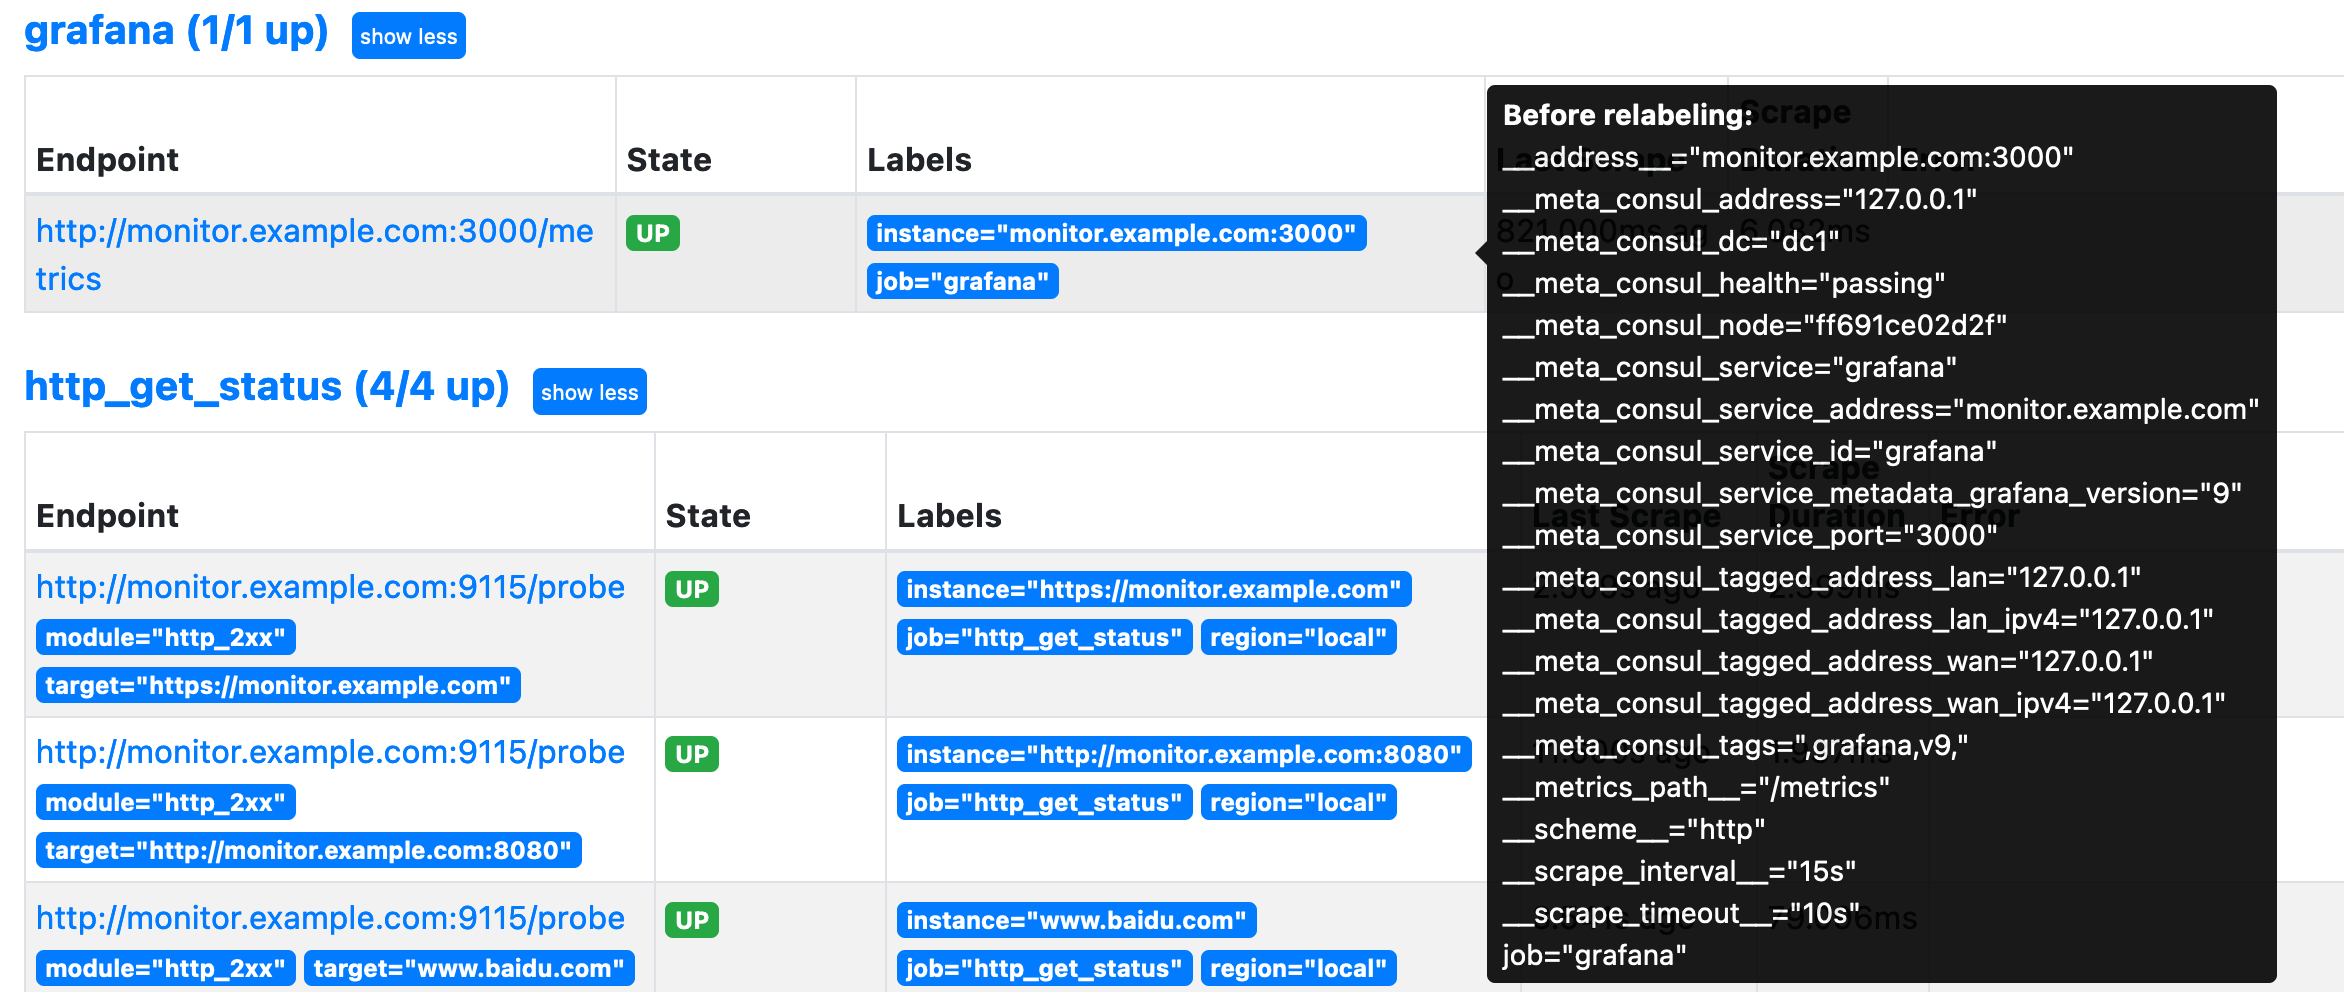
curl -XPUT --data @grafana.json http://monitor.example.com:8500/v1/agent/service/register檢視狀態:

通過consul自動發現的target會有很多__meta_consul開頭的標籤,我們可以通過relabel來重新利用這些標籤,這個下篇筆記總結。
常用的 api 指令:
# 檢視當前所有註冊的service
curl http://monitor.example.com:8500/v1/agent/services

# 檢視tomcat service的健康狀態
curl http://monitor.example.com:8500/v1/agent/health/service/name/tomcat

# 註冊服務,需提前準備好json檔案
curl -XPUT --data @grafana.json http://monitor.example.com:8500/v1/agent/service/register

# 登出服務
curl -XPUT http://monitor.example.com:8500/v1/agent/service/deregister/grafanaconsul命令方式註冊演示
準備nodes.json檔案,同一型別的target可以寫到一個json檔案中,便於編輯註冊
{
  "services": [
    {
      "id": "node.export1.com",
      "name": "node.export1.com",
      "address": "node.export1.com",
      "port": 9101,
      "tags": ["nodes"],
      "checks": [{
        "http": "http://node.export1.com:9101/metrics",
        "interval": "5s"
      }]
    },
    {
      "id": "node.export2.com",
      "name": "node.export2.com",
      "address": "node.export2.com",
      "port": 9101,
      "tags": ["nodes"],
      "checks": [{
        "http": "http://node.export2.com:9101/metrics",
        "interval": "5s"
      }]
    },
    {
      "id": "node.export3.com",
      "name": "node.export3.com",
      "address": "node.export3.com",
      "port": 9101,
      "tags": ["nodes"],
      "checks": [{
        "http": "http://node.export3.com:9101/metrics",
        "interval": "5s"
      }]
    },
    {
      "id": "monitor.example.com",
      "name": "monitor.example.com",
      "address": "monitor.example.com",
      "port": 9100,
      "tags": ["nodes"],
      "checks": [{
        "http": "http://monitor.example.com:9100/metrics",
        "interval": "5s"
      }]
    }
  ]
}
將node.json檔案放置到consul服務啟動的"-data-dir"目錄下,此範例為容器內/consul/data
/consul/config # pwd
/consul/config
/consul/config # ls
nodes.json
執行config重新載入
# consul reload
Configuration reload triggered
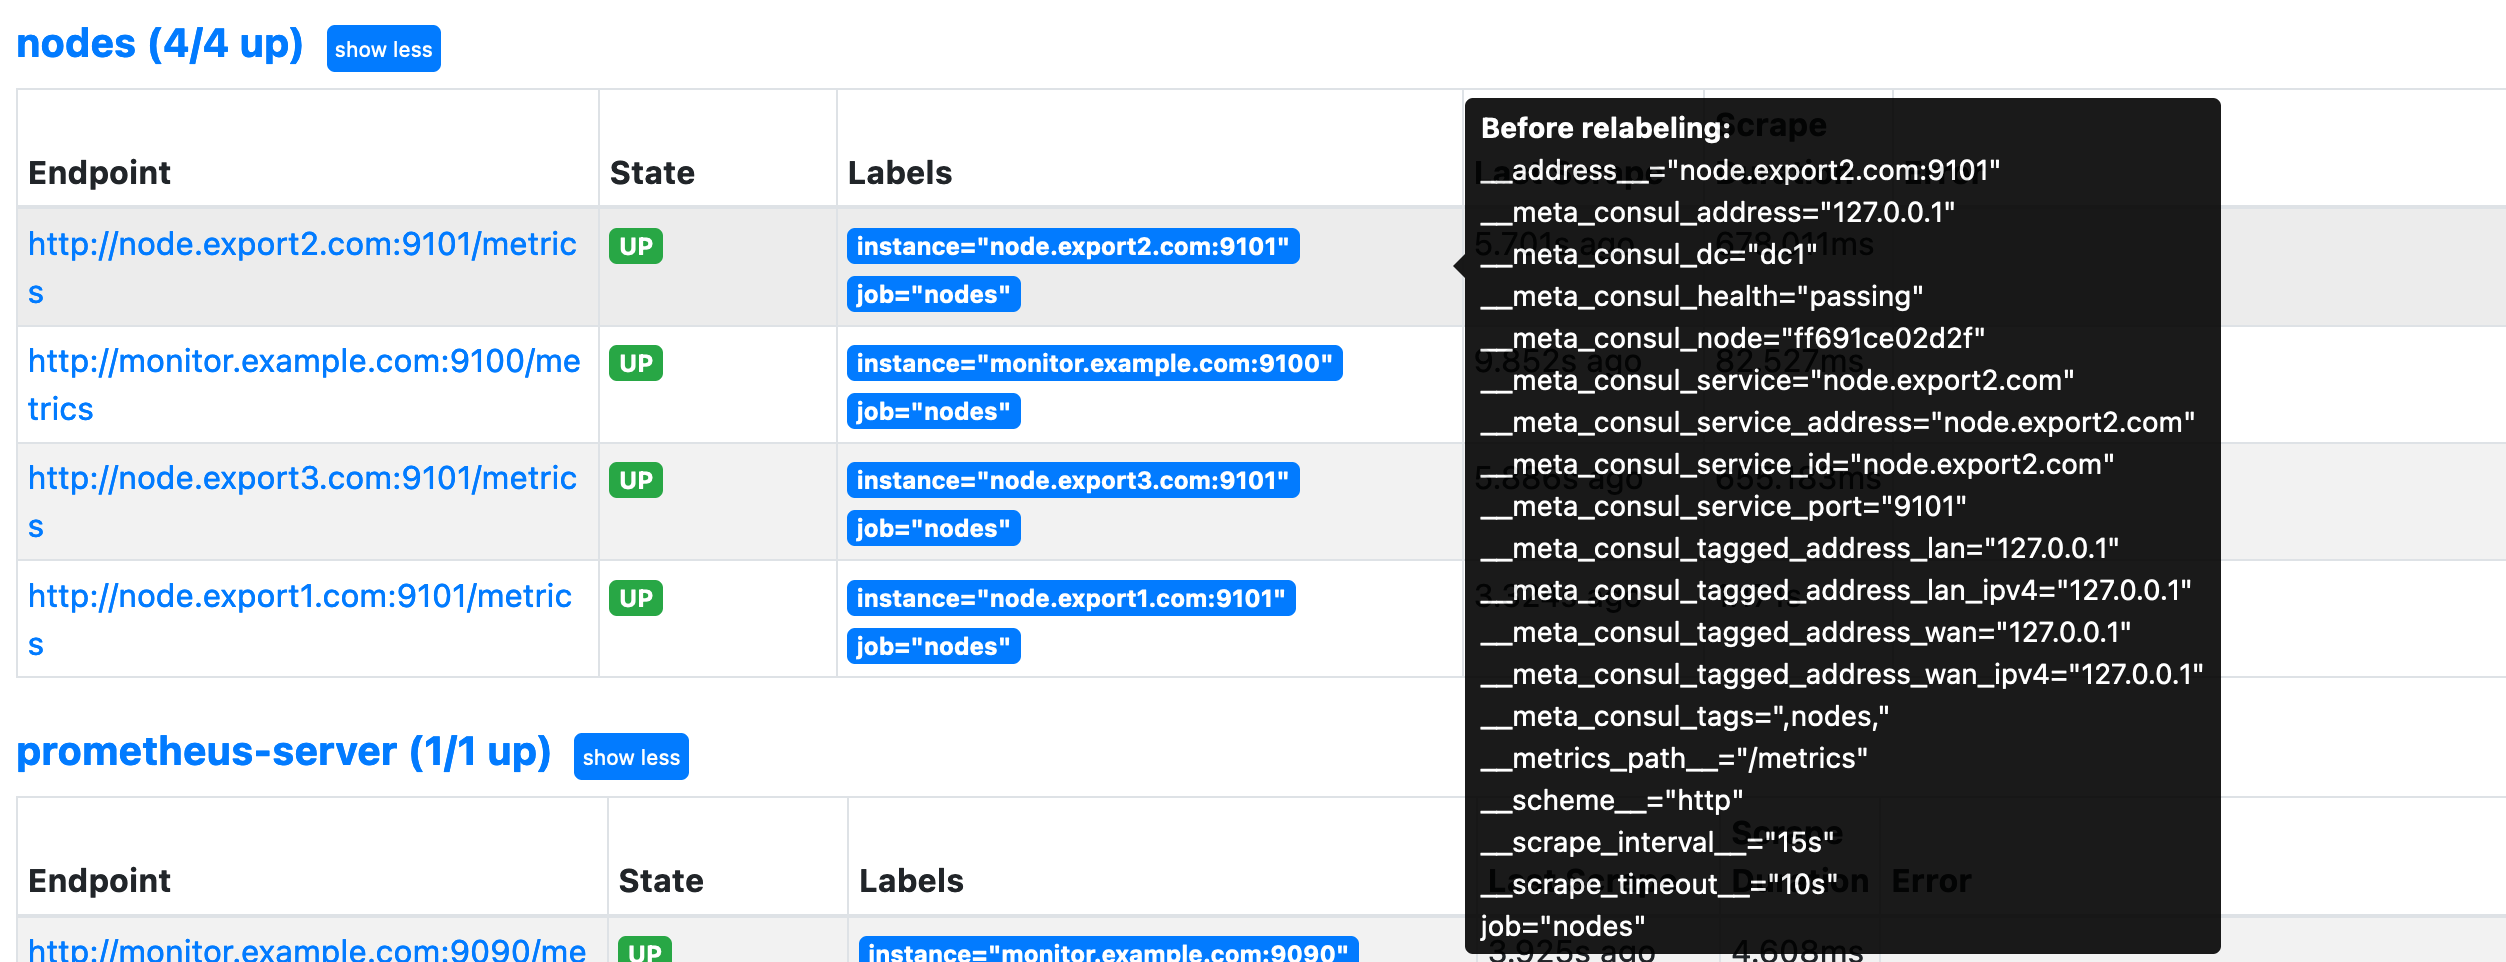
檢視consul及Prometheus狀態


至此,Prometheus基於consul的自動發現基本演示完畢。
寫到最後
後續準備單獨將kubernetes的監控體系起一篇部落格,這裡暫且先不做介紹,歡迎各位持續關注。