如何在 Windows Server 2022 阿里雲伺服器上搭建自己的 MQTT 伺服器。
最近,在做一個專案的時候,需要線上管理網路繼電器,以前也做過硬體的專案,但是這樣的專案不多。現在我想實現一個線上可以接受網路繼電器傳送的訊號,也可以向網路繼電器傳送命令,控制其的執行。這個功能的實現需要物聯網的支援,我在諮詢了網路繼電器賣家,想要線上實現網路硬體的管理有三種解決方案。
第一種:由於我買的是阿里雲的伺服器,可以在買阿里雲的IOT元件,而且提供了全部功能,提供優化的介面,硬體、網路的管理和維護都不用關心,但是費用不菲。
第二種:如果公司內部有特牛的 TCP/IP 軟體工程師的話,可以自己寫一套出來,但是這個開發過程、偵錯過程、維護過程等,週期比較長,這樣的人也不好找,價效比不高。
第三種:可以自己在雲伺服器上搭建MQTT伺服器,通過其元件實現線上管理,這種方案總體來說,價效比最高。
我選擇的是第三種解決方案,我已經在雲伺服器上搭建了自己的MQTT伺服器,硬體之間也可以實現管理了,我今天就把過程記錄下來,以防以後使用的時候到處亂找,而且網上的有的也不是很全和很詳細,如果大家有需要,也可以直接使用。我寫的很詳細,小白照著做都沒有問題,高手就略過吧。
我的搭建環境如下:
雲平臺:阿里雲平臺
作業系統:Windows Server 2022 Datacenter
機器記憶體:8.00 GB (7.73 GB 可用)
系統型別:64 位元運算系統, 基於 x64 的處理器
MQTT伺服器:Apache-Apollo
MQTT使用者端:MQTT.fx
IOT初次接觸,當然了,很多相關的工具也是初始使用,使用不好,大家不要見笑。
二、設定詳情
想要安裝 Apache-Apollo,必須安裝他的執行時,因為它是用Java 寫的,當然需要安裝 Java 的執行環境,下載 JDK,直接安裝就可以,很簡單,沒什麼可說的。安裝完成,也要設定環境變數,否則我們不能直接在 cmd 命令列終端種使用其命令。話不多說,直接開始。
1、由於 Apache-Apollo 的執行需要使用 Java 的執行環境,第一個必須先下載 JDK。
1)、下載 JDK 安裝程式,我貼了兩個地址,都可以直接下載。
地址1:https://www.java.com/zh-CN/ ,
地址2:https://www.oracle.com/cn/java/technologies/downloads/
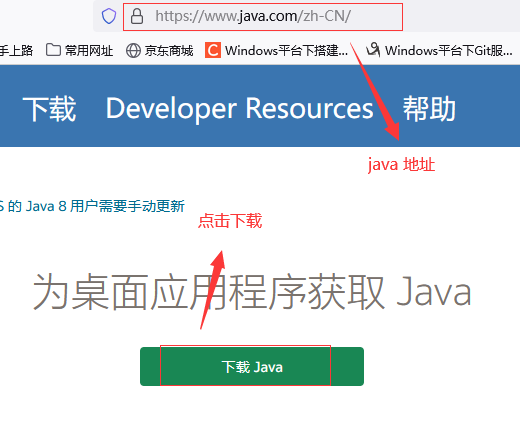
點選兩次才到真正下載頁面。
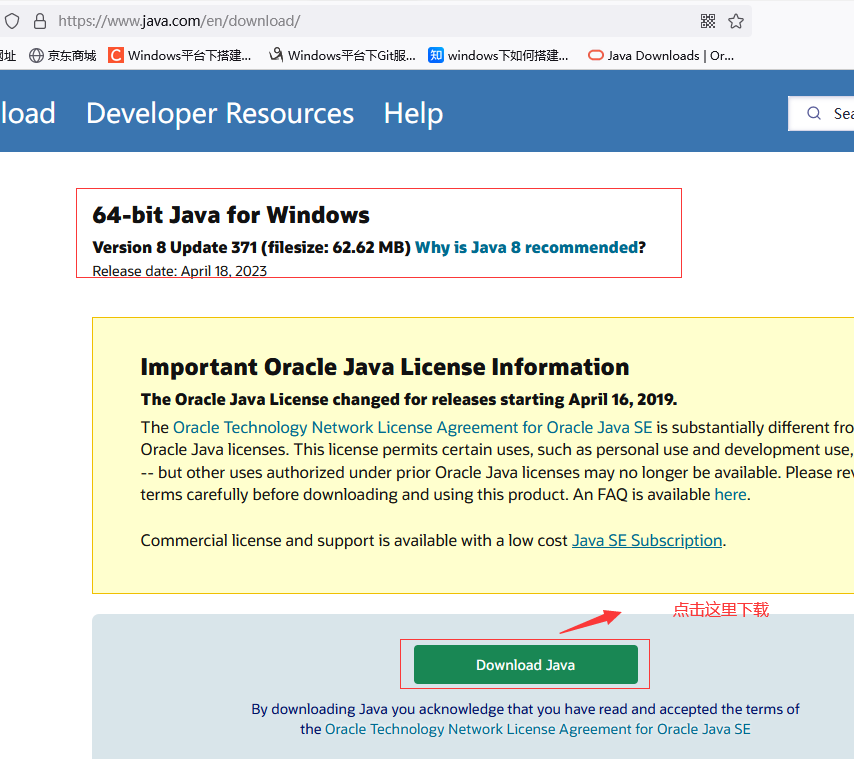
下載到原生的檔案,我下載兩個,一個是 JDK,一個是 JRE,大家只下載一個就好。
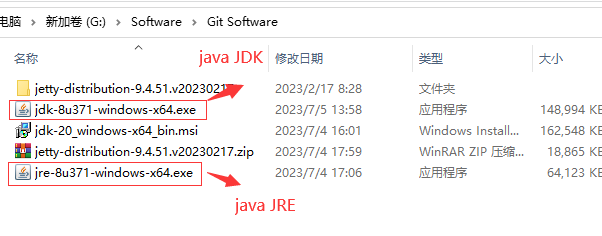
1】、第一步要先安裝好JDK的執行環境, 點選jdk-8u271-windows-x64安裝包,點選執行後彈出下列介面,點選下一步
2】、 我把安裝包放在了自定義目錄下,好多國外軟體安裝路徑出現中文或空格都會出現錯誤,所以我為了避免這種情況 安裝國外軟體的時候路徑都不包含中文和空格,選擇預設路徑也可以。
3)、設定Java環境變數
1】、設定系統的環境變數

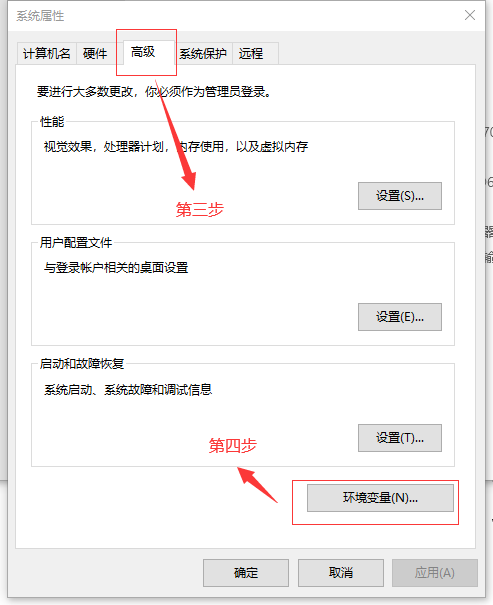
右鍵」計算機」 => 」屬性」 => 」高階系統設定」 => 」高階」 => 「環境變數」 => 「系統變數」。
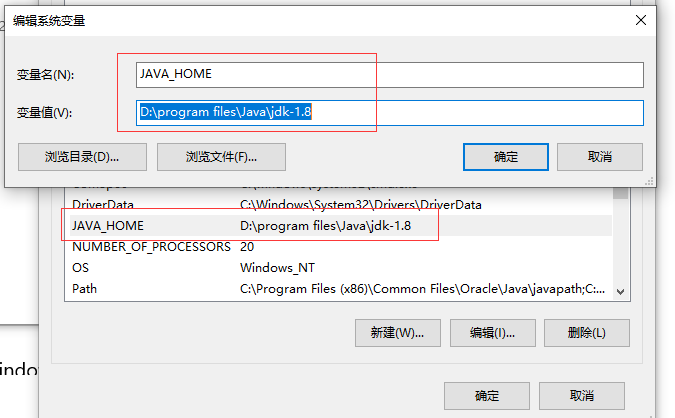
變數名:JAVA_HOME
變數值:D:\program files\Java\jdk-1.8【具體要根據你自己的安裝路徑,我的是安裝在D槽的】
3】、新建:
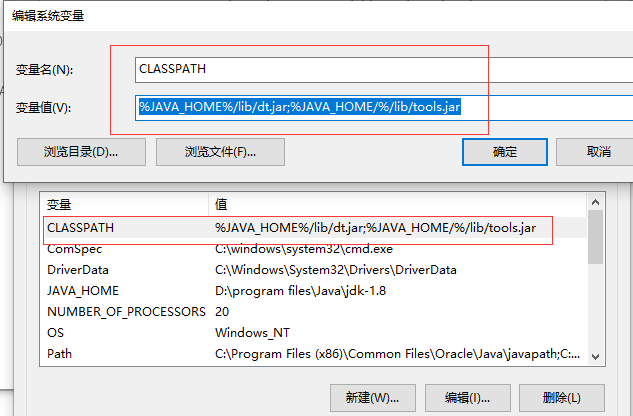
變數名:CLASSPATH
變數值:%JAVA_HOME%/lib/dt.jar;%JAVA_HOME/%/lib/tools.jar
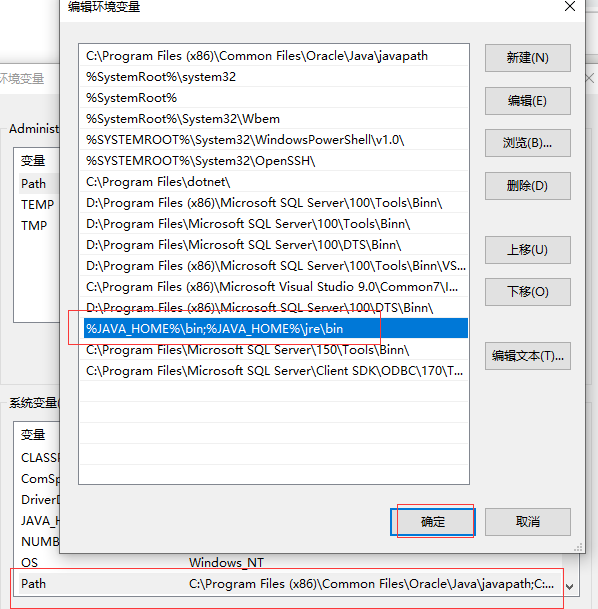
4】、新增:找到PATH變數,選擇編輯。
把 %JAVA_HOME%\bin;%JAVA_HOME%\jre\bin 新增到」變數值」的結尾處。
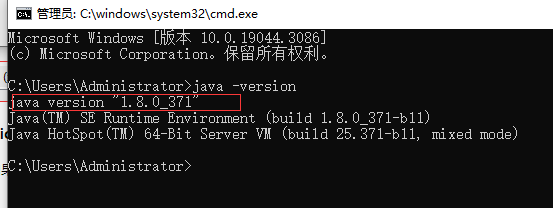
5】、確保電腦安裝了Java 執行時環境 JRE 或者 JDK ( version >=1.7 )
在命令視窗中,輸入java命令:java -version,回車,如果出現版本資訊,說明安裝成功。
1)、先上 Apollo 伺服器的下載地址。
地址1:https://pan.baidu.com/s/1-tU9P5srKiM3P1Vy10eOQg 百度網路硬碟下載地址(目前有效,不知是否一直有效)
提取碼:e5l0
(包含apache-apollo-1.7.1-windows-distro、jdk-8u271-windows-i586、jdk-8u271-windows-x64)
地址2:http://archive.apache.org/dist/activemq/activemq-apollo/1.7.1/
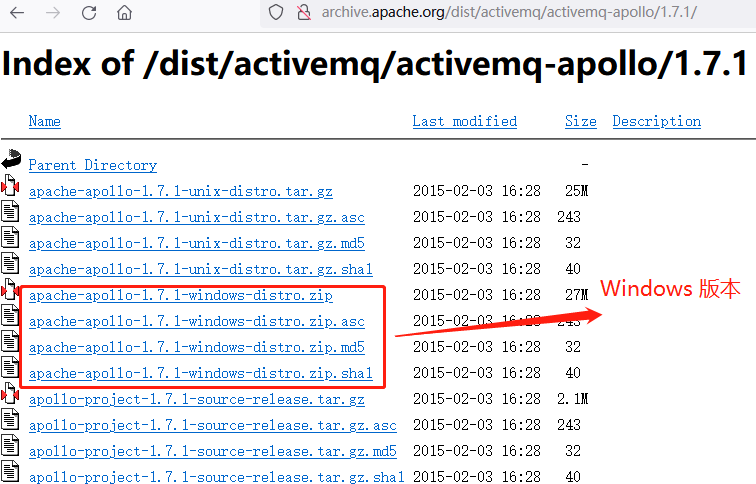
2)、 在CMD下輸入 apollo.cmd create mqttServer,顯示建立完成如下
下載Apollo伺服器並解壓,在apache-apollo-1.7.1\bin的路徑欄輸入cmd執行,這種方式便於測試,如果想正常使用,安裝為 Windows 服務。

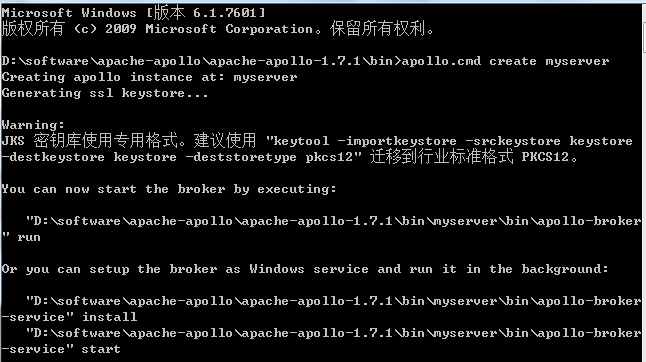
成功建立資料夾。

在 apache-apollo-1.7.1\bin\mqttServer\etc 目錄下,其中 apollo.xml 是組態檔,再次強調一下,如果想要在外網存取,必須把以前的127.0.0.1 改成 0.0.0.0 ,如果是雲伺服器,通過網站存取就是:http://雲伺服器公網IP:61680/console/index.html,如果是通過MQTT使用者端存取:雲伺服器公網IP:61613,我第一次就設定成了通過 IPconfig 命令獲取的地址了,總是不通 。

 1 <?xml version="1.0" encoding="UTF-8" standalone="yes"?>
 2 <!--
 3   Licensed to the Apache Software Foundation (ASF) under one or more
 4   contributor license agreements. See the NOTICE file distributed with
 5   this work for additional information regarding copyright ownership.
 6   The ASF licenses this file to You under the Apache License, Version
 7   2.0 (the "License"); you may not use this file except in compliance
 8   with the License. You may obtain a copy of the License at
 9   http://www.apache.org/licenses/LICENSE-2.0 Unless required by
10   applicable law or agreed to in writing, software distributed under
11   the License is distributed on an "AS IS" BASIS, WITHOUT WARRANTIES
12   OR CONDITIONS OF ANY KIND, either express or implied. See the
13   License for the specific language governing permissions and
14   limitations under the License.
15 -->
16
17 <!--
18   For more information on how configure this file please
19   reference:
20
21   http://activemq.apache.org/apollo/versions/1.7.1/website/documentation/user-manual.html
22   -->
23 <broker xmlns="http://activemq.apache.org/schema/activemq/apollo">
24
25   <notes>
26     The default configuration with tls/ssl enabled.
27   </notes>
28
29   <log_category console="console" security="security" connection="connection" audit="audit"/>
30
31
32   <authentication domain="apollo"/>
33   <!-- Give admins full access -->
34   <access_rule allow="admins" action="*"/>
35   <access_rule allow="*" action="connect" kind="connector"/>
36
37
38   <virtual_host id="mqttServer">
39     <!--
40       You should add all the host names that this virtual host is known as
41       to properly support the STOMP 1.1 virtual host feature.
42       -->
43     <host_name>mqttServer</host_name>
44     <host_name>localhost</host_name>
45     <host_name>127.0.0.1</host_name>
46
47     <!-- Uncomment to disable security for the virtual host -->
48     <!-- <authentication enabled="false"/> -->
49
50     <!-- Uncomment to disable security for the virtual host -->
51     <!-- <authentication enabled="false"/> -->
52     <access_rule allow="users" action="connect create destroy send receive consume"/>
53
54
55     <!-- You can delete this element if you want to disable persistence for this virtual host -->
56     <leveldb_store directory="${apollo.base}/data"/>
57
58
59   </virtual_host>
60   //Web網站系統存取的IP地址,127.0.0.1,這樣定義只能內網存取,如果想外網存取,改成:0.0.0.0,格式:http://1**.9*.11*.1**:61680/console/index.html#
61   <web_admin bind="http://0.0.0.0:61680"/>
62   <web_admin bind="https://0.0.0.0:61681"/>
63  //這是MQTT伺服器的地址,在使用MQTT使用者端存取MQTT伺服器的格式:雲伺服器公網地址(不是執行ipconfig獲取的地址):埠號,格式:1**.9*.11*.1**:61613
64   <connector id="tcp" bind="tcp://0.0.0.0:61613" connection_limit="2000"/>
65   <connector id="tls" bind="tls://0.0.0.0:61614" connection_limit="2000"/>
66   <connector id="ws"  bind="ws://0.0.0.0:61623"  connection_limit="2000"/>
67   <connector id="wss" bind="wss://0.0.0.0:61624" connection_limit="2000"/>
68
69   <key_storage file="${apollo.base}/etc/keystore" password="password" key_password="password"/>
70
71 </broker>
4)、修改 users.properties 檔案,我保持的預設。
apache-apollo-1.7.1\bin\mqttServer\etc\users.properties 這個檔案可以設定登入賬號密碼,範例有一個admin=password, admin是賬號,password是密碼,使用者端連線伺服器和web網頁登入所用的賬號密碼都是這個。
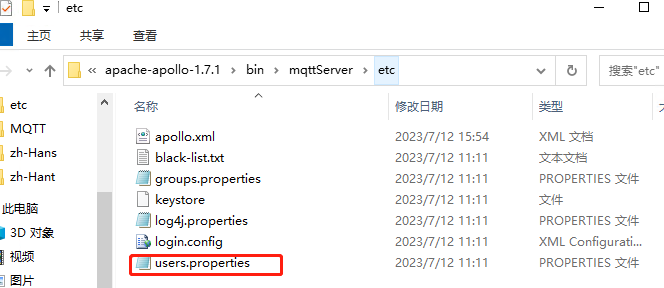
原始碼如下:
 1 ## ---------------------------------------------------------------------------
 2 ## Licensed to the Apache Software Foundation (ASF) under one or more
 3 ## contributor license agreements.  See the NOTICE file distributed with
 4 ## this work for additional information regarding copyright ownership.
 5 ## The ASF licenses this file to You under the Apache License, Version 2.0
 6 ## (the "License"); you may not use this file except in compliance with
 7 ## the License.  You may obtain a copy of the License at
 8 ##
 9 ## http://www.apache.org/licenses/LICENSE-2.0
10 ##
11 ## Unless required by applicable law or agreed to in writing, software
12 ## distributed under the License is distributed on an "AS IS" BASIS,
13 ## WITHOUT WARRANTIES OR CONDITIONS OF ANY KIND, either express or implied.
14 ## See the License for the specific language governing permissions and
15 ## limitations under the License.
16 ## ---------------------------------------------------------------------------
17
18 #
19 # The list of users that can login.  This file supports both plain text or
20 # encrypted passwords.  Here is an example what an encrypted password
21 # would look like:
22 #
23 # admin=ENC(Cf3Jf3tM+UrSOoaKU50od5CuBa8rxjoL)
24 #
25
26 admin=password
apache-apollo-1.7.1\bin\mqttServer\etc\groups.properties 這個檔案可以設定多個賬戶,如範例中的,範例是admins=admin 如果想新增多個賬戶可以 admins=admin|test ,其中test就是新增賬戶。
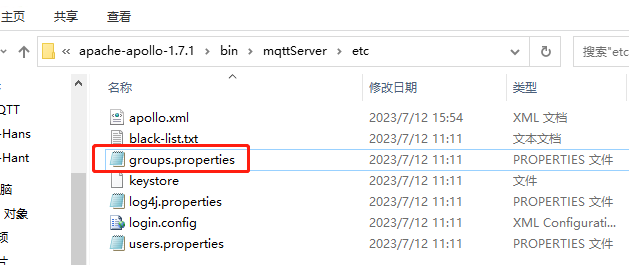
原始碼如下:
 1 ## ---------------------------------------------------------------------------
 2 ## Licensed to the Apache Software Foundation (ASF) under one or more
 3 ## contributor license agreements.  See the NOTICE file distributed with
 4 ## this work for additional information regarding copyright ownership.
 5 ## The ASF licenses this file to You under the Apache License, Version 2.0
 6 ## (the "License"); you may not use this file except in compliance with
 7 ## the License.  You may obtain a copy of the License at
 8 ##
 9 ## http://www.apache.org/licenses/LICENSE-2.0
10 ##
11 ## Unless required by applicable law or agreed to in writing, software
12 ## distributed under the License is distributed on an "AS IS" BASIS,
13 ## WITHOUT WARRANTIES OR CONDITIONS OF ANY KIND, either express or implied.
14 ## See the License for the specific language governing permissions and
15 ## limitations under the License.
16 ## ---------------------------------------------------------------------------
17
18 #
19 # Allows you to place multiple users in a group.
20 # Example:
21 #
22 # power_users=admin|chirino
23 #
24 admins=admin
6)、執行 apollo-broker.cmd 命令。
在 apache-apollo-1.7.1\bin\mqttServer\bin 路徑下輸入CMD開啟命令列,輸入apollo-broker.cmd run執行,出現下圖就說明設定成功

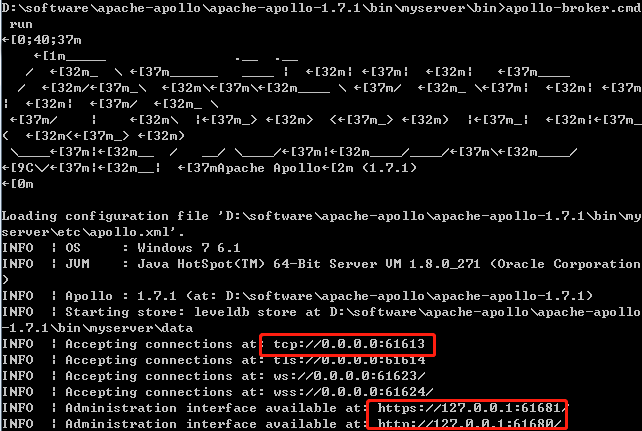
如果在伺服器本地存取,可以直接存取:http://localhost:61680,或者 http://127.0.0.1:61680,都可以存取,會出現如下介面,說明設定成功。
當然,如果是在外網存取的話,就要使用伺服器公網IP+埠號,否則也是不通的。比如:http://1**.9*.1**.1**:61680/
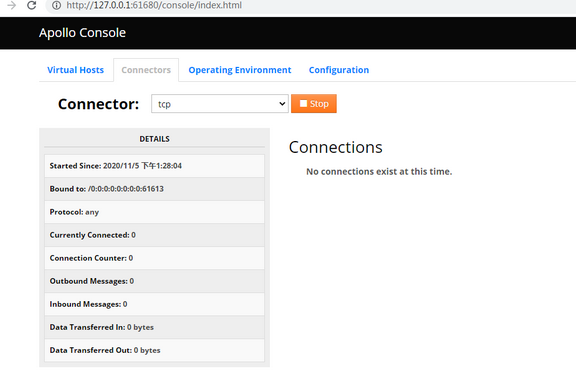
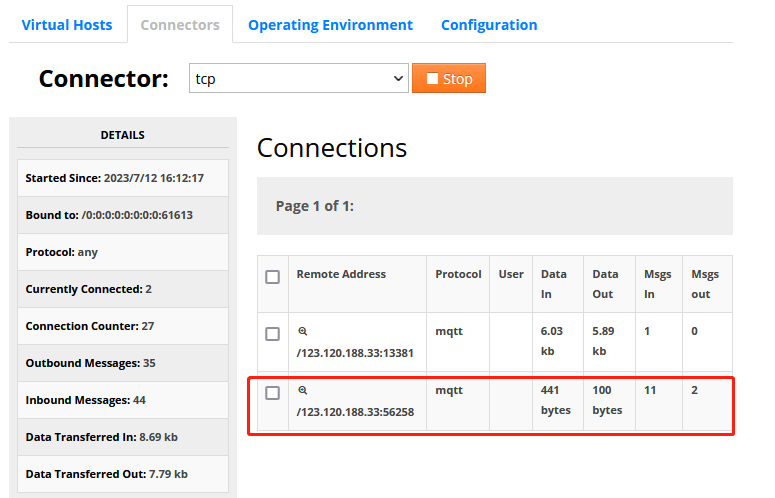
其中connectors選項下的TCP就代表MQTT的存取
如果我們有MQTT使用者端連線的話,這裡也是有顯示的。
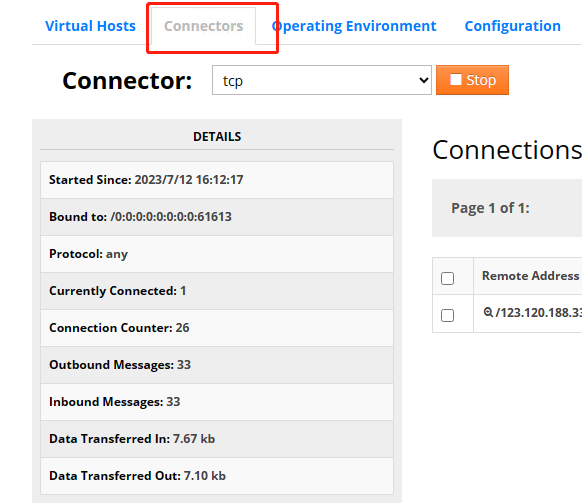
這就是我們當前的連結

8)、安裝 Windows 服務。
這個命令的目錄是:\apache-apollo-1.7.1\bin\mqttServer\bin

1】、執行 apollo-broker-service install 命令和 apollo-broker-service start 命令。

2】、通過services.msc 命令檢視服務。
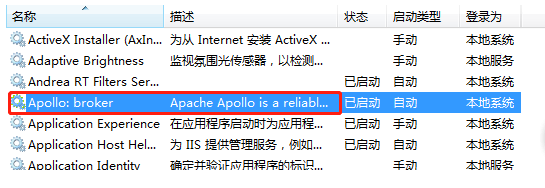
MQTT伺服器安裝好了,現在我們開始使用使用MQTT工具來存取了。我使用的是MQTT.fx,使用的版本是。1.7.1,也把過程記錄下來。這是啟動的圖示。MQTT.fx 是目前主流的mqtt使用者端,可以快速驗證是否可以與IoT Hub 服務交流釋出或訂閱訊息。裝置將當前所處的狀態作為MQTT主題傳送給IoT Hub,每個MQTT主題topic具有不同等級的名稱,如「建築/樓層/溫度。」 MQTT代理伺服器將接收到的主題topic傳送給給所有訂閱的使用者端。目前最新版下載地址(支援windows,linux,mac)
1)、下載地址:https://pan.baidu.com/s/1jwA7GUcT8h-rk_kt4CZq1A ,現在只有百度網路硬碟有了1.7.1版本的,提取碼:1234。
我在貼一個地址:https://softblade.de/en/download-2/ 這個應該是可以的,安裝很簡單,就不多說了,我就說說如何使用把。
【1】、首先設定 MQTT 代理
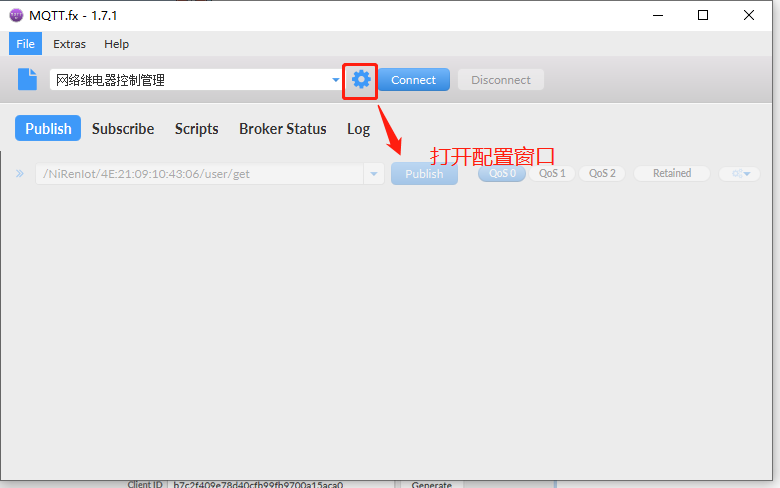
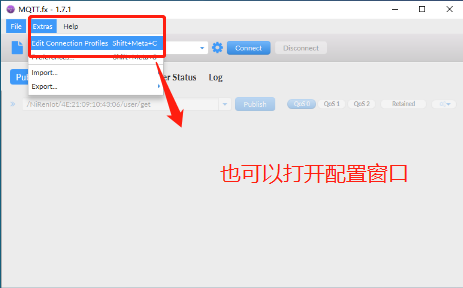

【3】、回到主介面,點選connect連線到MQTT 代理伺服器上,就可以進行訂閱和釋出訊息測試了。
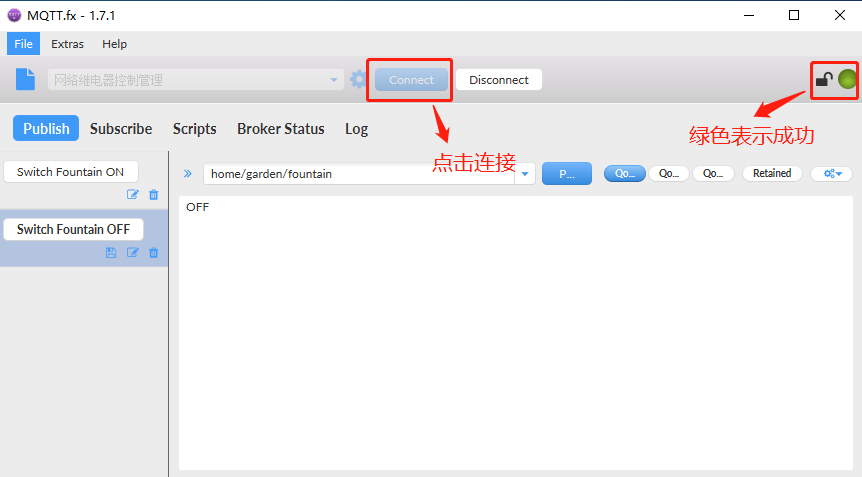
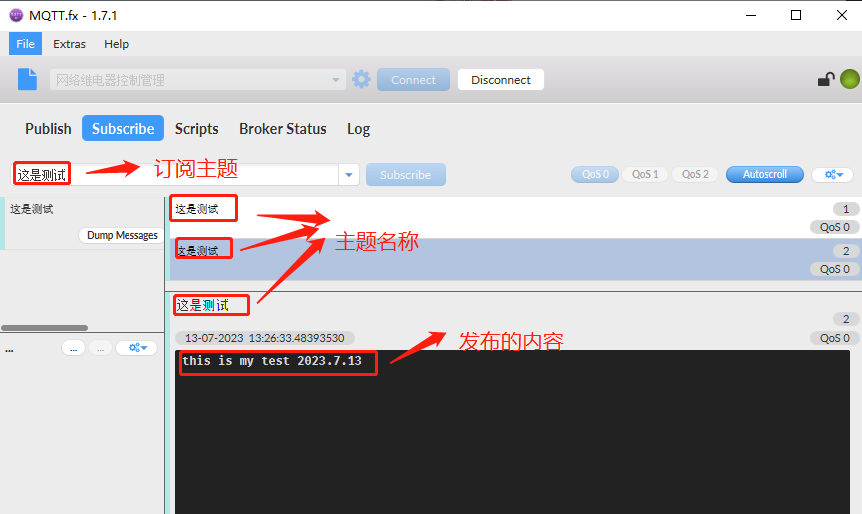
【4】、Publish 釋出測試。(主題:這是測試,內容:this is my test 2023.7.13)

【5】Subscribe即訂閱(訂閱該主題之後,每次釋出訊息均會收到通知)
【6】、連結成功之後,在apache-apollo管理平臺可以看到有一個連結存在了
好了,今天就寫道這裡了,這個測試也挺麻煩的,不熟悉的也踩草不少坑,誰都有第一次,慢慢來就好了。最近接觸了很多新的東西,也學到了不少東西,每天有進步,還是很開心的,不忘初心,繼續努力吧。