Spring Boot整合Dubbo 3.X
關注王有志,一個分享硬核Java技術的互金摸魚俠
歡迎加入Java人的提桶跑路群:共同富裕的Java人
上一篇我們一起認識了Dubbo與RPC,今天我們就來一起學習如何使用Dubbo,並將Dubbo整合到Spring Boot的專案中。我們來看下今天要使用到的軟體及版本:
| 軟體 | 版本 | 說明 |
|---|---|---|
| Java | 11 | |
| Spring Boot | 2.7.13 | Spring Boot 3.0版本開始,最低支援到Java 17 |
| Dubbo | 3.2.2 | |
| Zookeeper | 3.8.1 | 作為Dubbo的註冊中心 |
註冊中心的選擇沒有什麼強制要求,我們這裡以Zookeeper為例來做示範。
TIps:今天我們只處理Spring Boot,Dubbo與Zookeeper的整合,不會涉及到其他框架的整合。
部署Zookeeper
我們先來部署一個Zookeeper,這裡我提供Windows和Linux的部署教學,如果你已經部署成功,可以跳過這部分內容。
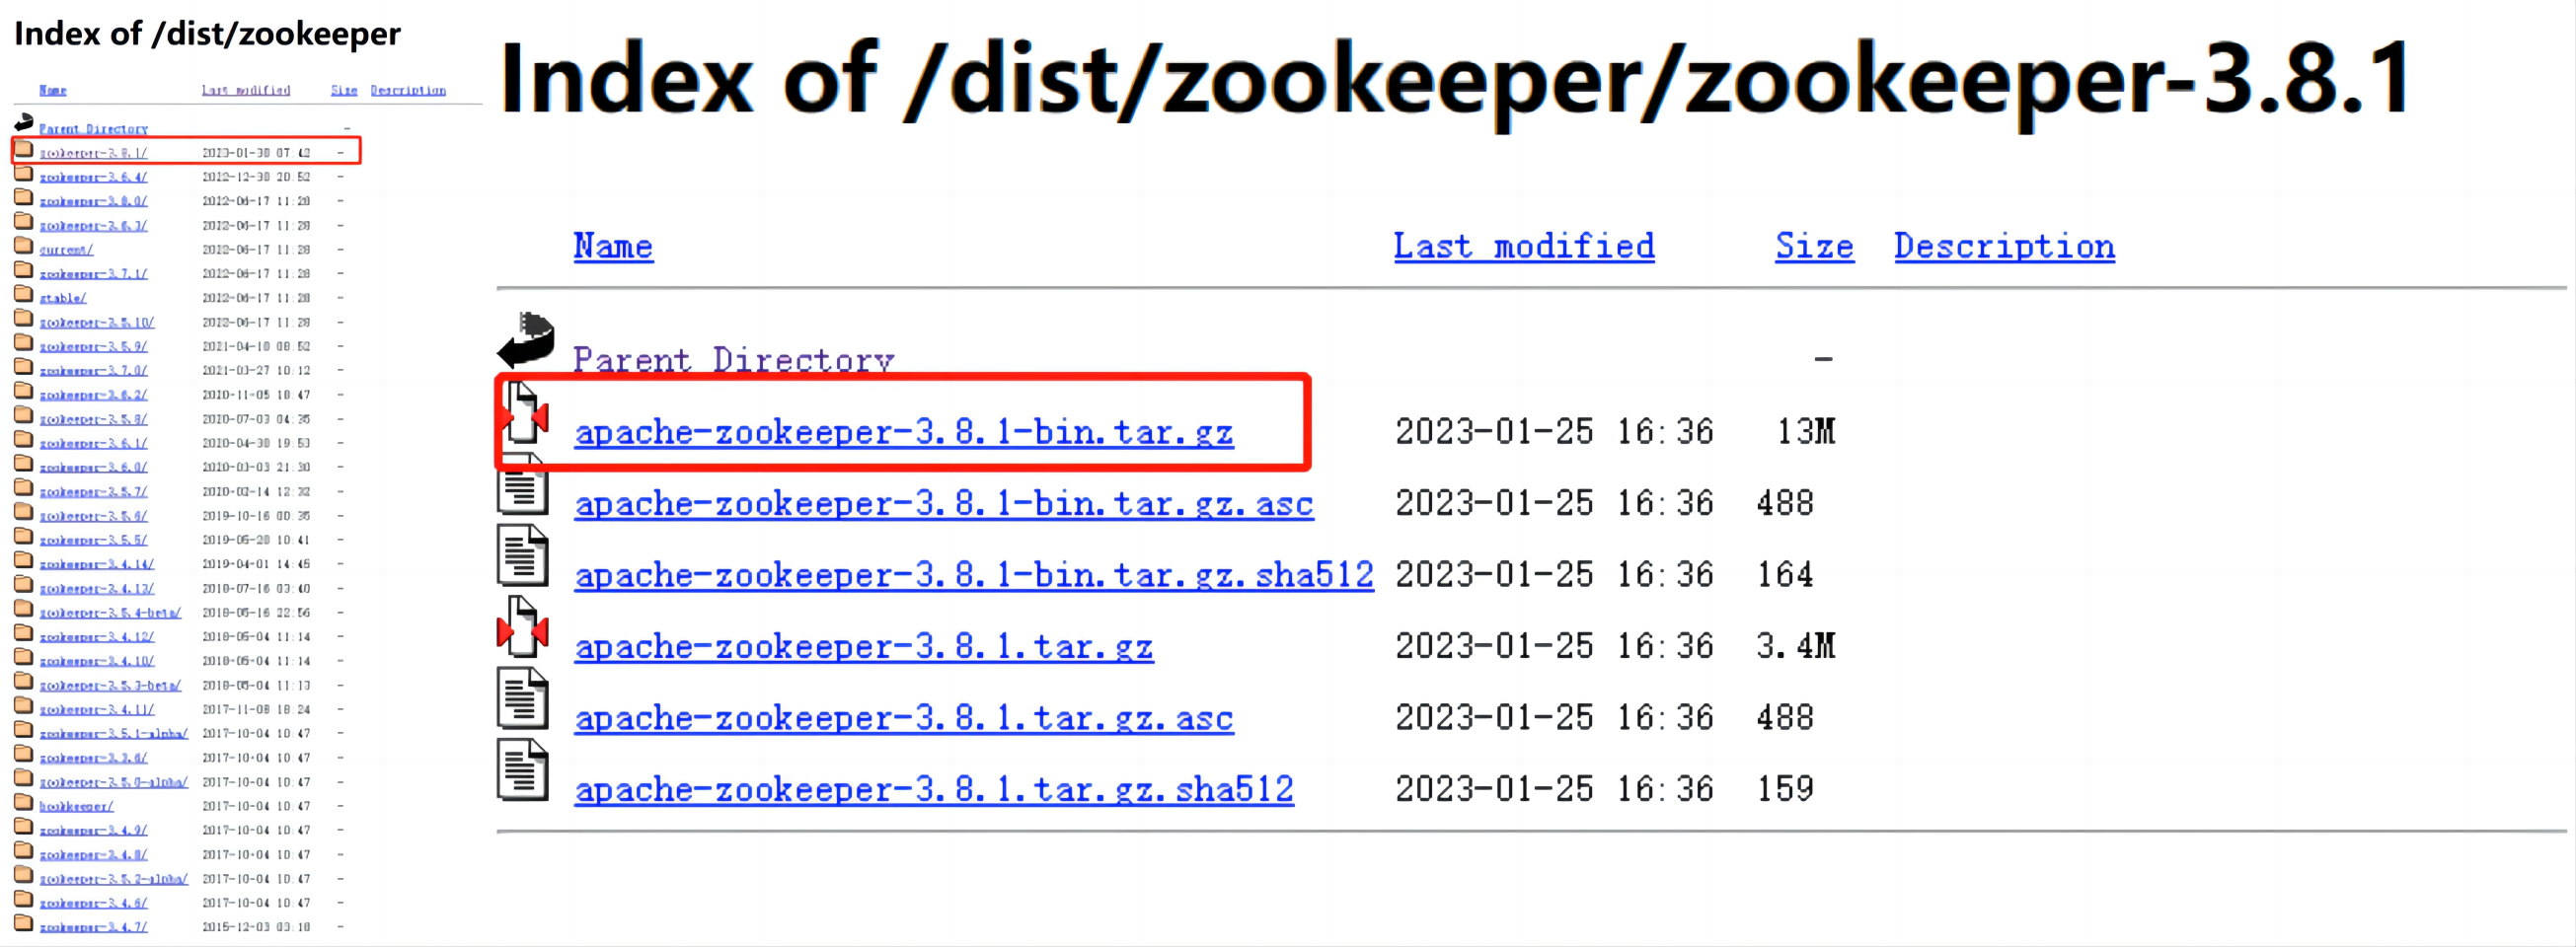
首先是下載Zookeeper,這裡我們選擇Zookeeper-3.8.1版本。
Linux下可以使用wget命令下載:
wget https://archive.apache.org/dist/zookeeper/zookeeper-3.8.1/apache-zookeeper-3.8.1-bin.tar.gz
Tips:注意,這裡我們下載的是apache-zookeeper-3.8.1-bin.tar.gz這個檔案。
Linux部署Zookeeper
解壓Zookeeper:
tar -zxvf apache-zookeeper-3.8.1-bin.tar.gz
Zookeeper的組態檔,組態檔位於../Zookeeper/conf目錄下,複製zoo_sample.cfg檔案,並命名為zoo.cfg:
cp zoo_sample.cfg zoo.cfg
在Dubbo的學習中,我們使用Zookeeper的預設設定即可,所以此處我們不需要再修改zoo.cfg。
修改profile檔案:
vim /etc/profile
將Zookeeper的設定新增到profile檔案中:
export ZOOKEEPER_HOME=/opt/opt/apache-zookeeper-3.8.1-bin
export PATH=$ZOOKEEPER_HOME/bin:$PATH
export PATH
重新整理profile檔案:
source profile
啟動Zookeeper:
zkServer.sh start
正常情況下會輸出紀錄檔:
ZooKeeper JMX enabled by default
Using config: /opt/apache-zookeeper-3.8.1-bin/bin/../conf/zoo.cfg
Starting zookeeper ... STARTED
可以使用命令來檢視Zookeeper的狀態:
zkServer.sh status
單機狀態輸出如下紀錄檔:
ZooKeeper JMX enabled by default
Using config: /opt/apache-zookeeper-3.8.1-bin/bin/../conf/zoo.cfg
Client port found: 2181. Client address: localhost. Client SSL: false.
Mode: standalone
到這裡我們就在Linux伺服器上成功的部署了一個簡單可用的單機版Zookeeper了。
Windows部署Zookeeper
參照Linux上部署Zookeeper的步驟來到修改組態檔的部分,Windows上我們要修改dataDir的路徑,並新增dataLogDir的路徑:
tickTime=2000
initLimit=10
syncLimit=5
dataDir=D:\\Apache\\Apache Zookeeper 3.8.1\\data
dataLogDir=D:\\Apache\\Apache Zookeeper 3.8.1\\logs
clientPort=2181
如果系統中沒有設定環境變數JAVA_HOME,我們要修改zkEnv.cmd中的JAVA_HOME設定,該檔案位於../Apache Zookeeper/bin目錄下:
@echo off
REM Licensed to the Apache Software Foundation (ASF) under one or more
REM contributor license agreements.  See the NOTICE file distributed with
REM this work for additional information regarding copyright ownership.
REM The ASF licenses this file to You under the Apache License, Version 2.0
REM (the "License"); you may not use this file except in compliance with
REM the License.  You may obtain a copy of the License at
REM
REM     http://www.apache.org/licenses/LICENSE-2.0
REM
REM Unless required by applicable law or agreed to in writing, software
REM distributed under the License is distributed on an "AS IS" BASIS,
REM WITHOUT WARRANTIES OR CONDITIONS OF ANY KIND, either express or implied.
REM See the License for the specific language governing permissions and
REM limitations under the License.

set ZOOCFGDIR=%~dp0%..\conf
set ZOO_LOG_DIR=%~dp0%..\logs

REM for sanity sake assume Java 1.6
REM see: http://java.sun.com/javase/6/docs/technotes/tools/windows/java.html

REM add the zoocfg dir to classpath
set CLASSPATH=%ZOOCFGDIR%

REM make it work in the release
SET CLASSPATH=%~dp0..\*;%~dp0..\lib\*;%CLASSPATH%

REM make it work for developers
SET CLASSPATH=%~dp0..\build\classes;%~dp0..\build\lib\*;%CLASSPATH%

set ZOOCFG=%ZOOCFGDIR%\zoo.cfg

@REM setup java environment variables

if not defined JAVA_HOME (
  echo Error: JAVA_HOME is not set.
  goto :eof
)

set JAVA_HOME=%JAVA_HOME%

if not exist "%JAVA_HOME%"\bin\java.exe (
  echo Error: JAVA_HOME is incorrectly set: %JAVA_HOME%
  echo Expected to find java.exe here: %JAVA_HOME%\bin\java.exe
  goto :eof
)

REM strip off trailing \ from JAVA_HOME or java does not start
if "%JAVA_HOME:~-1%" EQU "\" set "JAVA_HOME=%JAVA_HOME:~0,-1%"

set JAVA="%JAVA_HOME%"\bin\java
我們將第41行的set JAVA_HOME=%JAVA_HOME%提前到第36行前,在在判斷環境變數中是否存在JAVA_HOME前進行設定,並使用完整的路徑,如:set JAVA_HOME=D:\Java\jdk11.0.18。
上述內容修改完成後直接雙擊執行zkServer.cmd就可以啟動Zookeeper了。注意,Windows下啟動可能出現各種各樣的錯誤,最常見的如啟動閃退,這時可以在PowerShell中啟動zkServer.cmd,來檢視紀錄檔解決問題:
cd D:
PS D:\> cd '.\Apache\Apache Zookeeper 3.8.1\bin\'
PS D:\Apache\Apache Zookeeper 3.8.1\bin> .\zkServer.cmd
好了,到這裡你應該已經完成了Zookeeper的部署工作了,接下來我們在Spring Boot應用中整合Dubbo。
Dubbo的XML形式整合
首先我們準備兩個工程,DubboProviderXML和DubboConsumerXML,模仿服務提供方和服務使用方,建立工程的部分我們就直接跳過了,相信這一步大家都沒問題。
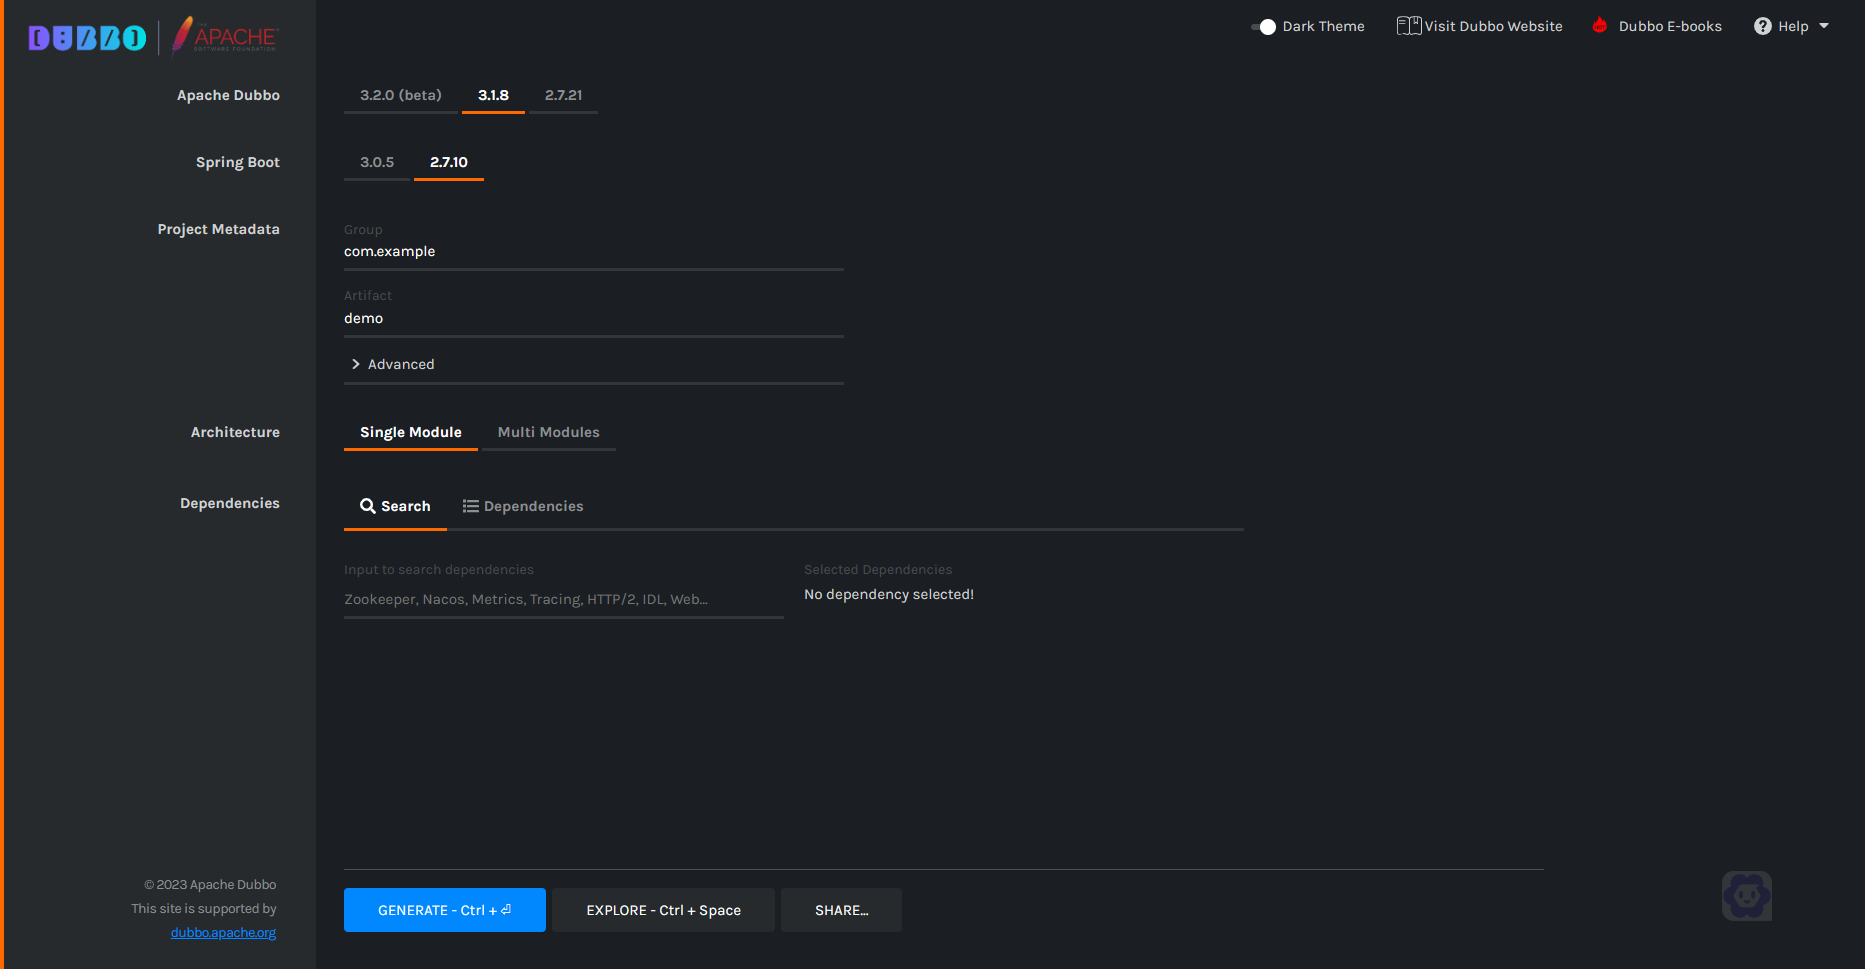
另外Dubbo官方提供了Dubbo Initializer專案腳手架,方便大家快速構建Dubbo專案:
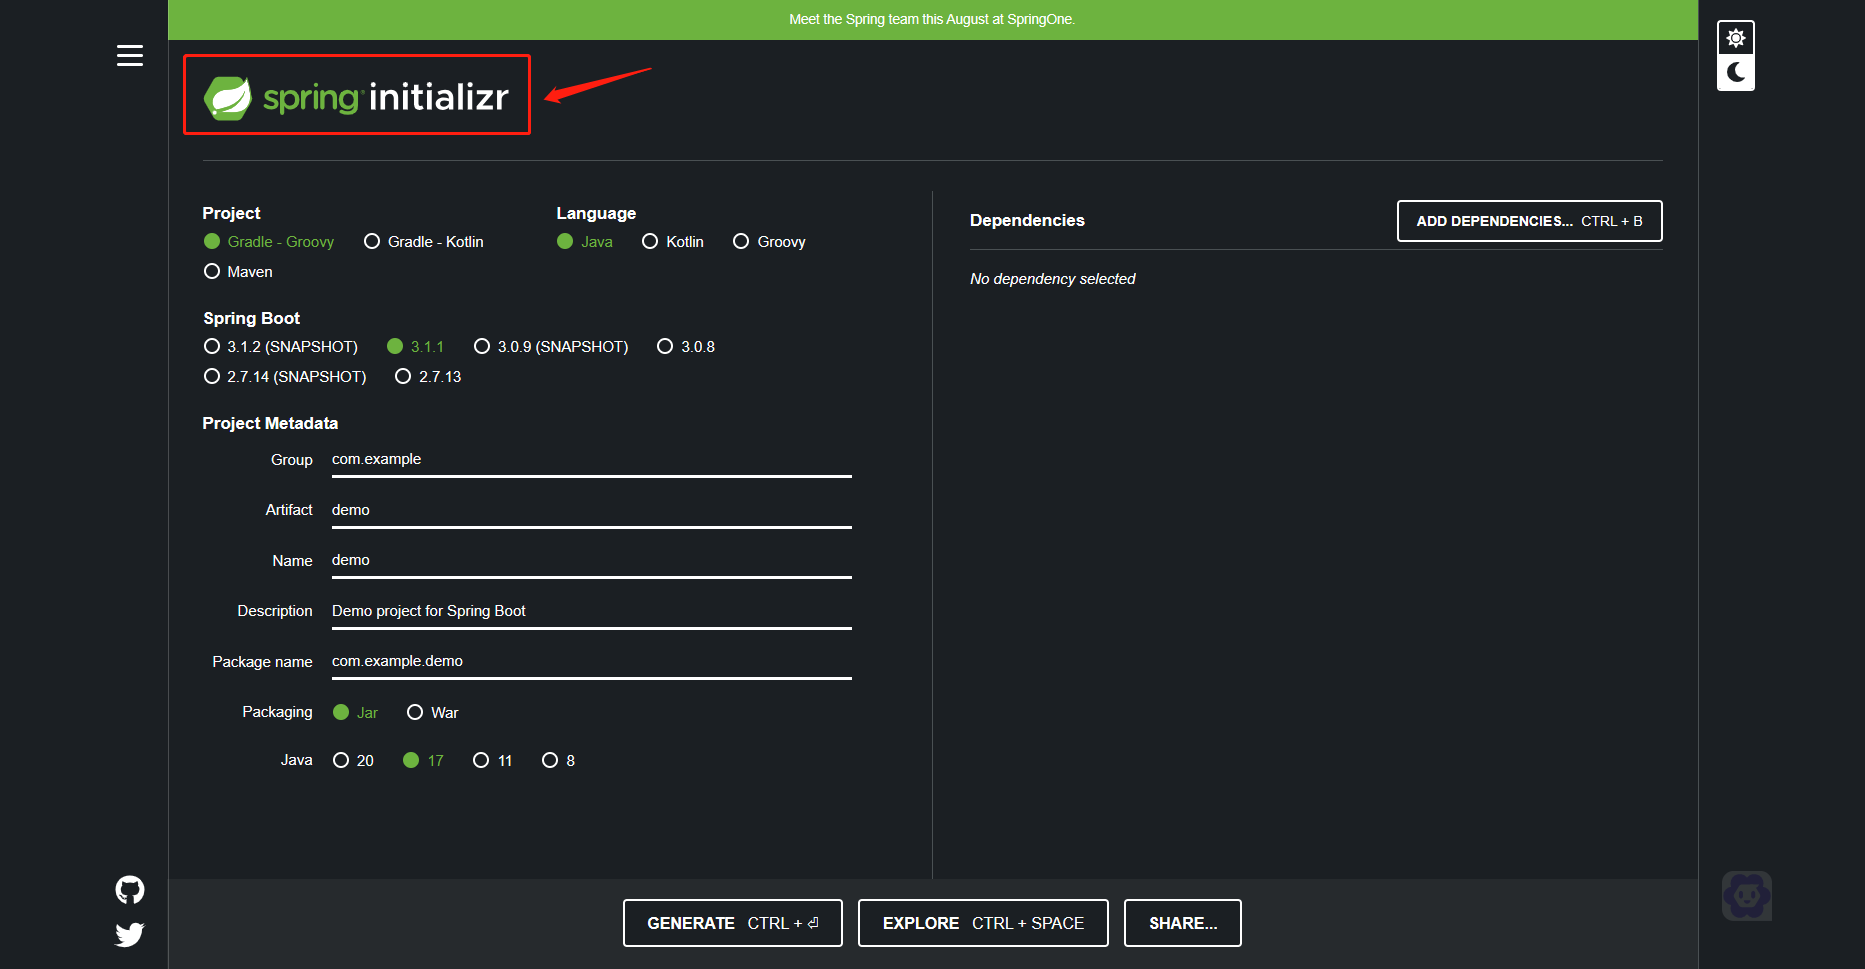
使用方式類似於Spring Initializr:
Tips:
-
當然你也可以在同一個工程中模擬提供方和使用方;
-
Spring Initializr嚴格意義上是一個錯別字,但大家也都接受了這種方式,V2EX上有關於名字的討論。
DubboProviderXML工程
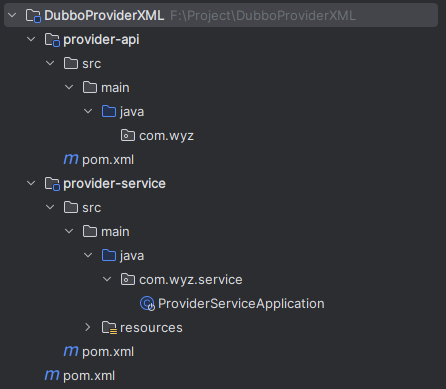
在DubboProviderXML專案下建立了兩個子工程:
-
provider-api,宣告RPC介面
-
provider-service,核心業務邏輯的實現
此時工程結構如下:
現在修改DubboProviderXML工程的POM檔案:
<modelVersion>4.0.0</modelVersion>
<groupId>com.wyz</groupId>
<artifactId>DubboProviderXML</artifactId>
<version>0.0.1-SNAPSHOT</version>
<packaging>pom</packaging>
<name>DubboProviderXML</name>
<description>DubboProviderXML</description>

<properties>
    <maven.compiler.source>11</maven.compiler.source>
    <maven.compiler.target>11</maven.compiler.target>
    <project.build.sourceEncoding>UTF-8</project.build.sourceEncoding>
</properties>

<modules>
    <module>provider-api</module>
    <module>provider-service</module>
</modules>
通常我會在DubboProviderXML工程中新增所有子專案都會用到的依賴,例如:lombok,commons-lang3等,在此我們忽略這部分內容。
設定provider-api
接著處理子工程provider-api中的POM檔案:
<modelVersion>4.0.0</modelVersion>
<parent>
    <groupId>com.wyz</groupId>
    <artifactId>DubboProviderXML</artifactId>
    <version>0.0.1-SNAPSHOT</version>
</parent>
<artifactId>provider-api</artifactId>
<version>0.0.1-SNAPSHOT</version>
<name>provider-api</name>
<packaging>jar</packaging>
<description>provider-api</description>
然後在provider-api中宣告RPC介面:
package com.wyz.api;

/**
 * @author wyz
 * @version 1.0
 * @date 2023/6/28
 */
public interface DubboDemoXMLService {
    String say(String message);
}
這樣provider-api就設定完成了,DubboProviderXML就有了對外提供RPC服務的入口。
Tips:需要將provider-api打包成jar,以便DubboConsumerXML使用。
設定provider-service
下面我們設定子工程provider-service的POM檔案:
<modelVersion>4.0.0</modelVersion>
<parent>
    <groupId>com.wyz</groupId>
    <artifactId>DubboProviderXML</artifactId>
    <version>0.0.1-SNAPSHOT</version>
</parent>
<artifactId>provider-service</artifactId>
<version>0.0.1-SNAPSHOT</version>
<name>provider-service</name>
<description>provider-service</description>

<properties>
    <spring.boot.version>2.7.13</spring.boot.version>
    <dubbo.version>3.2.2</dubbo.version>
    <zookeeper.version>3.8.1</zookeeper.version>
</properties>

<dependencies>
    <dependency>
        <groupId>org.springframework.boot</groupId>
        <artifactId>spring-boot-starter</artifactId>
        <version>${spring.boot.version}</version>
    </dependency>

    <!-- dubbo-spring-boot-starter引入了dubbo -->
    <dependency>
        <groupId>org.apache.dubbo</groupId>
        <artifactId>dubbo-spring-boot-starter</artifactId>
        <version>${dubbo.version}</version>
    </dependency>

    <!-- DUbbo與Zookeeper的聯結器 -->
    <!-- curator5自身引入了Zookeeper的依賴,因此無需額外引入 -->
    <dependency>
        <groupId>org.apache.dubbo</groupId>
        <artifactId>dubbo-dependencies-zookeeper-curator5</artifactId>
        <version>${dubbo.version}</version>
        <type>pom</type>
    </dependency>

    <dependency>
        <groupId>com.wyz</groupId>
        <artifactId>provider-api</artifactId>
        <version>0.0.1-SNAPSHOT</version>
    </dependency>
</dependencies>
接下來我們在provider-service中實現這個介面:
package com.wyz.service.impl;

import com.wyz.DubboDemoXMLService;

/**
 * @author wyz
 * @version 1.0
 * @date 2023/7/3
 */
public class DubboDemoXMLServiceImpl implements DubboDemoXMLService {

    @Override
    public String say(String message) {
        return "XML Provider say : " + message;
    }
}
現在,我們有了介面,也有了介面的實現,只需要設定成Dubbo的服務即可,新增dubbo-provider.xml檔案:
<?xml version="1.0" encoding="UTF-8"?>
<beans xmlns="http://www.springframework.org/schema/beans"
       xmlns:xsi="http://www.w3.org/2001/XMLSchema-instance"
       xmlns:dubbo="http://dubbo.apache.org/schema/dubbo"
       xsi:schemaLocation="http://www.springframework.org/schema/beans
        http://www.springframework.org/schema/beans/spring-beans.xsd
        http://dubbo.apache.org/schema/dubbo
        http://dubbo.apache.org/schema/dubbo/dubbo.xsd">

    <!-- Dubbo的基本設定-->
    <dubbo:application name="DubboProviderXML" qos-port="2222"/>
    <dubbo:registry address="zookeeper://127.0.0.1:2181"/>
    <dubbo:protocol name="dubbo"/>

    <!-- 設定提供的服務dubboDemoXMLServiceImpl -->
    <bean id="dubboDemoXMLServiceImpl" class="com.wyz.service.impl.DubboDemoXMLServiceImpl"/>
    <dubbo:service interface="com.wyz.api.DubboDemoXMLService" ref="dubboDemoXMLServiceImpl"/>
</beans>
所有設定完成後,我們匯入dubbo-provider.xml檔案:
package com.wyz.service;

import org.springframework.boot.SpringApplication;
import org.springframework.boot.autoconfigure.SpringBootApplication;
import org.springframework.context.annotation.ImportResource;

/**
 * @author wyz
 * @version 1.0
 * @date 2023/7/3
 */
@SpringBootApplication
@ImportResource(locations = "classpath:dubbo-provider.xml")
public class ProviderServiceApplication {

    public static void main(String[] args) {
        SpringApplication.run(ProviderServiceApplication.class, args);
    }
}
到這裡我們的DubboProviderXML工程就設定完了,此時工程的結構如下:
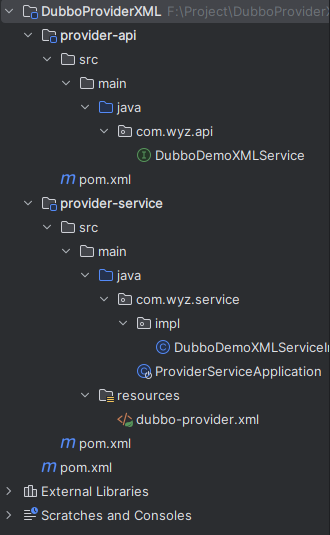
DubboConsumerXML工程
我們繼續設定服務使用方DubboConsumerXML工程,整體流程和DubboProviderXML的設定基本一致,我們直接快進到consumer-service中的設定部分。
設定consumer-service
consumer-service的POM檔案與DubboProviderXML工程的子工程provider-service完全一致,我們也直接跳過這部分內容。
接下來實現對DubboDemoXMLService#say的呼叫:
package com.wyz.service.impl;

import com.wyz.DubboDemoXMLService;
import org.springframework.beans.factory.annotation.Autowired;
import org.springframework.boot.CommandLineRunner;
import org.springframework.stereotype.Component;

/**
 * @author wyz
 * @version 1.0
 * @date 2023/7/3
 */
@Component
public class DubboConsumerXMLService implements CommandLineRunner {

    @Autowired
    DubboDemoXMLService dubboDemoXMLServiceImpl;

    @Override
    public void run(String... args) {
        String message = dubboDemoXMLServiceImpl.say("wyz");
        System.out.println(message);
    }
}
接著我們新增dubbo-consumer.xml檔案,設定使用方要呼叫的服務:
<?xml version="1.0" encoding="UTF-8"?>
<beans xmlns="http://www.springframework.org/schema/beans"
       xmlns:xsi="http://www.w3.org/2001/XMLSchema-instance"
       xmlns:dubbo="http://dubbo.apache.org/schema/dubbo"
       xsi:schemaLocation="http://www.springframework.org/schema/beans
        http://www.springframework.org/schema/beans/spring-beans.xsd
        http://dubbo.apache.org/schema/dubbo
        http://dubbo.apache.org/schema/dubbo/dubbo.xsd">

    <!-- Dubbo的基本設定-->
    <dubbo:application name="DubboConsumerXML" qos-port="2223"/>
    <dubbo:registry address="zookeeper://106.75.33.232:2181"/>
    <dubbo:protocol name="dubbo"/>

    <!-- 設定需要呼叫的服務 -->
    <dubbo:reference id="DubboDemoXMLService" interface="com.wyz.api.DubboDemoXMLService"/>
</beans>
同樣的,我們匯入dubbo-consumer.xml檔案:
package com.wyz.service;

import org.springframework.boot.SpringApplication;
import org.springframework.boot.autoconfigure.SpringBootApplication;
import org.springframework.context.annotation.ImportResource;

/**
 * @author wyz
 * @version 1.0
 * @date 2023/7/3
 */
@SpringBootApplication
@ImportResource(locations = "classpath:dubbo-consumer.xml")
public class ConsumerServiceApplication {

    public static void main(String[] args) {
        SpringApplication.run(ConsumerServiceApplication.class, args);
    }
}
最後,我們啟動程式,控制檯應該輸出如下紀錄檔:

此時DubboConsumerXML的工程結構如下:
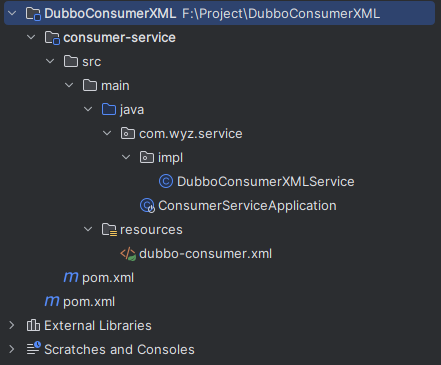
Dubbo的註解形式整合
除了使用XML外,我們還可以使用註解的方式設定Dubbo(畢竟有很多人不喜歡XML)。同樣的我們需要先建立兩個工程DubboProviderAnnotation和DubboConsumerAnnotation。
DubboProviderAnnotation工程
DubboProviderAnnotation工程與DubboProviderXML的設定步驟基本一致,我們快進到介面的實現部分,這次我們需要使用@DubboService註解宣告這是一個Dubbo服務:
package com.wyz.service.impl;

import com.wyz.api.DubboProviderAnnotationService;
import org.apache.dubbo.config.annotation.DubboService;

/**
 * @author wyz
 * @version 1.0
 * @date 2023/7/3
 */
@DubboService
public class DubboProviderAnnotationServiceImpl implements DubboProviderAnnotationService {

    @Override
    public String say(String message) {
        return "DubboProviderAnnotationService say : " + message;
    }
}
介面有了,實現也有了,我們來設定Dubbo的相關內容,這次我們使用YAML設定:
dubbo:
  application:
    name: DubboProviderAnnotation
    qos-port: 2222
  protocol:
    name: dubbo
  registry:
    address: zookeeper://${zookeeper.address:127.0.0.1}:2181
接著,我們在啟動類上新增@EnableDubbo註解,開啟Dubbo的自動注入:
package com.wyz.service;

import org.apache.dubbo.config.spring.context.annotation.EnableDubbo;
import org.springframework.boot.SpringApplication;
import org.springframework.boot.autoconfigure.SpringBootApplication;

/**
 * @author wyz
 * @version 1.0
 * @date 2023/7/3
 */
@SpringBootApplication
@EnableDubbo
public class ProviderServiceApplication {
    public static void main(String[] args) {
        SpringApplication.run(ProviderServiceApplication.class, args);
    }
}
此時DubboProviderAnnotation的結構如下:
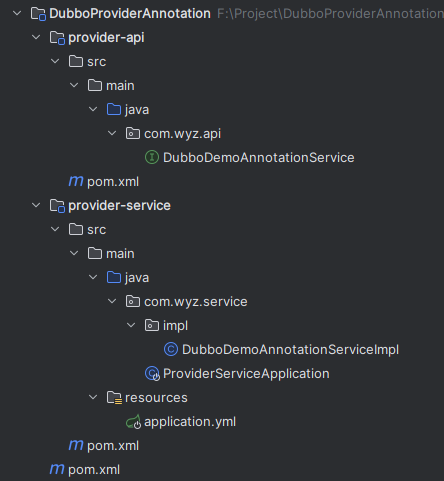
最後我們就可以正常啟動DubboProviderAnnotation專案了。
DubboConsumerAnnotation工程
有了前面的基礎,相信你一定可以想到DubboConsumerAnnotation該如何設定,我們先來寫呼叫DubboDemoAnnotationService#say的呼叫邏輯,此時通過@DubboReference注入介面:
package com.wyz.service.impl;

import com.wyz.api.DubboProviderAnnotationService;
import org.apache.dubbo.config.annotation.DubboReference;
import org.springframework.boot.CommandLineRunner;
import org.springframework.stereotype.Component;

/**
 * @author wyz
 * @version 1.0
 * @date 2023/7/3
 */
@Component
public class DubboConsumerAnnotationService implements CommandLineRunner {

    @DubboReference
    DubboProviderAnnotationService dubboProviderAnnotationService;

    @Override
    public void run(String... args) {
        String message = dubboProviderAnnotationService.say("wyz");
        System.out.println(message);
    }
}
接著來設定YAML檔案:
dubbo:
  application:
    name: DubboConsumerAnnotation
    qos-port: 2223
  protocol:
    name: dubbo
  registry:
    address: zookeeper://${zookeeper.address:127.0.0.1}:2181
同樣的,我們需要在服務使用方新增@EnableDubbo註解,開啟Dubbo的自動注入:
package com.wyz.service;

import org.apache.dubbo.config.spring.context.annotation.EnableDubbo;
import org.springframework.boot.SpringApplication;
import org.springframework.boot.autoconfigure.SpringBootApplication;

/**
 * @author wyz
 * @version 1.0
 * @date 2023/7/3
 */
@SpringBootApplication
@EnableDubbo
public class ConsumerServiceApplication {
    public static void main(String[] args) {
        SpringApplication.run(ConsumerServiceApplication.class, args);
    }
}
此時DubboConsumerAnnotation的結構如下:
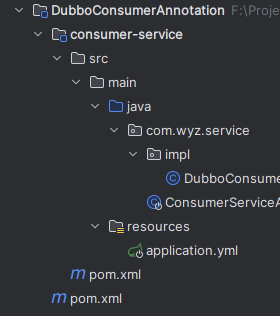
最後我們就可以正常啟動DubboConsumerAnnotation專案了。
結語
到這裡我們就完成了兩種形式在Spring Boot中整合Dubbo 3.X。通常來說我會選擇使用XML的形式來設定Dubbo提供的服務,但會選擇將Dubbo的基本資訊,如:協定型別,註冊中心地址等設定到YAML檔案中,這是為了統一管理對外提供的服務和使用的服務,可以一目瞭然的看到專案提供了哪些能力,和依賴了哪些外部介面。
好了,今天就到這裡結束了。如果本文對你有幫助的話,請多多點贊支援。最後歡迎大家關注分享硬核技術的金融摸魚俠王有志,我們下次再見!