ChatGPT Plugin 外掛開發:基於 ASP.NET Core Minimal API
前言
這是一篇ChatGPT外掛開發教學,描述如何使用 ASP.NET Core Minimal API 開發 ChatGPT 外掛,以最簡單的 Todo List 指導範例作為入門教學。
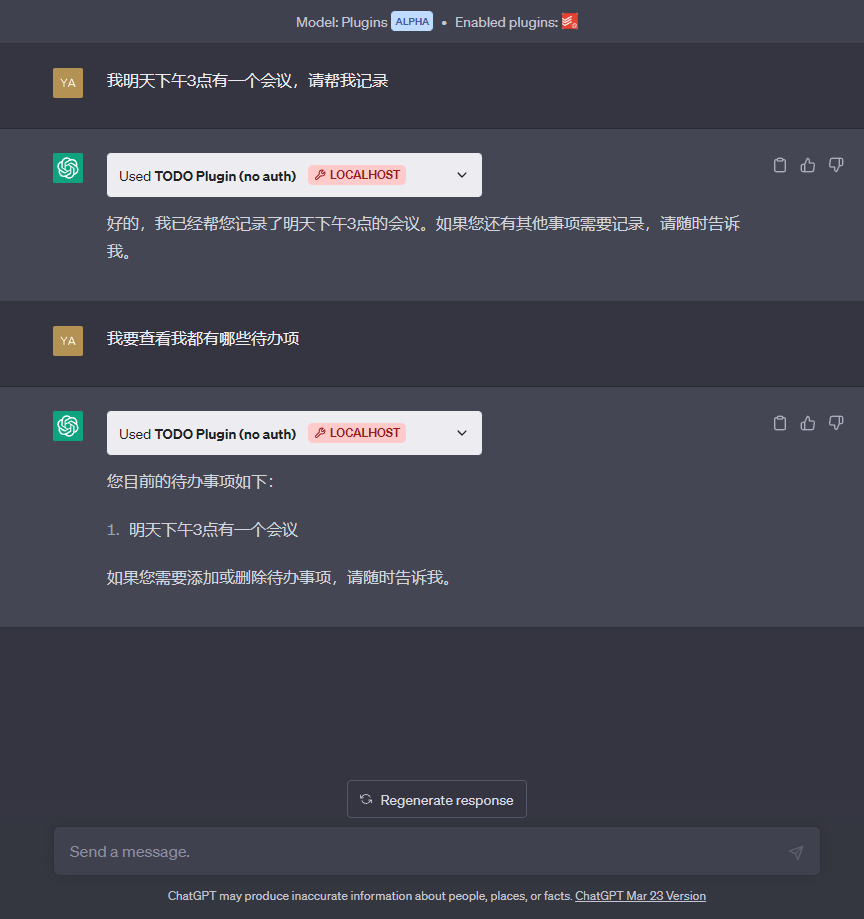
這個Todo List外掛主要功能是以自然語言的方式向ChatGPT發起指令,ChatGPT將根據合適的時機選擇呼叫此外掛。例如:我明天下午3點有一個會議,請幫我記錄。此時 ChatGPT將會根據外掛的後設資料功能描述,然後選擇呼叫外掛,將明天下午3點有一個會議通過API記錄到待辦列表中。
環境準備
首先你需要有一個開通了 Plugins 模組的賬號,然後你才能進行偵錯使用。如果你沒有可以在這裡申請加入等待列表。說明一下,我是Plus使用者,我在提交了申請列表大概過了2-3周左右收到的開通郵件。
在提交申請的時候,最好選擇 "I am a developer and want to build a plugin",然後填寫較為充分的理由,這樣更容易通過一些。
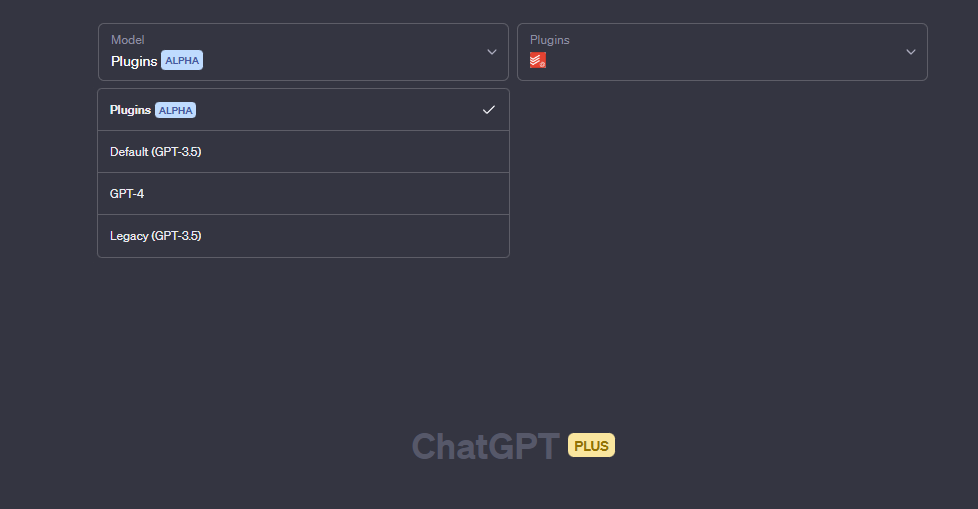
開通完成後,你可以在介面上看到列表中出現 Model 中可以選擇 Plugins 選項。

概念說明
整體上,構建 ChatGPT 外掛需要3個步驟,
- 構建伺服器端 API
- 啟用 Swagger OpenApi 介面描述
- 建立一個外掛清單檔案,描述外掛後設資料資訊
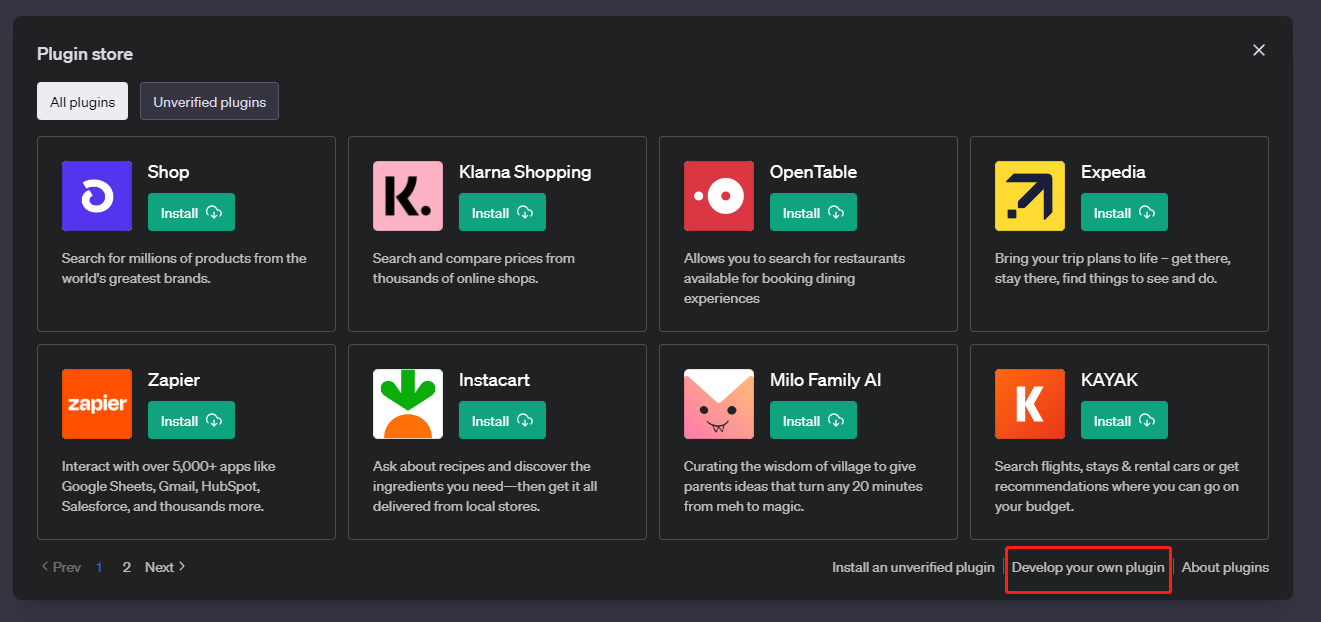
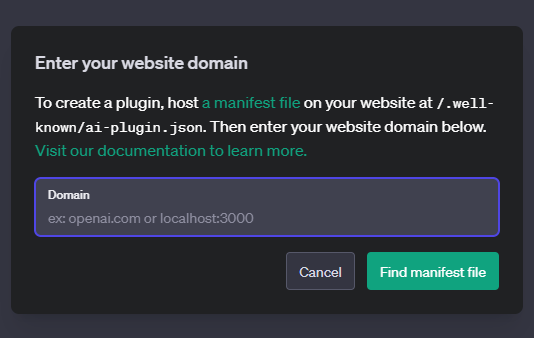
完成之後,你可以在介面上開啟 Plugin Store,然後選擇 Develop your own Plugin,填入本地 Api 地址即可。


使用 ASP.NET Core Minimal 開發伺服器端 API
為了簡單起見,我們的介面不進行授權(No Auth),主要分為幾個部分:
- 編寫ai-plugin.json後設資料檔案
- 啟用跨域
- 啟用Swagger,並詳細描述介面引數
- 編寫介面程式碼
編寫 ai-plugin.json後設資料檔案
每個外掛都需要一個 ai-plugin.json 檔案,該檔案需要託管在API的域中。例如,一家名為 example.com 的公司將通過 https://example.com 域存取外掛JSON檔案,因為這是他們的API託管的地方。
當通過ChatGPT UI安裝外掛時,ChatGPT會查詢位於 /.well-known/ai-plugin.json 的檔案,以便和外掛進行連線。如果找不到檔案,則無法安裝外掛。對於本地開發,可以使用HTTP,要指向遠端伺服器,則需要HTTPS。
新建一個 ai-plugin.json 清單檔案,填入以下內容:
{
  "schema_version": "v1",
  "name_for_human": "TODO Plugin (no auth)",
  "name_for_model": "todo",
  "description_for_human": "Plugin for managing a TODO list, you can add, remove and view your TODOs.",
  "description_for_model": "Plugin for managing a TODO list, you can add, remove and view your TODOs.",
  "auth": {
    "type": "none"
  },
  "api": {
    "type": "openapi",
    "url": "http://localhost:5000/openapi.yaml",
    "is_user_authenticated": false
  },
  "logo_url": "http://localhost:5000/logo.png",
  "contact_email": "[email protected]",
  "legal_info_url": "http://example.com/legal"
}
內容很簡單,需要說明的有2處。
- api:url 這個是指向 swagger 的 openapi描述檔案,需要在伺服器端暴露出來。
- description_for_model 這個是當用戶的指令可能有外掛的潛在請求查詢時,模型會檢視該描述,您可能測試多個提示和描述,以檢視哪些最有效。
description_for_model 屬性讓你可以自由地指導模型如何使用你的外掛。總的來說,ChatGPT背後的語言模型非常能夠理解自然語言並遵循指令。因此,這是一個很好的地方,可以放置關於外掛功能以及模型應該如何正確使用它的一般說明。使用自然語言,最好使用簡潔、描述性和客觀的語氣。您可以檢視一些範例,以瞭解這應該是什麼樣子。我們建議以「Plugin for ...」,然後列舉API提供的所有功能。
啟用跨域
由於是在網頁前端呼叫的本地localhost介面,所以需要介面啟用跨域以支援 chat.openai.com 的存取。
在 ASP.NET Core啟用跨域很簡單。
builder.Services.AddCors(x => x.AddDefaultPolicy(policyBuilder =>
    policyBuilder.WithOrigins("https://chat.openai.com").AllowAnyHeader().AllowAnyMethod()));

// 省略部分程式碼

app.UseCors();
啟用Swagger,並詳細描述介面引數
ChatGPT需要使用OpenAi V3版本,所以需要確保你參照了最新的 Swashbuckle.AspNetCore NuGet包。
builder.Services.AddSwaggerGen(c =>
{
    c.SwaggerDoc("openapi", new OpenApiInfo
    {
        Description = "A plugin that allows the user to create and manage a TODO list using ChatGPT. If you do not know the user's username, ask them first before making queries to the plugin. Otherwise, use the username \"global\".",
        Version = "v1",
        Title = "TODO Plugin"
    });
    c.AddServer(new OpenApiServer() { Url = "http://localhost:5000" });

    var xmlFilename = $"{Assembly.GetExecutingAssembly().GetName().Name}.xml";
    c.IncludeXmlComments(Path.Combine(AppContext.BaseDirectory, xmlFilename));
});

//省略部分程式碼

if (app.Environment.IsDevelopment())
{
    app.UseSwagger(x => x.RouteTemplate = "{documentName}.yaml");
    app.UseSwaggerUI(x =>
    {
        x.RoutePrefix = "";
        x.SwaggerEndpoint("/openapi.yaml", "TODO Plugin");
    });
}
我們設定 RoutePrefix=""以使主頁即為swagger預設地址,設定 x.SwaggerEndpoint("/openapi.yaml", "TODO Plugin") 為 OpenAPI檔案的存取地址,該地址和 ai-plgion.json中的地址要對應。
API 介面程式碼
我們使用 Minimal Api 來構建,程式碼中需要使用 OpenApi規範對引數進行詳細描述,這樣ChatGPT才能識別的更加準確。
var todos = new Dictionary<string, List<string>>();

app.MapPost("/todos/{username}", (string username, [FromBody] AddTodoRequest request) =>
{
    var todo = request.Todo;
    if (!todos.ContainsKey(username))
    {
        todos[username] = new List<string>();
    }
    todos[username].Add(todo);
    return todo;
})
.Produces<string>()
.WithOpenApi(operation =>
{
    operation.OperationId = "addTodo";
    operation.Summary = "Add a todo to the list";
    var parameter = operation.Parameters[0];
    parameter.Description = "The name of the user.";
    return operation;
});


app.MapGet("/todos/{username}", (string username) =>
    Results.Json(todos.TryGetValue(username, out var todo) ? todo : Array.Empty<string>())
)
.Produces<List<string>>()
.WithOpenApi(operation =>
{
    operation.OperationId = "getTodos";
    operation.Summary = "Get the list of todos";

    var parameter = operation.Parameters[0];
    parameter.Description = "The name of the user.";

    operation.Responses["200"].Description = "The list of todos";
    return operation;
});


app.MapDelete("/todos/{username}", (string username, [FromBody] DeleteTodoRequest request) =>
{
    var todoIdx = request.TodoIdx;
    if (todos.ContainsKey(username) && 0 <= todoIdx && todoIdx < todos[username].Count)
    {
        todos[username].RemoveAt(todoIdx);
    }
})
.Produces<List<string>>()
.WithOpenApi(operation =>
{
    operation.OperationId = "getTodos";
    operation.Summary = "Delete a todo from the list";
    operation.Parameters[0].Description = "The name of the user.";
    return operation;
});

app.MapGet("/logo.png", () => Results.File("logo.png", contentType: "image/png"))
    .ExcludeFromDescription();

app.MapGet("/.well-known/ai-plugin.json", () => Results.File("ai-plugin.json", contentType: "text/json"))
    .ExcludeFromDescription();

app.Run();

/// <summary>
/// AddTodoRequest Dto
/// </summary>
/// <param name="Todo">The todo to add to the list.</param>
internal record AddTodoRequest(string Todo);

/// <summary>
/// DeleteTodoRequest Dto
/// </summary>
/// <param name="TodoIdx">The index of the todo to delete.</param>
internal record DeleteTodoRequest(int TodoIdx);
測試外掛

總結
以上,就是簡單的使用 ASP.NET Core minimal api 開發的一個 Todo List外掛,功能比較簡單,基本上看下程式碼就懂了。
完整的程式碼我已經上傳到了Github,大家可自行檢視。
https://github.com/yang-xiaodong/chatgpt-aspnetcore-plugin
如果你覺得本篇文章對您有幫助的話,感謝您的【推薦】。