在echaerts中渲染50萬條資料的優化方案
背景:專案需求中要在頁面上渲染大約50萬條左右的波形資料圖表

那麼如何解決渲染中的卡頓呢?
肯定是要從伺服器端和前端一起優化這是毋庸置疑的。
1.伺服器端:
伺服器端耗時最多的一定是在資料庫的篩選資料的行為上,本次需求中資料的篩選是根據物理量的型別和時間來進行的。
為了提速,應當取消掉其他的篩選條件,並且使用mongodb和redis,還應該將資料分片傳送給前端。
2.前端:
首先我們要搞清楚,優化策略的重點是在資料的拿取上,因為渲染的速度其實遠快於資料互動的速度,要想提速首先要解決的是短板。
在資料拿取時我們應當進行輪詢,分片的拿到伺服器端傳輸的資料,然後進行渲染。
我們來整理一下思路:
1.第一次輪詢結束拿到資料後,我們需要進行繪圖。然後判斷是否進行下一次輪詢
2.第二次輪詢結束之後我們需要將拿到的資料,append到圖表之中,然後判斷否進行下一次輪詢
3.如何隨時的讓輪詢終止。
這三個就是目前我們需要解決的問題點。
第一次拿到資料之後我們判斷資料的長度是否為0,為0則終止輪詢,不為0則繼續。
後面繼續輪詢時,每次輪詢拿到資料都要判斷圖表是否存在,存在就dispose,然後重繪。
要注意的點時,我們的圖表是可以縮放的,所以在重繪時還需要將縮放條的位置進行記錄,然後設定到datazoom裡面,這樣可以提高使用者體驗。
下面貼出程式碼:
getListWaveformDat(count) {

      this.loading = true;//載入loading動畫


      //獲取波形圖資料
      getListWaveformDat({
        deviceId: this.queryPointParams.deviceId,
        diId: this.diId,
        reportedOn: this.orgTime,
        keyName: this.dataAxis,
        num: this.pageNum,
        size: 10000,
        count: count ? count : '',
      }).then((res) => {
        if (res.length > 0) {
          this.noData = false//是否載入預設值圖片
          console.log(this.orgchart)
          if (this.orgchart) {
            this.orgchart.dispose();
          }
          this.oscillograph = res;
          let x = [];
          for (let i = 0; i < this.oscillograph.length; i++) {
            x[i] = this.oscillograph[i].count;
          }//處理X軸資料

          let y = [];
          for (let i = 0; i < this.oscillograph.length; i++) {
            y[this.oscillograph[i].count * 1 - 1] = this.oscillograph[i].value * 1
          }
          for (let i = 0; i < this.oscillographY.length; i++) {
            if (this.oscillographY[i] == undefined) {
              if (y[i]) {
                this.oscillographY[i] = y[i]
              }
            }
          }//處理Y軸資料

          console.log(this.oscillographY)
          this.pageNum = this.pageNum + 1;//輪詢次數加1
          this.$nextTick(() => {
            this.orgDraw();//繪製圖表

          })

          this.loading = false;//關閉載入loading

          this.getListWaveformDat(x[x.length - 1])//繼續輪詢


        }
        else {
         //如果載入的資料為空
          this.loading = false;
          console.log(this.orgchart)
          if (this.pageNum == 1) {
         //如果第一次輪詢就為空,載入預設圖片
            this.noData = true;
            if (this.orgchart) {
              this.orgchart.dispose();//清除上一次載入的圖表


            }

          this.pageNum = 1;//請求完所有資料之後初始化一下
          return

        }

      });

    },

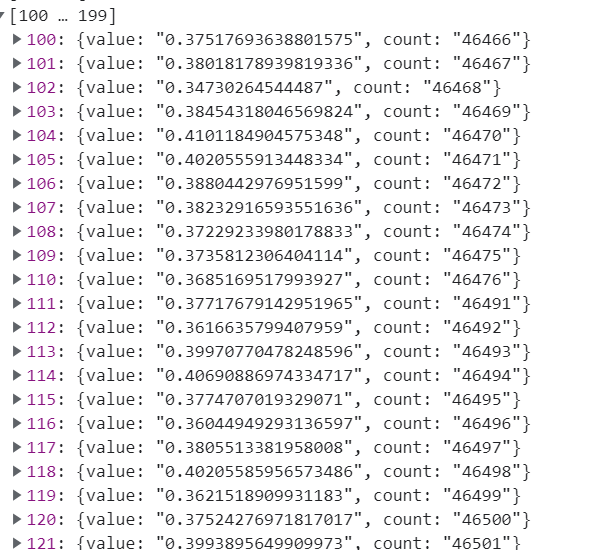
這是介面返回的資料來源,X就是count,Y就是Value。因為每次輪詢查到的資料都是亂序的,但是圖表要求X,Y必須對應所以需要對資料進行重新排序。
思路:1.先獲取X軸的長度,然後根據長度生成X,Y兩個陣列。2.將Y陣列的值都設定為undefined,X陣列的值設為1-X的長度3.遍歷介面的資料,將count作為Y的索引,將value塞入對應的元素中。
getX() {
      getMaxCount(
        {
          deviceId: this.queryPointParams.deviceId,
          reportedOn: this.orgTime,
          keyName: this.dataAxis,
        }
      ).then((res) => {
        console.log(res, '======')
        this.oscillographX = Array.from({ length: res * 1 }, (value, key) => key + 1)
        this.oscillographY = Array.from({ length: res * 1 }, (value, key) => undefined)
        console.log(this.oscillographX);
      })
    },
處理X,Y軸資料的程式碼在第一個程式碼塊中已經有就不貼了。
完成資料處理之後就是進行繪圖。
   orgDraw() {
      let that = this;
      if (this.orgchart) {
        this.orgchart.dispose();
      }
      console.log(this.start, this.end, 'xxx')
      if (this.tabname !== "原始資料") {
        return;
      }
      // if (this.orgchart) {
      //   this.orgchart.dispose()
      // }
      var chartDom = document.getElementById("orgChart");
      var myChart = echarts.init(chartDom);
      const option = {
        title: {
          left: "center",
          text: "原始資料",
        },
        tooltip: {
          trigger: "axis",
          axisPointer: {
            type: "shadow",
          },
        },
        grid: {
          bottom: 90,
        },
        dataZoom: [{
          type: 'inside',//圖表下方的伸縮條
          show: true, //是否顯示
          realtime: true, //拖動時,是否實時更新系列的檢視
          start: this.start, //伸縮條開始位置(1-100),可以隨時更改
          end: this.end, //伸縮條結束位置(1-100),可以隨時更改
        },
        {
          type: 'slider',//圖表下方的伸縮條
          show: true, //是否顯示
          realtime: true, //拖動時,是否實時更新系列的檢視
          start: this.start, //伸縮條開始位置(1-100),可以隨時更改
          end: this.end, //伸縮條結束位置(1-100),可以隨時更改
        }

        ],
        xAxis: {
          data: this.oscillographX,
          silent: false,
          splitLine: {
            show: false,
          },
          splitArea: {
            show: false,
          },
        },
        yAxis: {
        },
        series: [
          {
            // seriesIndex: 9,
            type: "line",
            data: this.oscillographY,
            large: true,
          },
        ],
      };
      console.log(myChart.appendData)

      myChart.setOption(option, true);
      // myChart.appendData({
      //   seriesIndex: 0,
      //   data: this.oscillographY
      // })
      myChart.on('datazoom', function (params) {
        // let xAxis = myChart.getModel().option.xAxis[1];//獲取axis
        console.log(params.batch[0].end, params.batch[0].start, 'xAxis')
        that.start = params.batch[0].start;
        that.end = params.batch[0].end;

      });//記錄datazoom的捲動距離
      this.orgchart = myChart;
      this.isStart = false;
      return;
    },
繪圖中唯一需要做的就是記錄datazoom的捲動進度拿到start和end重繪之後進行賦值。
總結一下:處理的思路就行以一萬條資料為一次不斷進行輪詢,將資料不斷的拼接,然後重新繪圖。為什麼不用echarts提供的appendData()方法呢?因為根本不支援。