Ocelot的限流、熔斷和負載均衡
一、限流
想要在Ocelot中設定限流,需要在設定如下綠色所示:
{
  "GlobalConfiguration": {
    "RateLimitOptions": {
      "DisableRateLimitHeaders": false,
      "QuotaExceededMessage": "Customize Tips!",
      "HttpStatusCode": 999,
      "ClientIdHeader": "Test"
    }
  },
  "Routes": [
    {
      "DownstreamPathTemplate": "/{everything}",
      "DownstreamScheme": "https",
      "DownstreamHostAndPorts": [
        {
          "Host": "localhost",
          "Port": 5001
        }
      ],
      "UpstreamPathTemplate": "/api/{everything}",
      "UpstreamHttpMethod": [ "Get", "Post" ],
      "RateLimitOptions": {
        "ClientWhitelist": [],
        "EnableRateLimiting": true,
        "Period": "1s",
        "PeriodTimespan": 1,
        "Limit": 1
      }
    }
  ]
}
在Route中設定的引數解釋如下:
ClientWhitelist:白名單,白名單內的使用者端請求不會被限流。
Period:限流時間,如1s、5m、1h、1d等。如果在此時間段內發出的請求超過限制,則需要等待PeriodTimespan結束後再發出另一個請求。
PeriodTimespan:觸發限流後多久後可以再次發起請求。
Limit:限流時間內限制的請求次數。
在GlobalConfiguration中設定的引數解釋如下:
DisableRateLimitHeaders:是否禁用X-Rate-Limit和Retry-After檔頭。
QuotaExceededMessage:限流返回的錯誤提示。
HttpStatusCode:設定限流發生後返回的HTTP狀態碼。
ClientIdHeader:指定應用於標識使用者端的檔頭,預設是ClientId。
然後看下效果:

二、熔斷
在Ocelot中熔斷採用了Plloy來實現,我們需要先安裝:
Install-Package Ocelot.Provider.Polly
需要注入方法
builder.Services.AddOcelot().AddPolly();
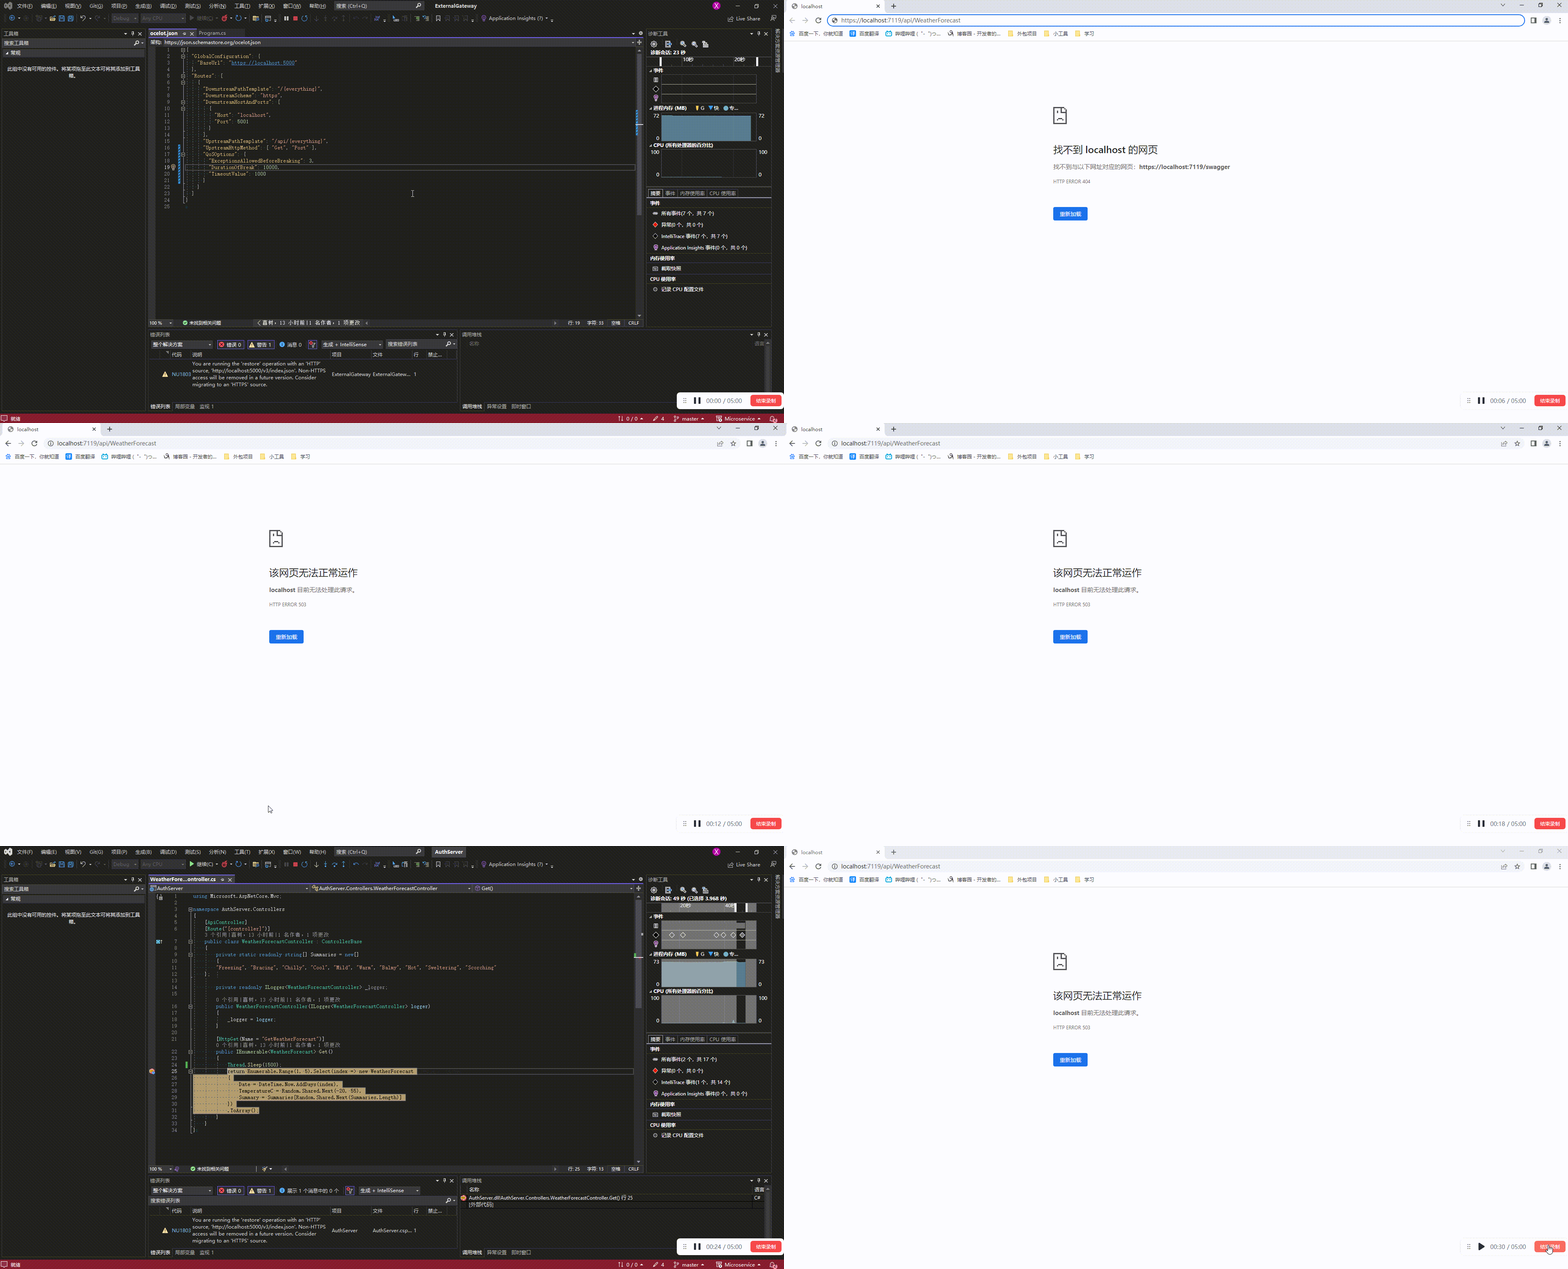
然後在每個路由設定中新增以下設定,表示出現超過3次異常將會熔斷1秒,請求超過5秒算超時。
"QoSOptions": {
    "ExceptionsAllowedBeforeBreaking":3,
    "DurationOfBreak":1000,
    "TimeoutValue":5000
}
ExceptionsAllowedBeforeBreaking必須大於0才能執行此規則,表示允許異常的次數。DurationOfBreak表示熔斷時長,單位為毫秒。TimeoutValue表示超時時間,超過多久算超時,單位毫秒。
我們測試一下從下面的動圖可以看到,我們三次超時後,熔斷了的請求直接返回了503。

三、負載均衡
Ocelot可以在每個路由的可用下游服務之間進行負載均衡,負載平衡有以下幾種型別:
LeastConnection :追蹤那些服務正在請求中,並且將最新的請求傳送給當前請求最少的服務。
RoundRobin :輪詢可用的服務並且傳送請求,需要配合Consul才能對下線服務進行檢測,否則還是直接報錯的。
NoLoadBalancer :從設定或者服務中發現第一個可用的服務傳送請求。
CookieStickySessions:使用cookie關聯所有相關的請求到制定的服務,下面會細說。
使用負載均衡就是在一條路由中設定多個下游服務,然後選擇一個負載均衡型別,如下:
{
    "DownstreamPathTemplate": "/api/posts/{postId}",
    "DownstreamScheme": "https",
    "DownstreamHostAndPorts": [
            {
                "Host": "10.0.1.10",
                "Port": 5000,
            },
            {
                "Host": "10.0.1.11",
                "Port": 5000,
            }
        ],
    "UpstreamPathTemplate": "/posts/{postId}",
    "LoadBalancerOptions": {
        "Type": "LeastConnection"
    },
    "UpstreamHttpMethod": [ "Put", "Delete" ]
}
1、服務發現中使用負載均衡
如下設定完服務名後,會自動查詢下游的主機和埠,並在任何可用的服務之間進行負載均衡請求。如果從Consul中新增和刪除服務,那麼Ocelot會停止呼叫刪除的服務,並且呼叫新增的服務。
{
    "DownstreamPathTemplate": "/api/posts/{postId}",
    "DownstreamScheme": "https",
    "UpstreamPathTemplate": "/posts/{postId}",
    "UpstreamHttpMethod": [ "Put" ],
    "ServiceName": "product",
    "LoadBalancerOptions": {
        "Type": "LeastConnection"
    },
}
2、CookieStickySessions
CookieStickySessions型別的負載均衡就是為了實現在有很多下游服務的時候共用對談狀態,只需要如下設定就行。
LoadBalancerOptions 就是需要設定為CookieStickySessions,Key是用於實現此功能的cookie的關鍵字,Expiry 是希望執行對談的時間,以毫秒計算,每次請求都將重新整理時間。
{
    "DownstreamPathTemplate": "/api/posts/{postId}",
    "DownstreamScheme": "https",
    "DownstreamHostAndPorts": [
            {
                "Host": "10.0.1.10",
                "Port": 5000,
            },
            {
                "Host": "10.0.1.11",
                "Port": 5000,
            }
        ],
    "UpstreamPathTemplate": "/posts/{postId}",
    "LoadBalancerOptions": {
        "Type": "CookieStickySessions",
        "Key": "ASP.NET_SessionId",
        "Expiry": 1800000
    },
    "UpstreamHttpMethod": [ "Put", "Delete" ]
}
如果有多個主機服務或者使用了Consul,那麼CookieStickySessions會使用輪詢的方式來選擇下個伺服器,目前是寫死的,但是可以改變。
3、自定義負載均衡策略
當我們啟用自定義的負載均衡時,Ocelot會根據負載均衡器的名稱去查詢,如果找到了就會使用。如果負載均衡的型別沒有與註冊的負載均衡類的名稱匹配,那麼將會返回500錯誤。沒有設定負載均衡策略將是不會進行負載均衡的。
我們建立一個自定義負載均衡策略類MyCustomLoadBalancer,繼承ILoadBalancer介面實現對應的介面
public class MyCustomLoadBalancer: ILoadBalancer
    {
        private readonly Func<Task<List<Service>>> _services;
        private readonly object _lock = new object();

        private int _last;

        public MyCustomLoadBalancer(Func<Task<List<Service>>> services)
        {
            _services = services;
        }

        public async Task<Response<ServiceHostAndPort>> Lease(HttpContext httpContext)
        {
            var services = await _services();
            lock (_lock)
            {
                if (_last >= services.Count)
                {
                    _last = 0;
                }

                var next = services[_last];
                _last++;
                return new OkResponse<ServiceHostAndPort>(next.HostAndPort);
            }
        }
        public void Release(ServiceHostAndPort hostAndPort)
        {
        }
    }
然後在注入該策略
s.AddOcelot().AddCustomLoadBalancer<MyCustomLoadBalancer>();
最後在組態檔中設定路由的策略型別名為我們定以的策略類的名稱即可
//...
"LoadBalancerOptions": {
    "Type": "MyCustomLoadBalancer"
 }
//...