Ansible 快速入門到放棄
Ansible 快速入門到放棄
最是人間留不住,朱顏辭鏡花辭樹。
1-Ansible 簡介
- Ansible是一個設定管理和設定工具,它使用SSH 連線到伺服器並執行設定好的任務,伺服器上只需要開啟ssh,所有工作都交給client 端的ansible 負責。
- 當我們有批次部署的需求時,我們可以自己寫指令碼,但是更推薦使用 Ansible。使用 Ansible 無需編碼只需要設定 yaml 檔案,並且 Ansible 已經內建了冪等性、並行度控制等功能,大大減少了批次部署時的工作量。
Ansible 是基於模組工作的,本身沒有批次部署的能力,真正具有批次部署的是ansible 所執行的模組,ansible只是提供一種框架。主要包括:
- 連線外掛connection plugins:負責和被監控端實現通訊;
- host inventory:指定操作的主機,是一個組態檔裡面定義監控的主機;
- 各種模組核心模組、command模組、自定義模組;
- 藉助於外掛完成記錄紀錄檔郵件等功能;
- playbook:劇本執行多個任務時,非必需可以讓節點一次性執行多個任務。
Ansible 特點,主要有以下幾點:
- 不需要安裝使用者端,通過sshd去通訊;
- 安裝簡易,centos上可直接yum安裝;
- 基於模組工作,模組可以由任何語言開發;
- 不僅支援命令列使用模組,也支援編寫yam l 格式的playbook,易於編寫和閱讀。
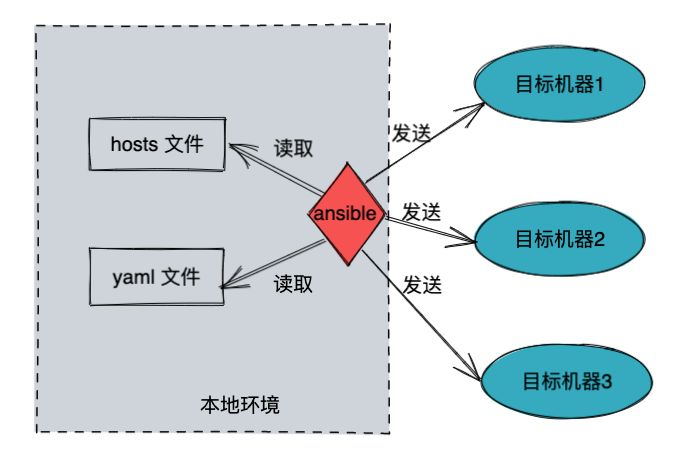
Ansible 大致原理,主要一下三點:
- hosts 組態檔,作用是告訴 Ansible 你的程式要部署到哪些機器。
- yaml 檔案,作用是告訴 Ansible 在目標機器上執行哪些操作。
- Ansible 不需要在目標機器上安裝使用者端,它通過 SSH 把指令和要部署的程式傳送到目
2-Ansible 安裝
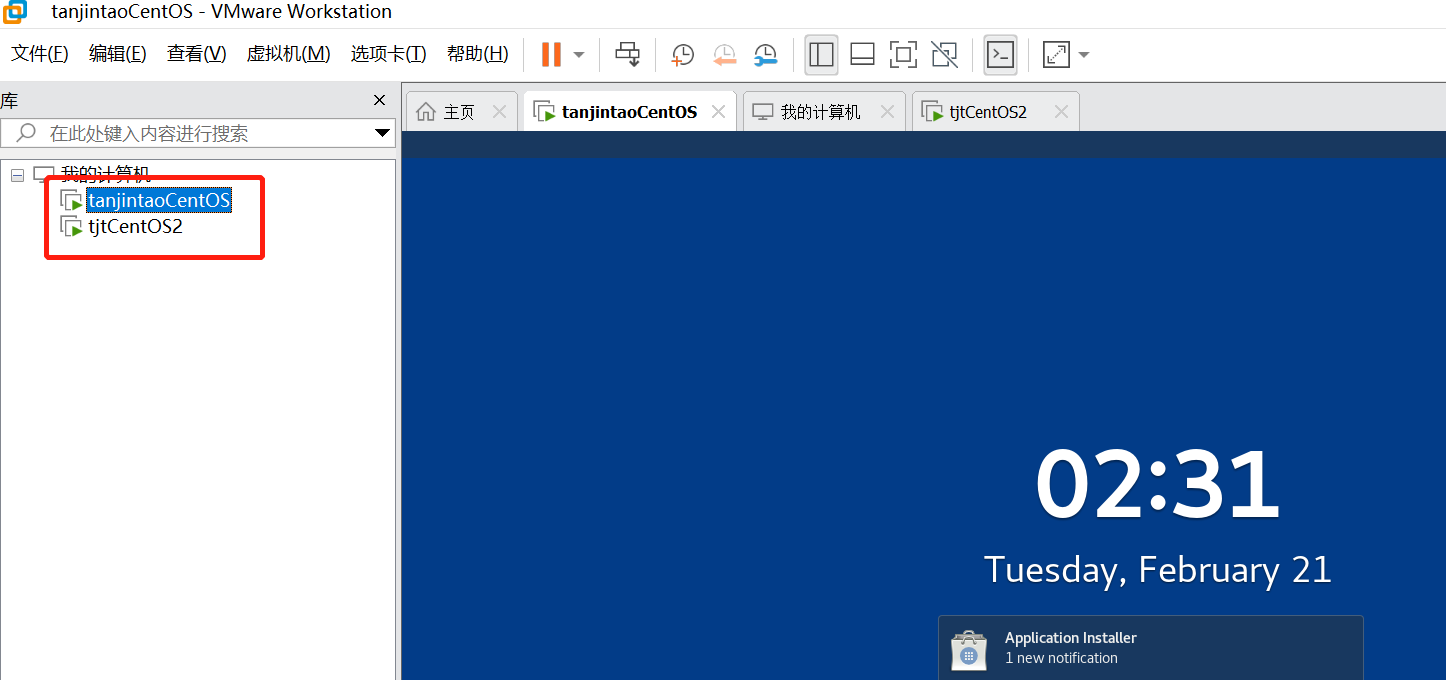
Ansible 支援叢集,資源有限本範例僅在本地虛擬機器器使用兩臺機器進行演示,角色如下。
- 192.168.8.135 角色-伺服器端
- 192.168.8.136 角色-使用者端
只需要在伺服器端上安裝ansible,安裝命令如下。
yum list |grep ansible
或
python3 -m pip install --user ansible==2.5.4
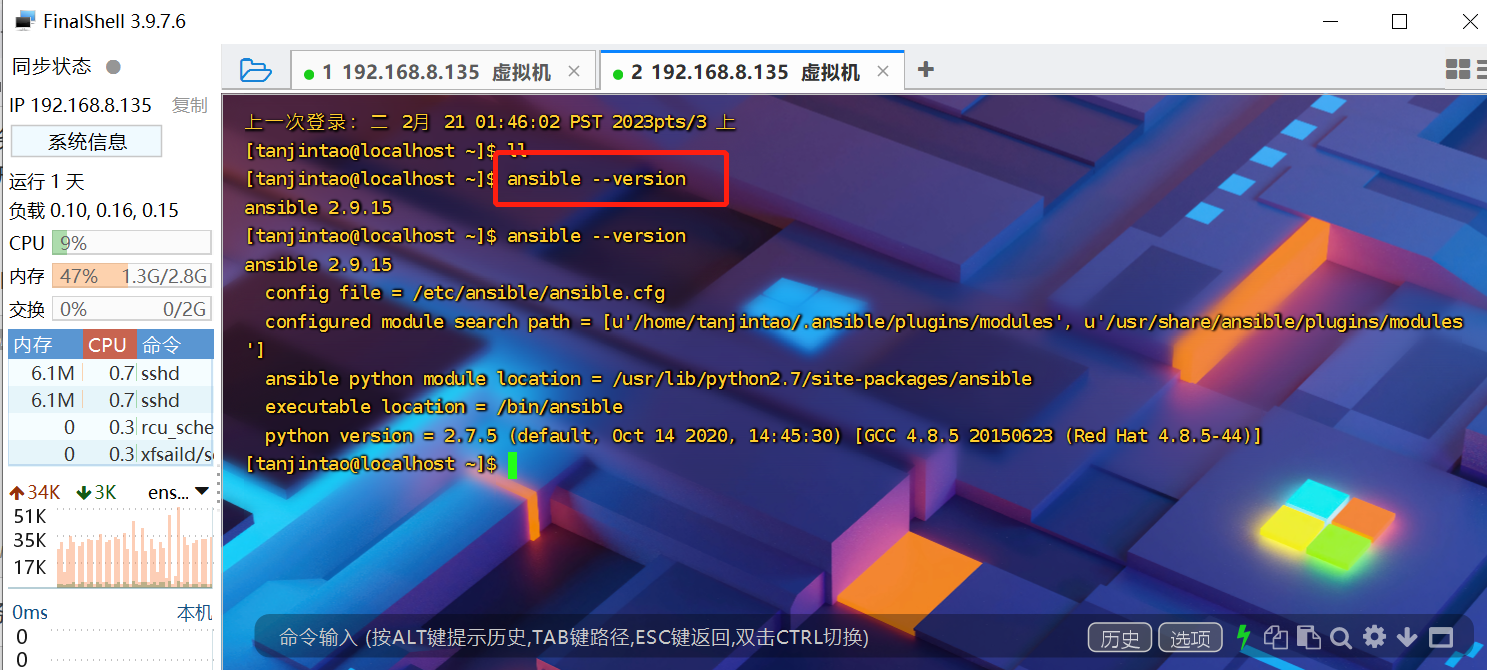
檢視安裝是否成功
-
ansible --version
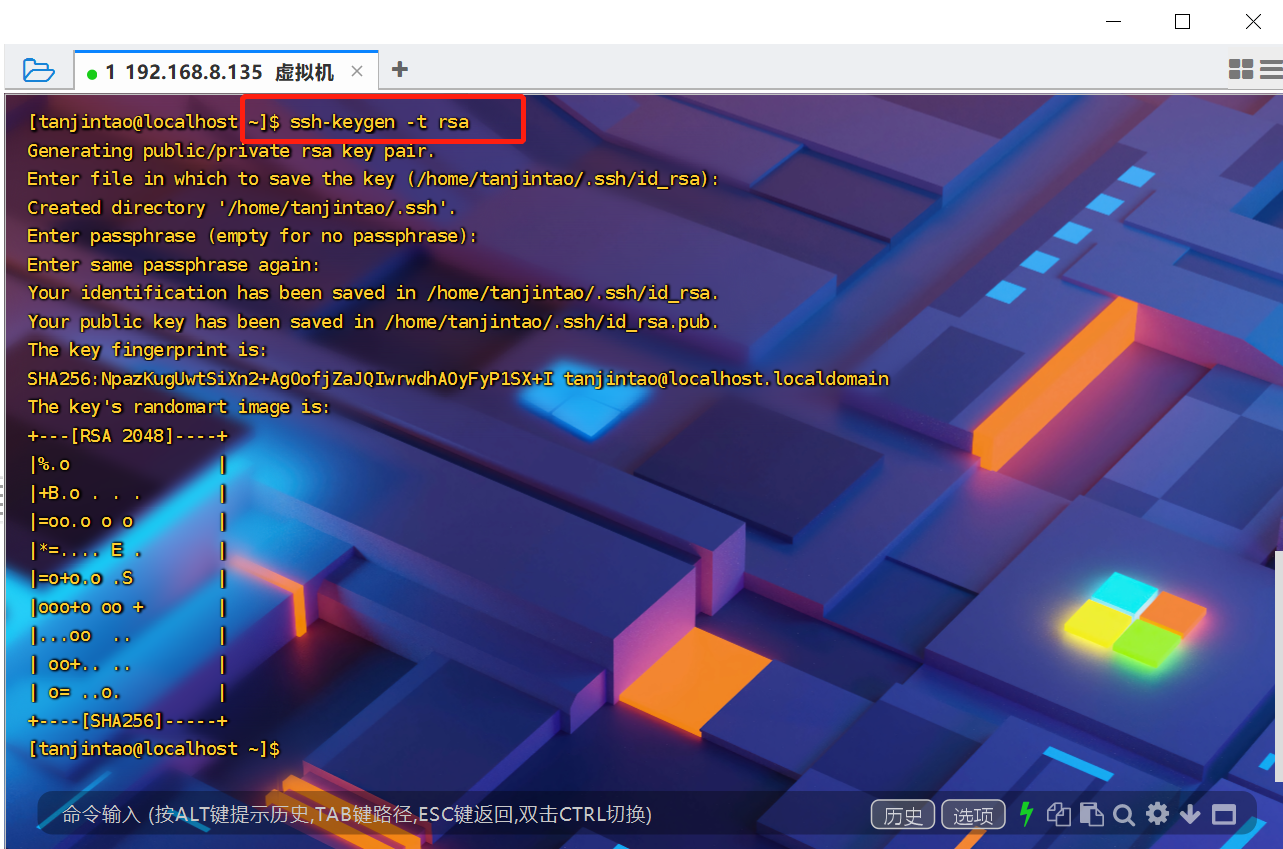
使用ssh-keygen 命令在伺服器端上生成金鑰對。
[tanjintao@localhost ~]$ ssh-keygen -t rsa
建立伺服器端與使用者端的連線,也就是設定金鑰認證的SSH連線。
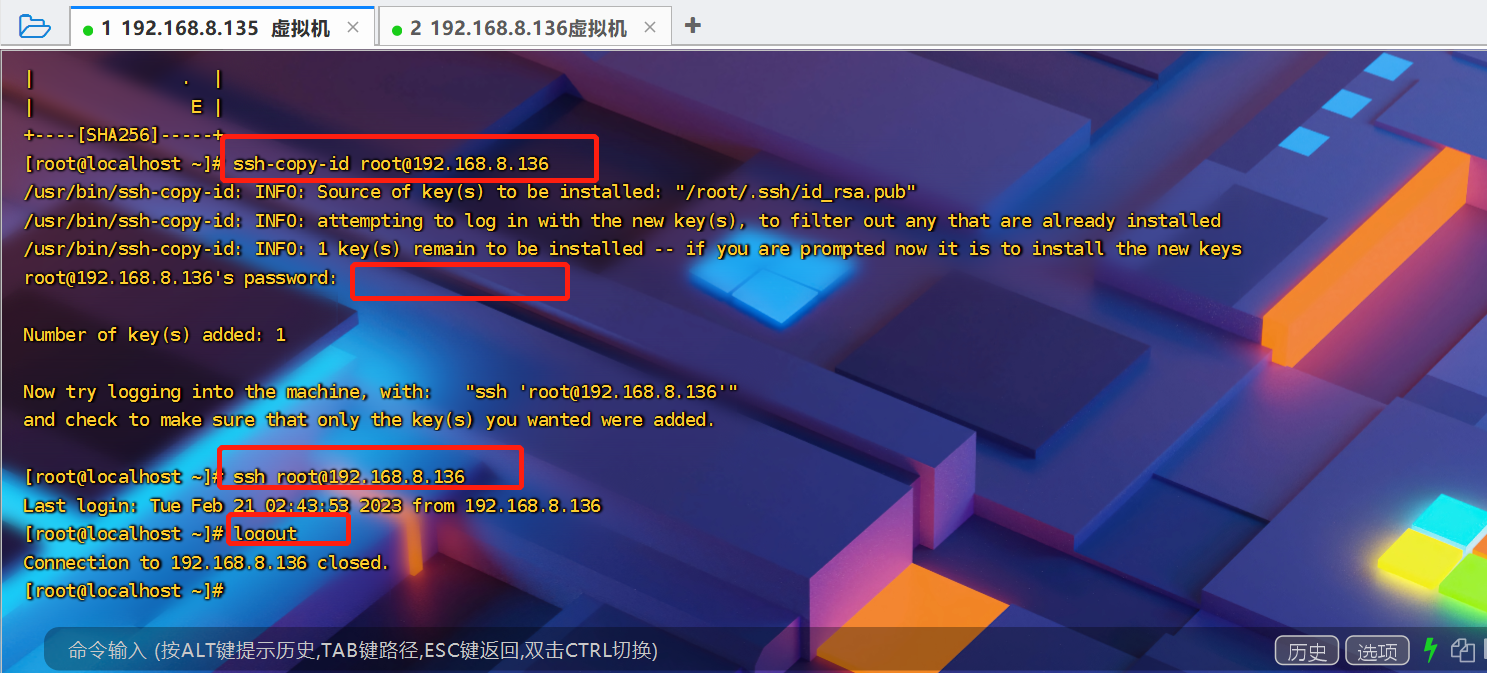

 1 [root@localhost ~]# ssh-copy-id root@192.168.8.136 # 拷貝ssh key到使用者端
 2 /usr/bin/ssh-copy-id: INFO: Source of key(s) to be installed: "/root/.ssh/id_rsa.pub"
 3 /usr/bin/ssh-copy-id: INFO: attempting to log in with the new key(s), to filter out any that are already installed
 4 /usr/bin/ssh-copy-id: INFO: 1 key(s) remain to be installed -- if you are prompted now it is to install the new keys
 5 root@192.168.8.136's password:
 6
 7 Number of key(s) added: 1
 8
 9 Now try logging into the machine, with:   "ssh '[email protected]'"
10 and check to make sure that only the key(s) you wanted were added.
11
12 [root@localhost ~]# ssh root@192.168.8.136 # 測試在伺服器端上能否通過金鑰登入使用者端
13 Last login: Tue Feb 21 02:43:53 2023 from 192.168.8.136
14 [root@localhost ~]# logout
15 Connection to 192.168.8.136 closed.
16 [root@localhost ~]#
補充步驟,設定金鑰認證的SSH連線。
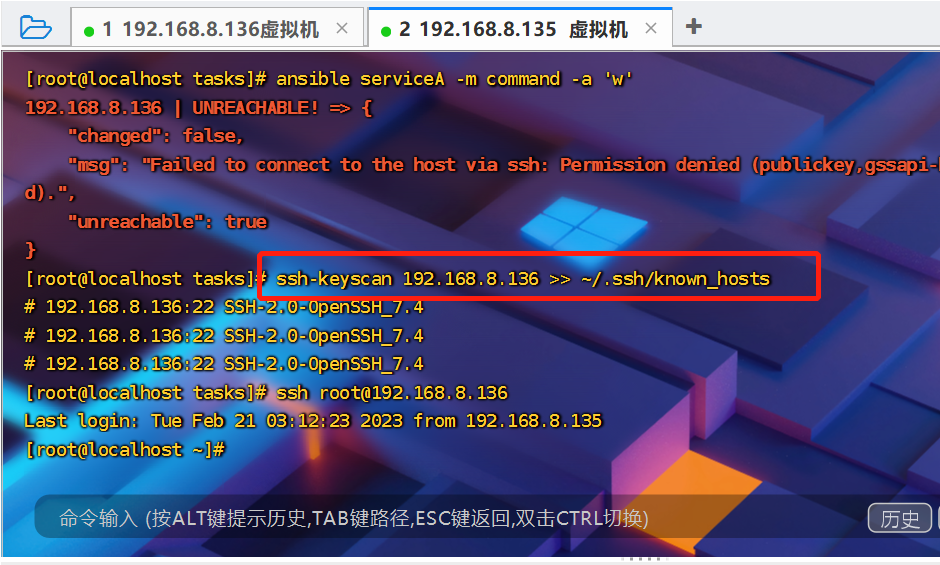
編輯伺服器端上的組態檔,設定遠端主機組。
# serviceA 是叢集名稱
[serviceA]
# 列舉 serviceA 叢集的 ip 地址,這裡設定了一個使用者端的IP
192.168.8.136
3-Ansible 執行遠端命令1
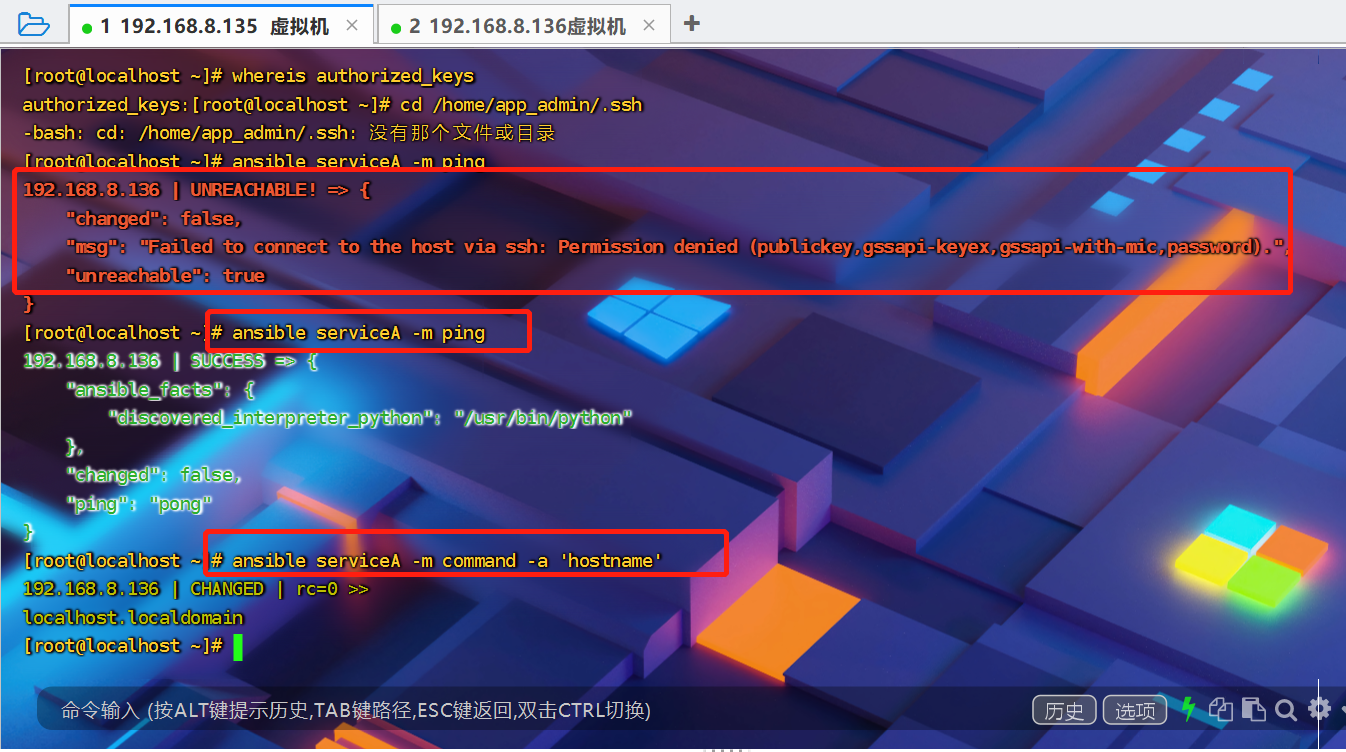
完成了ssh 金鑰認證以及主機組的設定之後就可以通過ansible 對使用者端遠端執行命令了,但是我這邊還是報錯UNREACHABLE Permission denied,暫時加上如下設定後可以正常執行遠端命令。
-
[root@flask-mysql ansible]# cat /etc/ansible/hosts
192.168.8.136 ansible_ssh_port=22 ansible_ssh_pass=123456 ansible_ssh_user=root
4-Ansible 執行遠端命令2
首先在伺服器端上建立一個簡單的shell 指令碼 tjt.sh 用來測試。
#!/bin/bash
echo `date` > /home/tjt/ansible_test.txt

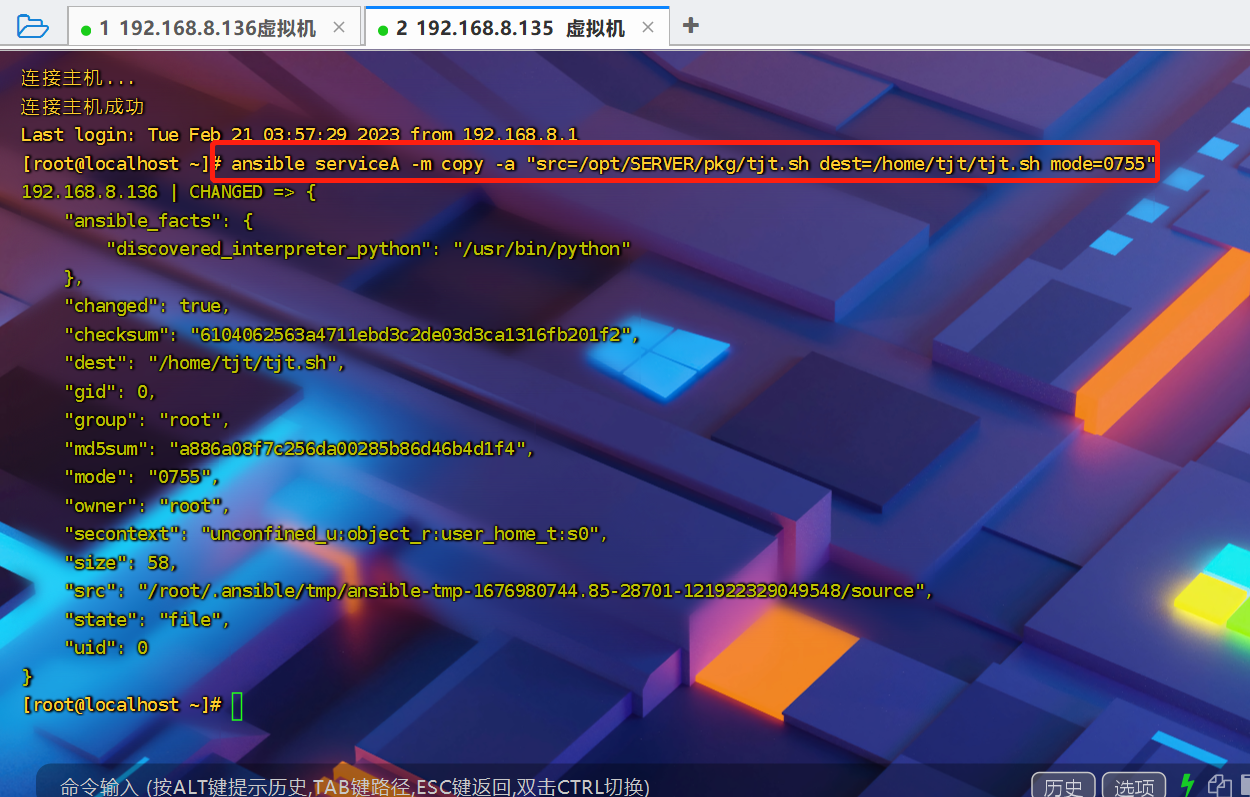
然後把指令碼 tjt.sh 分發到遠端機器上,具體路徑是/home/tjt 目錄下。
-
[root@localhost ~]# ansible serviceA -m copy -a "src=/opt/SERVER/pkg/tjt.sh dest=/home/tjt/tjt.sh mode=0755"
最後通過shell 模組執行遠端機器上的shell 指令碼。
-
[root@localhost ~]# ansible serviceA -m shell -a "/home/tjt/tjt.sh"
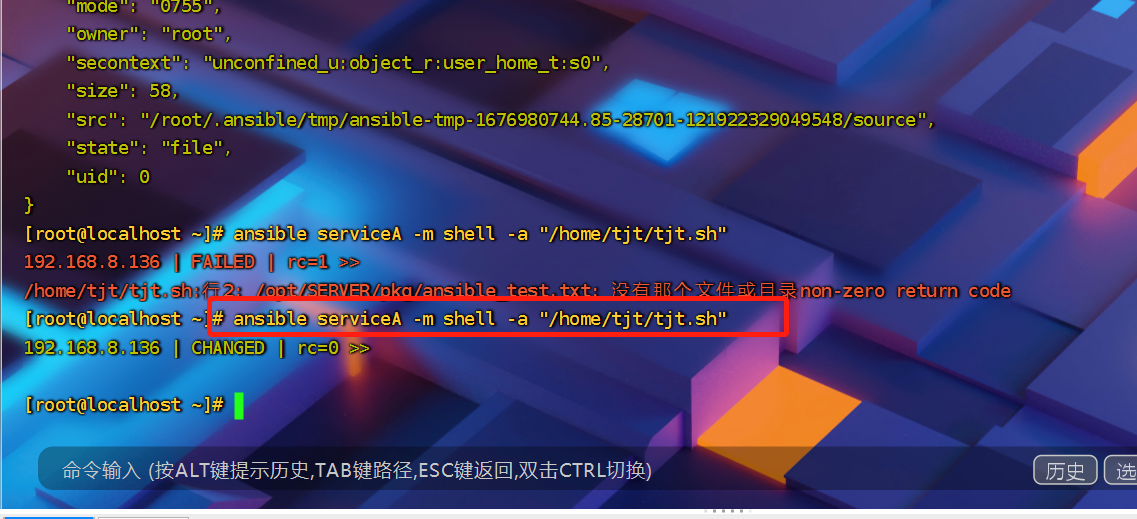
檢視遠端機器上,是否執行了 tjt.sh 指令碼,並且生成了/home/tjt/ansible_test.txt檔案。
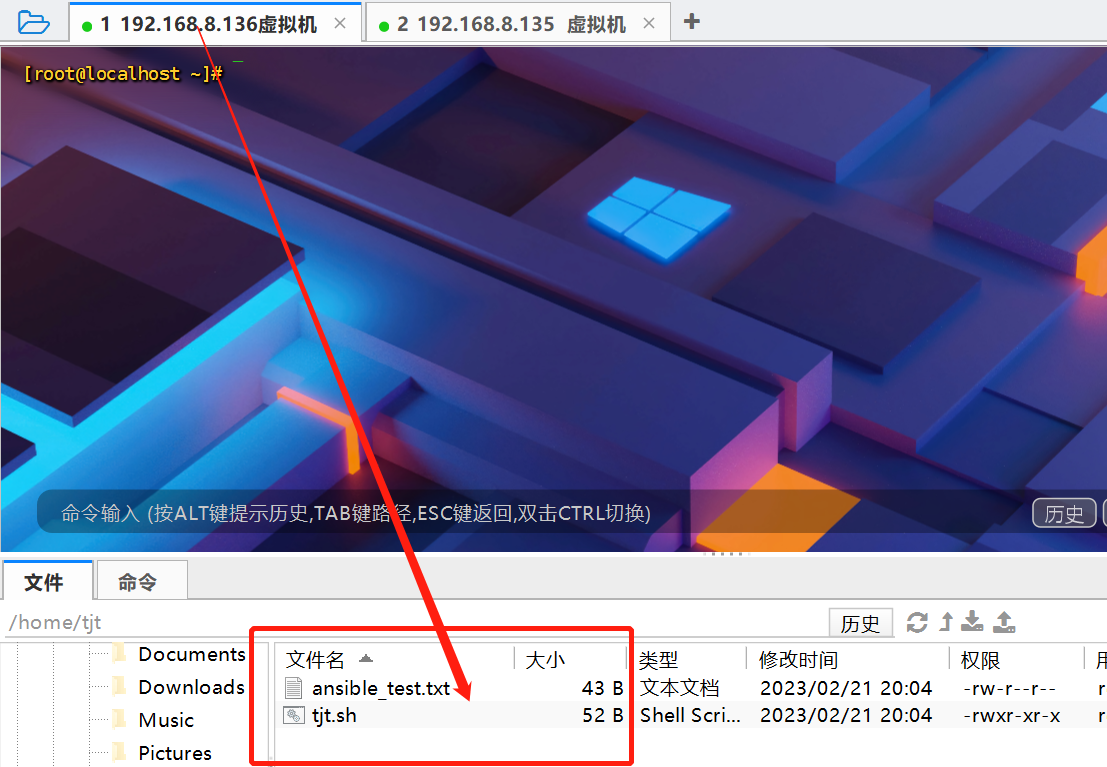
如上,可以看到指令碼被正常執行了。
-
5-Ansible 執行 yml 檔案
編輯 YAML 檔案
- yml 檔案是告訴 Ansible 在目標機器上執行哪些操作,Ansible 把這類檔案稱為 「playbook」。
- playbook 相當於可以把模組命令都寫入到組態檔裡面,這樣就可以直接執行組態檔了,類似指令碼的意思。
下面編寫一個為名 tjtAnsibleDemo.yml 的 playbook,這個 playbook 的作用是把 helloWorld.java 檔案傳送到 serviceA 叢集。

 1 # hosts 是要部署服務的叢集
 2 - hosts: serviceA
 3 # remote_user 是以 root 使用者登入遠端機器
 4   remote_user: root
 5 # vars 是定義一些變數。這些變數可以在接下來的 tasks 中使用。
 6   vars:
 7      src: /opt/SERVER/pkg
 8 # tasks 是在遠端機器上具體的執行動作。
 9   tasks:
10       # name 是該動作的名稱
11       - name: "一個簡單的Absible指令碼:把 helloWorld 檔案傳送到 serviceA 叢集"
12         # copy 是要具體執行的動作。copy 是 Ansible 模組,它的作用是把本地檔案上傳到目標機器上去。
13         # {{ src }} 是 Jinja2 模板語法
14         copy: src={{ src }}/helloWorld.java dest=/home/tjt
15
16
執行Ansible 指令碼
[root@localhost pkg]# ansible-playbook tjtAnsibleDemo.yml
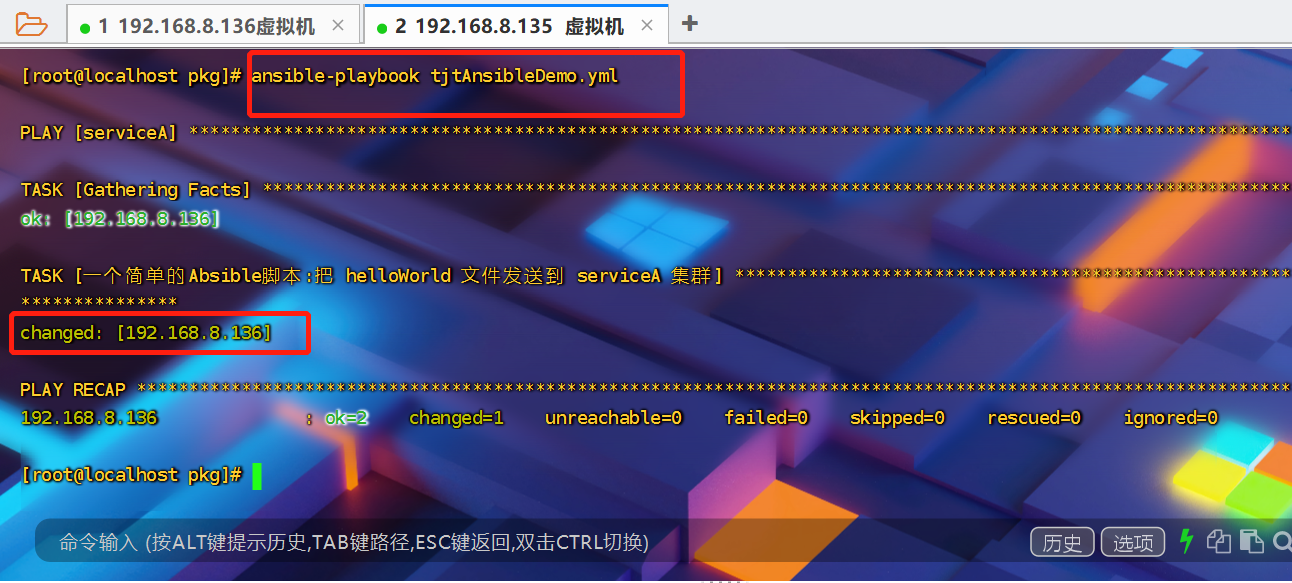
檢查遠端機器是否成功收到 helloWorld.java 檔案。
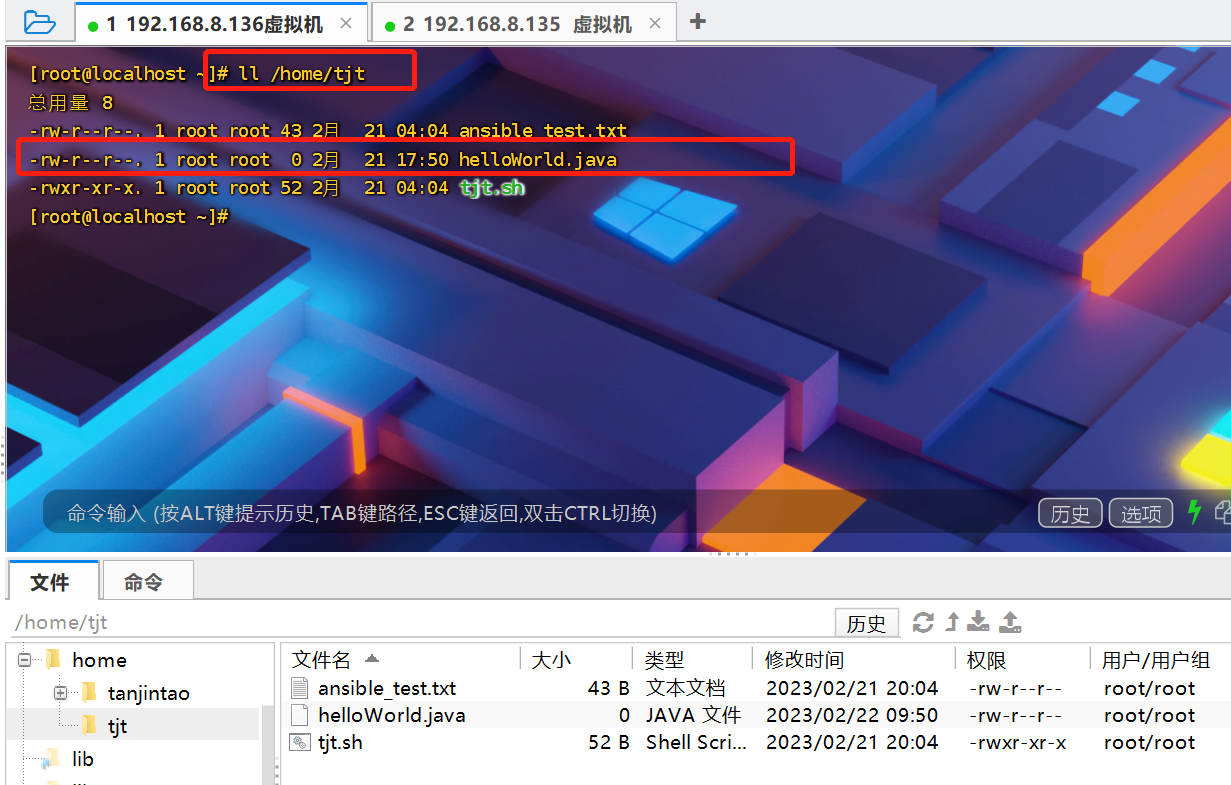
如上,代表執行成功。
最是人間留不住
朱顏辭鏡花辭樹
