vue適用多頁面應用嗎
vue適用多頁面應用。vue在工程化開發的時候依賴於webpack,而webpack是將所有的資源整合到一塊後形成一個html檔案 一堆js檔案;如果想使用vue實現多頁面應用,就需要對它的依賴進行重新設定,即通過修改webpack設定來讓腳手架具備構建多頁應用的能力。

本教學操作環境:windows7系統、vue3版,DELL G3電腦。
我們知道vue可以快速開發web單頁應用,而且官方為我們提供了自己的應用腳手架vue-cli,我們只需要下載腳手架,安裝依賴後就可以啟動vue應用雛形。
這得益與webpack的依賴追蹤,各種資源字尾的loader,以及相關webpack外掛的強大功能。
然而有些時候,我們有多頁面的開發需求,在這種情況下,我們可以為多頁面構建相應的多個應用,比如通過vue-cli生成多個應用目錄,但是這樣一方面會多出很多重複的構建程式碼和樣板程式碼,另外也會破壞應用的統一性,不便於維護。我們可以在vue-cli的基礎上通過修改webpack設定來讓腳手架具備構建多頁應用的能力。
vue在工程化開發的時候依賴於 webpack ,而webpack是將所有的資源整合到一塊後形成一個html檔案 一堆 js檔案, 如果將vue實現多頁面應用,就需要對他的依賴進行重新設定,也就是修改webpack的組態檔.
下面主要詳述Vue的多頁面應用開發(MPA)
具體實現步驟
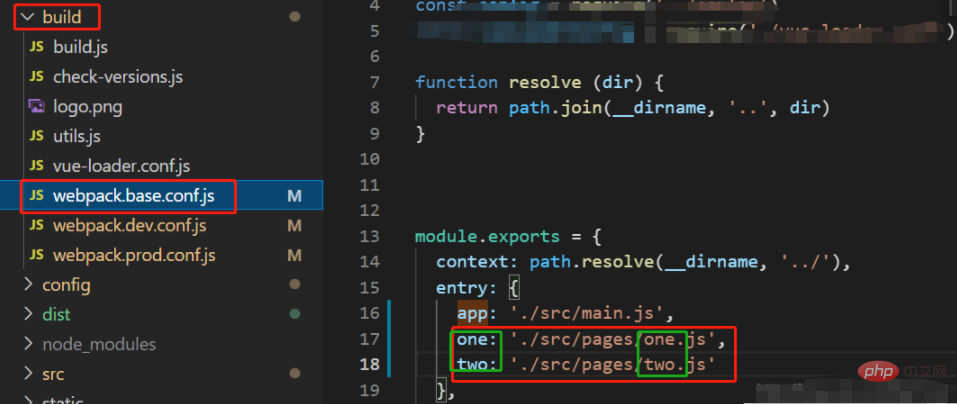
1、進入\build\webpack.base.conf.js目錄下,在module.exports的域裡,找到entry,在那裡設定新增多個入口:

注意綠色框的修改和對應。
  entry: {
    app: './src/main.js',
    one: './src/pages/one.js',
    two: './src/pages/two.js'
  }登入後複製
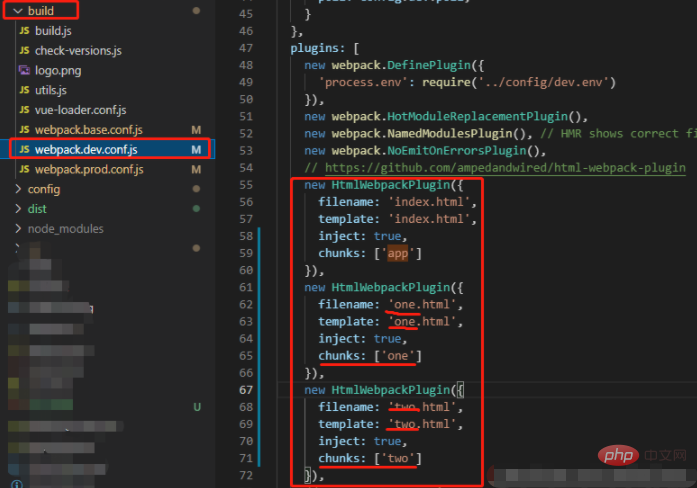
2、對開發環境run dev裡進行修改,開啟\build\webpack.dev.conf.js檔案,在module.exports那裡找到plugins,下面寫法如下:

    new HtmlWebpackPlugin({
      filename: 'index.html',
      template: 'index.html',
      inject: true,
      chunks: ['app']
    }),
    new HtmlWebpackPlugin({
      filename: 'one.html',
      template: 'one.html',
      inject: true,
      chunks: ['one']
    }),
    new HtmlWebpackPlugin({
      filename: 'two.html',
      template: 'two.html',
      inject: true,
      chunks: ['two']
    }),登入後複製
說明:這裡的設定比較重要 ,如果沒寫好的 在打包的時候就會報錯了, 在chunks那裡的app指的是webpack.base.conf.js的 entry 那裡與之對應的變數名。chunks的作用是每次編譯、執行時每一個入口都會對應一個entry,如果沒寫則引入所有頁面的資源。也就是沒有改專案設定前形成的單頁應用。
3、之後就對run build也就是編譯環境進行設定。首先開啟\config\index.js檔案,在build里加入這個

    index: path.resolve(__dirname, '../dist/index.html'),
    one: path.resolve(__dirname, '../dist/one.html'),
    two: path.resolve(__dirname, '../dist/two.html'),登入後複製
說明:這裡也就是打包之後dist資料夾中形成的 html。
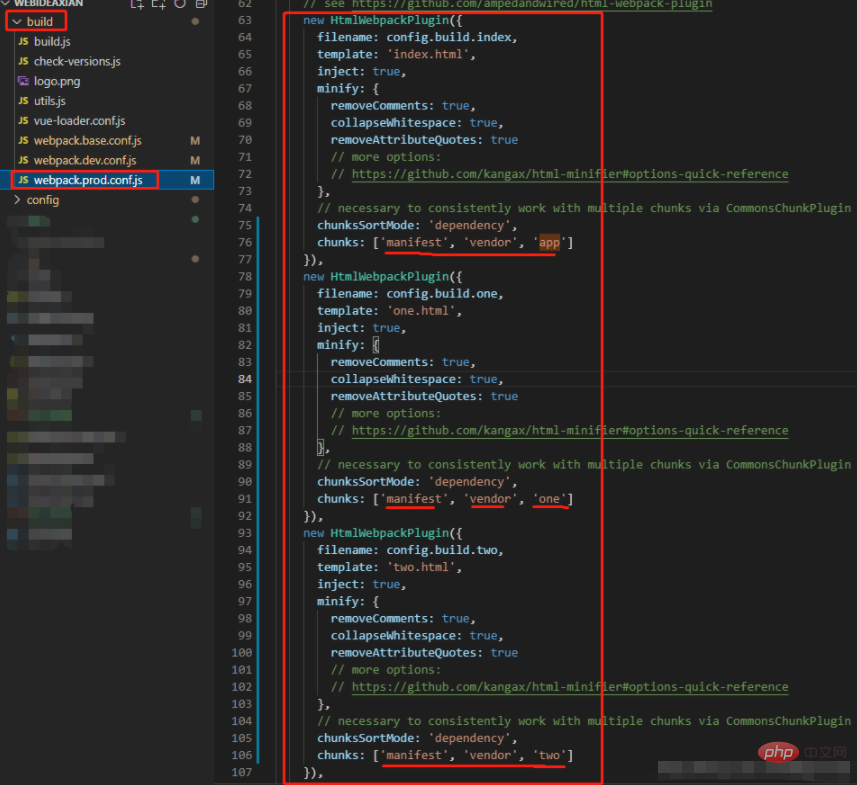
4、然後開啟/build/webpack.prod.conf.js檔案,在plugins那裡找到HTMLWebpackPlugin,新增

 new HtmlWebpackPlugin({
      filename: config.build.index,
      template: 'index.html',
      inject: true,
      minify: {
        removeComments: true,
        collapseWhitespace: true,
        removeAttributeQuotes: true
      },
      chunksSortMode: 'dependency',
      chunks: ['manifest', 'vendor', 'app']
    }),
    new HtmlWebpackPlugin({
      filename: config.build.one,
      template: 'one.html',
      inject: true,
      minify: {
        removeComments: true,
        collapseWhitespace: true,
        removeAttributeQuotes: true
      },
      chunksSortMode: 'dependency',
      chunks: ['manifest', 'vendor', 'one']
    }),
    new HtmlWebpackPlugin({
      filename: config.build.two,
      template: 'two.html',
      inject: true,
      minify: {
        removeComments: true,
        collapseWhitespace: true,
        removeAttributeQuotes: true
      },
      chunksSortMode: 'dependency',
      chunks: ['manifest', 'vendor', 'two']
    }),登入後複製
說明:其中filename參照的是\config\index.js裡的build,每個頁面都要設定一個chunks,不然會載入所有頁面的資源。

1、one.js檔案程式碼:(我這裡是舉例),two.js和這個程式碼類似,注意將「one」替換成「two」即可。
import Vue from 'vue'
import one from './one.vue'
Vue.config.productionTip = false
/* eslint-disable no-new */
new Vue({
    el: '#one',
    render: h => h(one)
})登入後複製
2、one.vue檔案程式碼:(我這裡是舉例),two.vue和這個程式碼類似,注意將「one」替換成「two」即可。
<template>
    <div id="one">
        <p>{{msg}}</p>
    </div>
</template>

<script>
    export default {
        name: 'one',
        data() {
            return {
                msg: 'I am one'
            }
        }
    }
</script>登入後複製
3、one.html檔案程式碼:(我這裡是舉例),two.vue和這個程式碼類似,注意將「one」替換成「two」即可。
<!DOCTYPE html>
<html>
<head>
    <meta charset="utf-8">
    <meta name="viewport" content="width=device-width,initial-scale=1.0">
    <title>one-page</title>
</head>
<body>
    <div id="one"></div>
</body>
</html>登入後複製注意!<div id="one"></div>中id的修改,之前忘記修改,頁面空白無內容,開啟控制檯可以看到div標籤中並無內容,且id是app我才反應過來,修改後就好了。
【相關推薦:、】
以上就是vue適用多頁面應用嗎的詳細內容,更多請關注TW511.COM其它相關文章!