巨量資料下一代變革之必研究資料湖技術Hudi原理實戰雙管齊下-下
@
整合Spark開發
Spark程式設計讀寫範例
通過IDE如Idea程式設計實質上和前面的spark-shell和spark-sql相似,其他都是Spark程式設計的知識,下面以scala語言為範例,idea新建scala的maven專案
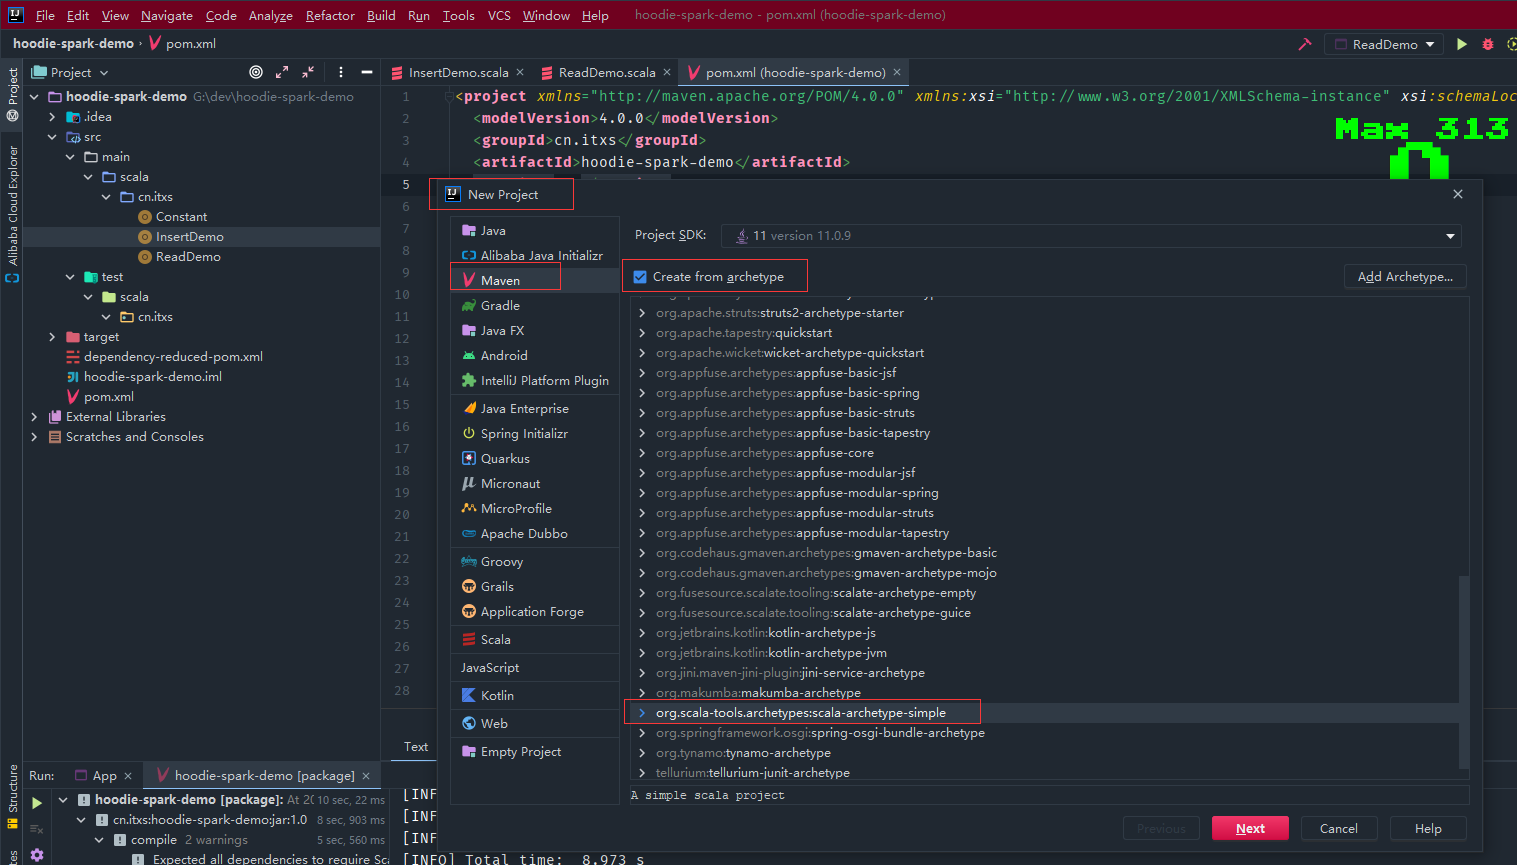
pom檔案新增如下依賴
<project xmlns="http://maven.apache.org/POM/4.0.0" xmlns:xsi="http://www.w3.org/2001/XMLSchema-instance" xsi:schemaLocation="http://maven.apache.org/POM/4.0.0 http://maven.apache.org/maven-v4_0_0.xsd">
  <modelVersion>4.0.0</modelVersion>
  <groupId>cn.itxs</groupId>
  <artifactId>hoodie-spark-demo</artifactId>
  <version>1.0</version>

  <properties>
    <project.build.sourceEncoding>UTF-8</project.build.sourceEncoding>
    <scala.version>2.12.10</scala.version>
    <scala.binary.version>2.12</scala.binary.version>
    <spark.version>3.3.0</spark.version>
    <hoodie.version>0.12.1</hoodie.version>
    <hadoop.version>3.3.4</hadoop.version>
  </properties>

  <dependencies>
    <dependency>
      <groupId>org.scala-lang</groupId>
      <artifactId>scala-library</artifactId>
      <version>${scala.version}</version>
    </dependency>

    <dependency>
      <groupId>org.apache.spark</groupId>
      <artifactId>spark-core_${scala.binary.version}</artifactId>
      <version>${spark.version}</version>
      <scope>provided</scope>
    </dependency>

    <dependency>
      <groupId>org.apache.spark</groupId>
      <artifactId>spark-sql_${scala.binary.version}</artifactId>
      <version>${spark.version}</version>
      <scope>provided</scope>
    </dependency>

    <dependency>
      <groupId>org.apache.spark</groupId>
      <artifactId>spark-hive_${scala.binary.version}</artifactId>
      <version>${spark.version}</version>
      <scope>provided</scope>
    </dependency>

    <dependency>
      <groupId>org.apache.hadoop</groupId>
      <artifactId>hadoop-client</artifactId>
      <version>${hadoop.version}</version>
      <scope>provided</scope>
    </dependency>

    <dependency>
      <groupId>org.apache.hudi</groupId>
      <artifactId>hudi-spark3.3-bundle_${scala.binary.version}</artifactId>
      <version>${hoodie.version}</version>
      <scope>provided</scope>
    </dependency>
  </dependencies>

  <build>
    <plugins>
      <plugin>
        <groupId>org.apache.maven.plugins</groupId>
        <artifactId>maven-compiler-plugin</artifactId>
        <version>3.10.1</version>
        <configuration>
          <source>1.8</source>
          <target>1.8</target>
          <encoding>${project.build.sourceEncoding}</encoding>
        </configuration>
      </plugin>
      <plugin>
        <groupId>org.scala-tools</groupId>
        <artifactId>maven-scala-plugin</artifactId>
        <version>2.15.2</version>
        <executions>
          <execution>
            <goals>
              <goal>compile</goal>
              <goal>testCompile</goal>
            </goals>
          </execution>
        </executions>
      </plugin>
      <plugin>
        <groupId>org.apache.maven.plugins</groupId>
        <artifactId>maven-shade-plugin</artifactId>
        <version>3.2.4</version>
        <executions>
          <execution>
            <phase>package</phase>
            <goals>
              <goal>shade</goal>
            </goals>
            <configuration>
              <filters>
                <filter>
                  <artifact>*:*</artifact>
                  <excludes>
                    <exclude>META-INF/*.SF</exclude>
                    <exclude>META-INF/*.DSA</exclude>
                    <exclude>META-INF/*.RSA</exclude>
                  </excludes>
                </filter>
              </filters>
            </configuration>
          </execution>
        </executions>
      </plugin>
    </plugins>
  </build>
</project>
建立常數物件
object Constant {
    val HUDI_STORAGE_PATH = "hdfs://192.168.5.53:9000/tmp/"
}
插入hudi資料
package cn.itxs

import org.apache.spark.sql.SparkSession
import org.apache.spark.SparkConf
import org.apache.hudi.QuickstartUtils._
import scala.collection.JavaConversions._
import org.apache.spark.sql.SaveMode._
import org.apache.hudi.DataSourceWriteOptions._
import org.apache.hudi.config.HoodieWriteConfig._

object InsertDemo {
  def main(args: Array[String]): Unit = {
    val sparkConf = new SparkConf()
      .setAppName(this.getClass.getSimpleName)
      .setMaster("local[*]")
      .set("spark.serializer", "org.apache.spark.serializer.KryoSerializer")

    val sparkSession = SparkSession.builder()
      .config(sparkConf)
      .enableHiveSupport()
      .getOrCreate()

    val tableName = "hudi_trips_cow_idea"
    val basePath =  Constant.HUDI_STORAGE_PATH+tableName
    val dataGen = new DataGenerator
    val inserts = convertToStringList(dataGen.generateInserts(10))

    val df = sparkSession.read.json(sparkSession.sparkContext.parallelize(inserts,2))
    df.write.format("hudi").
      options(getQuickstartWriteConfigs).
      option(PRECOMBINE_FIELD.key(), "ts").
      option(RECORDKEY_FIELD.key(), "uuid").
      option(PARTITIONPATH_FIELD.key(), "partitionpath").
      option(TBL_NAME.key(), tableName).
      mode(Overwrite).
      save(basePath)

    sparkSession.close()
  }
}
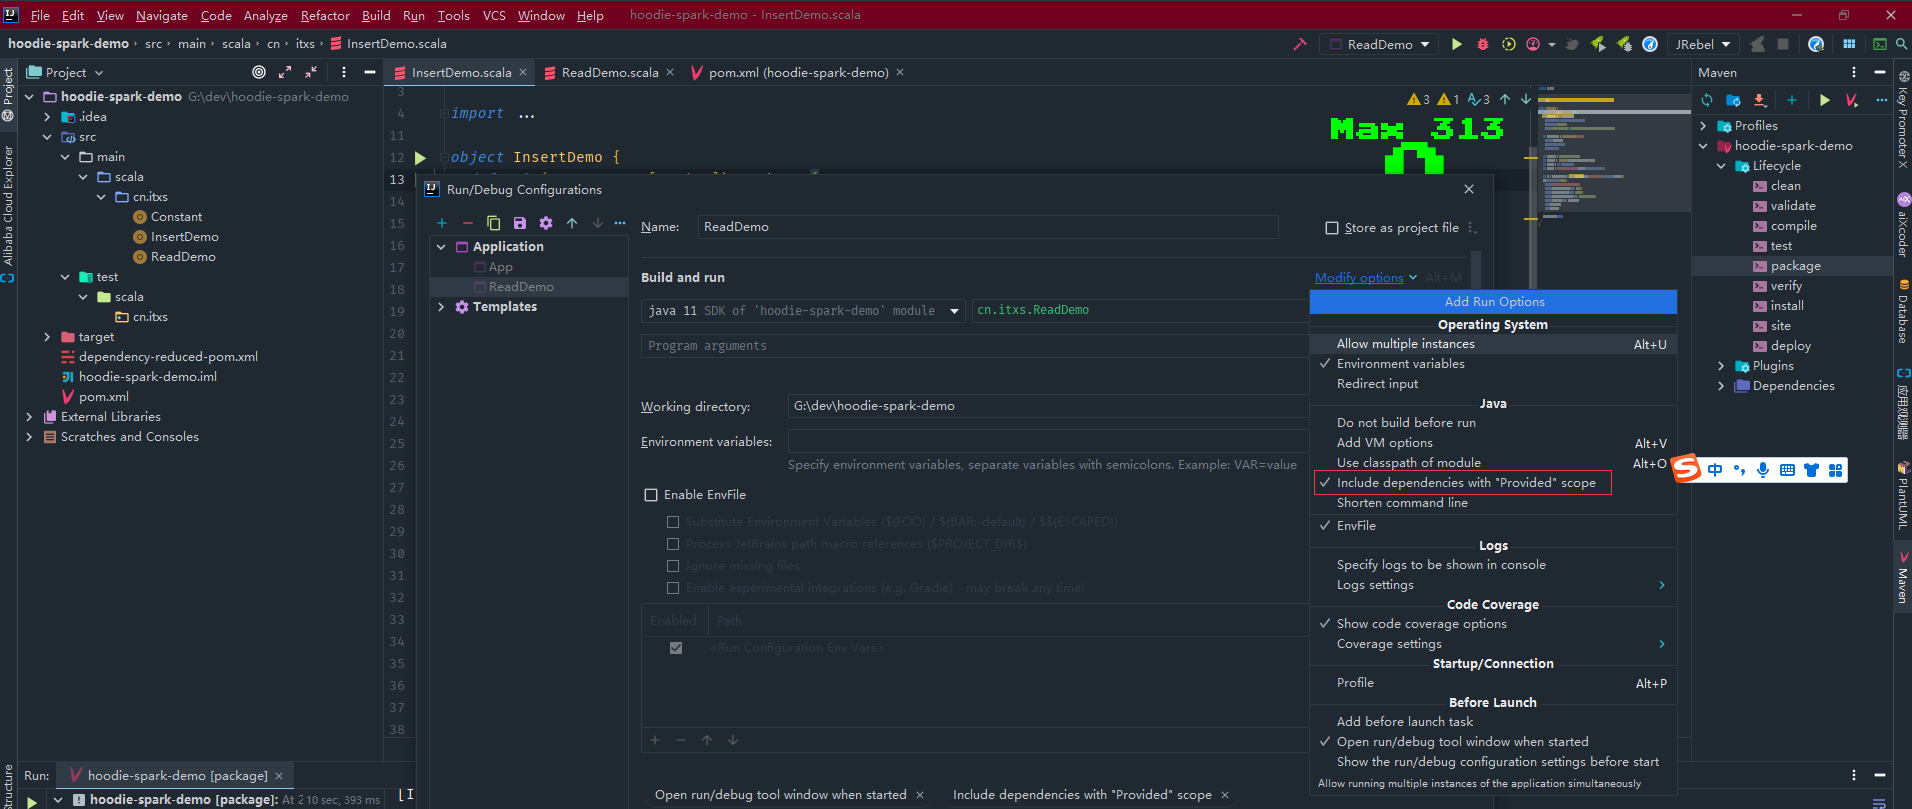
由於依賴中scope是設定為provided,因此執行設定中勾選下面這項
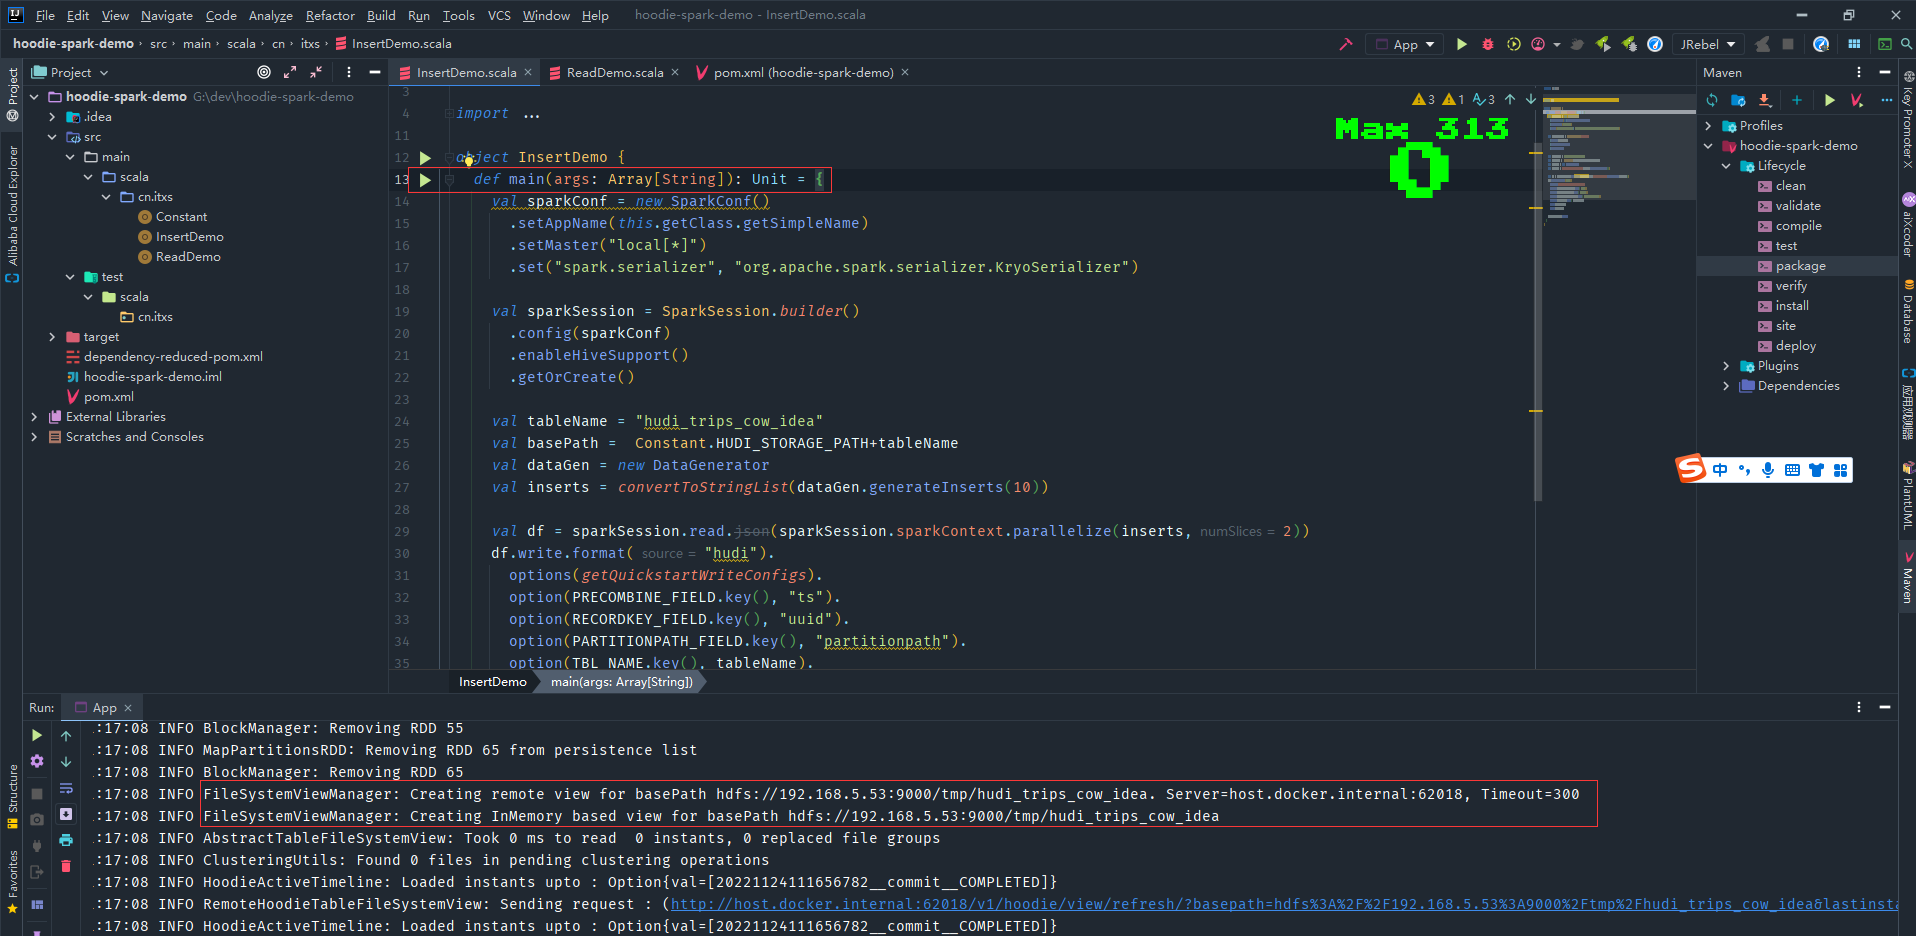
執行InsertDemo程式寫入hudi資料
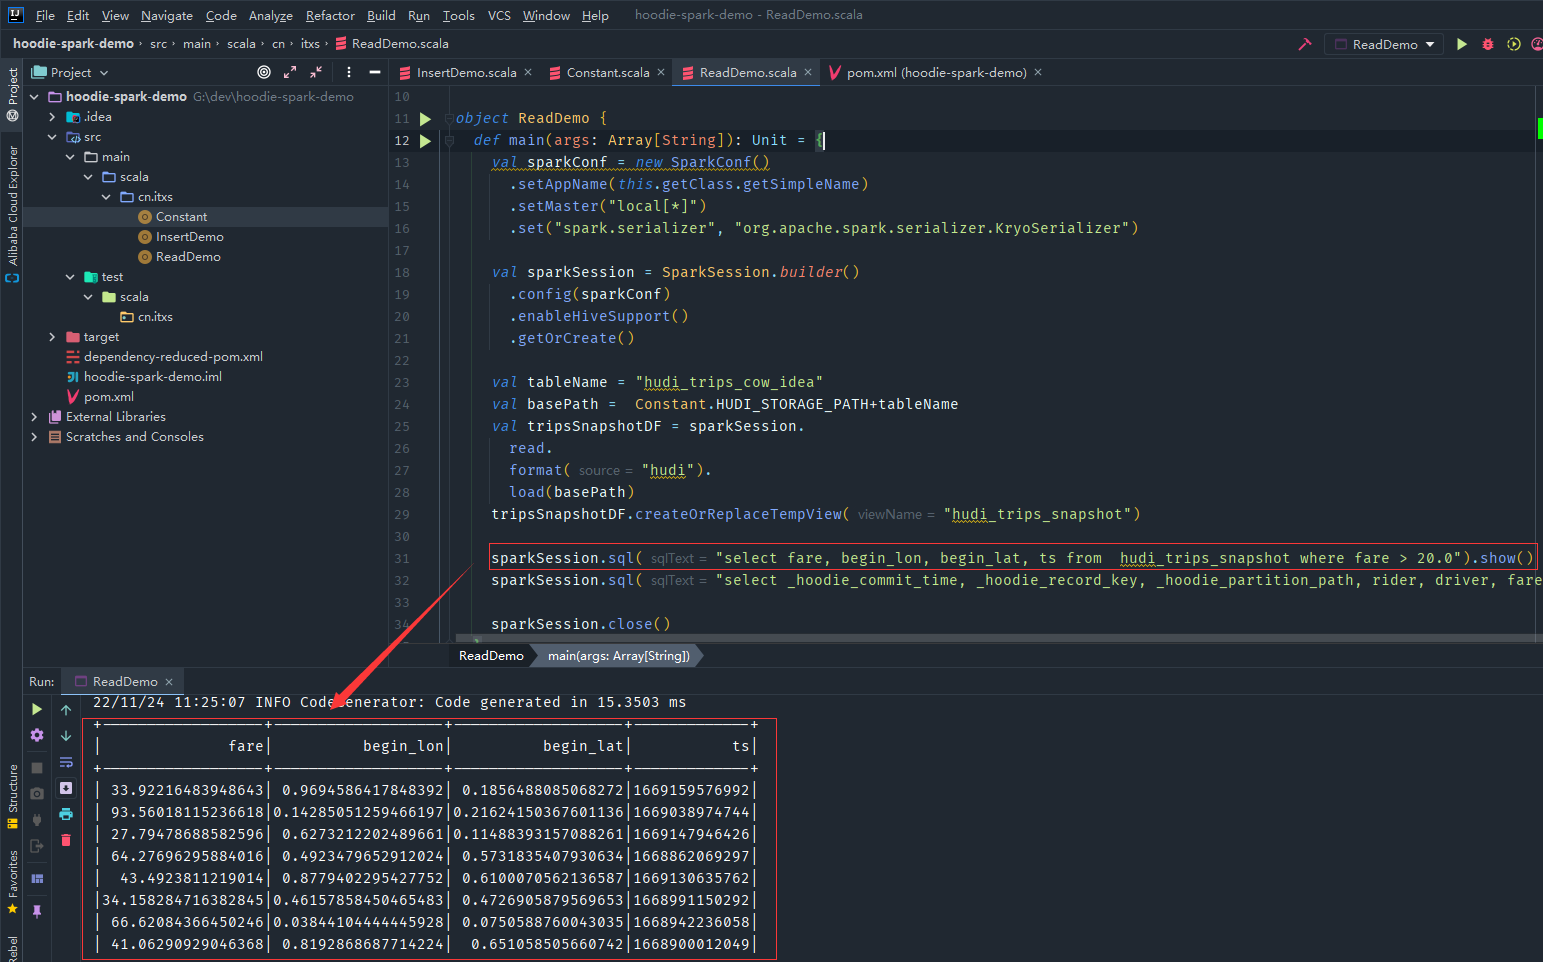
執行ReadDemo程式讀取hudi資料
通過mvn clean package打包後上傳執行
spark-submit \
--class cn.itxs.ReadDemo \
/home/commons/spark-3.3.0-bin-hadoop3/appjars/hoodie-spark-demo-1.0.jar
DeltaStreamer
HoodieDeltaStreamer實用程式(hudi-utilities-bundle的一部分)提供了從不同源(如DFS或Kafka)中獲取的方法,具有以下功能。
- 從Kafka的新事件,從Sqoop的增量匯入或輸出HiveIncrementalPuller或DFS資料夾下的檔案。
- 支援json, avro或自定義記錄型別的傳入資料。
- 管理檢查點、回滾和恢復。
- 利用來自DFS或Confluent模式註冊中心的Avro模式。
- 支援插入轉換。
# 拷貝hudi-utilities-bundle_2.12-0.12.1.jar到spark的jars目錄
cp /home/commons/hudi-release-0.12.1/packaging/hudi-utilities-bundle/target/hudi-utilities-bundle_2.12-0.12.1.jar jars/
# 檢視幫助檔案,引數非常多,可以在有需要使用的時候查閱
spark-submit --class org.apache.hudi.utilities.deltastreamer.HoodieDeltaStreamer /home/commons/spark-3.3.0-bin-hadoop3/jars/hudi-utilities-bundle_2.12-0.12.1.jar --help
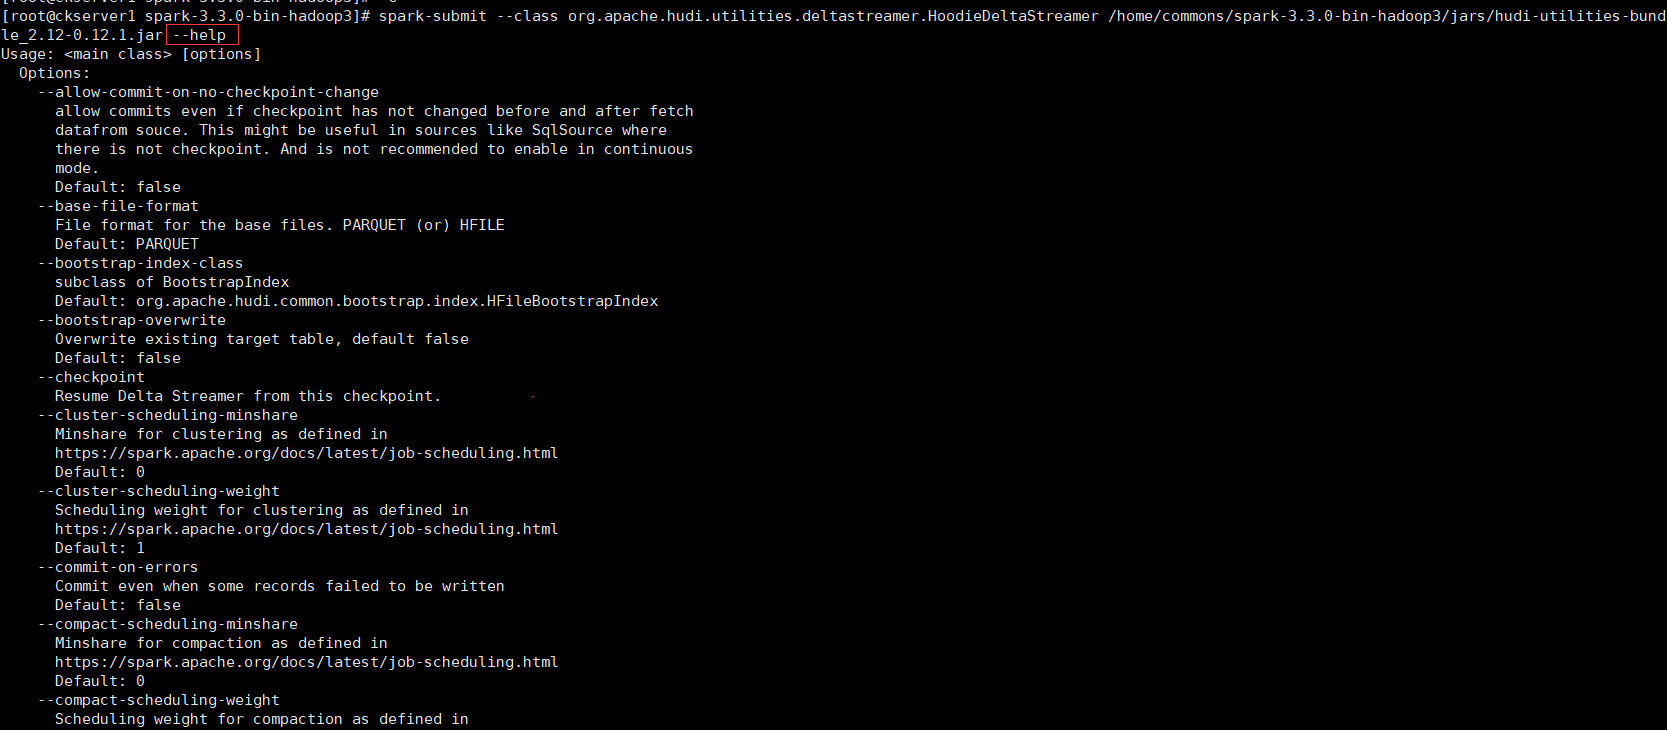
該工具採用層次結構組成的屬性檔案,並具有提取資料、金鑰生成和提供模式的可插入介面。在hudi-下提供了從kafka和dfs中攝取的範例設定
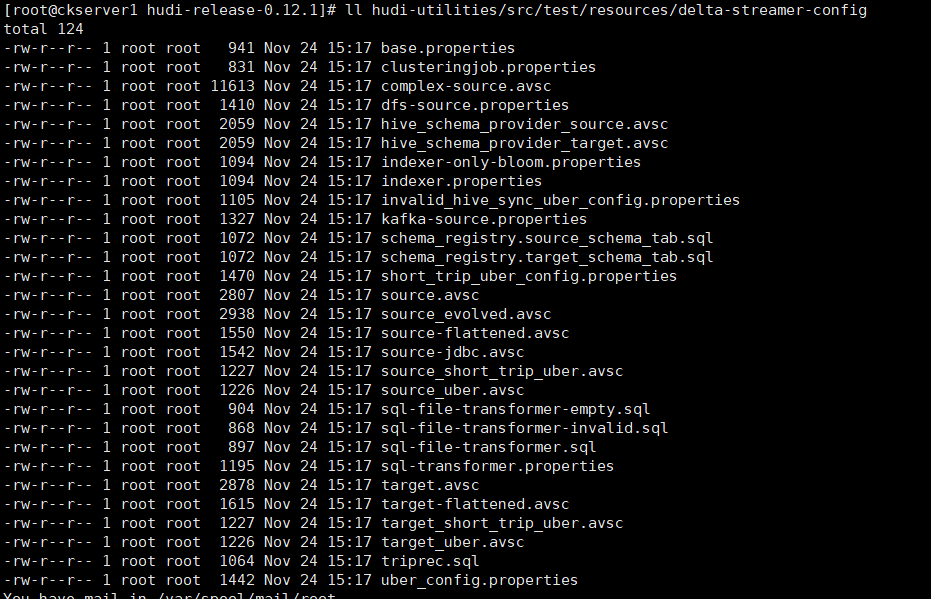
接下里以File Based Schema Provider和JsonKafkaSoiurce為範例演示如何使用
# 建立topic
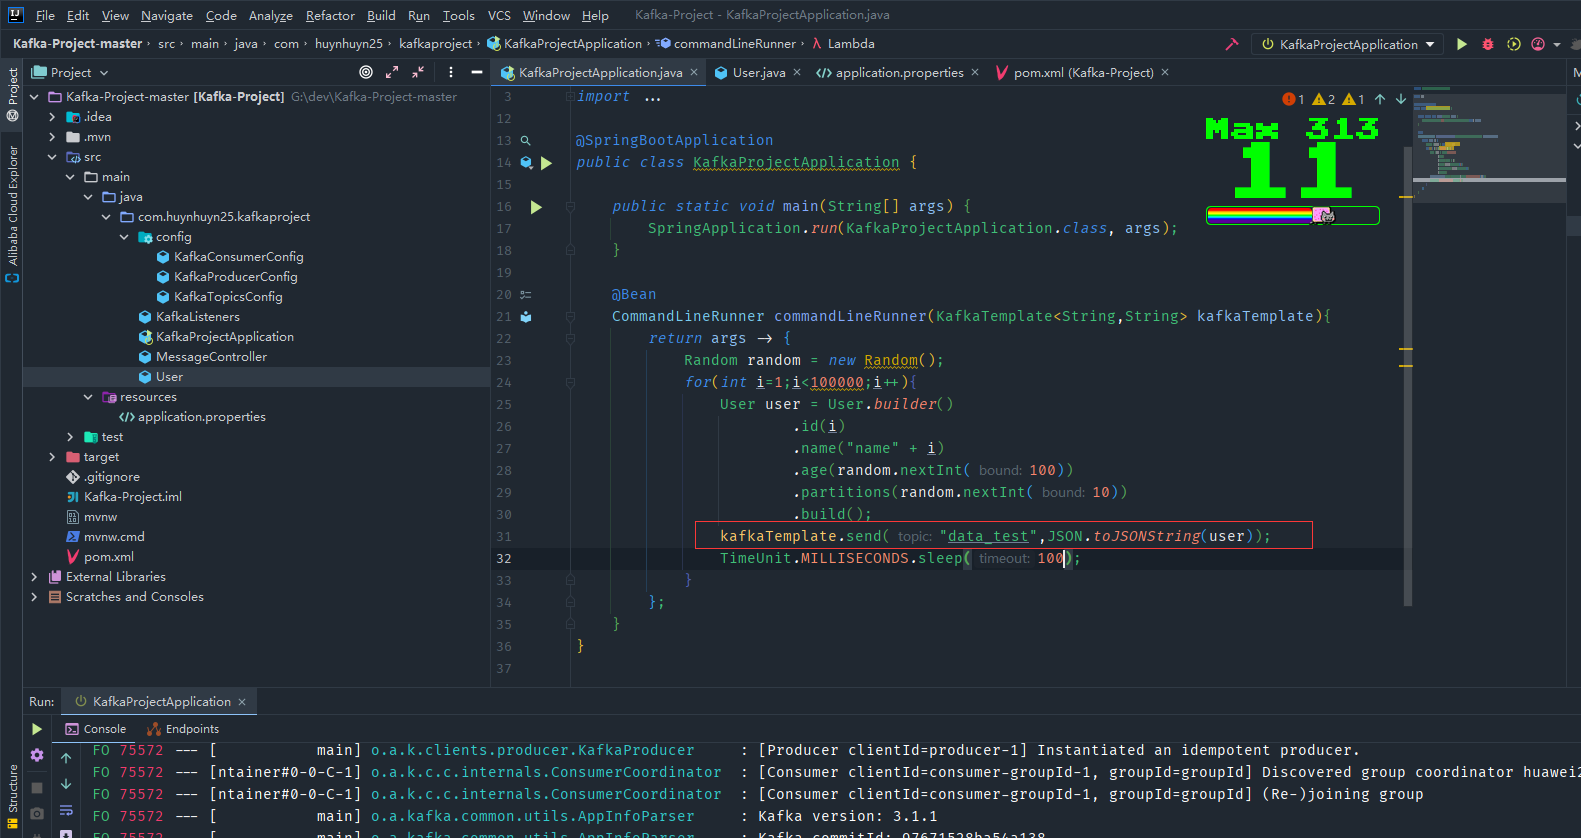
bin/kafka-topics.sh --zookeeper zk1:2181,zk2:2181,zk3:2181 --create --partitions 1 --replication-factor 1 --topic data_test
然後編寫demo程式持續向這個kafka的topic傳送訊息
# 建立一個組態檔目錄
mkdir /home/commons/hudi-properties
# 拷貝範例組態檔
cp hudi-utilities/src/test/resources/delta-streamer-config/kafka-source.properties /home/commons/hudi-properties/
cp hudi-utilities/src/test/resources/delta-streamer-config/base.properties /home/commons/hudi-properties/
定義avro所需的schema檔案包括source和target,建立source檔案 vim source-json-schema.avsc
{
  "type" : "record",
  "name" : "Profiles",
  "fields" : [
      {
        "name" : "id",
        "type" : "long"
      }, {
        "name" : "name",
        "type" : "string"
      }, {
         "name" : "age",
         "type" : "int"
      },  {
        "name" : "partitions",
        "type" : "int"
      }
  ]
}
拷貝一份為target檔案
cp source-json-schema.avsc target-json-schema.avsc
修改kafka-source.properties的設定如下
include=hdfs://hadoop2:9000/hudi-properties/base.properties
# Key fields, for kafka example
hoodie.datasource.write.recordkey.field=id
hoodie.datasource.write.partitionpath.field=partitions
# schema provider configs
#hoodie.deltastreamer.schemaprovider.registry.url=http://localhost:8081/subjects/impressions-value/versions/latest
hoodie.deltastreamer.schemaprovider.source.schema.file=hdfs://hadoop2:9000/hudi-properties/source-json-schema.avsc
hoodie.deltastreamer.schemaprovider.target.schema.file=hdfs://hadoop2:9000/hudi-properties/target-json-schema.avsc
# Kafka Source
#hoodie.deltastreamer.source.kafka.topic=uber_trips
hoodie.deltastreamer.source.kafka.topic=data_test
#Kafka props
bootstrap.servers=kafka1:9092,kafka2:9092,kafka3:9092
auto.offset.reset=earliest
#schema.registry.url=http://localhost:8081
group.id=mygroup
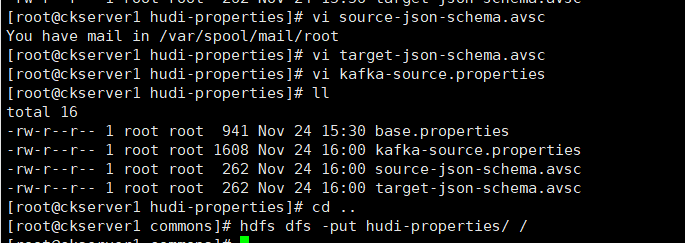
將本地hudi-properties資料夾上傳到HDFS
cd ..
hdfs dfs -put hudi-properties/ /
# 執行匯入命令
spark-submit \
--class org.apache.hudi.utilities.deltastreamer.HoodieDeltaStreamer \
/home/commons/spark-3.3.0-bin-hadoop3/jars/hudi-utilities-bundle_2.12-0.12.1.jar \
  --props hdfs://hadoop2:9000/hudi-properties/kafka-source.properties \
  --schemaprovider-class org.apache.hudi.utilities.schema.FilebasedSchemaProvider \
  --source-class org.apache.hudi.utilities.sources.JsonKafkaSource \
  --source-ordering-field id \
  --target-base-path hdfs://hadoop2:9000/tmp/hudi/user_test \
  --target-table user_test \
  --op BULK_INSERT \
  --table-type MERGE_ON_READ
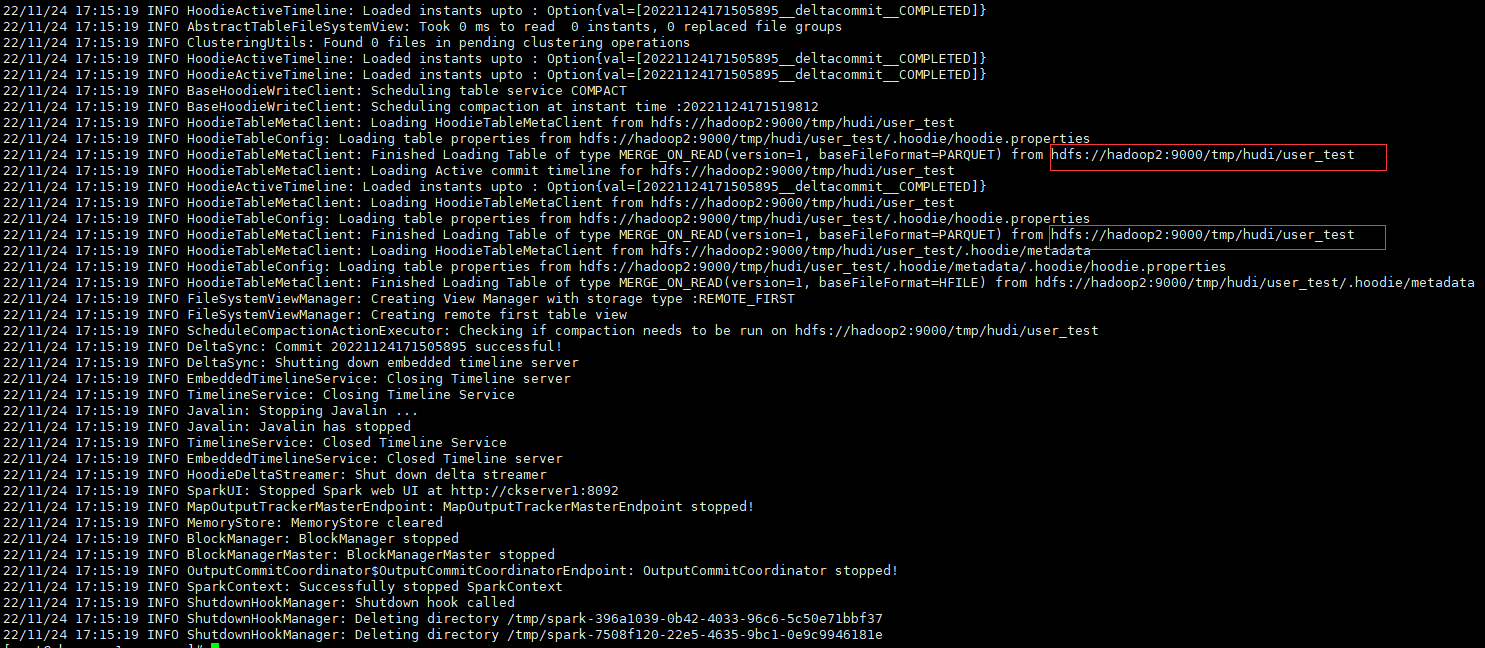
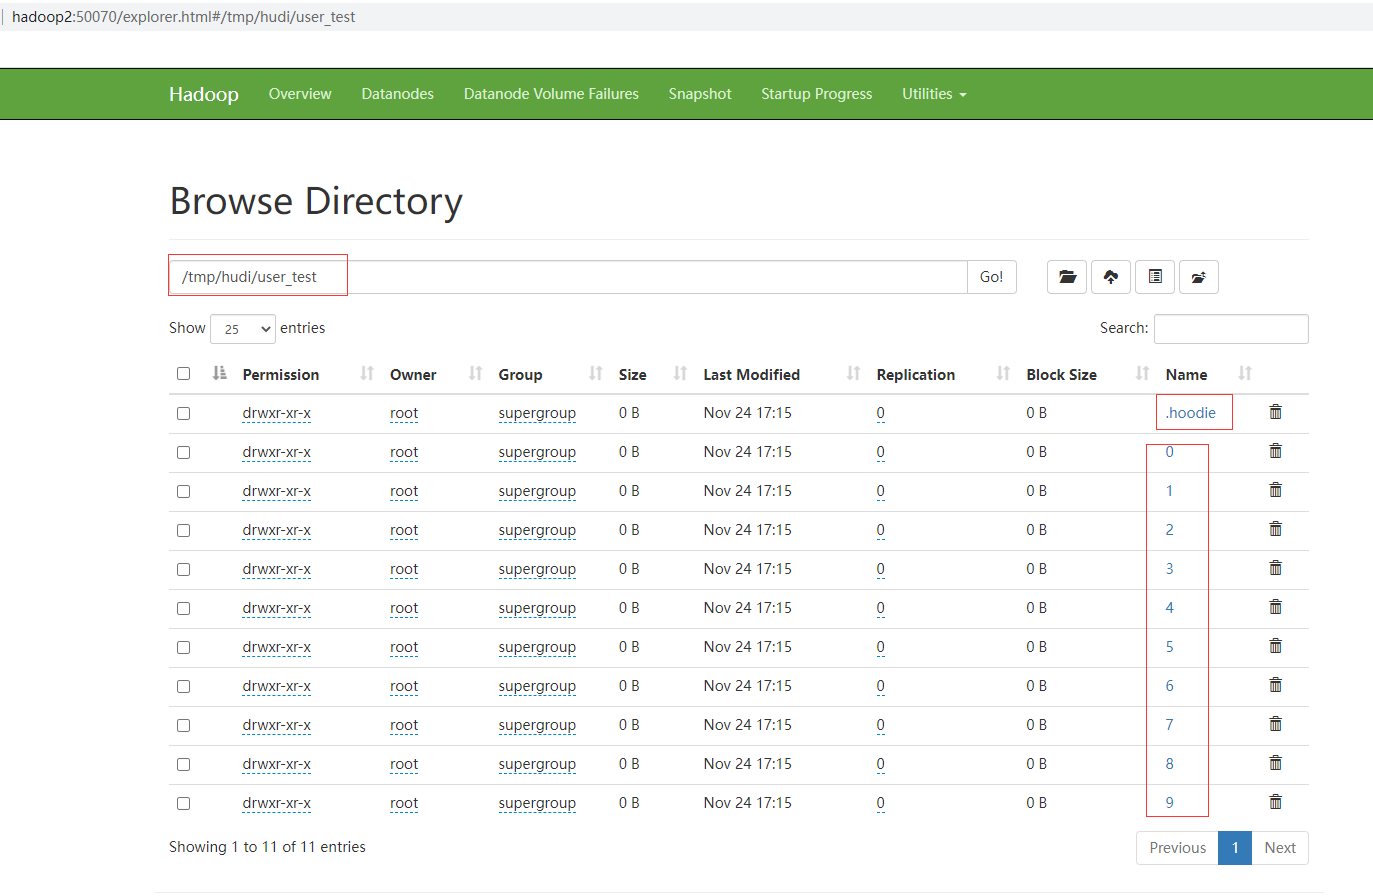
檢視hdfs目錄已經有表目錄和分割區目錄
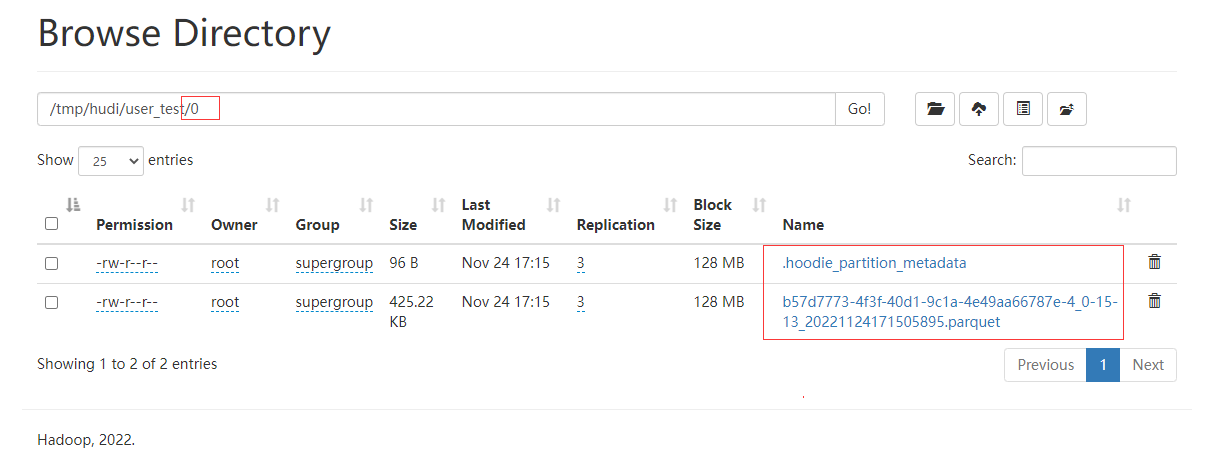
通過spark-sql查詢從kafka攝取的資料
use hudi_spark;
create table user_test using hudi
location 'hdfs://hadoop2:9000/tmp/hudi/user_test';
select * from user_test limit 10;

整合Flink
環境準備
# 解壓進入flink目錄,這裡我就用之前flink的環境,詳細可以檢視之前關於flink的文章
cd /home/commons/flink-1.15.1
# 拷貝編譯好的jar到flink的lib目錄
cp /home/commons/hudi-release-0.12.1/packaging/hudi-flink-bundle/target/hudi-flink1.15-bundle-0.12.1.jar lib/

# 拷貝guava包,解決依賴衝突
cp /home/commons/hadoop/share/hadoop/common/lib/guava-27.0-jre.jar lib/
# 設定hadoop環境變數和啟動hadoop
export HADOOP_CLASSPATH=`$HADOOP_HOME/bin/hadoop classpath`
sql-clent使用
啟動
修改組態檔 vi conf/flink-conf.yaml
classloader.check-leaked-classloader: false
taskmanager.numberOfTaskSlots: 4
state.backend: rocksdb
state.checkpoints.dir: hdfs://hadoop2:9000/checkpoints/flink
state.backend.incremental: true
execution.checkpointing.interval: 5min
- local 模式
修改workers檔案,也可以多配製幾個(偽分散式或完全分散式),官方提供範例是4個
localhost
localhost
localhost
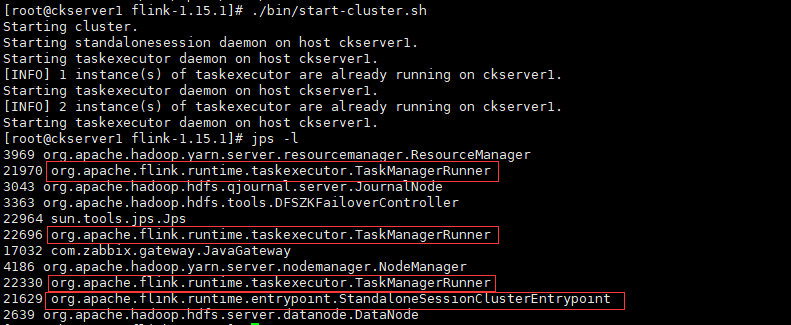
# 在本機上啟動三個TaskManagerRunner和一個Standalone偽分散式叢集
./bin/start-cluster.sh
# 檢視程序確認
jps -l
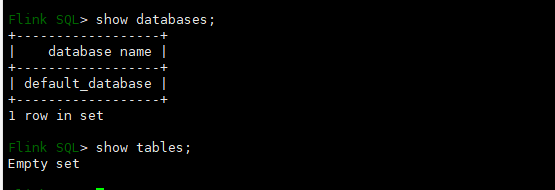
# 啟動內嵌的flink sql使用者端
./bin/sql-client.sh embedded
show databases;
show tables;
-
yarn-session 模式
- 解決依賴衝突問題
# 拷貝jar到flink的lib目錄 cp /home/commons/hadoop/share/hadoop/mapreduce/hadoop-mapreduce-client-core-3.3.4.jar lib/- 啟動yarn-session
# 先停止上面啟動Standalone偽分散式叢集
./bin/stop-cluster.sh
# 啟動yarn-session分散式叢集
./bin/yarn-session.sh --detached
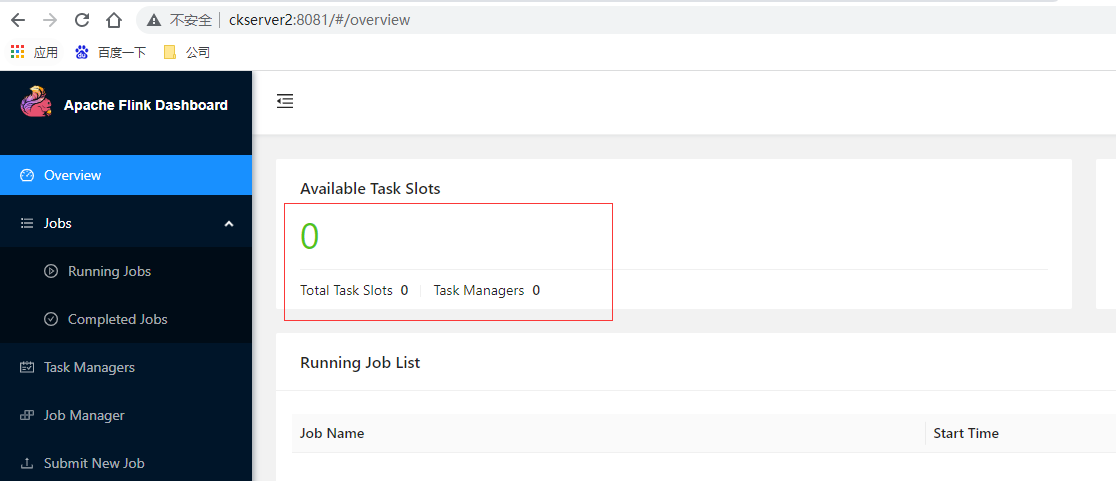
檢視yarn上已經有一個Flink session叢集job, ID為application_1669357770610_0015

檢視Flink的Web UI可用TaskSlots為0,可確認已切換為yarn管理資源非分配
- 啟動sql-client
# 由於使用內嵌模式管理後設資料,後設資料是儲存在記憶體中,關閉sql-client後則後設資料也會消失,生產環境建議使用如Hive後設資料管理方式,後面再做設定
./bin/sql-client.sh embedded -s yarn-session
show databases;
show tables;
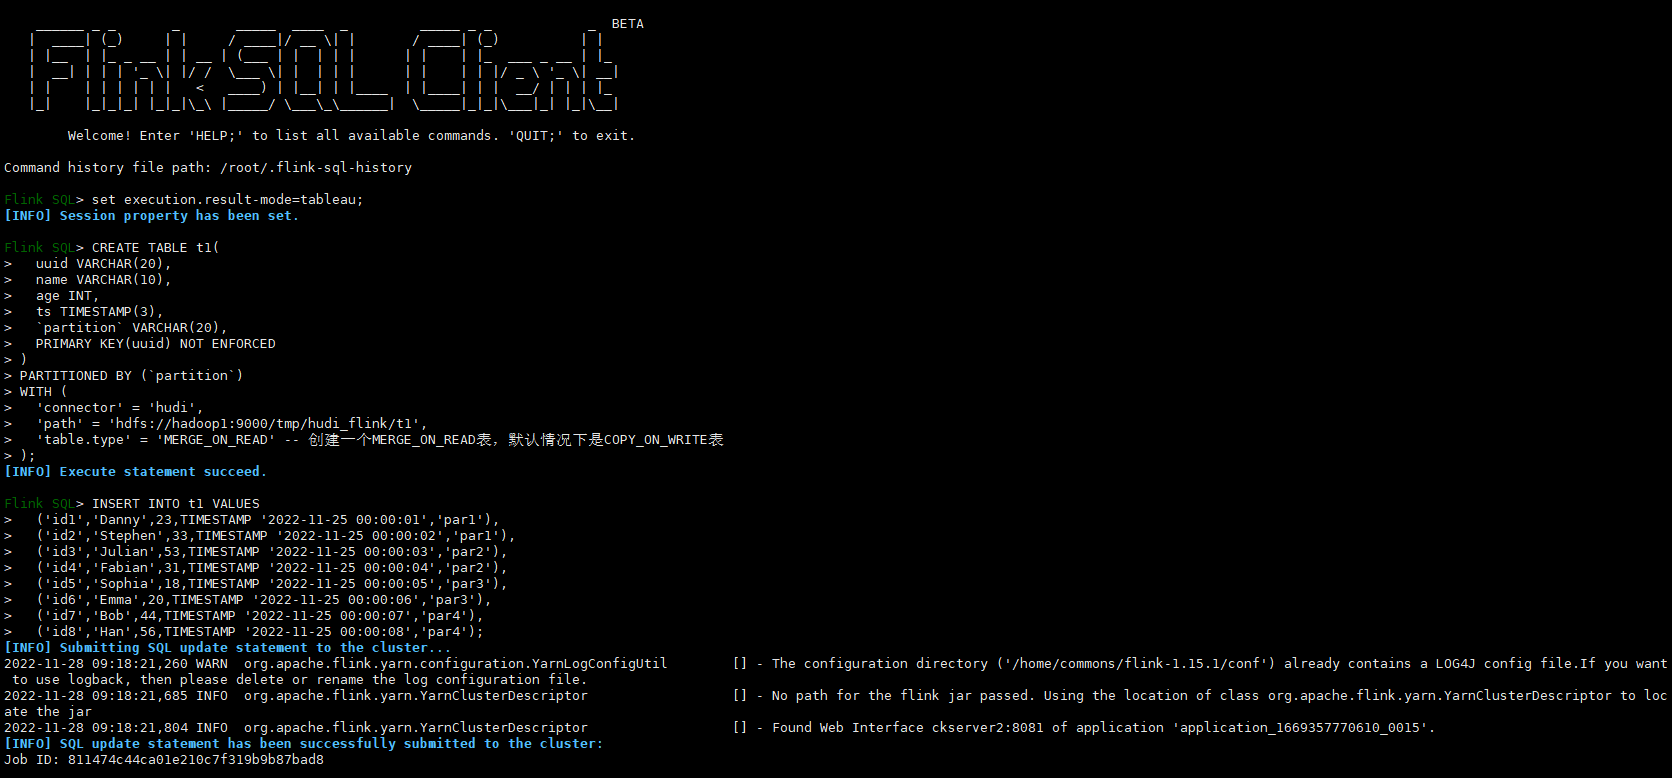
插入資料
CREATE TABLE t1(
  uuid VARCHAR(20),
  name VARCHAR(10),
  age INT,
  ts TIMESTAMP(3),
  `partition` VARCHAR(20),
  PRIMARY KEY(uuid) NOT ENFORCED
)
PARTITIONED BY (`partition`)
WITH (
  'connector' = 'hudi',
  'path' = 'hdfs://hadoop1:9000/tmp/hudi_flink/t1',
  'table.type' = 'MERGE_ON_READ' -- 建立一個MERGE_ON_READ表,預設情況下是COPY_ON_WRITE表
);
-- 插入資料
INSERT INTO t1 VALUES
  ('id1','Danny',23,TIMESTAMP '2022-11-25 00:00:01','par1'),
  ('id2','Stephen',33,TIMESTAMP '2022-11-25 00:00:02','par1'),
  ('id3','Julian',53,TIMESTAMP '2022-11-25 00:00:03','par2'),
  ('id4','Fabian',31,TIMESTAMP '2022-11-25 00:00:04','par2'),
  ('id5','Sophia',18,TIMESTAMP '2022-11-25 00:00:05','par3'),
  ('id6','Emma',20,TIMESTAMP '2022-11-25 00:00:06','par3'),
  ('id7','Bob',44,TIMESTAMP '2022-11-25 00:00:07','par4'),
  ('id8','Han',56,TIMESTAMP '2022-11-25 00:00:08','par4');
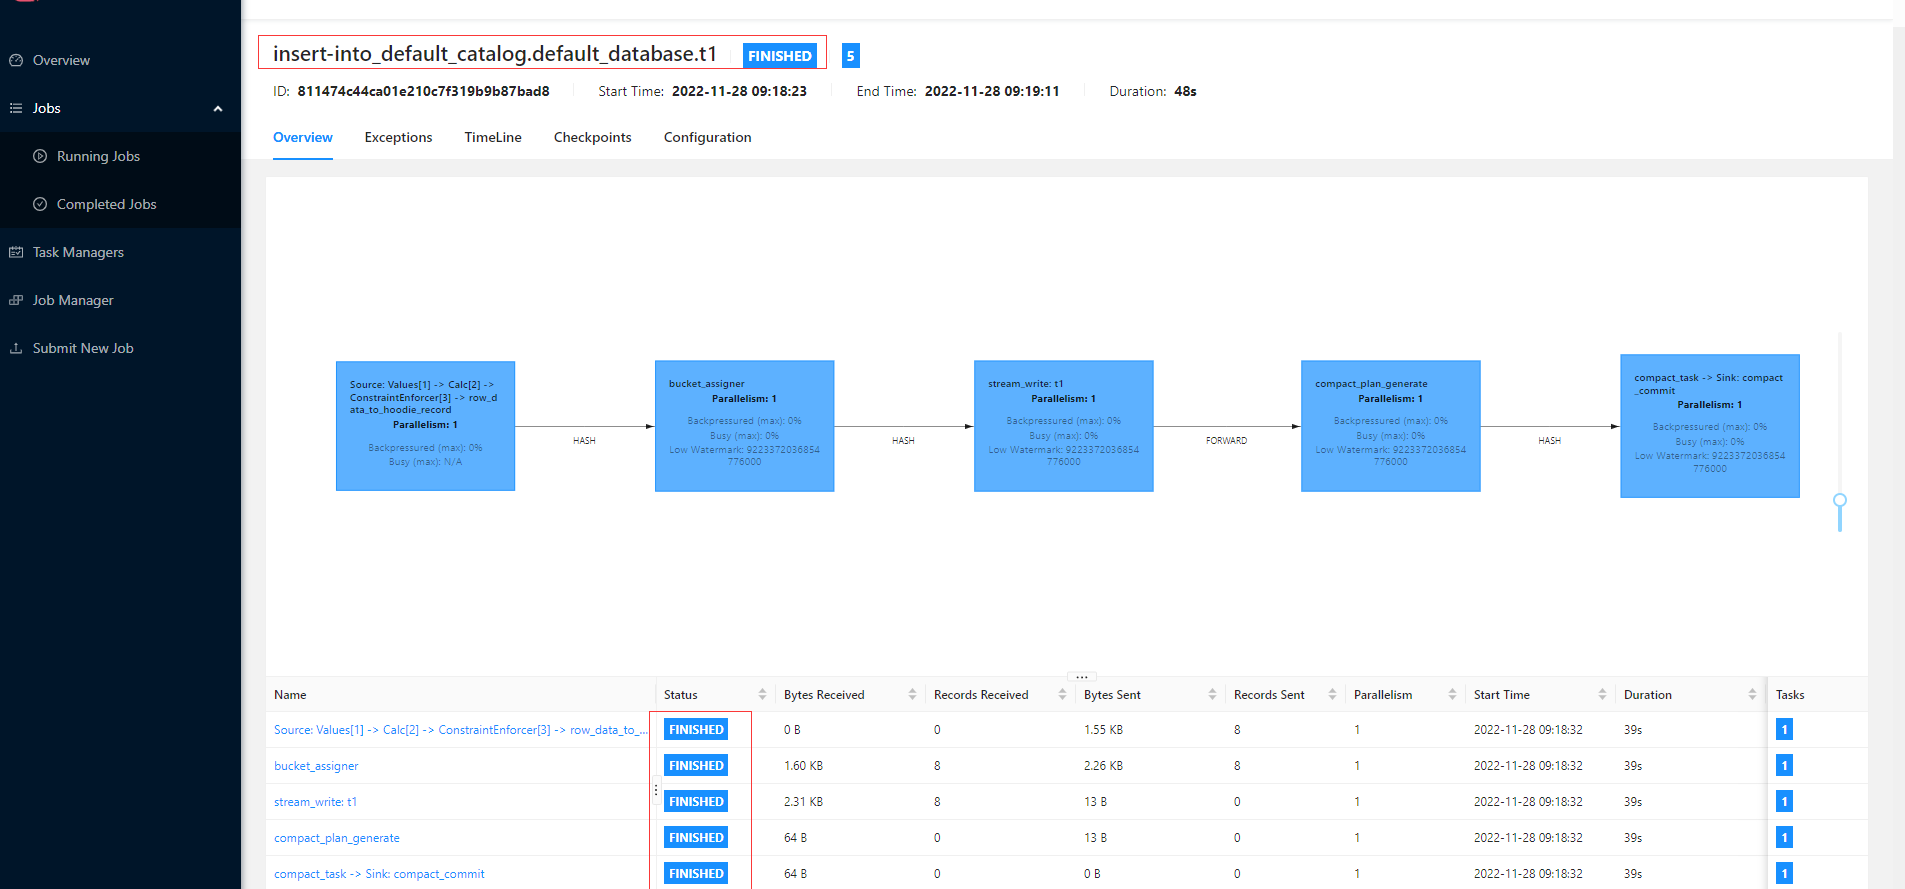
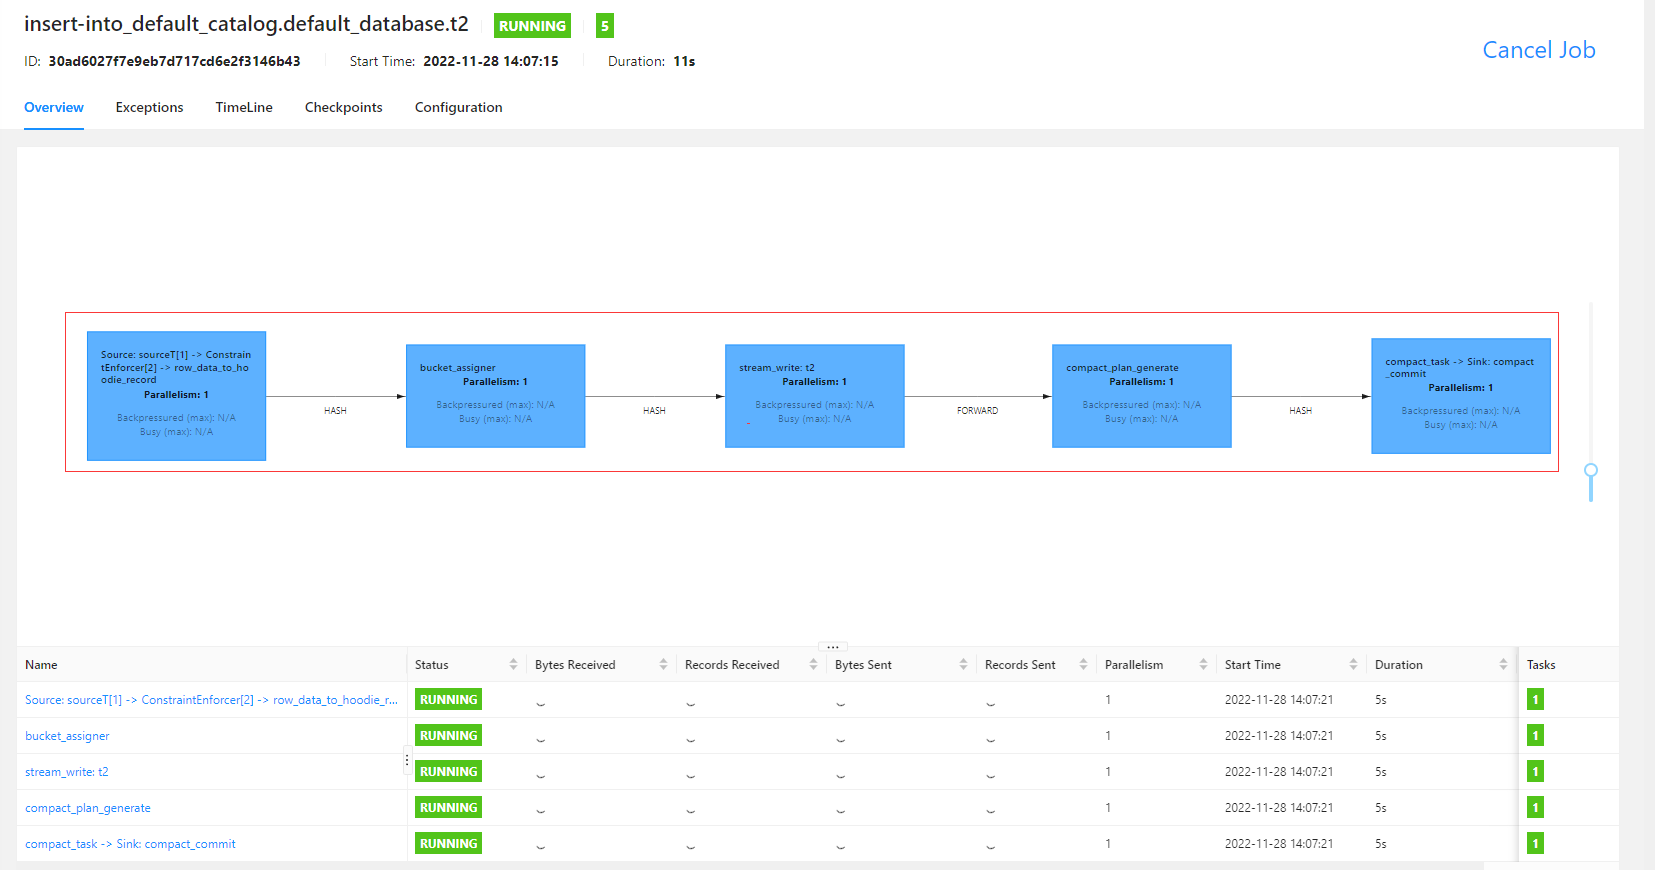
檢視Flink Web UI Job的資訊

# 查詢資料
select * from t1;

# 更新資料
INSERT INTO t1 VALUES
  ('id1','Danny',28,TIMESTAMP '2022-11-25 00:00:01','par1');
# 查詢資料
select * from t1;

流式讀取
-- 設定結果模式為tableau,在CLI中直接顯示結果;另外還有table和changelog;changelog模式可以獲取+I,-U之類動作資料;
set 'sql-client.execution.result-mode' = 'tableau';
CREATE TABLE sourceT (
  uuid varchar(20),
  name varchar(10),
  age int,
  ts timestamp(3),
  `partition` varchar(20),
  PRIMARY KEY(uuid) NOT ENFORCED
) WITH (
  'connector' = 'datagen',
  'rows-per-second' = '1'
);

CREATE TABLE t2 (
  uuid varchar(20),
  name varchar(10),
  age int,
  ts timestamp(3),
  `partition` varchar(20),
  PRIMARY KEY(uuid) NOT ENFORCED
)
WITH (
'connector' = 'hudi',
'path' = 'hdfs://hadoop1:9000/tmp/hudi_flink/t2',
'table.type' = 'MERGE_ON_READ',
'read.streaming.enabled' = 'true',
'read.streaming.check-interval' = '4'
);

insert into t2 select * from sourceT;
select * from t2;

Bucket索引
在0.11.0增加了一種高效、輕量級的索引型別bucket index,其為位元組貢獻回饋給hudi社群。
- Bucket Index是一種Hash分配方式,根據指定的索引欄位,計算hash值,然後結合Bucket個數,均勻分配到具體的檔案中。Bucket Index支援巨量資料量場景下的更新,Bucket Index也可以對資料進行分桶儲存,但是對於桶數的計算是需要根據當前資料量的大小進行評估的,如果後續需要re-hash的話成本也會比較高。在這裡我們預計通過建立Extensible Hash Index來提高雜湊索引的可延伸能力。
- 要使用此索引,請將索引型別設定為BUCKET並設定hoodie.storage.layout.partitioner.class為
org.apache.hudi.table.action.commit.SparkBucketIndexPartitioner。對於 Flink,設定index.type=BUCKET. - 該方式相比於BloomIndex在元素定位效能高很多,缺點是Bucket個數無法動態擴充套件。另外Bucket不適合於COW表,否則會導致寫放大更嚴重。
- 實時入湖寫入的效能要求高的場景建議採用Bucket索引。
Hudi Catalog
前面基於內容管理hudi後設資料的方式每次重啟sql使用者端就丟掉了,Hudi Catalog則是可以持久化後設資料;Hudi Catalog支援多種模式,包括dfs和hms,hudi還可以直接叢集hive使用,後續再一步步演示,現在先簡單看下dfs模式的Hudi Catalog,先新增啟動sql檔案,vim conf/sql-client-init.sql
create catalog hudi_catalog
with(
'type' = 'hudi',
'mode' = 'dfs',
'catalog.path'='/tmp/hudi_catalog'
);
use catalog hudi_catalog;

create catalog hudi_catalog
with(
'type' = 'hudi',
'mode' = 'hms',
'hive.conf.dir'='/etc/hive/conf'
);
建立目錄並啟動,建表測試
hdfs dfs -mkdir /tmp/hudi_catalog
./bin/sql-client.sh embedded -i conf/sql-client-init.sql -s yarn-session
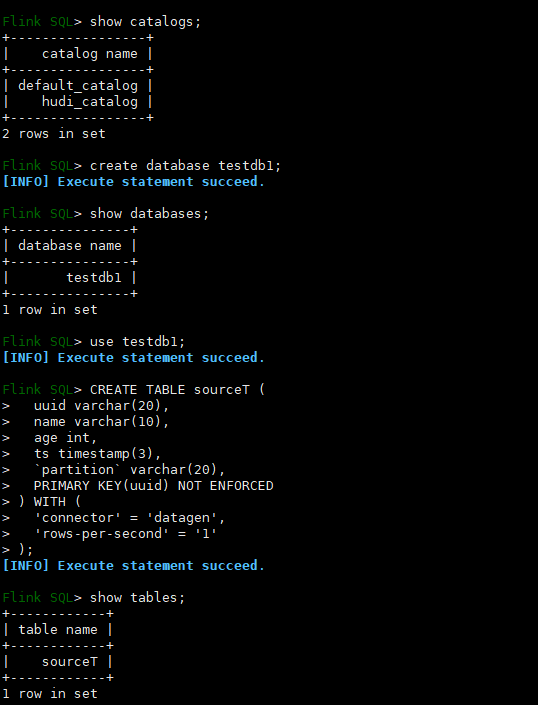
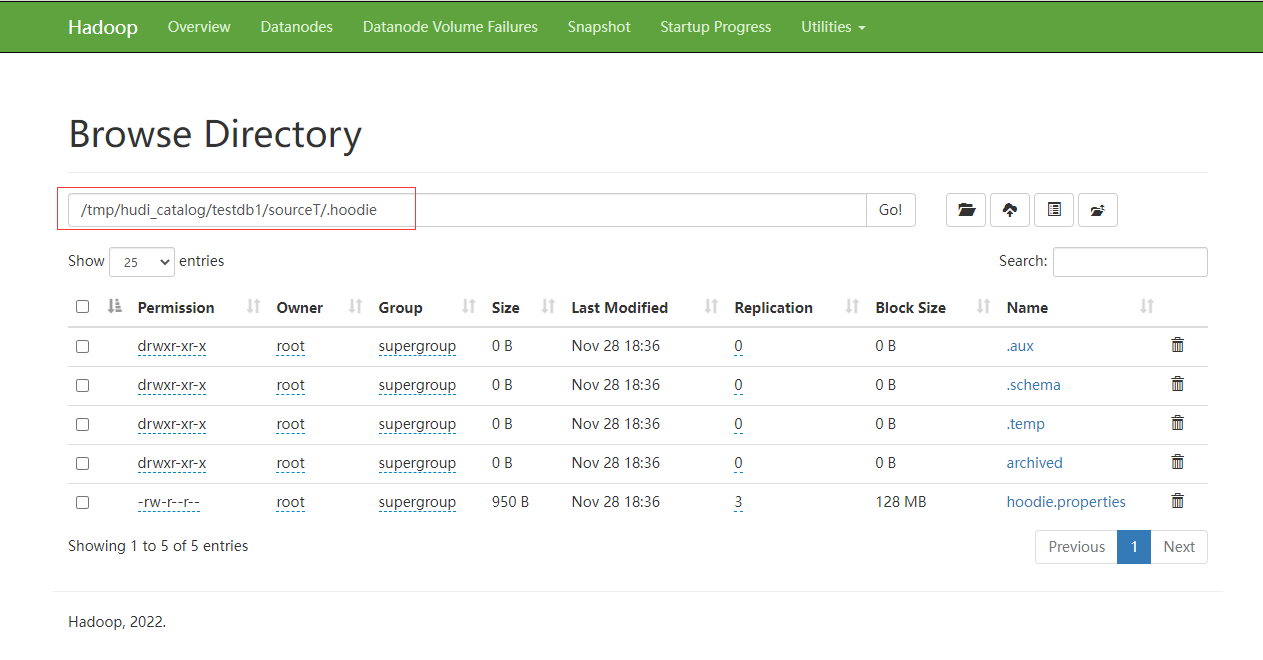
檢視hdfs的資料如下,退出使用者端後重新登入使用者端還可以查到上面的hudi_catalog及其庫和表的資料。
本人部落格網站IT小神 www.itxiaoshen.com