PHP+Referer實現圖片防盜鏈!(附範例程式碼)
1、圖片防盜鏈
在一些大型網站中,比如百度貼吧,該站點的圖片採用了防盜鏈的規則,以至於使用下面程式碼會發生錯誤。【推薦:】
簡單程式碼:
<!DOCTYPE html>
<html>
<head>
<meta charset="utf-8">
<meta http-equiv="X-UA-Compatible" content="IE=edge">
<title></title>
<link rel="stylesheet" href="">
</head>
<body>
<!--參照一張百度貼吧的圖片-->
<img src="http://imgsrc.baidu.com/forum/pic/item/03a4462309f79052204229be04f3d7ca7acbd5d5.jpg"/>
</body>
</html>
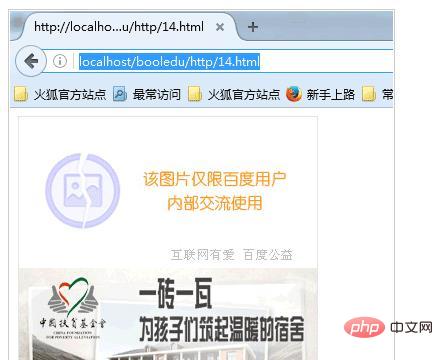
登入後複製出現的問題:

php入門到就業線上直播課:進入學習
Apipost = Postman + Swagger + Mock + Jmeter 超好用的API偵錯工具:
出錯的原因
主要是該站點的圖片採用了防盜鏈的規則,其實這個規則也比較簡單, 和大家一說就知道啦,主要是該站點在得知有請求時,會先判斷請求頭中的資訊,如果請求頭中有Referer資訊,然後根據自己的規則來判斷Referer頭資訊是否符合要求,Referer 資訊是請求該圖片的來源地址。
瀏覽器中的請求頭資訊:
(1)正常使用百度貼吧檢檢視片的請求頭資訊

(2)我的程式碼的頭資訊

相信讀者看到這,也就明白了,為什麼我的程式碼不能存取到圖片,而是顯示一張警告盜鏈圖片,因為我們的Referer頭資訊和百度貼吧的不同,當我的請求發出去時,該站點檢視Referer頭資訊,一看來源不是本站,就重定向到另外一張圖片了。
給自己的站點設定圖片防盜鏈:
(1)在web伺服器中開啟mod_rewrite模組
#LoadModule rewrite_module modules/mod_rewrite.so,//將前面的#給去掉,然後重新啟動伺服器
(2)在需要防盜的網站或目錄中,寫.htaccess檔案,並指定防盜鏈規則
步驟:
新建一個.htaccess檔案,在windows中使用另存為的方式來新建此檔案
查詢手冊,在.htaccess檔案中利用正則判斷
指定規則:
如果是圖片資源且referer頭資訊是來自於本站,則通過
重寫規則如下:
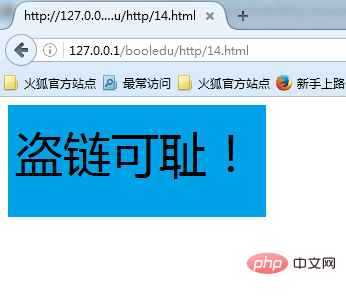
假定我的伺服器是localhost,規則的意思是,如果請求的是圖片資源,但是請求來源不是本站的話,就重定向到當前目錄的一張no.png的圖片上
RewriteEngine On
RewriteCond %{SCRIPT_FILENAME} .*\.(jpg|jpeg|png|gif) [NC]
RewriteCond %{HTTP_REFERER} !localhost [NC]
RewriteRule .* no.png
來自localhost的存取:

來自於其他站點的存取:

至此,關於防盜鏈的知識我們學完了,但是不急,既然是一個請求頭,當然是可以偽造的,下面我們來說一下反防盜鏈的規則。
2、反防盜鏈
上面我的伺服器設定了圖片防盜鏈,現在以它來講解反防盜鏈,如果我們在採集圖片的時候,遇到使用防盜鏈技術的站點,我們可以在採集圖片的時候偽造一個Referer頭資訊。
下面的程式碼是從一個設定了圖片防盜鏈的站點下載一張圖片。
<?php
/**
 * 下載圖片
 * @author webbc
 */
require './Http.class.php';//這個類是我自己封裝的一個用於HTTp請求的類
$http = new Http("http://localhost/booledu/http/apple.jpg");
//$http->setHeader('Referer:http://tieba.baidu.com/');//設定referer頭
$res = $http->get();
$content = strstr($res,"\r\n\r\n");
file_put_contents('./toutupian.jpg',substr($content,4));
echo "ok";
?>登入後複製
不加Referer頭資訊下載的結果:

加Referer頭資訊下載的結果:

相應大家看到這,應該能看出來如何反防盜鏈吧,其實就是加上一個Referer頭資訊,那麼,每個站點的Referer頭資訊從哪裡找呢?這個應該抓包分析就可以得出來了!
3、封裝的Http請求類
<?php
/**
 * Http請求類
 * @author webbc
 */
class Http{
  const CRTF = "\r\n";
  private $errno = -1;
  private $errstr = '';
  private $timeout = 5;
  private $url = null;//解析後的url陣列
  private $version = 'HTTP/1.1';//http版本
  private $requestLine = array();//請求行資訊
  private $header = array();//請求頭資訊
  private $body = array();//請求實體資訊
  private $fh = null;//連線埠後返回的資源
  private $response = '';//返回的結果
  //建構函式
  public function __construct($url){
    $this->connect($url);
    $this->setHeader('Host:'.$this->url['host']);//設定頭資訊
  }
  //通過URL進行連線
  public function connect($url){
    $this->url = parse_url($url);//解析url
    if(!isset($this->url['port'])){
      $this->url['port'] = 80;
    }
    $this->fh = fsockopen($this->url['host'],$this->url['port'],$this->errno,$this->errstr,$this->timeout);
  }
  //設定請求行資訊
  public function setRequestLine($method){
    $this->requestLine[0] = $method.' '.$this->url['path'].' '.$this->version;
  }
  //設定請求頭資訊
  public function setHeader($headerLine){
    $this->header[] = $headerLine;
  }
  //設定請求實體資訊
  public function setBody($body){
    $this->body[] = http_build_query($body);
  }
  //傳送get請求
  public function get(){
    $this->setRequestLine('GET');//設定請求行
    $this->request();//傳送請求
    $this->close();//關閉連線
    return $this->response;
  }
  //傳送請求
  private function request(){
    //拼接請求的全部資訊
    $reqestArr = array_merge($this->requestLine,$this->header,array(''),$this->body,array(''));
    $req = implode(self::CRTF,$reqestArr);
    //print_r($req);die;
    fwrite($this->fh,$req);//寫入資訊
    //讀取
    while(!feof($this->fh)){
      $this->response .= fread($this->fh,1024);
    }
  }
  //傳送post請求
  public function post($body = array()){
    //設定請求行
    $this->setRequestLine("POST");
    //設定實體資訊
    $this->setBody($body);
    //設定Content-Type
    $this->setHeader('Content-Type:application/x-www-form-urlencoded');
    //設定Content-Length
    $this->setHeader('Content-Length:'.strlen($this->body[0]));
    //請求
    $this->request();
    $this->close();//關閉連線
    return $this->response;
  }
  //關閉連線
  public function close(){
    fclose($this->fh);
  }
}
//測試get
// $http = new Http("http://news.163.com/16/0915/10/C10ES2HA00014PRF.html");
// $result = $http->get();
// echo $result;
//測試post
/*set_time_limit(0);
$str = 'abcdefghijklmnopqrstuvwxyz0123456789';
while(true){
  $http = new Http("http://211.70.176.138/yjhx/message.php");
  $str = str_shuffle($str);
  $username = substr($str,0,5);
  $email = substr($str,5,10).'@qq.com';
  $content = substr($str,10);
  $message = "發表";
  $http->post(array('username'=>$username,'email'=>$email,'content'=>$content,'message'=>$message));
  //sleep(0.1);
}*/
?>登入後複製
以上就是PHP+Referer實現圖片防盜鏈!(附範例程式碼)的詳細內容,更多請關注TW511.COM其它相關文章!
