雲原生之旅
前言
前面有幾篇文章講述瞭如何使用Terraform建立資源 (基礎設施即程式碼 Terraform 快速入門, 使用 Terraform 建立 Kubernetes) 以及 Kubernetes時代的包管理工具 Helm 裡也講述瞭如何用Terraform 安裝 Helm Charts,但我們都是在local 執行Terrafrom的,那麼有什麼辦法自動化整個流程呢?並且讓這些基礎設施的程式碼也需要走Pull Request Review 評審。
這時候推薦一款利器:開源工具 Atlantis,在程式碼提交時自動執行terraform plan命令,並將 plan命令的輸出新增到pull request的註釋中,經過團隊夥伴Approve之後,才能執行terraform apply 變更資源,資源apply 成功之後,程式碼合併到master分支,整個流程遵循GitOps的最佳實踐。換句話說就是我們使用了 Atlantis 為 Terraform 實現 GitOps。
Atlantis 在國內的文章很少,本篇文章就給大家詳細的介紹下如何使用這款利器。
關鍵詞:Terraform自動化,Atlantis入門,Atlantis範例,Terraform Pull Request Automation, Terraform基礎設施自動化
安裝
前提條件
* Kubernetes 我用的GKE 1.22
* 準備一個common github user, 也可以用自己的賬號
* 隨機生成一個 Webhook Secret
* kubectl 建一個 generic secret 供Atlantis使用
echo -n "xxx" > ghUser
echo -n "xxx" > ghToken
echo -n "xxx" > ghWebhookSecret

kubectl create secret generic atlantis --from-file=ghUser --from-file=ghToken --from-file=ghWebhookSecret
安裝
有多種方式,這裡使用Kustomize 作為例子,k8s manifests 參考 my repo
修改 statefulset-patch.yaml 環境變數為自己的。
kustomize build sre-mgmt-dev > deploy.yaml

kubectl apply -f deploy.yaml
設定閘道器
需要一個Gateway,設定一個 URL 指向 atlantis ClusterIP svc ,我的 Ingress-nginx 設定參考。(Optional) Ingress-Nginx入門參考我下一篇文章 雲原生之旅 - 8)雲原生時代的閘道器 Ingress Nginx
也可以把atlantis 置成 LB型別或者NodePort本地測試。
設定Github webhook
很簡單,參考檔案 https://www.runatlantis.io/docs/configuring-webhooks.html#github-github-enterprise
使用
許可權
確保Running 在 Kubernetes 的 Atlantis service account 對所操作的資源有許可權,能Terraform init/plan/apply 雲端資源。
我這裡是GCP Project作為例子。
設定 Atlantis.yaml
簡單例子如下
假設Terraform 程式碼結構如下
Terraform
├── quick_demo1
│   ├── xxx.tf
│   └── xxx.tf
├── quick_demo2
    ├── xxx.tf
    └── xxx.tf
Atlantis yaml 設定
---
version: 3
automerge: true
delete_source_branch_on_merge: true

projects:
- name: project-1
  dir: Terraform/quick_demo1
  terraform_version: 1.2.9
  autoplan:
    when_modified:
    - '**/*.tf'

- name: project-2
  dir: Terraform/quick_demo2
  terraform_version: 1.2.9
  autoplan:
    when_modified:
    - '**/*.tf'
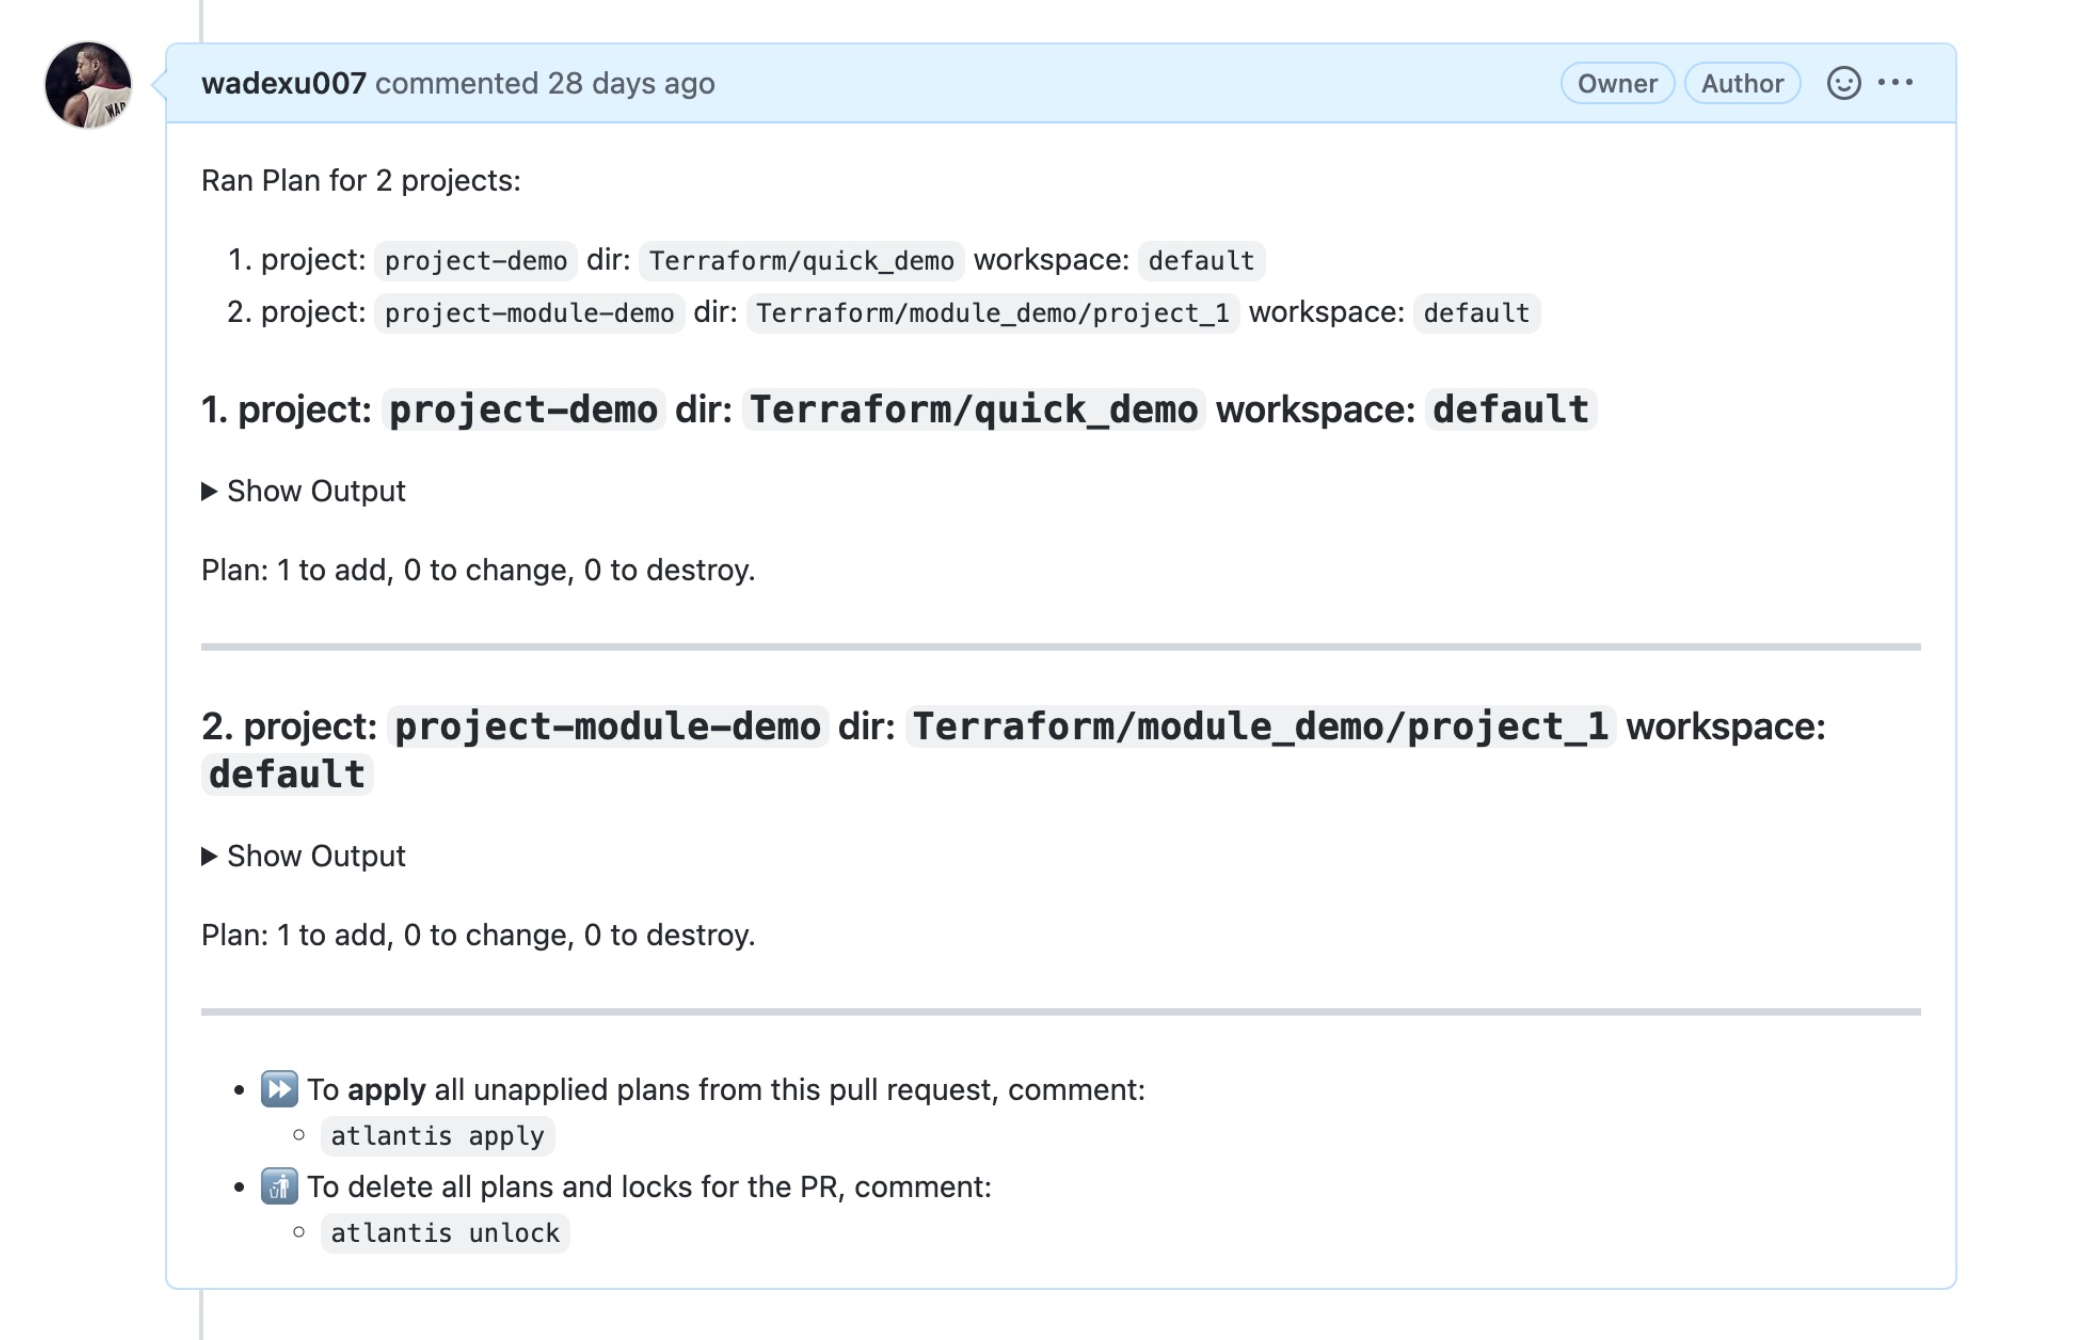
當你修改TF檔案 提交PR的時候,Atlantis 會自動使用default workflow 執行 Terraform Plan, plan result 會 comment到 PR裡面。
注意: 需要設定 Github -> Settings -> Branches-> Branch protection rule -> Protect matching branches 需要Approve才能merge。
然後有隊友Approve了PR, 你才可以執行 Atlantis Apply, 最終資源會被Terraform apply,PR 自動 merged to master。
Workflow breakdown
- Step 1: Open a Pull Request
- Step 2: Atlantis automatically run `terraform plan` and comments back on PR
- Step 3: Someone reviews and approves PR
- Step 4: Comment `atlantis apply`
- Step 5: Atlantis run `terraform apply` and comments back on PR about result
- Step 6: PR merged automatically.
自定義 Workflow
加個Terraform format check, 程式碼如下:
workflows:
  test:
    plan:
      steps:
      - env:
          name: ENV_NAME
          command: 'echo "dynamic-value-$(date)"'
      - run: terraform${ATLANTIS_TERRAFORM_VERSION} fmt -check=true -write=false -diff=true
      - init
      - plan
    apply:
      steps:
      - apply
需顯示申明使用此workflow 如 "workflow: test", 完整 Atlantis yaml 參考

---
version: 3
automerge: true
delete_source_branch_on_merge: true

projects:
- name: project-demo
  dir: Terraform/quick_demo
  terraform_version: 1.2.9
  autoplan:
    when_modified:
    - '**/*.tf'

- name: project-module-demo
  dir: Terraform/module_demo/project_1
  terraform_version: 1.2.9
  workflow: test
  autoplan:
    when_modified:
    - '**/*.tf'

# (Optional) custom workflows
workflows:
  test:
    plan:
      steps:
      - env:
          name: ENV_NAME
          command: 'echo "dynamic-value-$(date)"'
      - run: terraform${ATLANTIS_TERRAFORM_VERSION} fmt -check=true -write=false -diff=true
      - init
      - plan
    apply:
      steps:
      - apply
測試

總結
我們的Terraform 程式碼結構是按環境分成不同的folder,這樣做的好處是可以通過github CODEOWNERS檔案來針對不同的資料夾(環境)給不同的組許可權。比如以下例子給予group-dev許可權審批這個folder project-xx/dev下面的Terraform程式碼變化。
* @sre
Terraform/project-xx/dev/** @group-dev
Terraform/project-xx/prod/** @sre
我們也試過同一套程式碼利用Terraform的工作區workspace 來區分環境,實踐下來不如上面的結構靈活,維護性差。
感謝閱讀,如果您覺得本文的內容對您的學習有所幫助,您可以打賞和推薦,您的鼓勵是我創作的動力。
