2. 單主機 Elasticsearch 雙節點或多節點叢集環境部署
我已經買了一年的騰訊雲輕量級伺服器,並且安裝好了ES,也做了一些系統設定,比如 修改vm.max_map_count、修改檔案描述符數量
同時,也用ES安裝目錄下的
bin/elasticsearch指令碼嘗試了第一次啟動 ES,並且用https://localhost:9200來存取它。本文,我打算在我的騰訊雲伺服器上搭一個雙節點的環境,並且用上 kibana 來管理。
網上給出了兩種方案:
- 把 elasticsearch.tar.gz 解壓多次到不同的資料夾,每個資料夾作為一個節點,然後分別修改每個資料夾中的 elasticsearch.yml,再分別啟動。比如 Elasticsearch 在本地單機多節點部署叢集
- 把 elasticsearch.tar.gz 解壓一次,然後準備多個YAML組態檔,然後啟動時,每個節點用上不同的組態檔。比如 設定Elasticsearch
我傾向於第2種,可以把叢集中的各個節點的組態檔放到一個資料夾下,方便檢視。
1. 檢視可執行檔案 elasticsearch
使用命令 more bin/elasticsearch 檢視啟動指令碼,如下圖所示:

從啟動指令碼 elasticsearch 的頭部註釋可以看出,可以使用
ES_PATH_CONF=/path/to/custom/config ./bin/elasticsearch
這樣的命令來指定啟動節點時,使用不同的組態檔!
有了思路之後,接下來就開始實踐。
2. 準備兩個組態檔
| 設定項 | 節點1 | 節點2 |
|---|---|---|
| 節點名稱 | node1 | node2 |
| 組態檔目錄 | /opt/config/es-cluster/node1/ | /opt/config/es-cluster/node2/ |
| data目錄 | /var/lib/es-cluster/node1 | /var/lib/es-cluster/node2 |
| log目錄 | /var/log/es-cluster/node1 | /var/log/es-cluster/node2 |
執行以下命令建立目標資料夾和檔案:
[lighthouse@centos ~]$ cd /opt
[lighthouse@centos opt]$ sudo mkdir config
[lighthouse@centos opt]$ cd config
[lighthouse@centos config]$ sudo mkdir es-cluster
[lighthouse@centos config]$ sudo chown elastic:elastic es-cluster/
[lighthouse@centos config]$ ls -al
total 12
drwxr-xr-x   3  root     root     4096  0ct  9  17:59  .
drwxr-xr-x.  6  root     root     4096  0ct  9  17:59  ..
drwxr-xr-x.  2  elastic  elastic  4096  0ct  9  17:59  es-cluster
[lighthouse@centos config]$ su elastic
Password:
[elastic@centos config]$ cd es-cluster
[elastic@centos es-cluster]$ mkdir node1
[elastic@centos es-cluster]$ mkdir node2
[elastic@centos es-cluster]$ touch node1/elasticsearch.yml
[elastic@centos es-cluster]$ touch node2/elasticsearch.yml
[elastic@centos es-cluster]$ exit
[lighthouse@centos es-cluster]$ cd /var/lib
[lighthouse@centos lib]$ sudo mkdir es-cluster
[lighthouse@centos lib]$ cd es-cluster
[lighthouse@centos es-cluster]$ sudo mkdir node1
[lighthouse@centos es-cluster]$ sudo mkdir node2
[lighthouse@centos es-cluster]$ cd ..
[lighthouse@centos lib]$ sudo chown -R elastic:elastic es-cluster/
[lighthouse@centos lib]$ cd /var/log
[lighthouse@centos log]$ sudo mkdir es-cluster
[lighthouse@centos log]$ cd es-cluster
[lighthouse@centos es-cluster]$ sudo mkdir node1
[lighthouse@centos es-cluster]$ sudo mkdir node2
[lighthouse@centos es-cluster]$ cd ..
[lighthouse@centos log]$ sudo chown -R elastic:elastic es-cluster/
修改 node1/elasticsearch.yml 內容如下:
cluster.name: es-cluster
node.name: node1
node.roles: ["master", "data", "ingest"]
network.host: 10.0.4.10
http.port: 9200
transport.port: 9300
path:
  data: /var/lib/es-cluster/node1
  logs: /var/log/es-cluster/node1
discovery.seed_hosts:
  - 10.0.4.10:9300
  - 10.0.4.10:9301
cluster.initial_master_nodes:
  - node1
  - node2
xpack.security.enabled: false
xpack.security.transport.ssl.enabled: false
修改 node2/elasticsearch.yml 內容如下:
cluster.name: es-cluster
node.name: node2
node.roles: ["master", "data", "ingest"]
network.host: 10.0.4.10
http.port: 9201
transport.port: 9301
path:
  data: /var/lib/es-cluster/node2
  logs: /var/log/es-cluster/node2
discovery.seed_hosts:
  - 10.0.4.10:9300
  - 10.0.4.10:9301
cluster.initial_master_nodes:
  - node1
  - node2
xpack.security.enabled: false
xpack.security.transport.ssl.enabled: false
3. 啟動兩個es範例
[lighthouse@centos es-cluster]$ su elastic
Password:
[elastic@centos es-cluster]$ cd /opt/elasticsearch-8.1.0
[elastic@centos elasticsearch-8.1.0]$ ES_PATH_CONF=/opt/config/es-cluster/node1 ES_JAVA_OPTS="-Xms256m -Xmx256m" ./bin/elasticsearch -d
[elastic@centos elasticsearch-8.1.0]$ ES_PATH_CONF=/opt/config/es-cluster/node2 ES_JAVA_OPTS="-Xms256m -Xmx256m" ./bin/elasticsearch -d
首次嘗試啟動時,遇到異常報錯 Exception in thread "main" java.nio.file.NoSuchFileException: /opt/config/es-cluster/node1/jvm.options
於是,執行命令拷貝 jvm.options 檔案:
[elastic@centos elasticsearch-8.1.0]$ cp config/jvm.options /opt/config/es-cluster/node1
[elastic@centos elasticsearch-8.1.0]$ cp config/jvm.options /opt/config/es-cluster/node2
類似地,還會出現錯誤 ERROR: no log4j2.properties found; tried [/opt/config/es-cluster/node2] and its subdirectories
因此,執行命令拷貝 log4j2.properties 檔案:
[elastic@centos elasticsearch-8.1.0]$ cp config/log4j2.properties /opt/config/es-cluster/node1
[elastic@centos elasticsearch-8.1.0]$ cp config/log4j2.properties /opt/config/es-cluster/node2
4. Kibana
4.1 下載Kibana
https://www.elastic.co/cn/downloads/past-releases
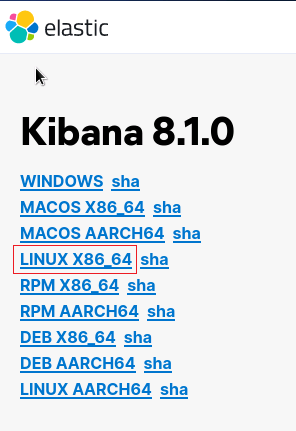
選擇:8.1.0版本下載,如下圖所示:

選擇:LINUX_X86_64,如下圖所示:

解壓並把 kibana 移動到目標資料夾:
[lighthouse@centos Downloads]$ tar -zxvf kibana-8.1.0-linux-x86_64.tar.gz
[lighthouse@centos Downloads]$ sudo mv kibana-8.1.0 /opt/kibana-8.1.0
4.2 修改kibana.yml設定
使用命令 cd /opt/kibana-8.1.0/config 進入組態檔夾,再用命令 vim kibana.yml 修改檔案
server.port: 5601
server.host: "10.0.4.10"
elasticsearch.hosts: ["http://10.0.4.10:9200"]
server.publicBaseUrl: "http://10.0.4.10:5601"
server.publicBaseUrl is missing and should be configured when running in a production environment. Some features may not behave correctly. See the documentation.
報錯解決方案
4.3 啟動kibana
nohup ./bin/kibana --allow-root & > /dev/null 2>&1
kibana 使用
ps -ef|grep kibana是查不到程序的,主要原因大概是因為 kibana 是 node 寫的。所以 kibana 執行的時候是執行在 node 裡面。所以,可以使用
ps -ef|grep node檢視到程序。
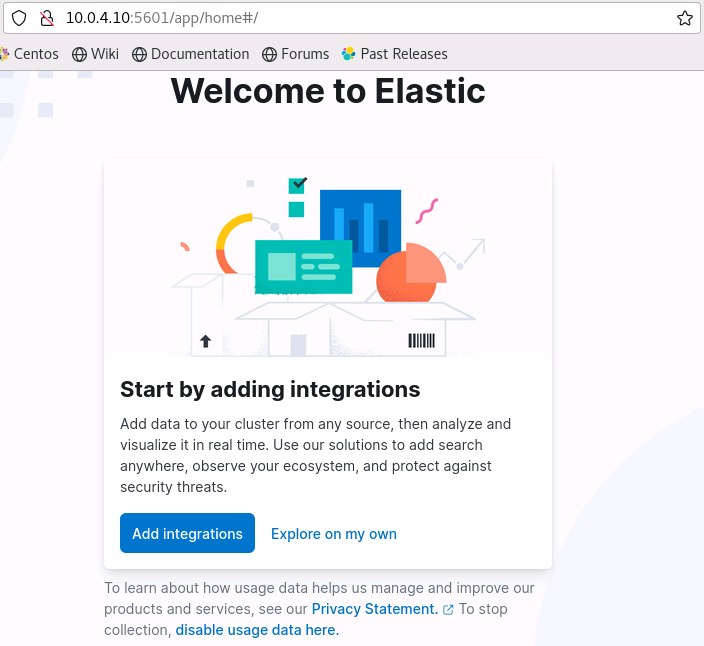
kibana 啟動成功後,可以在瀏覽器中存取:

選擇 Explore on my own,新手暫時不需要新增整合 Add integrations。