Libgdx遊戲開發(2)——接水滴遊戲實現
本文使用Kotlin語言開發
通過本文的學習可以初步瞭解以下基礎知識的使用:
- Basic file access
- Clearing the screen
- Drawing images
- Using a camera
- Basic input processing
- Playing sound effects
遊戲玩法
遊戲的主要玩法有以下5點:
- 使用桶接水滴
- 桶只能左右移動
- 水滴會從頂部並加速下落
- 玩家可以通過滑鼠或鍵盤來移動桶
- 遊戲沒有結束一說,可以一直玩
預覽動圖:

步驟
1.建立專案
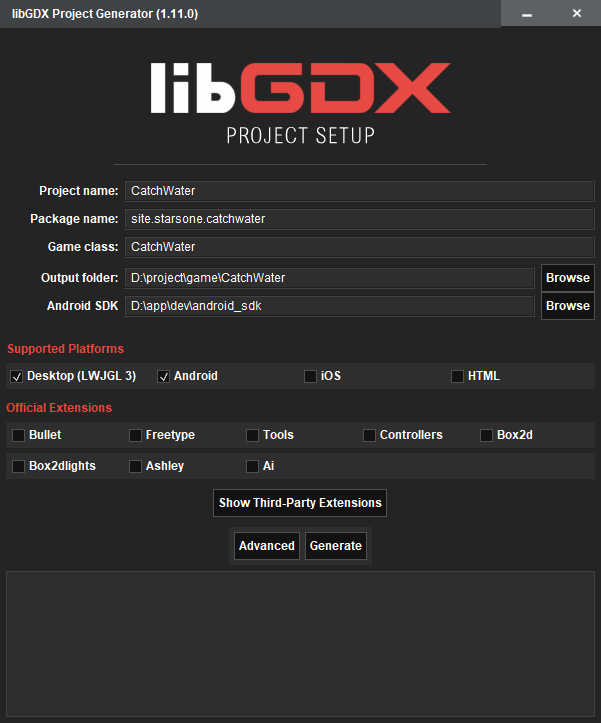
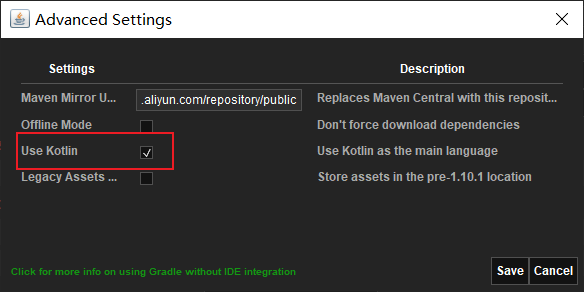
由於我是要使用Kotlin開發,所以勾選了Kotlin開發的選項
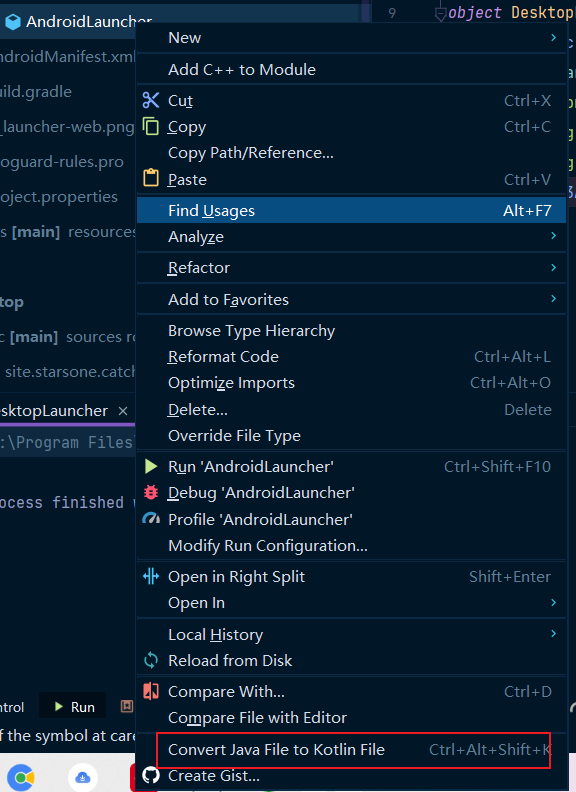
實際上,建立出來的專案,還是Java檔案寫的,所以,為了方便,我用了Android Studio把Java檔案轉為了Kotlin檔案
2.新增資原始檔
之後,我們需要新增該有的素材檔案,總共有四個檔案
drop.wav水滴掉落在桶裡的聲音rain.mp3雨聲(背景聲)bucket.png桶圖片drop.png水滴圖片
都放在assets資原始檔夾中
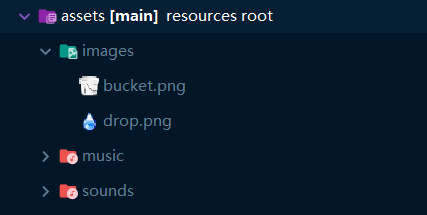
資原始檔下載可以點選下載 藍奏雲下載
3.設定遊戲設定
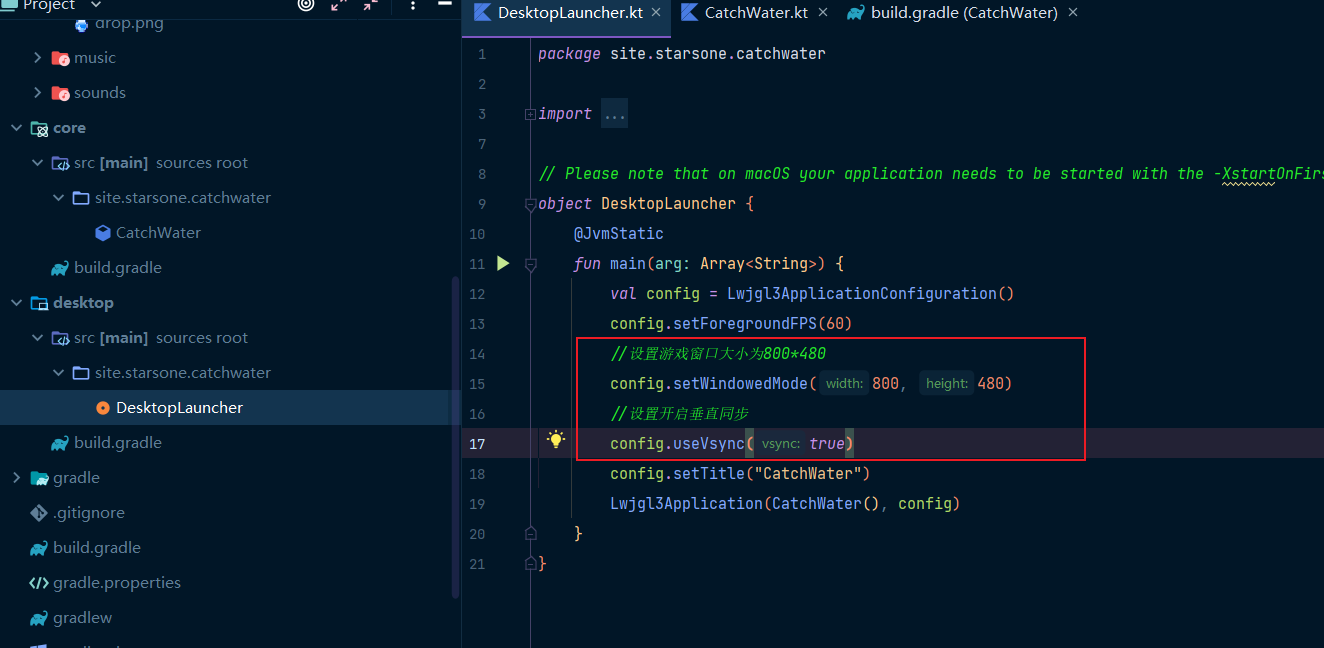
找到desktop資料夾目錄下的程式碼檔案,進行程式碼的修改,調整遊戲視窗大小為800*480,並開啟垂直同步
//設定遊戲視窗大小為800*480
config.setWindowedMode(800, 480)
//設定開啟垂直同步
config.useVsync(true)
4.載入資原始檔
我們進入到core目錄下的CatchWater檔案,可以看到具體的程式碼結構

這裡可以看到我們的類是繼承ApplicationAdapter,從名字上就可以讓我們猜測到是使用的設計模式中的介面卡模式來相容不同平臺(沒深入驗證,僅是猜測)
ApplicationAdapter是抽象類方法,提供了幾個需要重寫的方法,感覺和Android開發中的Activity差不多,應該就是Libgdx遊戲的生命週期方法了,這裡先不深入擴充套件了
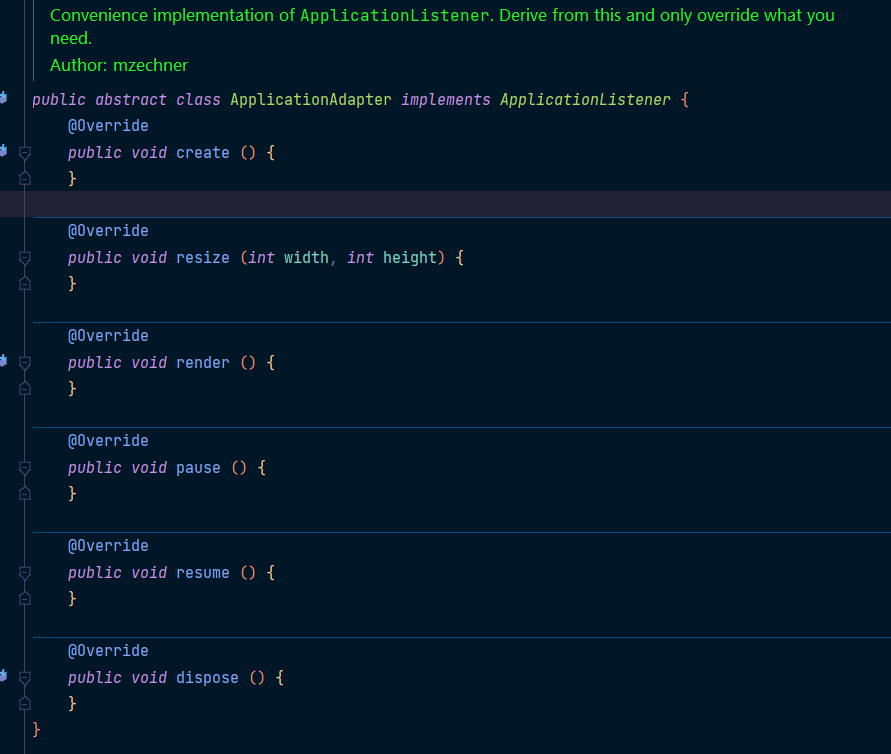
因為在遊戲開始前,我們得先載入上述我們複製到專案的一些圖片和音樂的資原始檔,所以我們選擇在create()方法中進行初始化我們的資原始檔
新增以下程式碼:
lateinit var dropImage: Texture
lateinit var bucketImage: Texture
lateinit var dropSound: Sound
lateinit var rainMusic: Music

override fun create() {
    // load the images for the droplet and the bucket, 64x64 pixels each
    dropImage = Texture(Gdx.files.internal("drop.png"))
    bucketImage = Texture(Gdx.files.internal("bucket.png"))

    // load the drop sound effect and the rain background "music"
    dropSound = Gdx.audio.newSound(Gdx.files.internal("drop.wav"))
    rainMusic = Gdx.audio.newMusic(Gdx.files.internal("rain.mp3"))

}
這裡需要注意下,我們兩張圖片(水滴和桶)解析度都是64*64
我們使用了Gdx.files.internal()方法來獲取assets資料夾裡的內容,之後遊戲如果是執行在Android平臺上,這個方法也是通用的
如果是assets資料夾裡還有一層資料夾,可以這樣寫:
Gdx.files.internal("iamge/myimg.png")
稍微講解下用到的幾個類,具體知識得後面再新開文章進行研究
- Texture 這個英文翻譯是紋理,但其實可以看做成圖片的記憶體物件,類似Android開發裡的Bitmap
- Sound 比較短的那種音效檔案
- Music 時長較長的音訊檔
5.播放背景音樂
之後我們可以實現播放背景音樂了,這個我們也直接在資原始檔載入完畢之後播放吧
//設定迴圈播放背景音樂
rainMusic.setLooping(true)
rainMusic.play()
這個時候,我們可以進入到desktop裡的那個檔案,點選箭頭執行遊戲
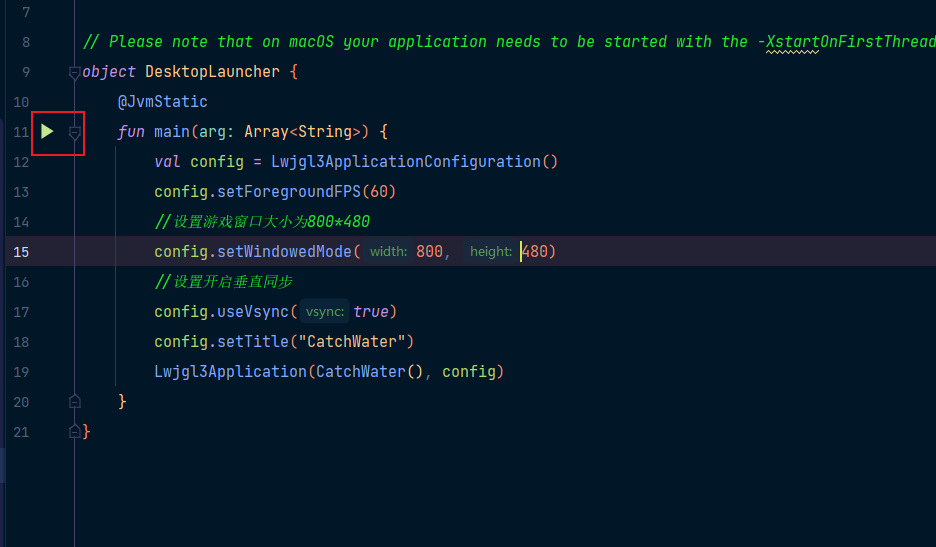
遊戲介面是黑畫面的,但是已經開始播放音樂了,這裡就不放圖了
6.繪製圖形
上述載入資原始檔,我們已經得到了兩個Texture物件,這個時候我們需要將其畫出來,可以通過SpriteBatch這個類來實現
我們直接新建一個全域性變數,然後也是在create()方法初始化即可
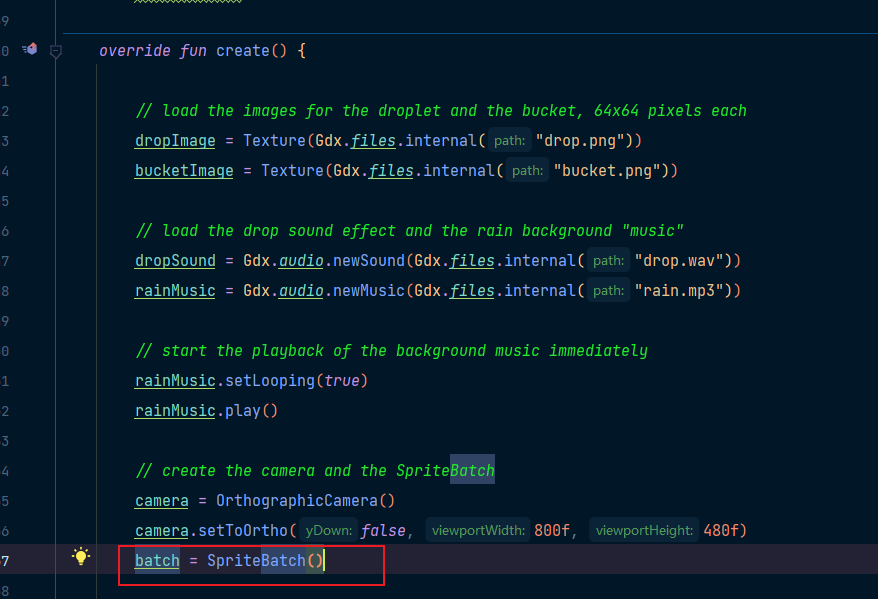
之後,在render()方法裡,將我們的圖片繪製出來
override fun render() {
    //設定螢幕背景色
    ScreenUtils.clear(0f, 0f, 0.2f, 1f)

    //繪製圖片
    batch.begin()
    batch.draw(bucketImage, 400f, 400f)
    batch.end()
}
效果如下圖所示:
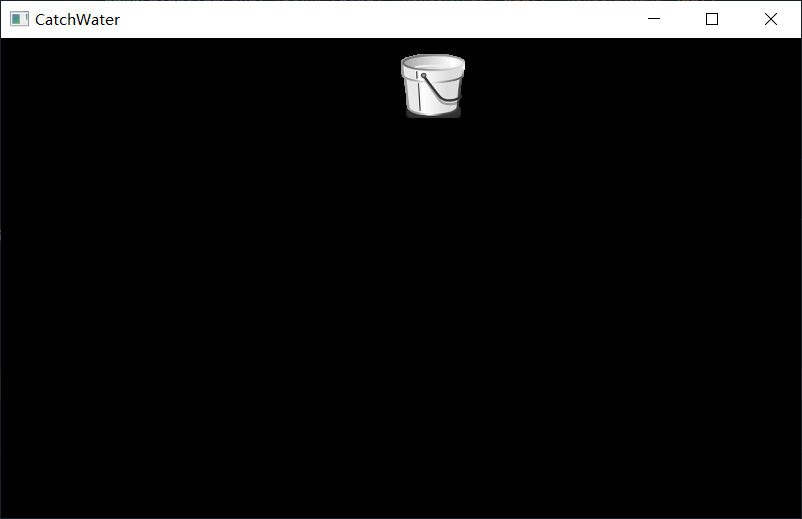
這裡需要注意一個問題:
在Libgdx中,預設座標系是以左下角為原點,也就是常規的數學座標系,當然,也可以通過Camare進行修改,具體如何修改,這裡先不研究
上述程式碼,我們將圖片物件的左下角,繪製到螢幕的(400,400)座標位置上
上面雖然我們成功繪製了一個圖片,但是考慮到下述幾個問題:
- 雨滴掉落需要改變y座標,但是y座標如何儲存呢?
- 桶左右移動,需要改變x座標,x座標應該如何儲存呢?
- 如何確認雨滴和桶的邊界關係呢?
考慮到上述的問題,單純的座標點記錄會使後續的流程程式碼變得十分的複雜,這個時候我們可以引入一個範圍來記錄相關的座標點資訊
這裡我們可以選用矩形Rectangle來儲存我們的圖片繪製位置
PS:實際上,不只有
Rectangle矩形,還有其他的形狀,但具體的使用,還是留在後面教學再進行補充吧
我們通過定義矩形的左上角(x,y)座標點和寬高,就可以確認一個Rectangle矩形範圍了,如下程式碼所示:
val bucket = Rectangle().apply {
    //桶放中間
    x = (800 / 2 - 64 / 2).toFloat()
    y = 20.toFloat()
    width = 64.toFloat()
    height = 64.toFloat()
}
由於此矩形區域是我們用來找回進行邊界關係的比對,所以將其寬高都設定為與圖片影象的解析度一樣(64*64)
這樣一來,我們使用batch.draw()方法繪製的時候,能將圖片物件剛好覆蓋到矩形範圍裡
batch.begin()
batch.draw(bucketImage, bucket.x, bucket.y)
batch.end()
7.雨滴下落實現
按照上述的邏輯,我們也建立一個雨滴的矩形範圍,並將其繪製出來
雨滴預設在最上面,由於繪製圖片的時候以左下角來繪製的,所以,最大y座標減去64,即是雨滴開始的固定高度
然後雨滴的x座標是隨機的,但是最大範圍為800減去寬度64
MathUtils是Libgdx提供的亂數工具類
val rainDrop = Rectangle().apply {
    //x座標隨機
    x = MathUtils.random(0, 800 - 64).toFloat()
    y = (480 - 64).toFloat()
    width = 64.toFloat()
    height = 64.toFloat()
}

override fun render() {
    batch.projectionMatrix = camera.combined
    batch.begin()
    batch.draw(dropImage, rainDrop.x, rainDrop.y)
    batch.end()
}
效果如下所示:

接下來,我們需要實現雨滴的下落功能,這裡,我們可以採用時間作為變數,隨著時間的變長來改rainDrop物件的y座標數值
override fun render() {
    batch.begin()
    batch.draw(dropImage, rainDrop.x, rainDrop.y)
    batch.end()

    rainDrop.y -= 200 * Gdx.graphics.deltaTime
}
效果如下:
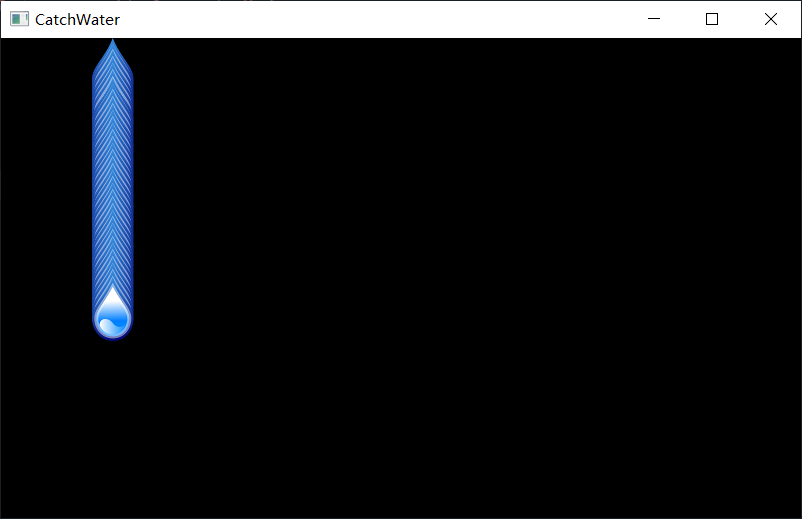
可以看到,下落效果實現了,但是似乎出現了重複的東西,其實就是我們在開始的沒清除掉上次繪製的影象,加上清除的程式碼即可:
override fun render() {
     //清除並設定螢幕背景色
    ScreenUtils.clear(0f, 0f, 0.2f, 1f)

    batch.begin()
    batch.draw(dropImage, rainDrop.x, rainDrop.y)
    batch.end()

    //每幀的時間,高度減少200
    rainDrop.y -= 200 * Gdx.graphics.deltaTime
}
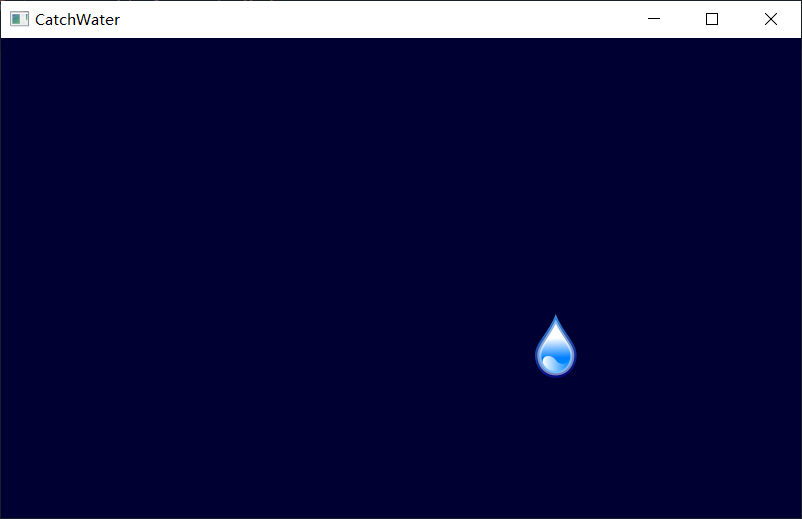
8.判斷雨滴是否掉落在桶裡
這裡,就是需要判斷邊界了,上面也說到,使用Rectangle矩形,就是方便我們判斷是否水滴和桶接觸了
Rectangle物件中,有個overlaps()方法,就是專門來判斷兩個矩形是否重疊了
//判斷兩個矩形的接觸面積有重疊,即水滴掉落在桶裡
if (rainDrop.overlaps(bucket)) {
    //播放音效
    dropSound.play()
}
9.鍵盤控制改變桶位置
上面的功能已經基本完成了,那麼還差通過鍵盤來控制桶的位置就能實現了
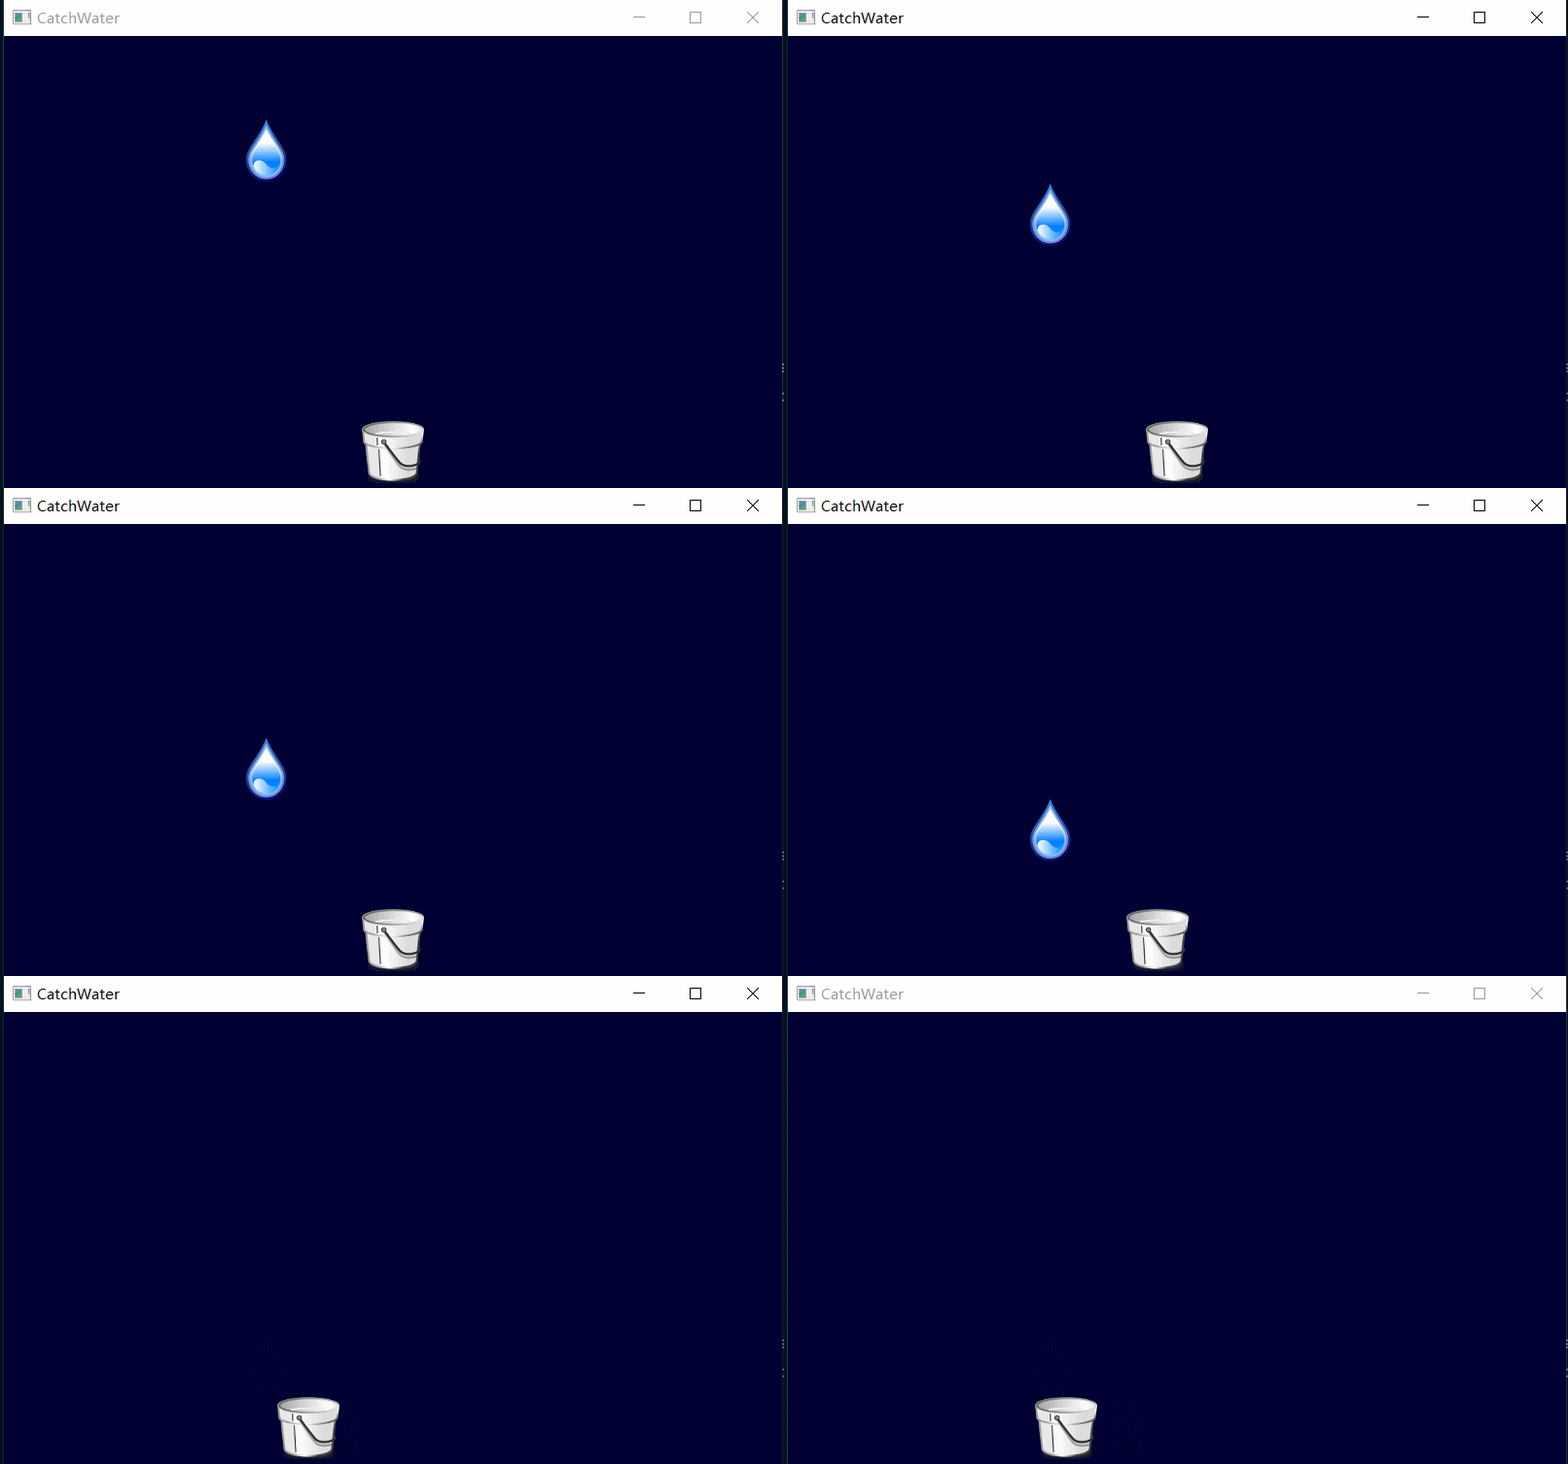
我們判斷是否按下方向鍵左或右來改變桶對應矩形的x座標,這樣就能改變桶的繪製位置了
override fun render() {
    //清除設定螢幕背景色
    ScreenUtils.clear(0f, 0f, 0.2f, 1f)
    batch.projectionMatrix = camera.combined

    batch.begin()
    batch.draw(bucketImage, bucket.x, bucket.y)
    batch.draw(dropImage, rainDrop.x, rainDrop.y)
    batch.end()

    rainDrop.y -= 200 * Gdx.graphics.deltaTime

    //鍵盤輸入判斷
    if (Gdx.input.isKeyPressed(Input.Keys.LEFT)) bucket.x -= 200 * Gdx.graphics.deltaTime
    if (Gdx.input.isKeyPressed(Input.Keys.RIGHT)) bucket.x += 200 * Gdx.graphics.deltaTime

    //判斷兩個矩形的接觸面積有重疊,即水滴掉落在桶裡
    if (rainDrop.overlaps(bucket)) {
        //播放音效
        dropSound.play()
        //模擬消失(讓水滴圖片消失在遊戲螢幕內)
        rainDrop.y = -64f
    }
}
效果如下圖:
10.隨機雨滴
最後,上述完成的只是一個雨滴,那麼,我們需要生成多個雨滴,可以使用一個List來儲存雨滴的位置
- 當雨滴掉落在地上,將雨滴從列表中移除;
- 當雨滴被桶接到,雨滴也從列表中移除;
class CatchWater : ApplicationAdapter() {
    lateinit var dropImage: Texture
    lateinit var bucketImage: Texture
    lateinit var dropSound: Sound
    lateinit var rainMusic: Music

    lateinit var camera: OrthographicCamera
    lateinit var batch: SpriteBatch

    //最後雨滴下落時間
    var lastDropTime = TimeUtils.millis()

    val bucket = Rectangle().apply {
        //桶放中間
        x = (800 / 2 - 64 / 2).toFloat()
        y = 20.toFloat()
        width = 64.toFloat()
        height = 64.toFloat()
    }

    val rainDropList = arrayListOf<Rectangle>()

    override fun create() {

        // load the images for the droplet and the bucket, 64x64 pixels each
        dropImage = Texture(Gdx.files.internal("drop.png"))
        bucketImage = Texture(Gdx.files.internal("bucket.png"))

        // load the drop sound effect and the rain background "music"
        dropSound = Gdx.audio.newSound(Gdx.files.internal("drop.wav"))
        rainMusic = Gdx.audio.newMusic(Gdx.files.internal("rain.mp3"))

        // start the playback of the background music immediately
        rainMusic.setLooping(true)
        rainMusic.play()

        // create the camera and the SpriteBatch
        camera = OrthographicCamera()
        camera.setToOrtho(false, 800f, 480f)
        batch = SpriteBatch()

        //開始先預設生成一個雨滴
        generateRainDrop()
    }

    private fun generateRainDrop() {
        val rainDrop = Rectangle().apply {
            //x座標隨機
            x = MathUtils.random(0, 800 - 64).toFloat()
            y = (480 - 64).toFloat()
            width = 64.toFloat()
            height = 64.toFloat()
        }
        rainDropList.add(rainDrop)
    }

    override fun render() {
        //清除設定螢幕背景色
        ScreenUtils.clear(0f, 0f, 0.2f, 1f)

        // tell the camera to update its matrices.
        camera.update()

        // tell the SpriteBatch to render in the
        // coordinate system specified by the camera.
        batch.projectionMatrix = camera.combined

        batch.begin()
        batch.draw(bucketImage, bucket.x, bucket.y)
        //繪製雨滴列表
        rainDropList.forEach {
            batch.draw(dropImage, it.x, it.y)
        }
        batch.end()

        // 觸控(手機端的操作和滑鼠操作)
        if (Gdx.input.isTouched) {
            val touchPos = Vector3()
            touchPos[Gdx.input.x.toFloat(), Gdx.input.y.toFloat()] = 0f
            bucket.x = touchPos.x - 64 / 2
            camera.unproject(touchPos)
        }

        //鍵盤操作
        if (Gdx.input.isKeyPressed(Input.Keys.LEFT)) bucket.x -= 200 * Gdx.graphics.deltaTime
        if (Gdx.input.isKeyPressed(Input.Keys.RIGHT)) bucket.x += 200 * Gdx.graphics.deltaTime

        //500ms生成一個雨滴
        if (TimeUtils.millis() - lastDropTime > 500) {
            generateRainDrop()
            lastDropTime = TimeUtils.millis()
        }

        val iter: MutableIterator<Rectangle> = rainDropList.iterator()
        while (iter.hasNext()) {
            val raindrop = iter.next()
            raindrop.y -= 200 * Gdx.graphics.deltaTime

            //如果雨滴掉落在地上
            if (raindrop.y + 64 < 0) iter.remove()

            //判斷兩個矩形的接觸面積有重疊,即水滴掉落在桶裡
            if (raindrop.overlaps(bucket)) {
                //播放音效
                dropSound.play()
                //將此雨滴移除列表
                iter.remove()
            }
        }

    }

    override fun dispose() {
        //資源釋放
        dropImage.dispose();
        bucketImage.dispose();
        dropSound.dispose();
        rainMusic.dispose();
        batch.dispose();
    }
}
上面有個涉及到手機和滑鼠的操作,因為和Camera物件一起使用,還沒過於研究,之後看看再深入一下吧
打包
關於打包的操作,可以通過Gradle的Task來進行操作
Android Studio4.2之後版本,把task給隱藏掉了,所以需要通過設定開啟出來
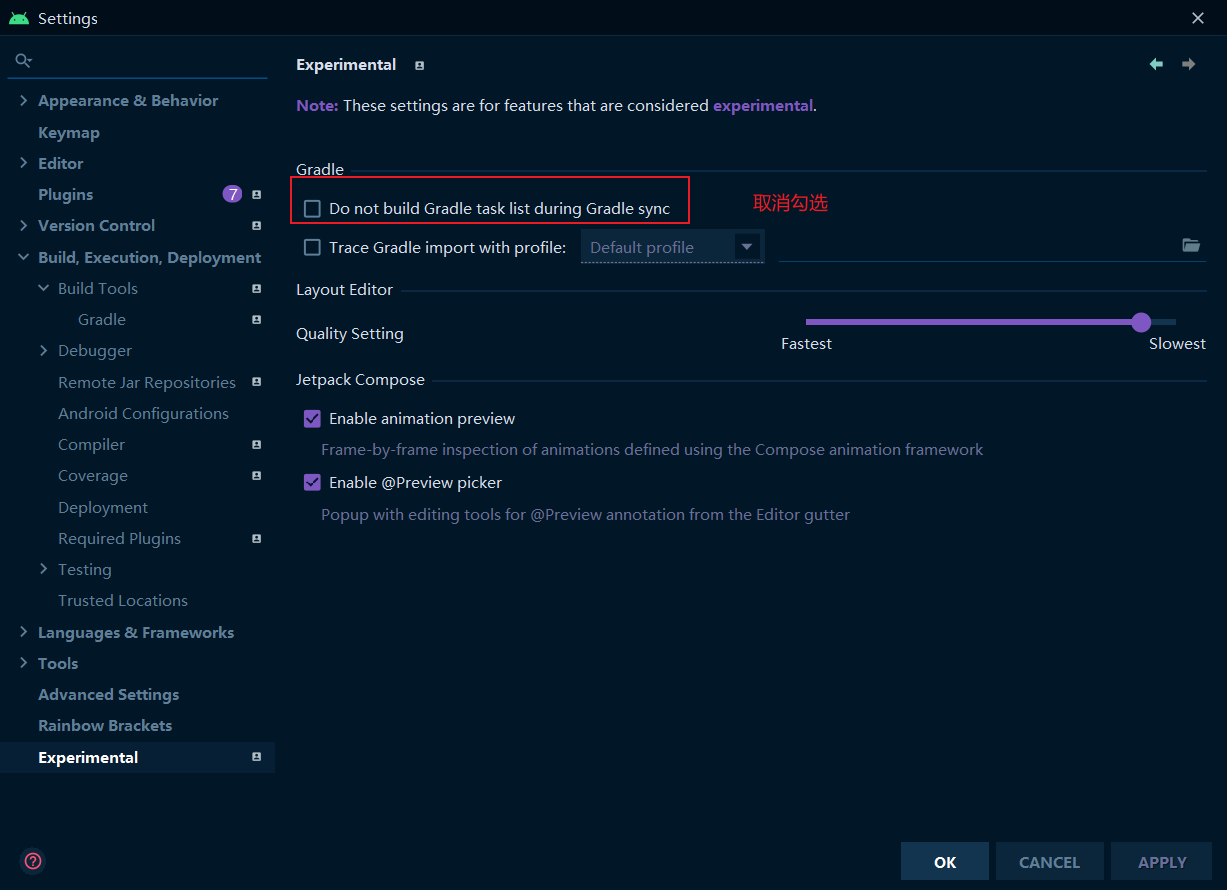
之後Gradle重構當前專案,右側的Gradle就會出現Task列表了

打包Android的和Android專案開發打包步驟一樣的,這裡不再贅述
如果是要打包的jar包,則可以點選右側的Task任務,如下圖所示:

生成的jar檔案,在desktop\build\libs目錄下
實際上打出來的jar檔案,在JDK8環境能夠執行,有些疑惑...
至於打包成exe,暫時還沒研究,各位可以參考下這篇文章libGDX遊戲開發之打包遊戲(十二)_漫淺的部落格-CSDN部落格_libgdx開發的遊戲


