一文學會Spring JDBC 使用
Spring JDBC
1、JDBC
JDBC 就是 資料庫開發 操作的 代名詞,因為只要是現代商業專案的開發那麼一定是離不開 資料庫 的,不管你搞的是什麼,只要是想使用動態的開發結構,那麼一定就是 JDBC ,那麼下面首先來回顧一下傳統JDBC的使用。

JDBC有四種連線: 像JDBC-ODBC的連線已經確定不再使用了、主要採用的是 JDBC網路連線模式。
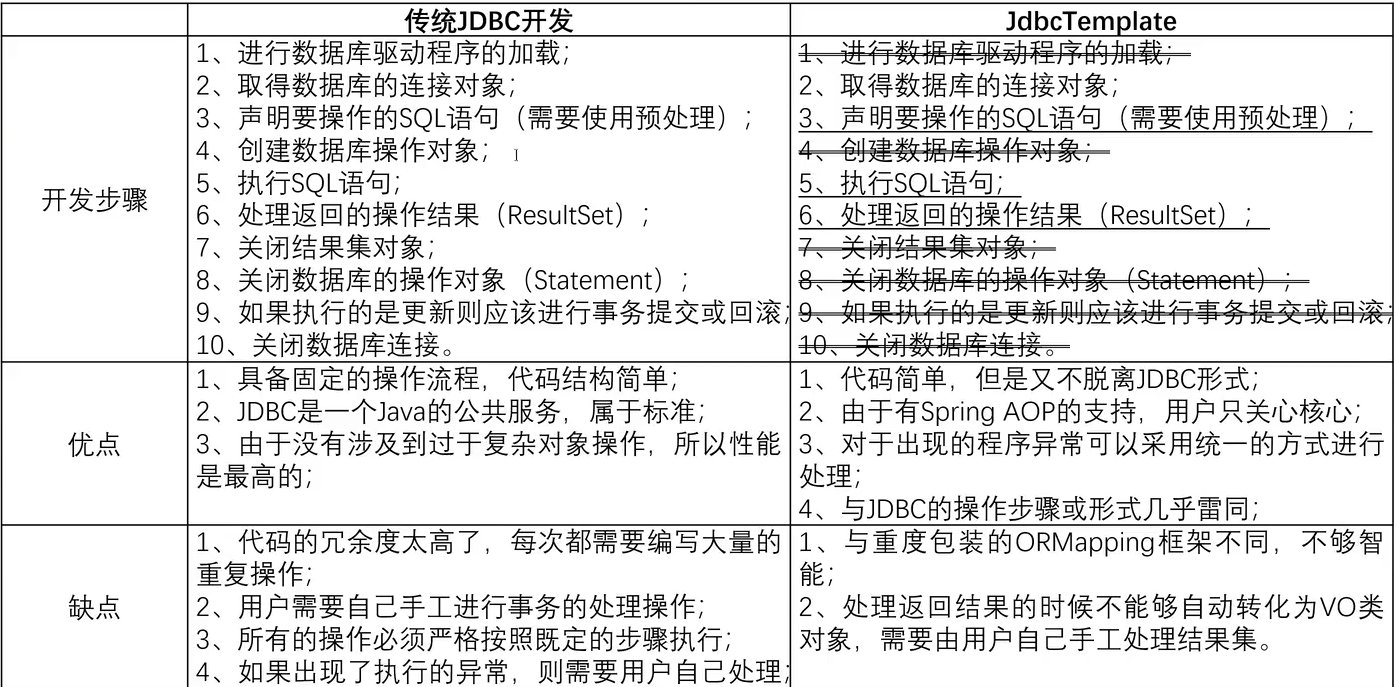
- 在JDBC的開發之中,一定要 設定相應資料庫的驅動程式 後才可以使用,所以這就屬於標準的做法,同時還有一點必須明確,不管未來出現了什麼樣的 Java資料庫開發框架,那麼核心的本質只有一點: JDBC,可是JDBC 標準裡面所定義的 操作結構 是屬於 較為底層 的操作形式,所以使用起來 非常的
繁瑣,因為幾乎所有的資料庫的專案都需要載入驅動、建立資料庫連線、資料庫的操作物件、關閉資料庫,只有中間的資料庫的CRUD操作是有區別的,那麼就需要考慮對JDBC進行封裝了,那麼這個時候就有了ORM元件(全稱ORMapping、物件關聯對映,採用物件的形式實現JDBC的開發操作)。

從歷史的發展上來講,ORMapping元件出現較多:JDO、Entity Bean、Hibernate、IBatis、SpringJDBC、MyBatis、JPA標準,當然隨著技術的發展與淘汰,基本上現在階段剩下的ORM元件,常用的就是MyBatis(國內網際網路公司)、JPA(國外機構),而SpringJDBC是屬於JDBC的輕度包裝元件(其他的元件都屬於重度包裝),所以使用
SpringJDBC可以簡化JDBC傳統開發裡面繁瑣的操作步驟。
新增依賴
<properties>
        <maven.compiler.source>17</maven.compiler.source>
        <maven.compiler.target>17</maven.compiler.target>
        <project.build.sourceEncoding>UTF-8</project.build.sourceEncoding>
        <spring.version>5.3.21</spring.version>
        <mysql.version>8.0.30</mysql.version>
</properties>

<dependencies>
    	<!--核心依賴-->
        <dependency>
            <groupId>org.springframework</groupId>
            <artifactId>spring-context</artifactId>
        </dependency>
		<!--spring-jdbc-->
        <dependency>
            <groupId>org.springframework</groupId>
            <artifactId>spring-jdbc</artifactId>
        </dependency>
		<!--資料庫依賴-->
        <dependency>
            <groupId>mysql</groupId>
            <artifactId>mysql-connector-java</artifactId>
        </dependency>

    	<!--測試-->
        <dependency>
            <groupId>org.junit.jupiter</groupId>
            <artifactId>junit-jupiter-api</artifactId>
            <version>5.8.2</version>
        </dependency>

    	<!--紀錄檔依賴-->
        <dependency>
            <groupId>org.projectlombok</groupId>
            <artifactId>lombok</artifactId>
            <version>1.18.24</version>
        </dependency>
     	<dependency>
            <groupId>org.slf4j</groupId>
            <artifactId>slf4j-api</artifactId>
            <version>1.7.25</version>
        </dependency>
		<!--紀錄檔依賴-->
        <dependency>
            <groupId>org.slf4j</groupId>
            <artifactId>slf4j-log4j12</artifactId>
            <version>1.7.25</version>
        </dependency>
    </dependencies>
log4j.properties 紀錄檔組態檔 (當啟動程式,沒有任何報錯,但是沒有資訊列印時,需要設定紀錄檔)
#將等級為DEBUG的紀錄檔資訊輸出到console和file這兩個目的地,console和file的定義在下面的程式碼
log4j.rootLogger=DEBUG,console,file

#控制檯輸出的相關設定
log4j.appender.console=org.apache.log4j.ConsoleAppender
log4j.appender.console.Threshold=DEBUG
log4j.appender.console.ImmediateFlush=true
log4j.appender.console.Target=System.err
log4j.appender.console.layout=org.apache.log4j.PatternLayout
log4j.appender.console.layout.ConversionPattern=[%-5p] %d(%r) --> [%t] %l: %m %x %n


#檔案輸出的相關設定
log4j.appender.file = org.apache.log4j.RollingFileAppender
log4j.appender.file.File=./log/logFile.log
log4j.appender.file.MaxFileSize=10mb
log4j.appender.file.Threshold=DEBUG
log4j.appender.file.layout=org.apache.log4j.PatternLayout
log4j.appender.file.layout.ConversionPattern=[%p][%d{yy-MM-dd}][%c]%m%n

#紀錄檔輸出級別
log4j.logger.org.mybatis=DEBUG
log4j.logger.java.sql=DEBUG
log4j.logger.java.sql.Statement=DEBUG
log4j.logger.java.sql.ResultSet=DEBUG
log4j.logger.java.sql.PreparedStatement=DEBUG
2、使用
要想使用JDBC,設定資料來源,是關鍵性的一步。
2.1、設定資料來源:
2.1.1、註冊資料來源對像
建立資料來源的設定類:(基於設定類的方式)
import org.springframework.context.annotation.Bean;
import org.springframework.context.annotation.Configuration;
import org.springframework.jdbc.datasource.DriverManagerDataSource;
import javax.sql.DataSource;
@Configuration
public class DataSourceConfig {
    @Bean
    public DataSource dataSource() {
        // 驅動資料來源
        DriverManagerDataSource dataSource = new DriverManagerDataSource();
        // 載入驅動程式
        dataSource.setDriverClassName("com.mysql.cj.jdbc.Driver");
        dataSource.setUrl("jdbc:mysql://localhost:3306/yootk");
        dataSource.setUsername("root");
        dataSource.setPassword("317311");
        return dataSource;
    }
}
建立資料來源的設定類:(基於xml的方式)
<?xml version="1.0" encoding="UTF-8"?>
<beans xmlns="http://www.springframework.org/schema/beans"
       xmlns:xsi="http://www.w3.org/2001/XMLSchema-instance"
       xmlns:p="http://www.springframework.org/schema/p"
       xmlns:c="http://www.springframework.org/schema/c"
       xsi:schemaLocation="http://www.springframework.org/schema/beans
    http://www.springframework.org/schema/beans/spring-beans.xsd">

    <!--資料來源的設定-->
    <bean id="dataSource" class="org.springframework.jdbc.datasource.DriverManagerDataSource">
        <property name="driverClassName" value="com.mysql.cj.jdbc.Driver"/>
        <property name="url" value="jdbc:mysql://localhost:3306/yootk"/>
        <property name="username" value="root"/>
        <property name="password" value="317311"/>
    </bean>
</beans>
2.1.2、測試:
import look.word.jdbc.config.DataSourceConfig;
import org.junit.jupiter.api.Test;
import org.junit.jupiter.api.extension.ExtendWith;
import org.slf4j.Logger;
import org.slf4j.LoggerFactory;
import org.springframework.beans.factory.annotation.Autowired;
import org.springframework.test.context.ContextConfiguration;
import org.springframework.test.context.junit.jupiter.SpringExtension;
import javax.sql.DataSource;

@ContextConfiguration(classes = DataSourceConfig.class) //	兩者二選一即可
//@ContextConfiguration(locations ={"classpath:data-source.xml"})
@ExtendWith(SpringExtension.class)
public class TestDataSource {
	// 紀錄檔工廠物件
    private static final Logger LOGGER = LoggerFactory.getLogger(TestDataSource.class);
    @Autowired
    private DataSource dataSource;
    @Test
    public void testConnection() throws Exception{
        LOGGER.info("【資料庫連線物件】:{}",dataSource);
    }
}

// 執行結果 輸入資料來源物件,說明連線成功
// [INFO ] 2022-09-14 12:18:59,307(386) --> [main] look.word.test.TestDataSource.testConnection(TestDataSource.java:29): 【資料庫連線物件】:org.springframework.jdbc.datasource.DriverManagerDataSource@535779e4
但是基於這種連線操作的效能是非常一般的,請追隨原始碼,一探究竟。

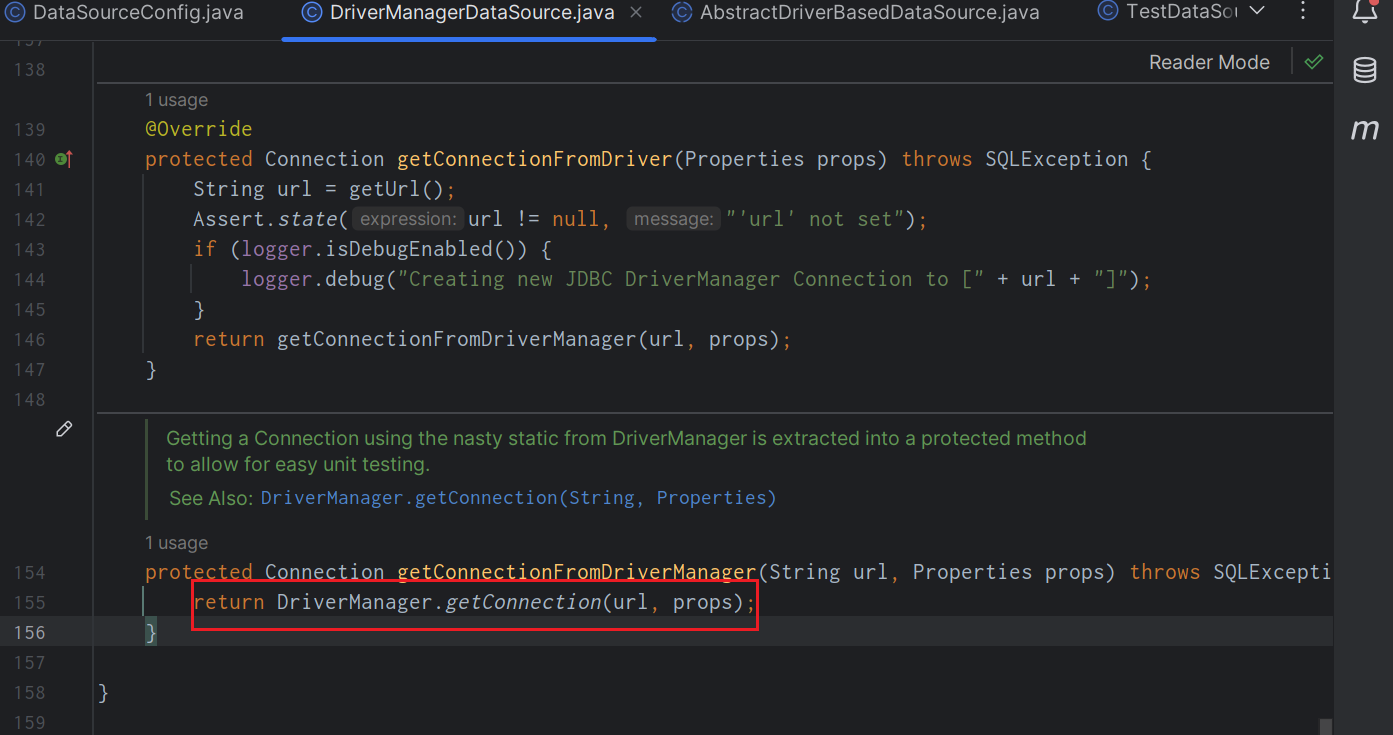
然後找到我們的AbstractDriverBasedDataSource.getConnection()方法,進入getConnectionFromDriver()方法。
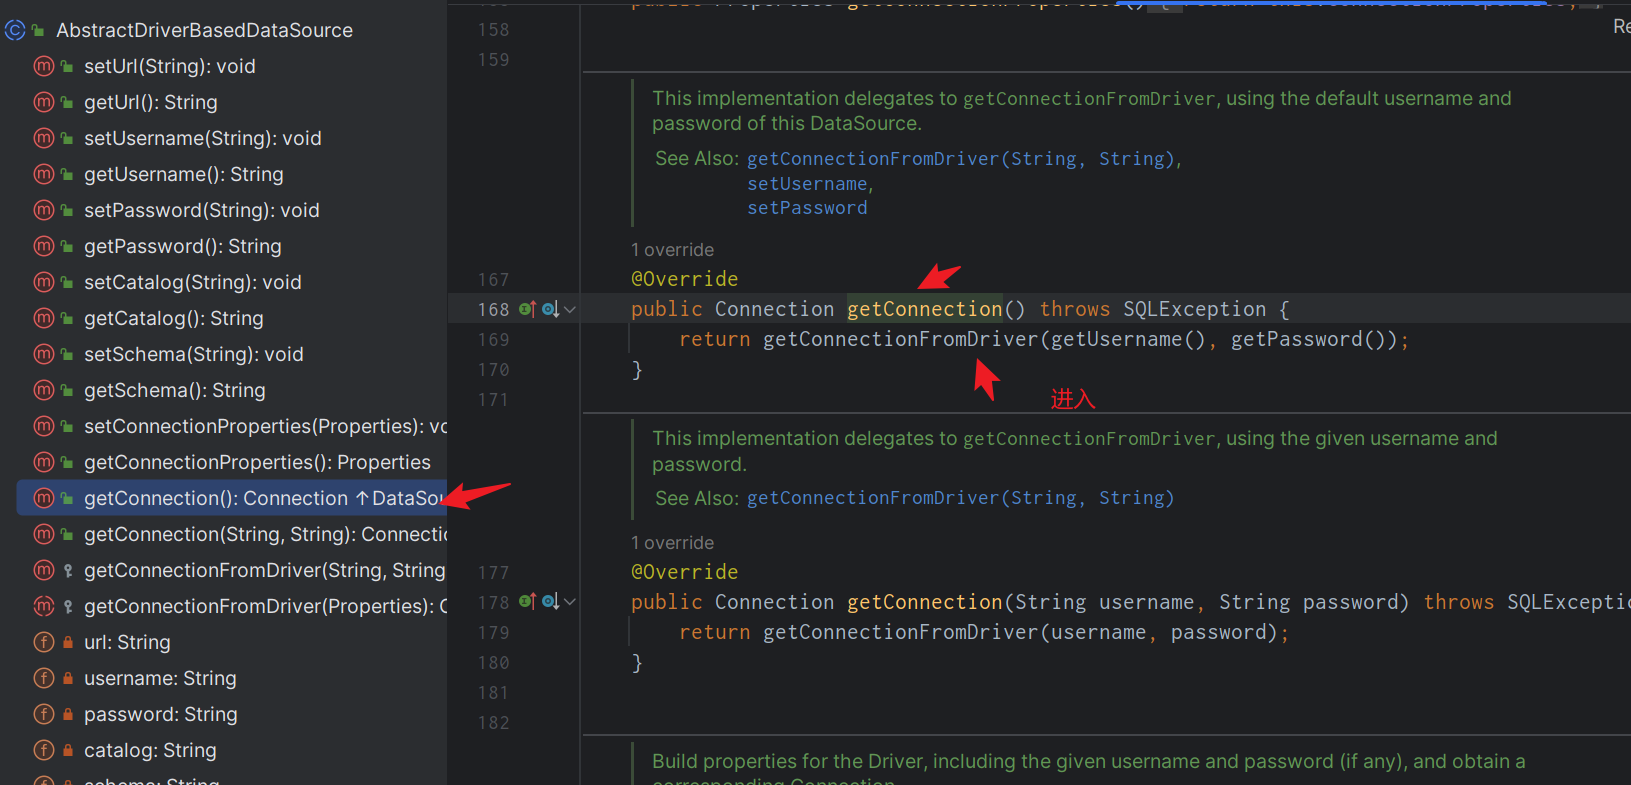
找到getConnectionFromDriver(),他是一個抽象方法,然後找到其子類,DriverManagerDataSource
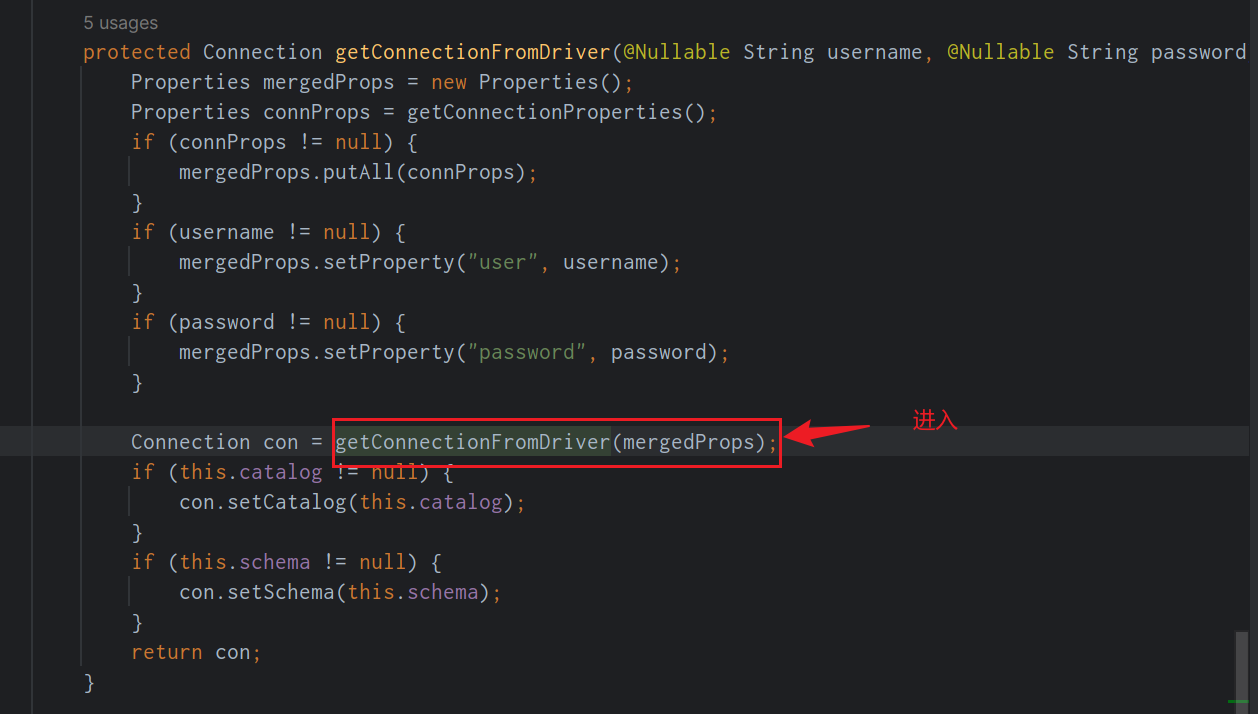
然後又會發現,我們回到了DriverManagerDataSource,然後我們在進入getConnectionFromDriverManager方法。
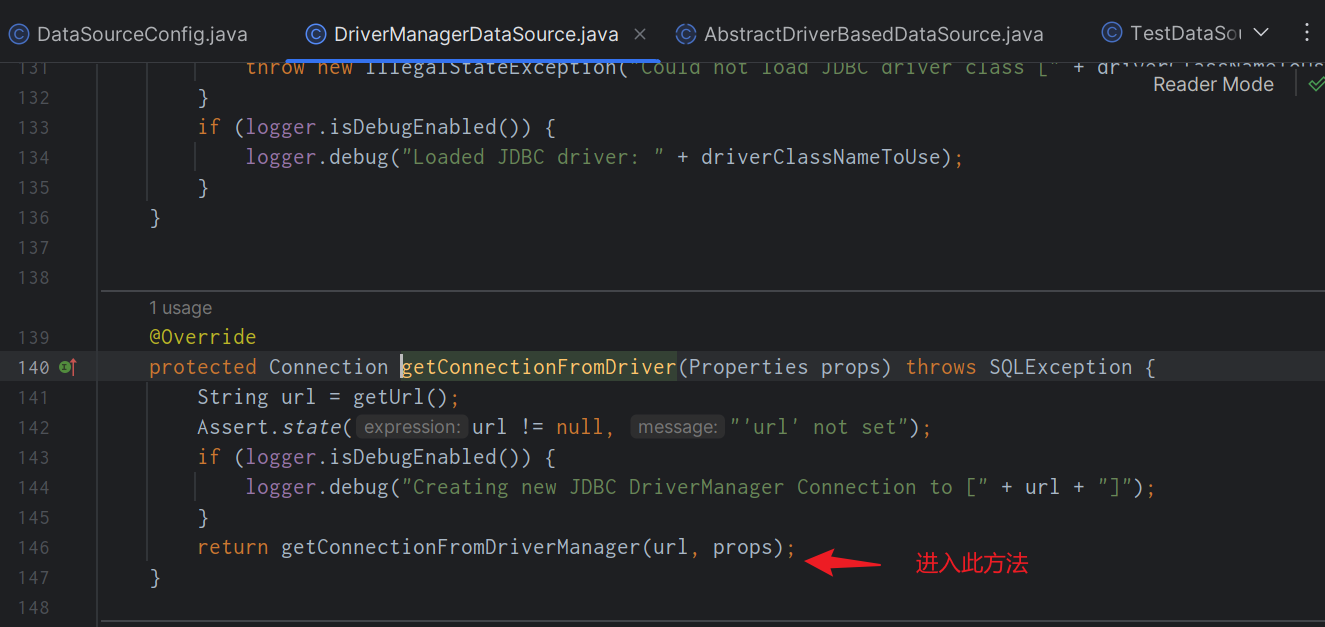
最終獲取連線的方式,
2.1.3、預設連線方式的缺點
這種連線的管理方式,是在每一次 獲取連線 的時候 才進行 資料庫連線的操作了,那麼現在的問題就來了,這樣的管理方式好嗎 ?首先在資料庫連線的處理之中,一定會建立若干個Socket 連線,那麼會有耗時,而在資料庫關閉的時候也會存在有同樣的耗時處理,這樣在「次次次高並行」的處理下很難得到有效的控制。所以在實際專案中最佳資料庫連線的管理,一定是基於資料庫連線池方式實現的。所以此時可以考慮在 Spring 內部去實現一個連線池的維護。早期的資料庫連線池元件提供有一個 C3P0元件,但是現在已經停止維護了。
2.2、HikariCP
在實際的專案應用開發過程之中,為了解決JDBC連線與關閉的延時以及效能問題,提供了資料庫連線池的解決方案,並且針對於該方案提供了成型的HikariCP服務元件。HikariCP (Hikari來自日文,是「光」的含義)是由日本程式設計師開源的一個資料庫連線池元件,該元件擁有如下特點:
- 宇節碼更加的精簡,這樣可以在快取中新增更多的程式程式碼;
- 實現了一個無鎖集合,減少了並行存取造成的資源競爭問題;
- 使用了自定義陣列型別(FastList)代替了ArrayList,提高了get()與remove()的操作效能;
- 針對CPU的時間片演演算法進行了優化,儘可能在一個時間片內完成所有處理操作。
在Spring之中預設推薦的資料庫連線池元件就是HikariCP,不建議再使用其他的資料庫連線池元件,當然國內也有優秀的CP元件,那麼就是阿里推出的Druid(在效能上可能低於HikariCP,但是提供有完整的管理介面),如果要想使用這個元件,可以採用如下的步驟進行設定。
2.2.1、使用
新增依賴:
			<dependency>
                <groupId>com.zaxxer</groupId>
                <artifactId>HikariCP</artifactId>
                <version>5.0.1</version>
            </dependency>
編寫設定類:
這次我們再用組態檔的方式,方便擴充套件
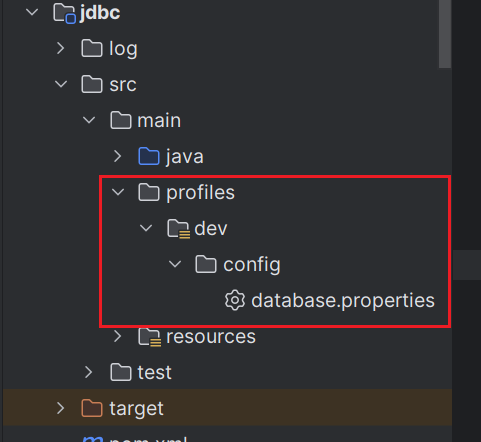
- 建立組態檔:src/main/profiles/dev/config/database.properties
yootk.database.driverClassName=com.mysql.cj.jdbc.Driver
yootk.database.jdbcUrl=jdbc:mysql://localhost:3306/yootk
yootk.database.username=root
yootk.database.password=317311
# 【Hikaricp】設定資料庫連線超時時間 單位【毫秒】
yootk.database.connectionTimeOut=3000
# 【Hikaricp】一個連線最小維持的時間 單位【毫秒】
yootk.database.idleTimeOut=3000
# 【Hikaricp】一個連線最長存活的時間 單位【毫秒】
yootk.database.maxLifetime=6000
# 【Hikaricp】最大儲存的資料庫連線範例
yootk.database.maximumPoolSize=60
# 【Hikaricp】最小儲存的資料庫連線範例 (在沒有任何使用者存取時,最少維持的連線數量)
yootk.database.minimumIdle=20
# 【Hikaricp】是否為唯讀
yootk.database.readOnly=false
建立設定物件
@Configuration
//讀取指定位置的資原始檔
@PropertySource("classpath:config/database.properties")
public class HikariCpDataSourceConfig {
    /**
     * 繫結資原始檔中的設定資料項
     */
    @Value("${yootk.database.driverClassName}")
    private String driverClassName;
    @Value("${yootk.database.jdbcUrl}")
    private String jdbcUrl;
    @Value("${yootk.database.username}")
    private String username;
    @Value("${yootk.database.password}")
    private String password;
    @Value("${yootk.database.connectionTimeOut}")
    private Long connectionTimeOut;
    @Value("${yootk.database.idleTimeOut}")
    private Long idleTimeOut;
    @Value("${yootk.database.maxLifetime}")
    private Long maxLifetime;
    @Value("${yootk.database.maximumPoolSize}")
    private Integer maximumPoolSize;
    @Value("${yootk.database.minimumIdle}")
    private Integer minimumIdle;
    @Value("${yootk.database.readOnly}")
    private boolean readOnly;

    @Bean("dataSource")
    public DataSource dataSource() {
        // Hikari連線池資料來源
        HikariDataSource dataSource = new HikariDataSource();
        dataSource.setDriverClassName(driverClassName);
        dataSource.setJdbcUrl(jdbcUrl);
        dataSource.setUsername(username);
        dataSource.setPassword(password);
        dataSource.setPassword(password);
        // 超時時間
        dataSource.setConnectionTimeout(connectionTimeOut);
        // 空閒超時
        dataSource.setIdleTimeout(idleTimeOut);
        // 連線的最長時間
        dataSource.setMaxLifetime(maxLifetime);
        // 連線池最大數量
        dataSource.setMaximumPoolSize(maximumPoolSize);
        // 當沒有連線時 最小保留的連線數量
        dataSource.setMinimumIdle(minimumIdle);
        // 是否唯讀資料庫
        dataSource.setReadOnly(readOnly);
        return dataSource;
    }
}
測試類:
import look.word.jdbc.config.HikariCpDataSourceConfig;
import org.junit.jupiter.api.Test;
import org.junit.jupiter.api.extension.ExtendWith;
import org.slf4j.Logger;
import org.slf4j.LoggerFactory;
import org.springframework.beans.factory.annotation.Autowired;
import org.springframework.test.context.ContextConfiguration;
import org.springframework.test.context.junit.jupiter.SpringExtension;

import javax.sql.DataSource;
@ContextConfiguration(classes = HikariCpDataSourceConfig.class)
@ExtendWith(SpringExtension.class)
public class TestDataSource {
    private static final Logger LOGGER = LoggerFactory.getLogger(TestDataSource.class);

    @Autowired
    private DataSource dataSource;

    @Test
    public void testConnection() throws Exception {
        LOGGER.info("【資料庫連線物件】:{}", dataSource.getConnection());
    }
}
如果出錯,可以看看紀錄檔輸入資訊。
這樣我們就實現了,使用HikariCP獲取連線物件了,接下來就會使用HikariCP對具體的資料庫進行操作。
2.3、JdbcTempLate
JdbcTempLate的使用很簡單,只需要為其指定資料來源即可。
我們採用設定類的方式,為其設定資料來源
2.3.1、增
新增設定類:
@Configuration
public class JdbcTempLateConfig {
    @Bean // 方法形參 會自動從容器中注入物件
    public JdbcTemplate jdbcTemplate(DataSource dataSource) {
        JdbcTemplate jdbcTemplate = new JdbcTemplate(dataSource);
        return jdbcTemplate;
    }
}
編寫測試類:
@ContextConfiguration(classes = {HikariCpDataSourceConfig.class, JdbcTempLateConfig.class})
@ExtendWith(SpringExtension.class)
public class TestJdbcTempLate {
    private static final Logger LOGGER = LoggerFactory.getLogger(TestJdbcTempLate.class);

    @Autowired
    private JdbcTemplate jdbcTemplate;

    @Test
    public void testConnection() throws Exception {
        String sql = "insert into book(title,author,price) values('java入門','李老師',99.90)";
        LOGGER.info("【插入執行結果】:{}", jdbcTemplate.update(sql));
    }
}
執行結果:

這個時候就是用JdbcTemplate輕鬆地實現了資料的插入操作。
但是,可以發現,我們上面的操作,還是存在問題的,比如沒有對sql 進行預處理,會出現 Sql 注入的風險。
2.3.2、改
測試類
   @Test
    public void testUpdate() {
        String sql = "update yootk.book set title = ? where bid = ?";
        LOGGER.info("【插入執行結果】:{}", jdbcTemplate.update(sql, "Python入門", 2));
    }
2.3.3、刪
測試類
    @Test
    public void testDelete() {
        String sql = "delete from yootk.book  where bid = ?";
        LOGGER.info("【插入執行結果】:{}", jdbcTemplate.update(sql, 2));
    }
2.3.4、增 (返回id)
在MySQL資料庫裡面,有一種功能,可以通過一個next()處理常式獲取當前所生成的ID號(主要針對於自動增長列),實際上這個功能主要的目的是為了解決增加資料時的ID返回處理問題了,因為很多的時候需要在資料增加成功之後對指定的ID進行控制,所以才提供了專屬的處理常式,Oracle之中直接使用序列即可,但是MySQL的實現就需要專屬的處理常式了。.在程式的開發之中,如果要想獲取到增長後的ID資料,在SpringJDBC裡面提供有了一個KeyHolder介面,在這個介面裡面定義了獲取主鍵內容的處理方法。
在平常開發中,我們經常會遇到,插入這個資料後,會需要這個資料的id,然後對其進行一系類操作。
如果要想獲取到增長後的ID資料,在SpringJDBC裡面提供有了一個KeyHolder介面,在這個介面裡面定義了獲取主鍵內容的處理方法。
測試類
    @Test
    public void testInsertReturnId() {
        String sql = "insert into yootk.book(title,author,price) values(?,?,?)";
        GeneratedKeyHolder keyHolder = new GeneratedKeyHolder(); // 獲取KEY的處理資訊
        int count = jdbcTemplate.update(new PreparedStatementCreator() {
            @Override
            public PreparedStatement createPreparedStatement(Connection con) throws SQLException {
                PreparedStatement ps = con.prepareStatement(sql, Statement.RETURN_GENERATED_KEYS); // 對sql進行預處理
                ps.setString(1, "Springboot實戰");
                ps.setString(2, "老李");
                ps.setDouble(3, 99.00);
                return ps;
            }
        }, keyHolder);
        LOGGER.info("【插入執行影響行數】:{},當前插入資料的ID:{}", count, keyHolder.getKey());
    }
// 執行結果
// look.word.test.TestJdbcTempLate.testInsertReturnId(TestJdbcTempLate.java:61): 【插入執行影響行數】:1,當前插入資料的ID:4
如果在
PreparedStatement ps = con.prepareStatement(sql);中,沒有指定需要返回KEY,則會出現異常。
2.3.5、批次處理

測試類:
這種方式是基於集合的。
	@Test
    public void testInsertBatch() {
        List<String> titles = List.of("Springboot開發實戰", "SSM開發案例", "Netty開發實戰", "Redis開發實戰");
        List<Double> prices = List.of(90.1, 98.9, 78.9, 98.9);
        String sql = "insert into yootk.book(title,author,price) values(?,?,?)";
        this.jdbcTemplate.batchUpdate(sql, new BatchPreparedStatementSetter() {  // 執行批次插入
             //@param i  集合索引
            @Override
            public void setValues(PreparedStatement ps, int i) throws SQLException {
                ps.setString(1, titles.get(i));
                ps.setString(2, "老李老師");
                ps.setDouble(3, prices.get(i));
            }
            @Override
            public int getBatchSize() {
                return titles.size(); //總長度
            }
        });
    }
基於物件
@Test
    public void testInsertBatch2() {
        List<Object[]> params = List.of(
                new Object[]{"Spring開發實戰", "11", 89.0},
                new Object[]{"Spring開發實戰1", "11", 89.0},
                new Object[]{"Spring開發實戰2", "11", 89.0},
                new Object[]{"Spring開發實戰3", "11", 89.0}
        );
        String sql = "insert into yootk.book(title,author,price) values(?,?,?)";
        int[] result = jdbcTemplate.batchUpdate(sql, params);//批次插入
        System.out.println("result = " + result);
    }
2.3.4、查
在資料庫操作過程中,除了資料更新操作之外,最為繁瑣的就是資料庫的查詢功能了。由於JdbcTemplate設計的定位屬於ORMapping元件,所以就需要在查詢完成之後,可以自動的將查詢結果轉為VO型別的範例,而為了解決該問題,在SpringJDBC中提供了一個RowMapper介面,這個介面可以實現ResultSet向指定物件範例的轉換。該介面提供有一個mapRow()處理方法,可以接收查詢結果每行資料的結果集,使用者可以將指定列取出,並儲存在自標VO範例之中

查詢單個
Book 物件 根據資料庫建立
@Data
@AllArgsConstructor
@NoArgsConstructor
public class Book {
    private Integer bid;
    private String title;
    private String author;
    private Double price;
}
測試類:
    // 查詢單個
    @Test
    public void testQuery() {
        String sql = "select  bid, title, author, price from yootk.book  where bid = ?";
        Book book = jdbcTemplate.queryForObject(sql, new RowMapper<Book>() {
            @Override
            public Book mapRow(ResultSet rs, int rowNum) throws SQLException {
                Book book = new Book();
                book.setBid(rs.getInt(1));
                book.setTitle(rs.getString(2));
                book.setAuthor(rs.getString(3));
                book.setPrice(rs.getDouble(4));
                return book;
            }
        }, 3); // 這裡的3 是對預處理資料的回填 多個需按照順序編寫
        System.out.println("【queryForObject 查詢結果】book = " + book);
    }
查詢多個
    // 查詢所有
    @Test
    public void testQueryAll() {
        String sql = "select  bid, title, author, price from yootk.book ";
        List<Book> list = jdbcTemplate.query(sql, new RowMapper<Book>() {
            @Override
            public Book mapRow(ResultSet rs, int rowNum) throws SQLException {
                Book book = new Book();
                book.setBid(rs.getInt(1));
                book.setTitle(rs.getString(2));
                book.setAuthor(rs.getString(3));
                book.setPrice(rs.getDouble(4));
                return book;
            }
        });
        list.stream().forEach(System.out::println);
    }
分頁查詢
    // 分頁
    @Test
    public void testQuerySpAll() {
        int current = 2; // 頁數
        int size = 5;// 每頁數量
        String sql = "select  bid, title, author, price from yootk.book limit ? ,?  ";
        List<Book> list = jdbcTemplate.query(sql, new RowMapper<Book>() {
            @Override
            public Book mapRow(ResultSet rs, int rowNum) throws SQLException {
                Book book = new Book();
                book.setBid(rs.getInt(1));
                book.setTitle(rs.getString(2));
                book.setAuthor(rs.getString(3));
                book.setPrice(rs.getDouble(4));
                return book;
            }
        }, (current - 1) * size, size);
        list.stream().forEach(System.out::println);
    }
統計行數
    // 查詢行數
    @Test
    public void testQueryCount() {
        String sql = "select  count(*) from yootk.book where title like ?";
        long count = jdbcTemplate.queryForObject(sql, new RowMapper<Long>() {
            @Override
            public Long mapRow(ResultSet rs, int rowNum) throws SQLException {
                return rs.getLong(1);
            }
        }, "%Spring%");
        LOGGER.info("【資料庫記錄總行數】{}", count);
    }