前端利器躬行記(8)——VSCode外掛研發
VSCode提供了豐富的 API,可以藉助編輯器擴充套件許多客製化功能。
本次研發了一款名為 Search Method 的外掛,在此記錄整個研發過程。
一、準備工作
1)安裝環境
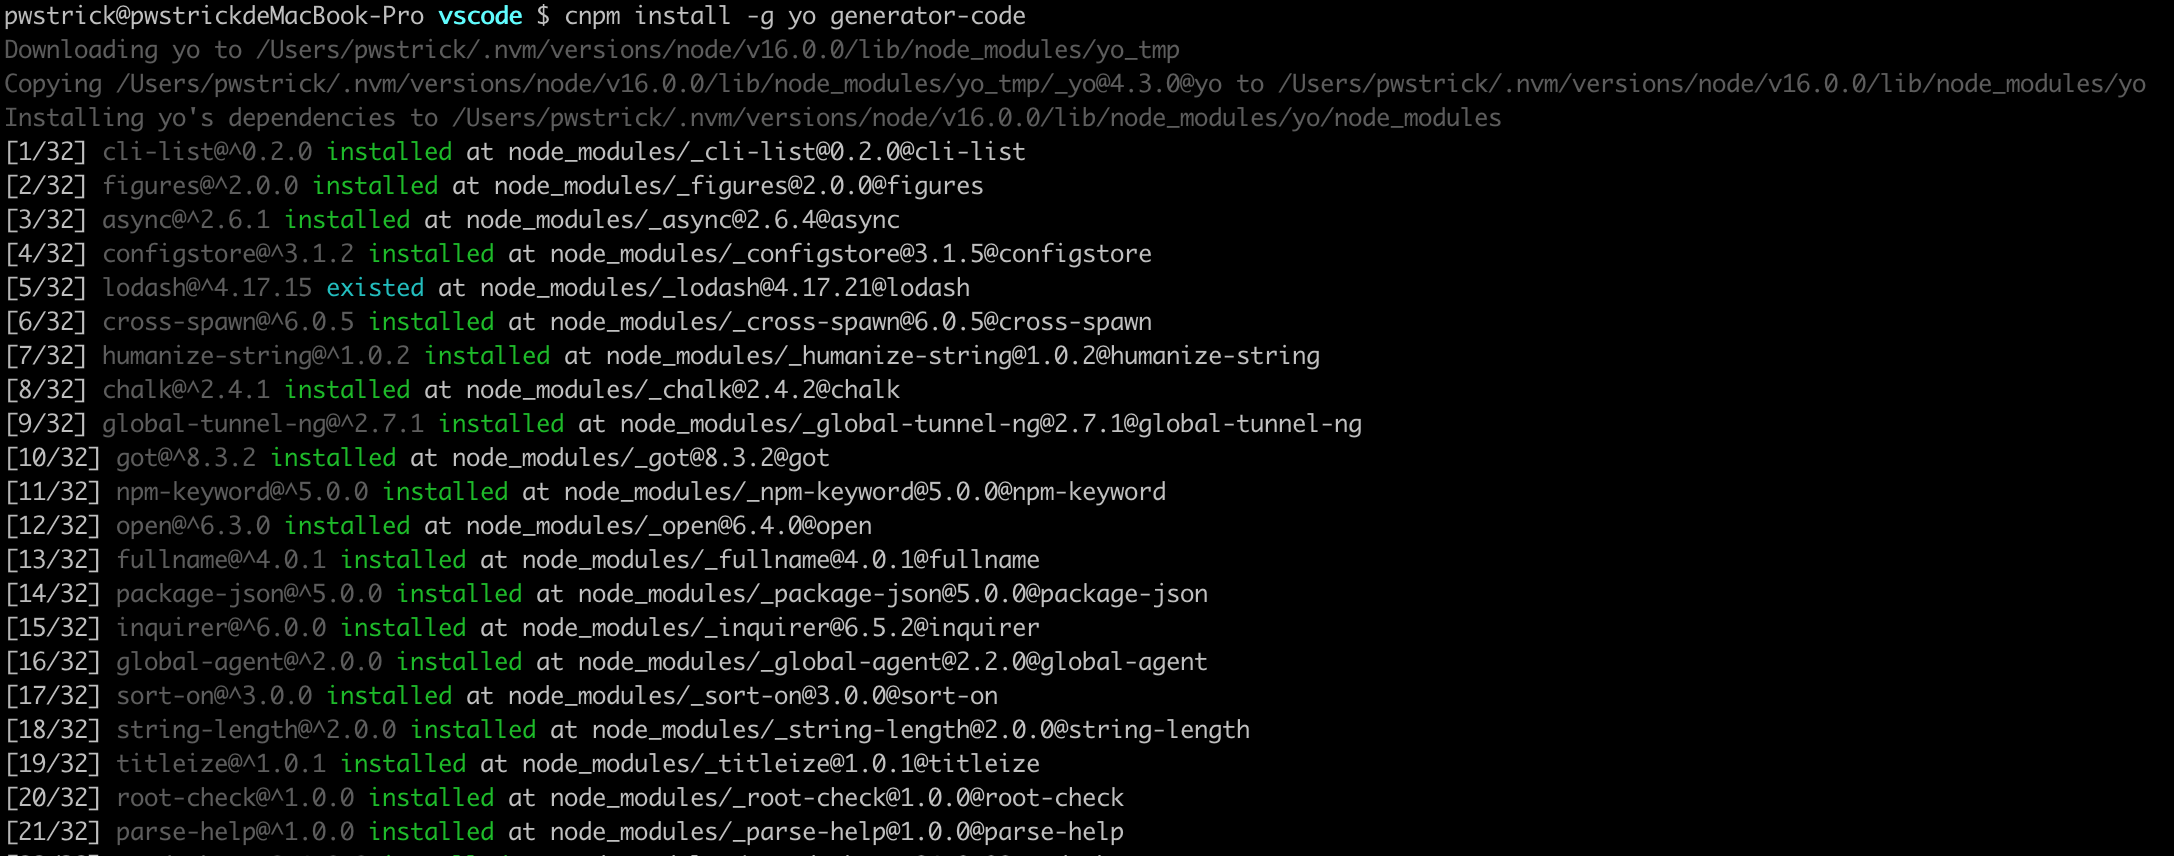
首先是全域性安裝 yo 和 generator-code 兩個庫,我本地全域性安裝了 cnpm,所以用它來安裝。
npm install yo generator-code -g
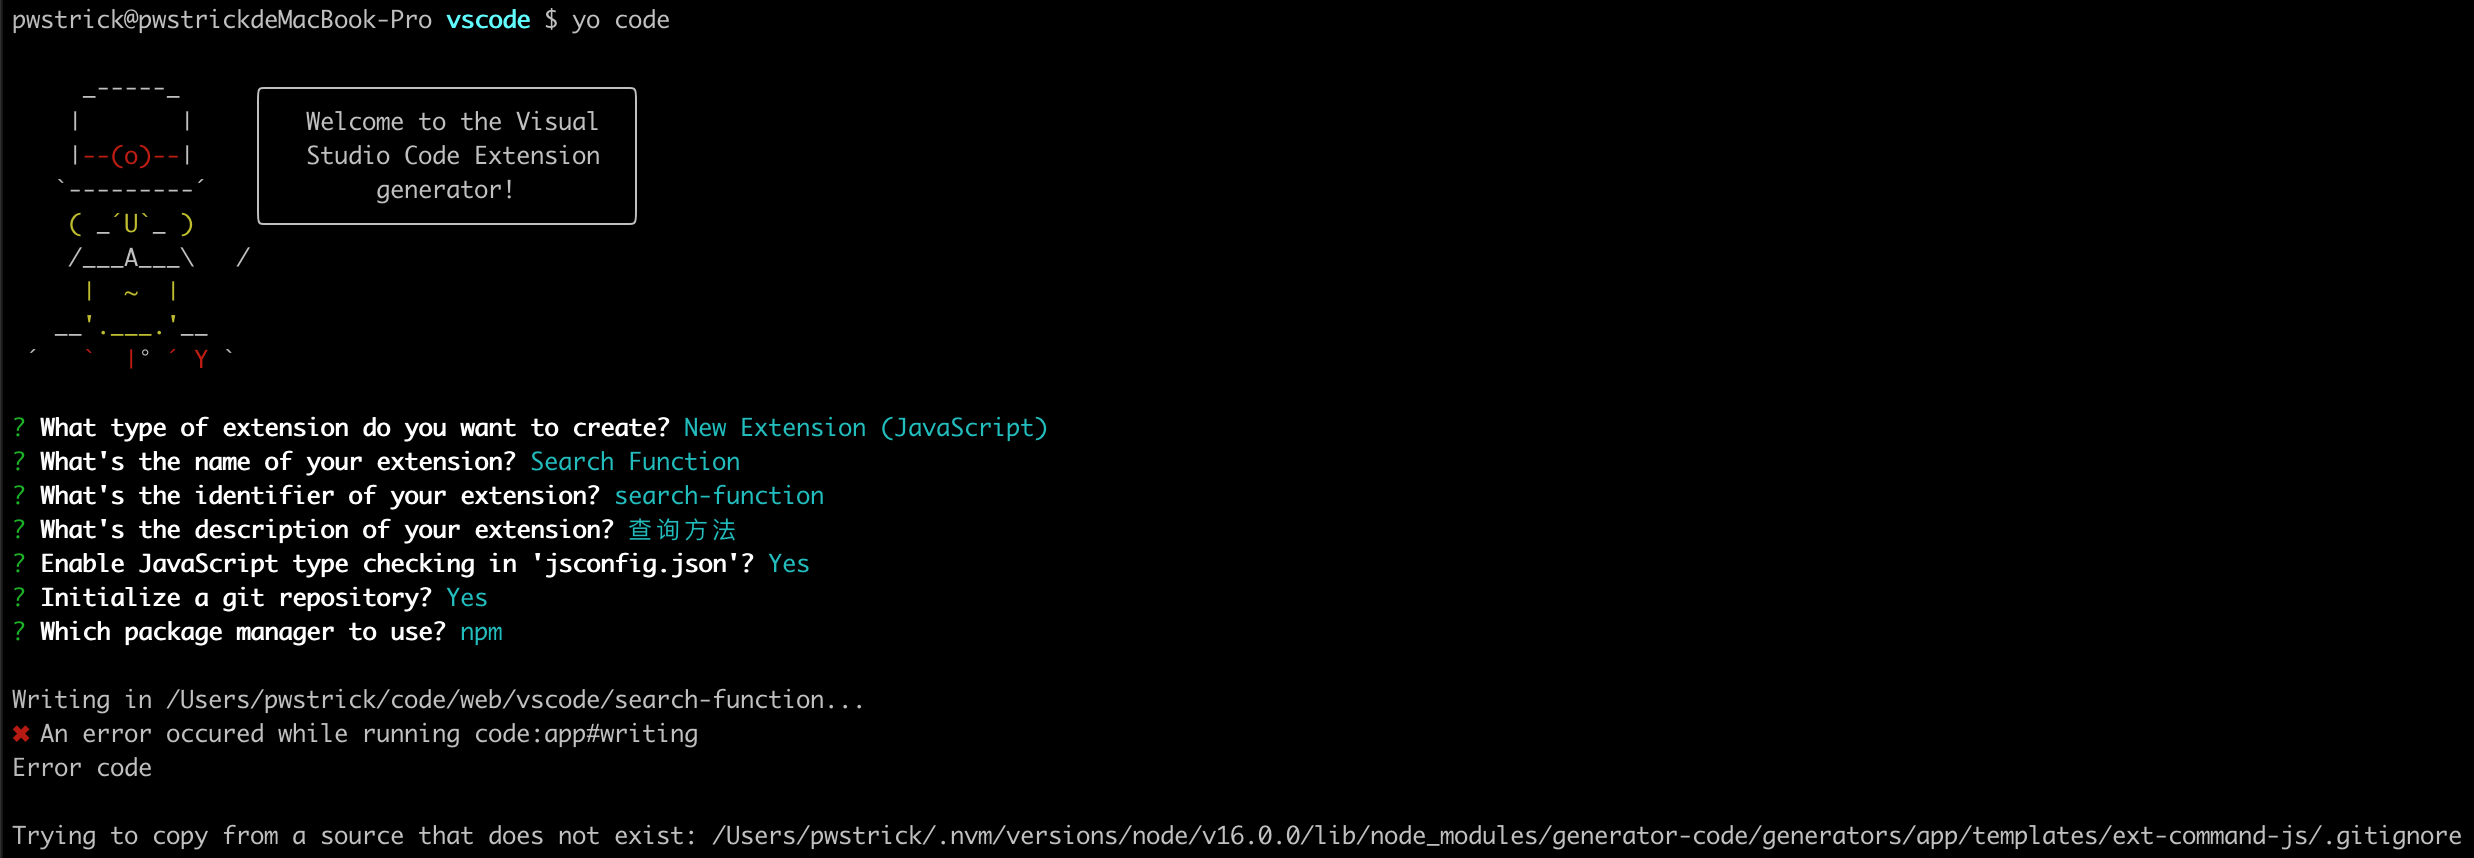
yo code
回答些問題,但如果在回答 Initialize a git repository 時選擇 yes,那麼就會出現報錯。
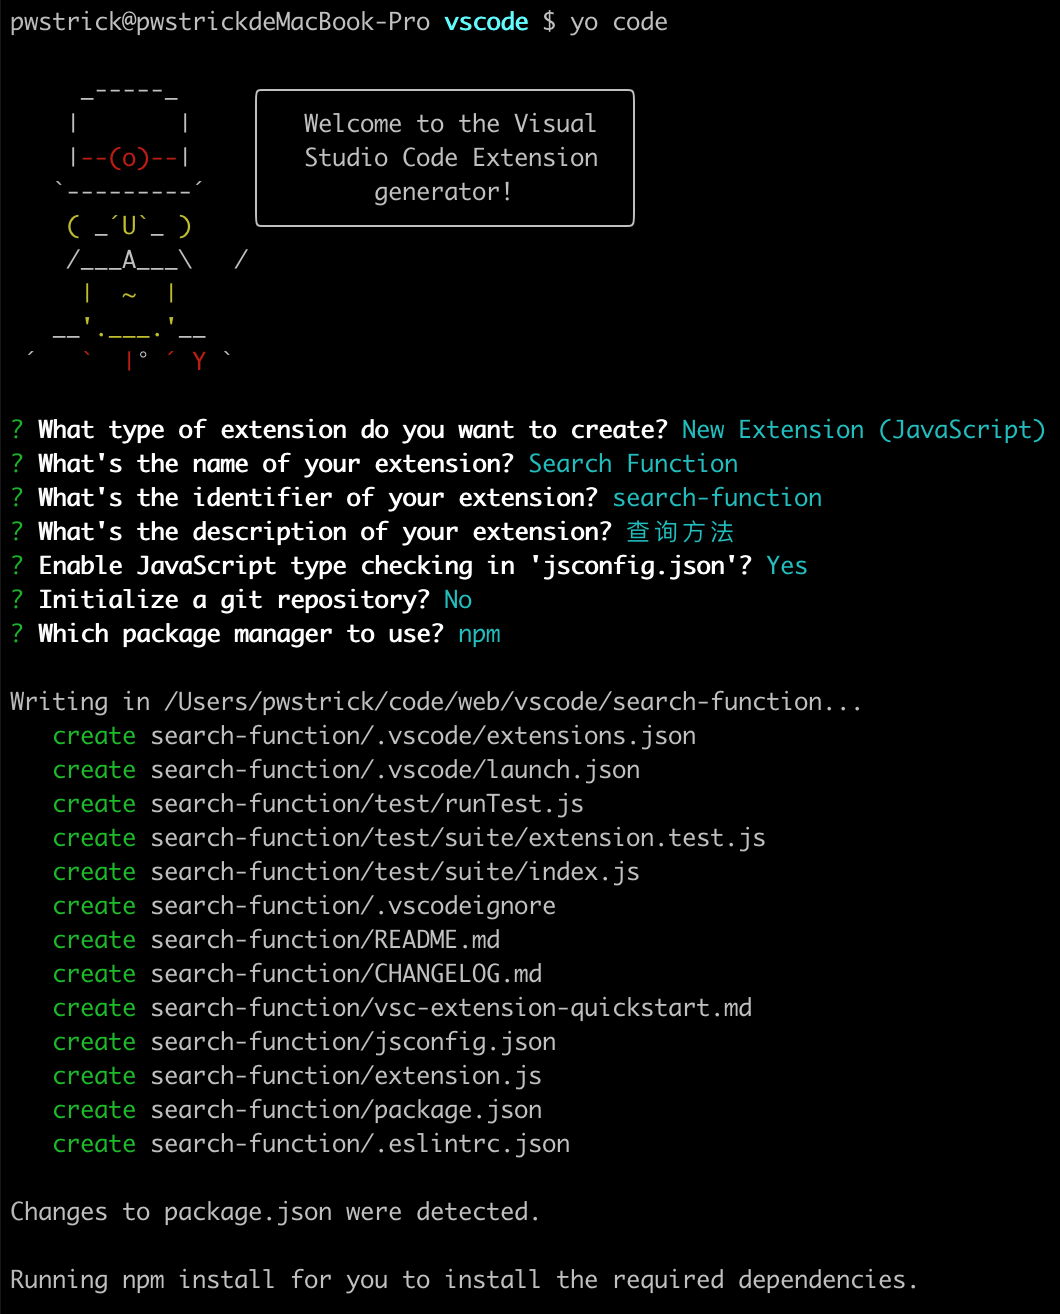
|-- test
|-- extension.js                     // 外掛入口檔案,外掛的邏輯在此完成
|-- CHANGELOG.md
|-- package-lock.json
|-- package.json
|-- README.md                        // 外掛說明 README,釋出後會展示
|-- jsconfig.json
|-- .eslintrc.json
|-- vsc-extension-quickstart.md
最重要的就是 extension.js 和 package.json,前者會實現外掛的核心功能,後者包括外掛的設定資訊。
2)偵錯
選擇 run =》 Start Debugging 後,就會自動彈出另一個 VSCode 視窗。
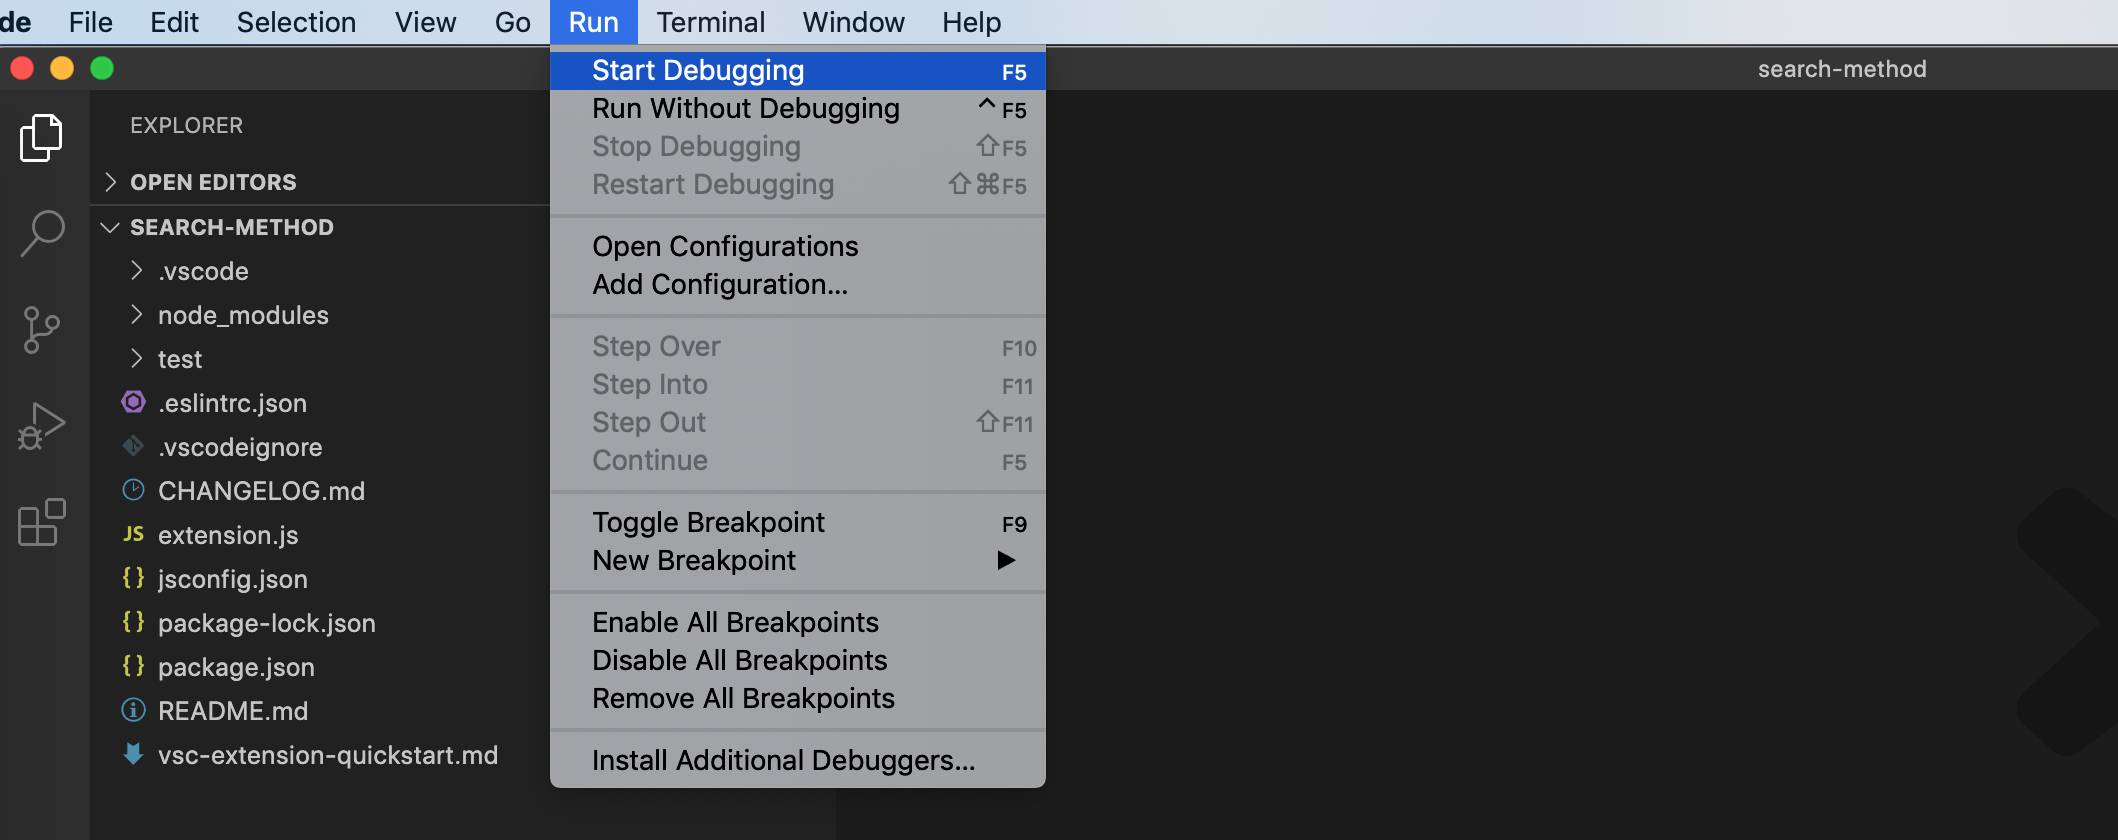
在這個視窗中,會預設安裝上正在偵錯的外掛,其實我本來起的外掛名字叫 Search Function。
但是在偵錯時,按下 Command + Shift + P 開啟命令面板,卻無法在此處找到預設的 Hello World 命令。
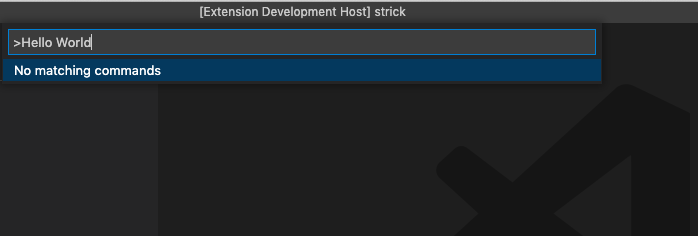
直到我換了名字後,才能在偵錯時找到 Hello World,這個坑也花了我好幾個小時。
還有個問題,就是在在編輯器的 Debug Console 標籤內無法看到列印資訊,相當於是在盲調,電腦重啟後,就能看到了,還是重啟大法好。
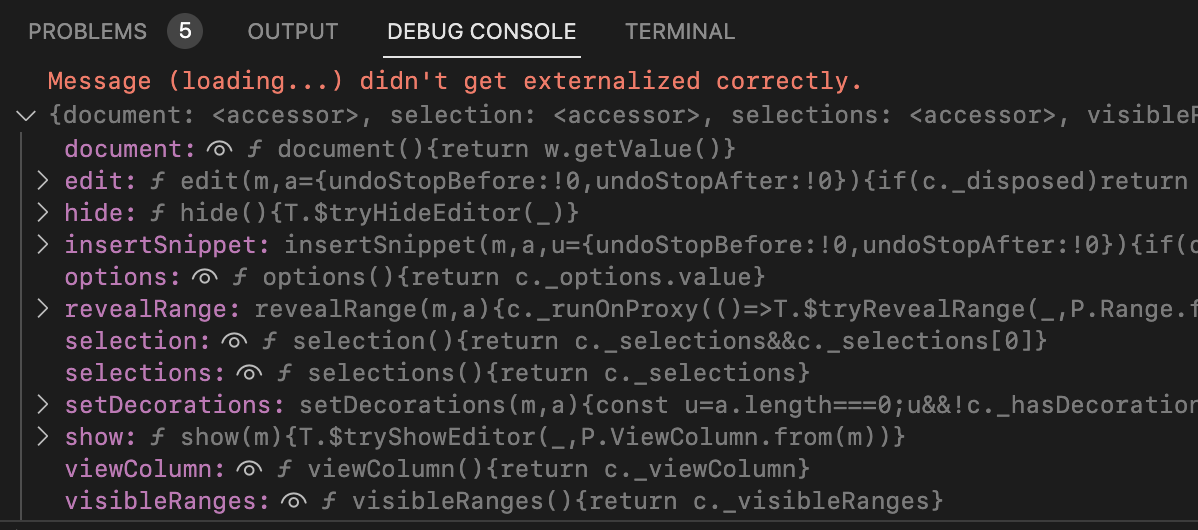
至此,完成了整個準備工作。
二、開發過程
公司有個 Node 專案,現在有個問題,就是 router 層的程式碼無法自動關聯到 service 層的方法宣告。
下面這段程式碼存在於 router 層,common 存在於service 層,它有一個 aggregation() 方法。
原先滑鼠拖到方法處,按住 command 鍵,就能跳轉到宣告處,檢視方法實現邏輯,但是現在無法跳轉。
const data = await services.common.aggregation({ tableName });
因為專案為了不用每次初始化 service 中的類,一下子全部都初始化好了,賦到一個物件中,如下所示。
Object.keys(dir).forEach((item) => {
  services[item] = new dir[item](models);
});
這次要開發的外掛,其實就是為了解決此問題,提升大家的開發效率。
1)最終效果
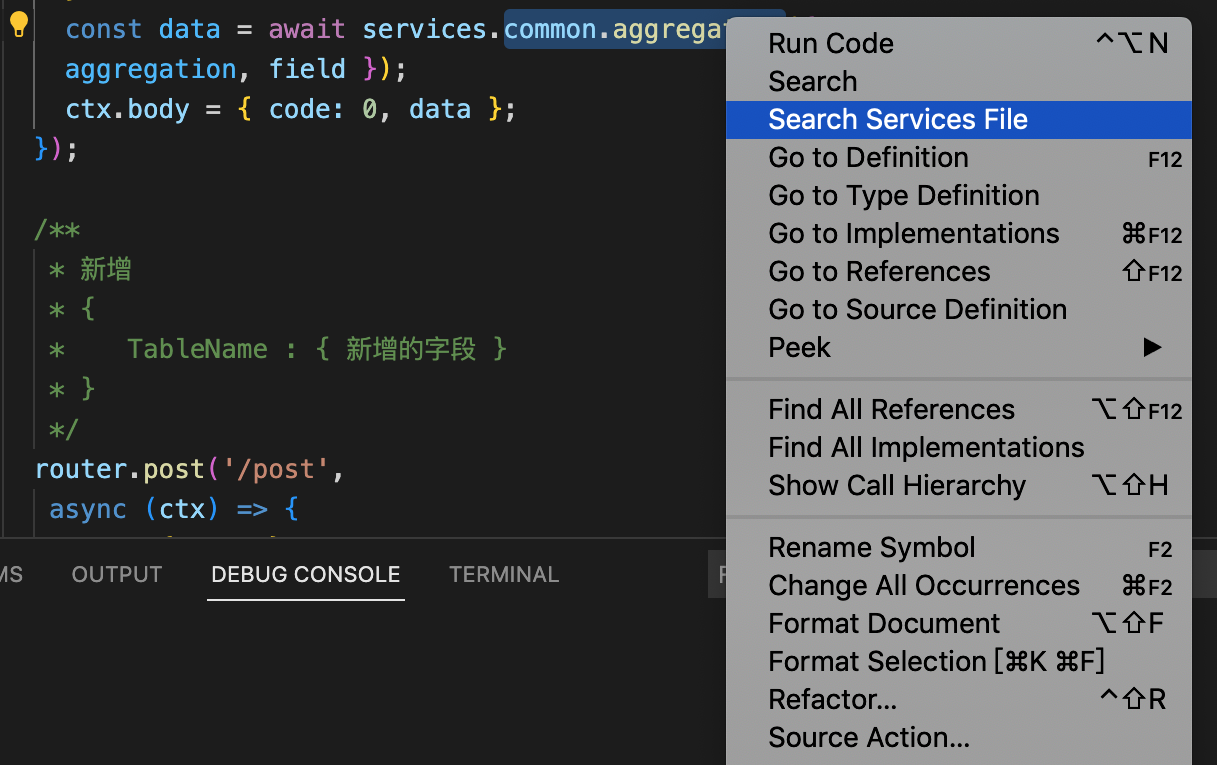
在經過多輪深思熟慮的設計之後,確定了要達到的效果,那就是先選中要檢視的方法以及檔名稱,然後右鍵找到 Search Services File 選單,此時就能直接跳轉過去了。
2)選單設定
要想在右鍵顯示這個自定義的選單,需要在 package.json 中做些設定。
commands 是預設就存在的,主要是 menus 欄位,註冊選單。
  "contributes": {
    "commands": [
      {
        "command": "search-method.services",
        "title": "Search Services File"
      }
    ],
    "menus": {
      "editor/context": [
        {
          "command": "search-method.services",
          "group": "navigation",
          "when": "editorHasSelection"
        }
      ]
    }
  },
editor/context 是指編輯器上下文選單,在 contributes.menus 一欄中,還可以找到其餘 menus 的關鍵字,可以都嘗試下。
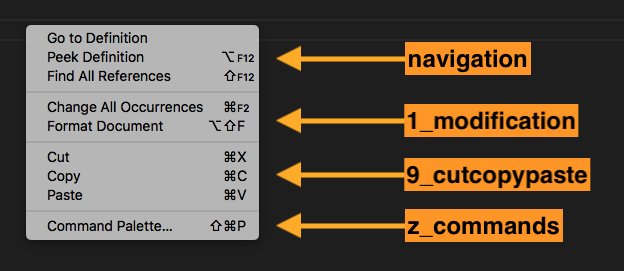
editor/context 的值是一個陣列,可以設定多個選單,選單中的 group 就是選單所處的位置。
navigation 就是最上面,還有 1_modification,9_cutcopypaste 和 z_commands 參考下圖。
when 就是觸發條件,editorHasSelection 就是指在編輯器中選中時觸發。
可選的關鍵字還可以是 editorFocus、inputFocus、editorHasMultipleSelections 等,參考 available contexts。
下面這段就是最精簡的 extension.js 程式碼了,註冊一個名為 search-method.services 的命令,核心功能會在此回撥函數中實現。
const vscode = require('vscode');
function activate(context) {
    const disposable = vscode.commands.registerCommand(
    'search-method.services',  (uri) => {
    }
    context.subscriptions.push(disposable);
}
function deactivate() {}
module.exports = {
    activate,
    deactivate
}
在研發時,以為像下面這樣就能直接得到 webMonitor.js 絕對目錄,但其實此處讀的是外掛的根目錄,而不是專案的。
path.resolve(__dirname, '../services/webMonitor.js')
通過回撥函數的引數 uri.fsPath 才能得到當前選中的程式碼所處的絕對位置。下面是完整的外掛邏輯。
 1 const vscode = require('vscode');
 2 const path = require('path');
 3 const fs = require('fs');
 4 const { Uri, window, Position, Range, Selection } = vscode;
 5 const disposable = vscode.commands.registerCommand(
 6   "search-method.services",
 7   (uri) => {
 8     // 獲取編輯器物件
 9     const editor = window.activeTextEditor;
10     if (!editor) {
11       return;
12     }
13     // 當前選中的程式碼所處的絕對位置
14     const dirPath = uri.fsPath;
15     // services的絕對目錄
16     const serviceDir = path.resolve(dirPath, "../../services");
17     // 獲取選中文字
18     const doc = editor.document;
19     const selection = editor.selection;
20     const words = doc.getText(selection).split(".");
21     const serviceName = words[0];
22     const methodName = words.length > 1 ? words[1] : "";
23     // 列出目錄中所有的檔案
24     const files = fs.readdirSync(serviceDir);
25     for (const item of files) {
26       // 讀取檔名稱
27       const name = item.split(".")[0];
28       // 檔案匹配
29       if (serviceName === name) {
30         const file = Uri.file(path.resolve(serviceDir, item));
31         // 根據換行符分隔字串
32         const fileContentArr = fs
33           .readFileSync(path.resolve(serviceDir, item), "utf8")
34           .split(/\r?\n/);
35         // 宣告的方法會有 async 關鍵字,或者通過空格和括號匹配
36         const index = fileContentArr.findIndex(
37           (element) =>
38             element.indexOf(`async ${methodName}`) >= 0 ||
39             element.indexOf(` ${methodName}(`) >= 0
40         );
41         // 跳轉到指定行數的檔案
42         window.showTextDocument(file).then((editor) => {
43           // 開始位置
44           const start = new Position(index, 0);
45           // 結束位置加了 20 行,為了便於檢視
46           const end = new Position(index + 20, 0);
47           // 遊標聚焦的位置
48           editor.selections = [new Selection(start, start)];
49           // 可見範圍
50           const range = new Range(start, end);
51           editor.revealRange(range);
52         });
53         break;
54       }
55     }
56   }
57 );
- 第13行,讀取當前專案 services 的絕對路徑。
- 第17行,獲取選中的文字,例如 common.aggregation,然後分隔得到檔名和方法名。
- 第23行,列出 services 的所有檔案,並與選中的檔名匹配。
- 第28行,匹配成功時讀取檔案內容並通過換行符分隔,查詢方法所在的行。
- 第41行,通過 window.showTextDocument 開啟 Uri.file() 處理過的檔案,初始化 Position 類,設定遊標聚焦的位置(Selection)和可見範圍(Range)。
雖然只有40多行程式碼,但花費了我一天的時間才完成,中間走了不少彎路,最麻煩的是跳轉檔案,showTextDocument() 方法也是偶然間才發現的。
還有個小技巧,可以通過看 window、Uri 這些類的宣告,就能瞭解到它們提供的功能。
三、對外發布
為了能在 VSCode 的 Extensions 中被搜尋到,還需要幾個步驟。
1)註冊賬號
首先到 Azure DevOps 建立管理賬號,根據提示來就行了。
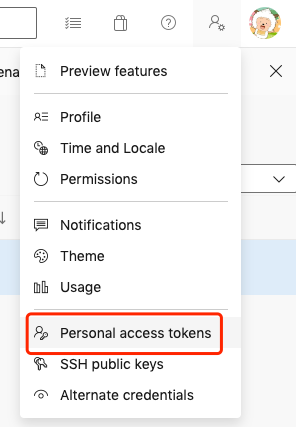
然後選中 Personal access tokens,去建立 token。
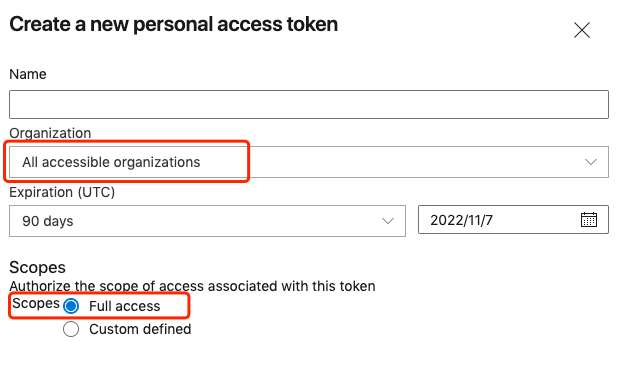
接著在建立時,有些選項要注意,Organization 和 Scopes,網上說不能亂選,否則釋出會不成功。建立後,記得自己將 token 儲存一下,後面就無法檢視了。
最後建立釋出賬號,填些資訊,下一步登入時使用。
vsce 用於上傳外掛,首先全域性安裝。
npm i vsce -g
然後是登入剛剛註冊的釋出賬號,例如 vsce login pwstrick。
vsce login <publisher name>
選好後會要求你輸入之前申請的 token,登入成功後就會有下面的一段提示。
Personal Access Token for publisher 'pwstrick': ************************
The Personal Access Token verification succeeded for the publisher 'pwstrick'.
此時,就可以輸入釋出命令了,成功的話,就會出現 DONE 的提示。
vsce publish

INFO  Publishing 'pwstrick.search-method v0.0.1'...
INFO  Extension URL (might take a few minutes): https://marketplace.visualstudio.com/items?itemName=pwstrick.search-method
INFO  Hub URL: https://marketplace.visualstudio.com/manage/publishers/pwstrick/extensions/search-method/hub
DONE  Published pwstrick.search-method v0.0.1.
上傳成功後,不會馬上就能搜尋到。
在外掛管理中,當出現綠色的勾時,才表示外掛釋出完成,現在可以在應用市場搜尋到了。

可以看到並不是在第一行,需要往下翻一翻。
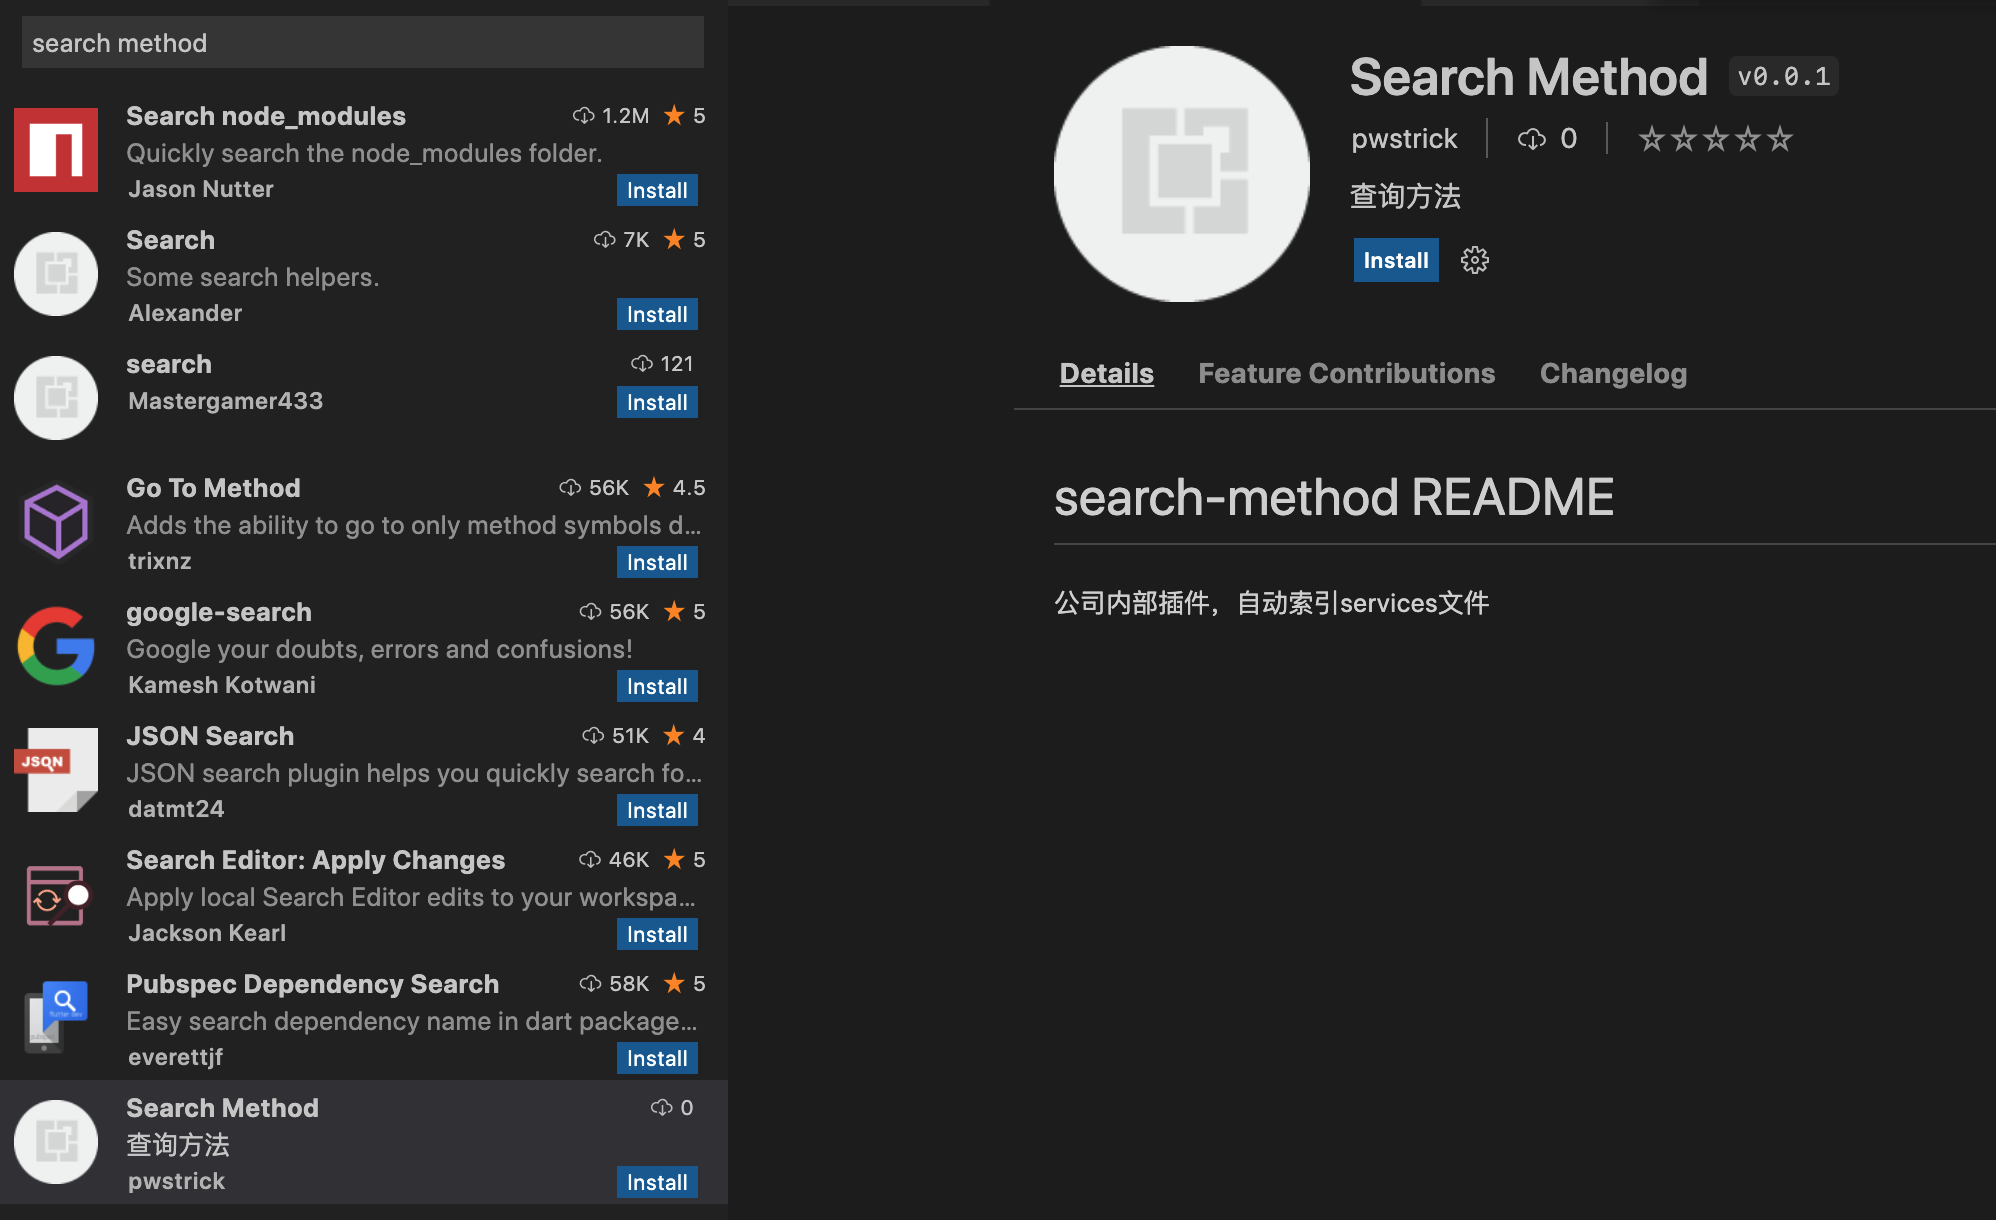
在給組員使用時,發現他們不能安裝,因為我設定的最低版本是 1.7.0,這個在開發的時候也需要注意。
  "engines": {
    "vscode": "^1.70.0"
  },