identity4 系列————持久化設定篇[五]
2022-08-28 12:05:48
前言
上面已經介紹了3個例子了,並且介紹瞭如何去使用identity。
但是在前面的例子中,我們使用的都是在記憶體中操作,那麼正式上線可能需要持久到資料庫中。
這裡值得說明的是,並不一定一定要持久化到資料庫中,場景不一樣,需求就不一樣。
那麼看下如何持久化吧。
正文
例子位置:https://github.com/IdentityServer/IdentityServer4/tree/main/samples/Quickstarts/5_EntityFramework
- 安裝對應的庫
IdentityServer4.EntityFramework
dotnet add package IdentityServer4.EntityFramework
安裝對應的:
dotnet add package Microsoft.EntityFrameworkCore.SqlServer
官網中例子使用了sql server localdb。 那麼需要安裝 Microsoft.EntityFrameworkCore.SqlServer.
dotnet add package Microsoft.EntityFrameworkCore.SqlServer
identity server 的設定在這,那麼我們處理的應該就是這麼一部分。

改成下面這樣:
var migrationsAssembly = typeof(Startup).GetTypeInfo().Assembly.GetName().Name;
const string connectionString = @"Data Source=(LocalDb)\MSSQLLocalDB;database=IdentityServer4.Quickstart.EntityFramework-4.0.0;trusted_connection=yes;";

var  builder = services.AddIdentityServer()
	.AddTestUsers(TestUsers.Users)
	.AddConfigurationStore(options =>
	{
		options.ConfigureDbContext = b => b.UseSqlServer(connectionString,
			sql => sql.MigrationsAssembly(migrationsAssembly));
	})
	.AddOperationalStore(options =>
	{
		options.ConfigureDbContext = b => b.UseSqlServer(connectionString,
			sql => sql.MigrationsAssembly(migrationsAssembly));
	});
- 這樣設定暫時沒有很大的用處,因為:
The IdentityServer4.EntityFramework.Storage package contains entity classes that map from IdentityServer’s models.
IdentityServer4.EntityFramework.Storage 儲存的是實體類,相當於是code first,那麼這個得做遷移了。
dotnet tool install --global dotnet-ef
dotnet add package Microsoft.EntityFrameworkCore.Design
加入工具和相應的庫。
注:這裡就不解釋太多了,後面介紹ef code first 會介紹其中的原理之類的
然後做好遷移。
dotnet ef migrations add InitialIdentityServerPersistedGrantDbMigration -c PersistedGrantDbContext -o Data/Migrations/IdentityServer/PersistedGrantDb
dotnet ef migrations add InitialIdentityServerConfigurationDbMigration -c ConfigurationDbContext -o Data/Migrations/IdentityServer/ConfigurationDb
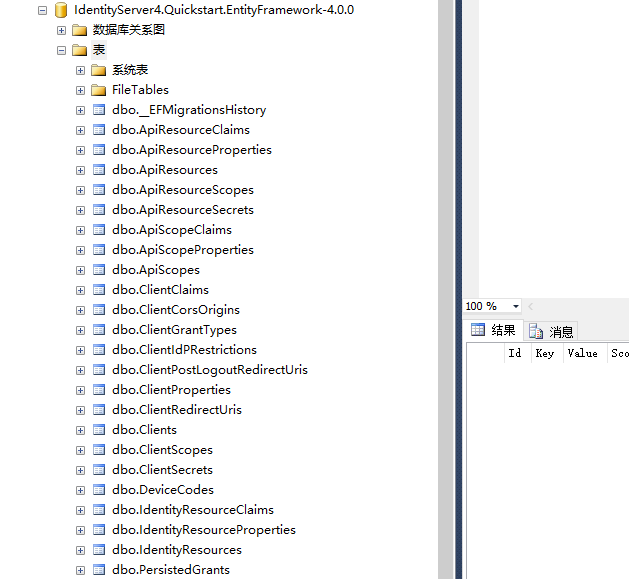
這樣那麼資料庫就建立好了。

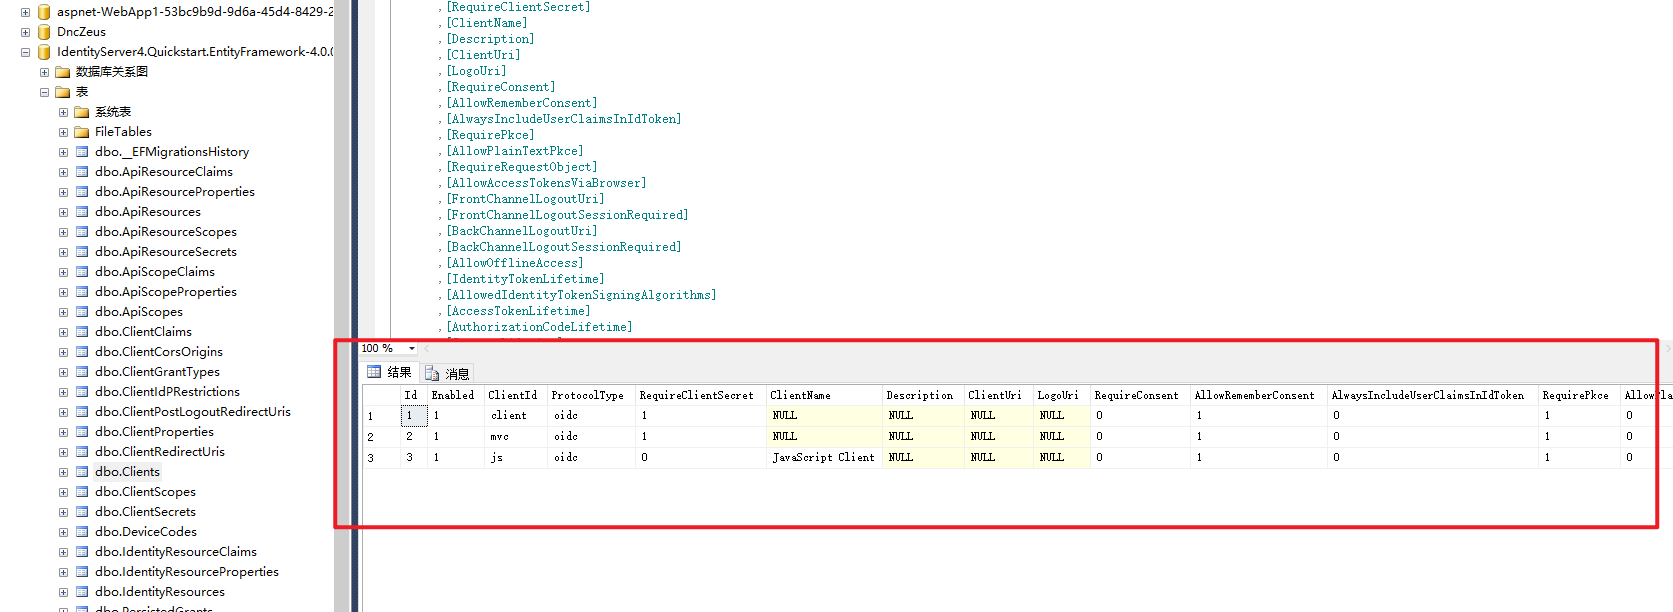
然後初始化一些資料:

private void InitializeDatabase(IApplicationBuilder app)
{
	using (var  serviceScope = app.ApplicationServices.GetService<IServiceScopeFactory>().CreateScope())
	{
		serviceScope.ServiceProvider.GetRequiredService<PersistedGrantDbContext>().Database.Migrate();

		var context = serviceScope.ServiceProvider.GetRequiredService<ConfigurationDbContext>();
		context.Database.Migrate();

		if (!context.Clients.Any())
		{
			foreach (var client in Config.Clients)
			{
				context.Clients.Add(client.ToEntity());
			}

			context.SaveChanges();
		}

		if (!context.IdentityResources.Any())
		{
			foreach (var resource in Config.IdentityResources)
			{
				context.IdentityResources.Add(resource.ToEntity());
			}

			context.SaveChanges();
		}

		if (!context.ApiScopes.Any())
		{
			foreach (var scope in Config.ApiScopes)
			{
				context.ApiScopes.Add(scope.ToEntity());
			}

			context.SaveChanges();
		}
	}
}
然後啟動後就有了。

結
下一節介紹如何持久化使用者資料,然後下下節,介紹各個表。