SpringBoot(一、快速入門)
1、SpringBoot簡介
Spring Boot 是由 Pivotal 團隊提供的全新框架,其設計目的是用來簡化新 Spring 應用的初始搭建以及開發過程。該框架使用了特定的方式來進行設定,從而使開發人員不再需要定義樣板化的設定。
SpringBoot官網:https://spring.io/projects/spring-boot/
Spring Boot 可以輕鬆建立可以「直接執行」的獨立的、生產級的基於 Spring 的應用程式。
Spring Boot 基於Spring開發,Spring Boot 本身並不提供Spring 框架的核心特性以及擴充套件功能,只是用於快速.敏捷的開發新一代基於Spring 框架的應用程式。 Spring Boot以約定大於設定的核心思想,預設幫我們進行了很多設定,多數Spring Boot應用只需要很少的Spring設定,幾乎可以零設定開箱即用。
2、優勢
- 建立獨立的 Spring 應用程式
- 直接嵌入 Tomcat、Jetty 或 Undertow(無需部署 WAR 檔案)
- 提供自以為是的「入門」依賴項以簡化您的構建設定
- 儘可能自動設定 Spring 和 3rd 方庫
- 提供生產就緒功能,例如指標、健康檢查和外部化設定
- 完全無需程式碼生成,無需 XML 設定
3、快速入門
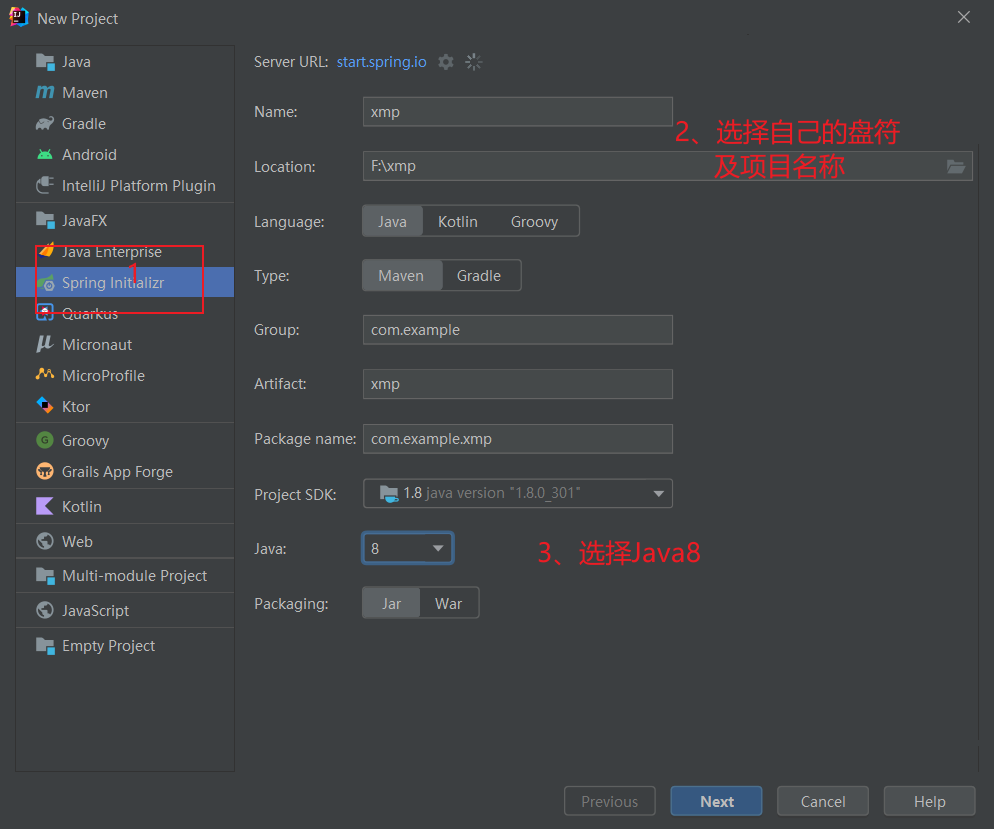
1、新建工程
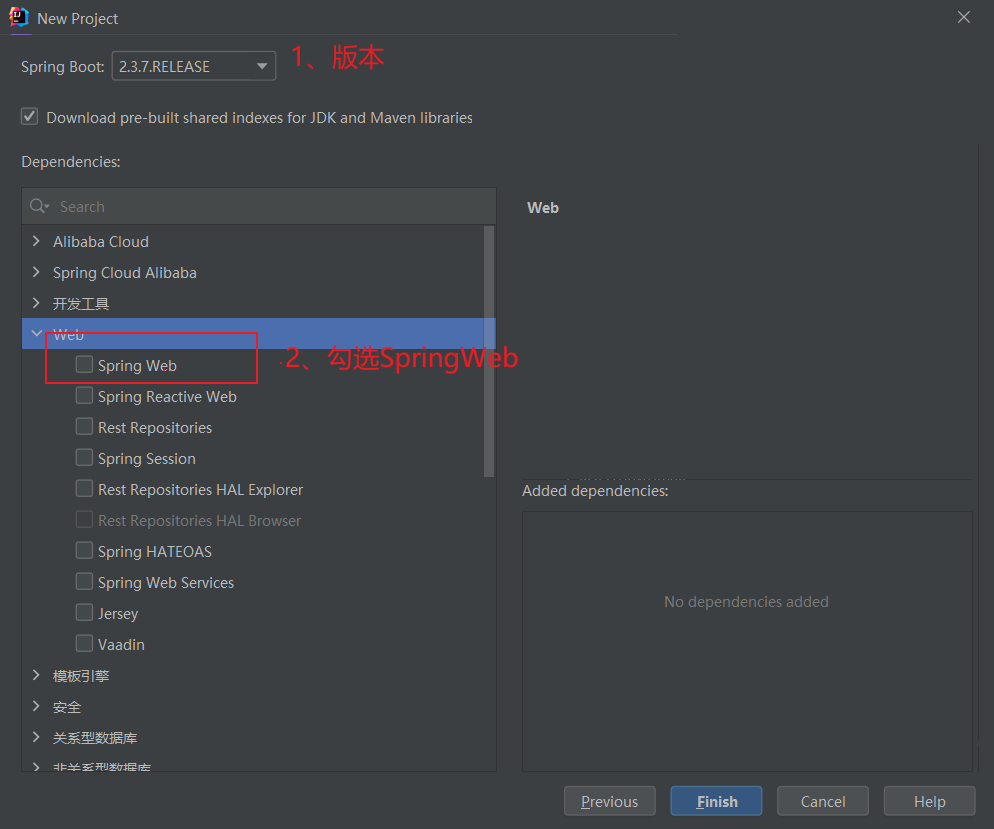
2、勾選SpringWeb
經過以上步驟後就建立了如下結構的模組,它會幫我們自動生成一個 Application 類

在建立好的工程中不需要建立設定類
建立好的專案會自動生成其他的一些檔案,而這些檔案目前對我們來說沒有任何作用,所以可以將這些檔案刪除。
可以刪除的目錄和檔案如下:
.mvn.gitignoreHELP.mdmvnwmvnw.cmd
3、建立Controller
package com.example.xmp.Controller;

import org.springframework.web.bind.annotation.RequestMapping;
import org.springframework.web.bind.annotation.RestController;

@RestController
@RequestMapping("/hello")
public class HelloController {

    @RequestMapping("/")
    public String index() {
        return "Greetings from Spring Boot!";
    }

}
4、啟動伺服器
執行 SpringBoot 工程不需要使用原生的 Tomcat 和 外掛,只執行專案包下的 Application 類,我們就可以在控制檯看出如下資訊:

使用 Apifox或者Postman工具來測試我們的程式
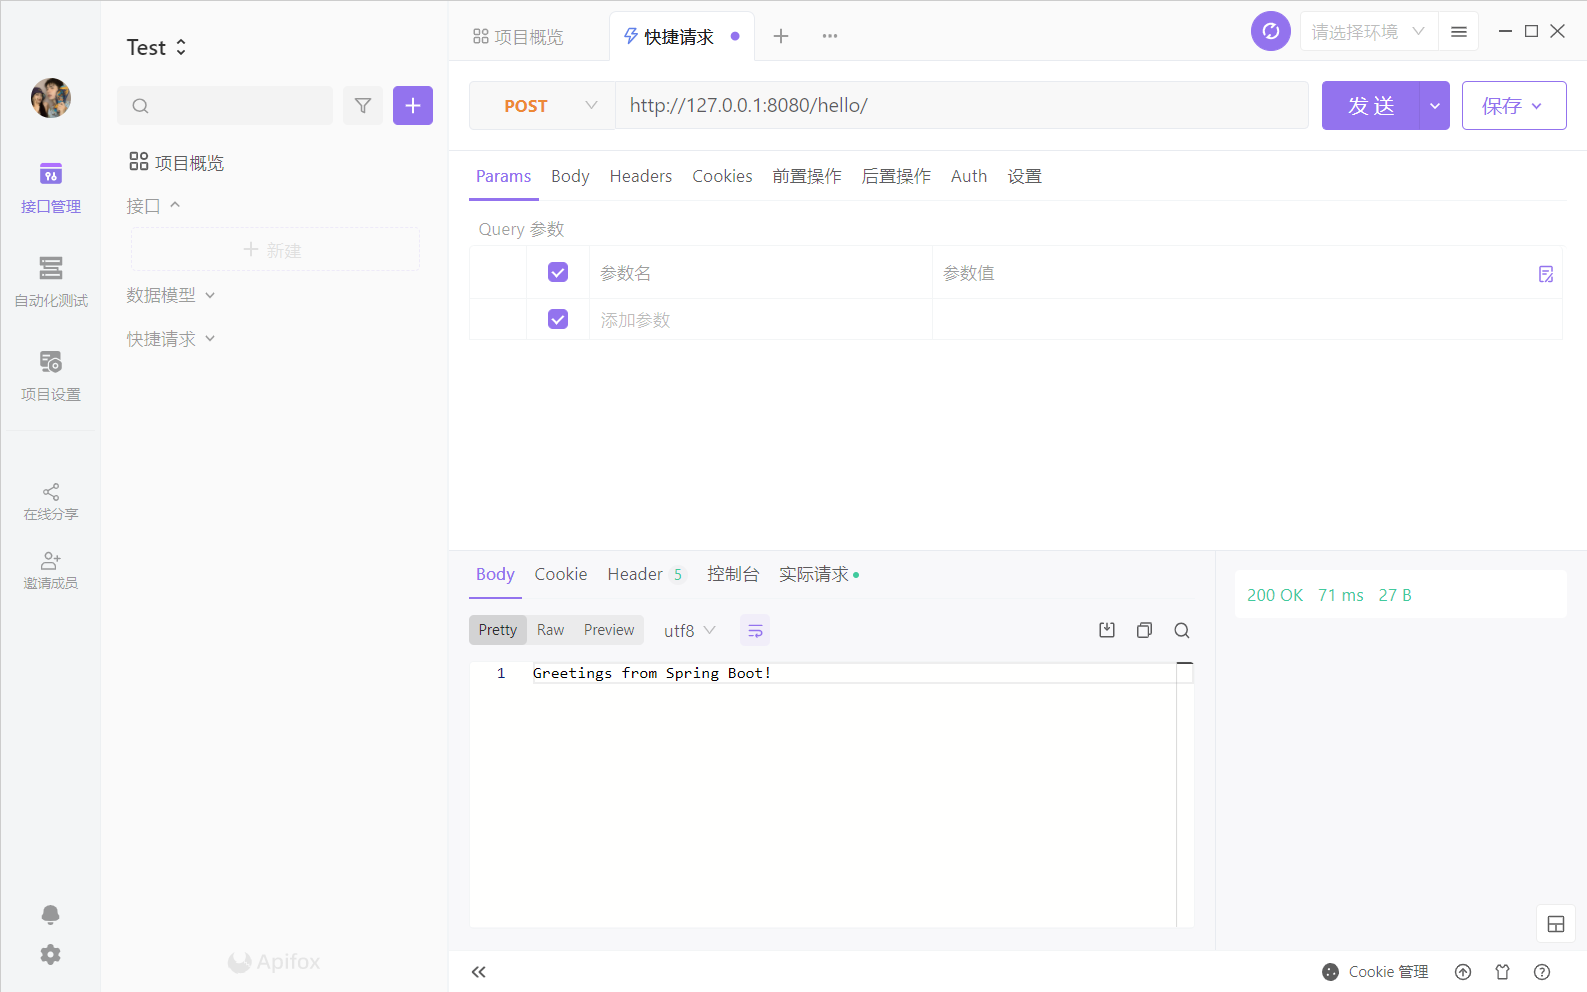
通過上面的入門案例我們可以看到使用 SpringBoot 進行開發,使整個開發變得很簡單。
pom.xml 組態檔中的內容詳解
<?xml version="1.0" encoding="UTF-8"?>
<project xmlns="http://maven.apache.org/POM/4.0.0" xmlns:xsi="http://www.w3.org/2001/XMLSchema-instance"
         xsi:schemaLocation="http://maven.apache.org/POM/4.0.0 https://maven.apache.org/xsd/maven-4.0.0.xsd">
    <modelVersion>4.0.0</modelVersion>
    <groupId>com.example</groupId>
    <artifactId>xmp</artifactId>
    <version>0.0.1-SNAPSHOT</version>
    <name>xmp</name>
    <description>xmp</description>

    <properties>
        <!--JDK 的版本-->
        <java.version>1.8</java.version>
        <project.build.sourceEncoding>UTF-8</project.build.sourceEncoding>
        <project.reporting.outputEncoding>UTF-8</project.reporting.outputEncoding>
        <spring-boot.version>2.3.7.RELEASE</spring-boot.version>
    </properties>

    <dependencies>
        <!--該依賴就是我們在建立 SpringBoot 工程勾選的那個 Spring Web 產生的-->
        <dependency>
            <groupId>org.springframework.boot</groupId>
            <artifactId>spring-boot-starter-web</artifactId>
        </dependency>
    </dependencies>

    <build>
        <plugins>
            <!--這個外掛是在打包時需要的-->
            <plugin>
                <groupId>org.springframework.boot</groupId>
                <artifactId>spring-boot-maven-plugin</artifactId>
            </plugin>
        </plugins>
    </build>
</project>
我們程式碼之所以能簡化,就是因為指定的父工程和 Spring Web 依賴實現的。
4、Spring和SpringBoot對比
| 類/組態檔 | Spring | SpringBoot |
|---|---|---|
| pom.xml | 手工製作 | 勾選新增 |
| Web3.0設定類 | 手工製作 | 無 |
| Spring/SpringMVC設定類 | 手工製作 | 無 |
| 控制器Controller | 手工製作 | 手工製作 |
-
座標
Spring程式中的座標需要自己編寫,而且座標非常多SpringBoot程式中的座標是我們在建立工程時進行勾選自動生成的 -
web3.0設定類
Spring程式需要自己編寫這個設定類。這個設定類大家之前編寫過,肯定感覺很複雜SpringBoot程式不需要我們自己書寫 -
設定類
Spring/SpringMVC程式的設定類需要自己書寫。而SpringBoot程式則不需要書寫。
5、在官網構建工程
官網地址如下:
https://spring.io/projects/spring-boot
進入到 SpringBoot 官網後拖到最下方就可以看到如下內容

然後點選 Spring Initializr 超連結就會跳轉到如下頁面
然後操作與在Idea中類似,建立完成後會生成一個資料夾壓縮包,開啟即可,與Idea建立的一模一樣。
6、問題
- Idea建立SpringBoot一直轉圈圈
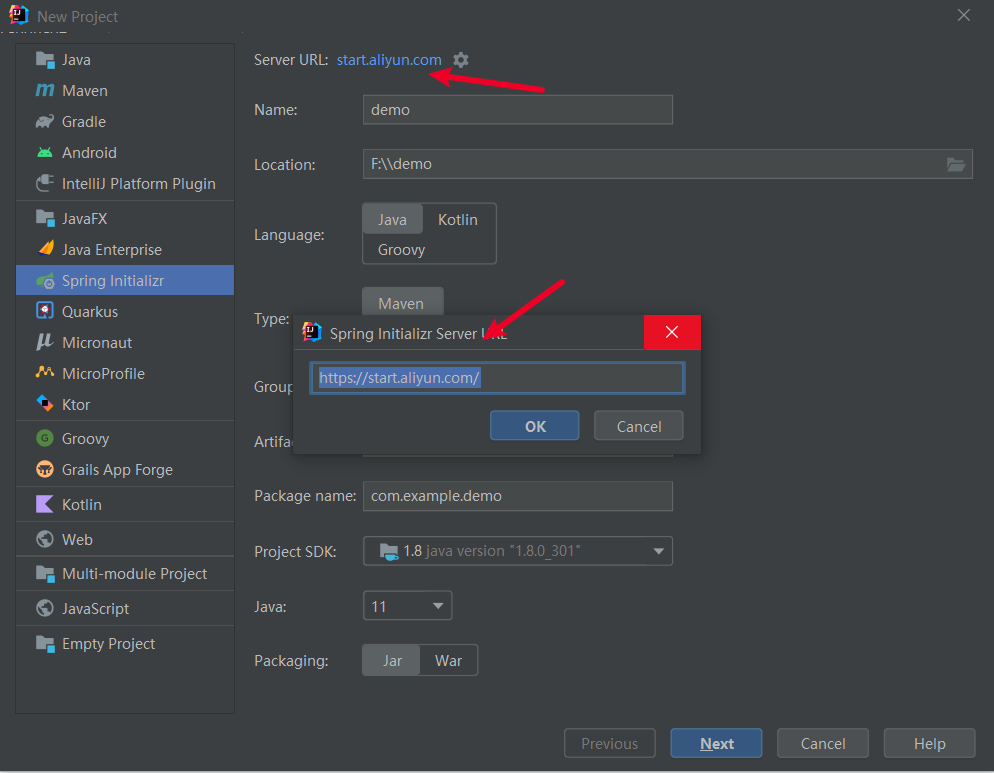
- 打不開Spring官網
可通過阿里雲映象建立:https://start.aliyun.com/
