webpack打包CSS詳細流程解析
2022-08-09 14:02:42

【相關推薦:、】
1,要打包的檔案,和引入的模板檔案准備
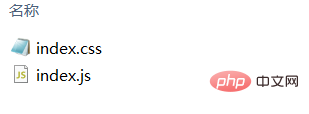
先準備好需要轉換的檔案,放在src資料夾中,有index.css樣式檔案和index.js。雖然說是把css也編譯打包,也是先將其轉換給index.js檔案的,index中的檔案內容import './index.css'
還有一個模板檔案,也就是將打包編譯好的檔案引入到的index.html檔案


import './index.css'
2,環境搭建
npm init =》專案搭建環境的初始化
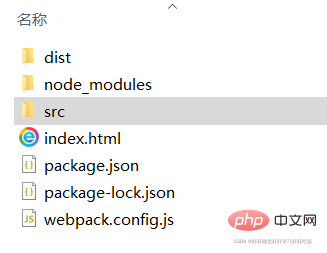
初始化就會自動生成webpack.json和node_modules包安裝的檔案。
再在環境中安裝包
1)基本的webpack包的安裝
npm install --save-dev [email protected] [email protected]
2)將模組化編譯打包的檔案自動引入模板檔案,也就是html檔案
npm install --save-dev [email protected]
3)橋樑檔案loder-css和webpack的橋樑
識別css檔案的安裝包
npm install --save-dev [email protected]
CSS樣式以style的方式引入的
npm install --save-dev [email protected]
CSS樣式以link的方式引入
npm install --save-dev [email protected]
最後安裝的包,可以從package.json中檢視
{
  "name": "webpack-css",
  "version": "1.0.0",
  "description": "",
  "main": "index.js",
  "scripts": {
    "webpack": "webpack"
  },
  "author": "",
  "license": "ISC",
  "devDependencies": {
    "css-loader": "^4.1.1",
    "html-webpack-plugin": "^4.3.0",
    "mini-css-extract-plugin": "^0.9.0",
    "style-loader": "^1.2.1",
    "webpack": "^4.44.1",
    "webpack-cli": "^3.3.12"
  }
}
3,對環境進行設定
plugins
HtmlWebpackPlugin
js檔案引入到html檔案中需要手動,但是使用該外掛,可以自動引入到html檔案中
需要範例化,在plugins中進行設定
 const HtmlWebpackPlugin = require('html-webpack-plugin');
 plugins: [
    // 自動將依賴注入 html 模板,並輸出最終的 html 檔案到目標資料夾
    new HtmlWebpackPlugin({
      //在dist檔案下成為打包生成的檔案
      filename: 'index.html',
      //原始檔,一起作為模板
      template: './src/index.art',
      //要引入的檔案,在entry裡面的js檔案的名稱
      chunks: ['index']
    }),
    new HtmlWebpackPlugin({
      filename: 'list.html',
      template: './src/list.art',
      chunks: ['list']
    })
  ]
環境進行設定 webpack.config.js
const path = require('path');
const HtmlWebpackPlugin = require('html-webpack-plugin');
//css用link的方式引入
const MiniCssExtractPlugin = require('mini-css-extract-plugin');

module.exports = {
  mode: 'development',
  entry: './src/index.js',
  output: {
    path: path.resolve(__dirname, 'dist'),
    filename: '[name].js'
  },
  module: {
    rules: [
      {
        test: /\.css$/,
        // loader: 'css-loader'
        // use: ['style-loader', 'css-loader']
        use: [MiniCssExtractPlugin.loader, 'css-loader']
      }
    ]
  },
  plugins: [
    new HtmlWebpackPlugin({
      template: './index.html',
      filename: 'index.html'
    }),
    new MiniCssExtractPlugin({
      filename: 'css/[name].css'
    })
  ]
};
4,執行
通過命令列
npm run webpeck
【相關推薦:、】
以上就是webpack打包CSS詳細流程解析的詳細內容,更多請關注TW511.COM其它相關文章!
