通過範例簡單瞭解基礎CSS導航欄、CSS下拉式選單

(學習視訊分享:、html視訊教學)
導航欄
熟練使用導航欄,對於任何網站都非常重要。
使用CSS你可以轉換成好看的導航欄而不是枯燥的HTML選單。
導航欄=連結列表
作為標準的HTML基礎一個導航欄是必須的。
在我們的例子中我們將建立一個標準的HTML列表導航欄。
導覽列基本上是一個連結列表,所以使用 <ul> 和 <li> 元素非常有意義,公共HTML:
<ul>
    <li><a href="#home">主頁</a></li>
    <li><a href="#news">新聞</a></li>
    <li><a href="#contact">聯絡</a></li>
    <li><a href="#about">關於</a></li></ul>
現在,讓我們從列表中刪除邊距和填充:
ul {
    list-style-type: none;
    margin: 0;
    padding: 0;}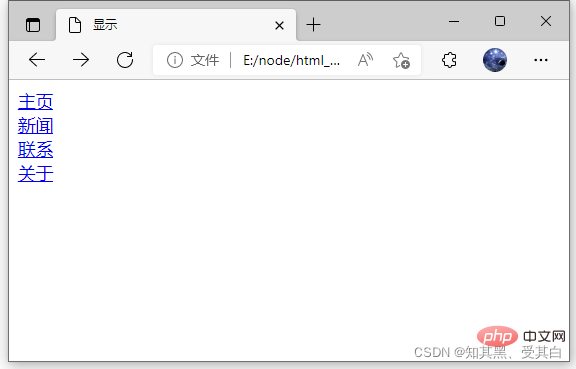
例子解析:list-style-type:none – 移除列表前小標誌,一個導航欄並不需要列表標記。
移除瀏覽器的預設設定將邊距和填充設定為0。
上面的例子中的程式碼是垂直和水平導航欄使用的標準程式碼。
<!DOCTYPE html><html><head>
    <meta charset="UTF-8">
    <title>顯示</title>
    <style>
        ul {
            list-style-type: none;
            margin: 0;
            padding: 0;
        }
    </style></head><body><ul>
    <li><a href="#home">主頁</a></li>
    <li><a href="#news">新聞</a></li>
    <li><a href="#contact">聯絡</a></li>
    <li><a href="#about">關於</a></li></ul></body></html>
垂直導航欄
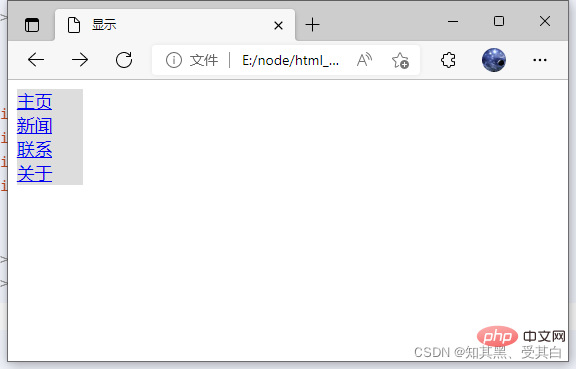
上面的程式碼,我們只需要 <a> 元素的樣式,建立一個垂直的導航欄:
li a {
  display: block;
  width: 60px;
  background-color: #dddddd;}
範例說明:
display:block 顯示塊元素的連結,讓整體變為可點選連結區域(不只是文字),它允許我們指定寬度 width:60px 。
塊元素預設情況下是最大寬度。我們要指定一個60畫素的寬度。
注意: 請務必指定 <a> 元素在垂直導航欄的的寬度。如果省略寬度,IE6可能產生意想不到的效果。
<!DOCTYPE html><html><head>
    <meta charset="UTF-8">
    <title>顯示</title>
    <style>
        ul {
            list-style-type: none;
            margin: 0;
            padding: 0;
        }
        li a {
            display: block;
            width: 60px;
            background-color: #dddddd;
        }
    </style></head><body><ul>
    <li><a href="#home">主頁</a></li>
    <li><a href="#news">新聞</a></li>
    <li><a href="#contact">聯絡</a></li>
    <li><a href="#about">關於</a></li></ul></body></html>
垂直導覽列範例
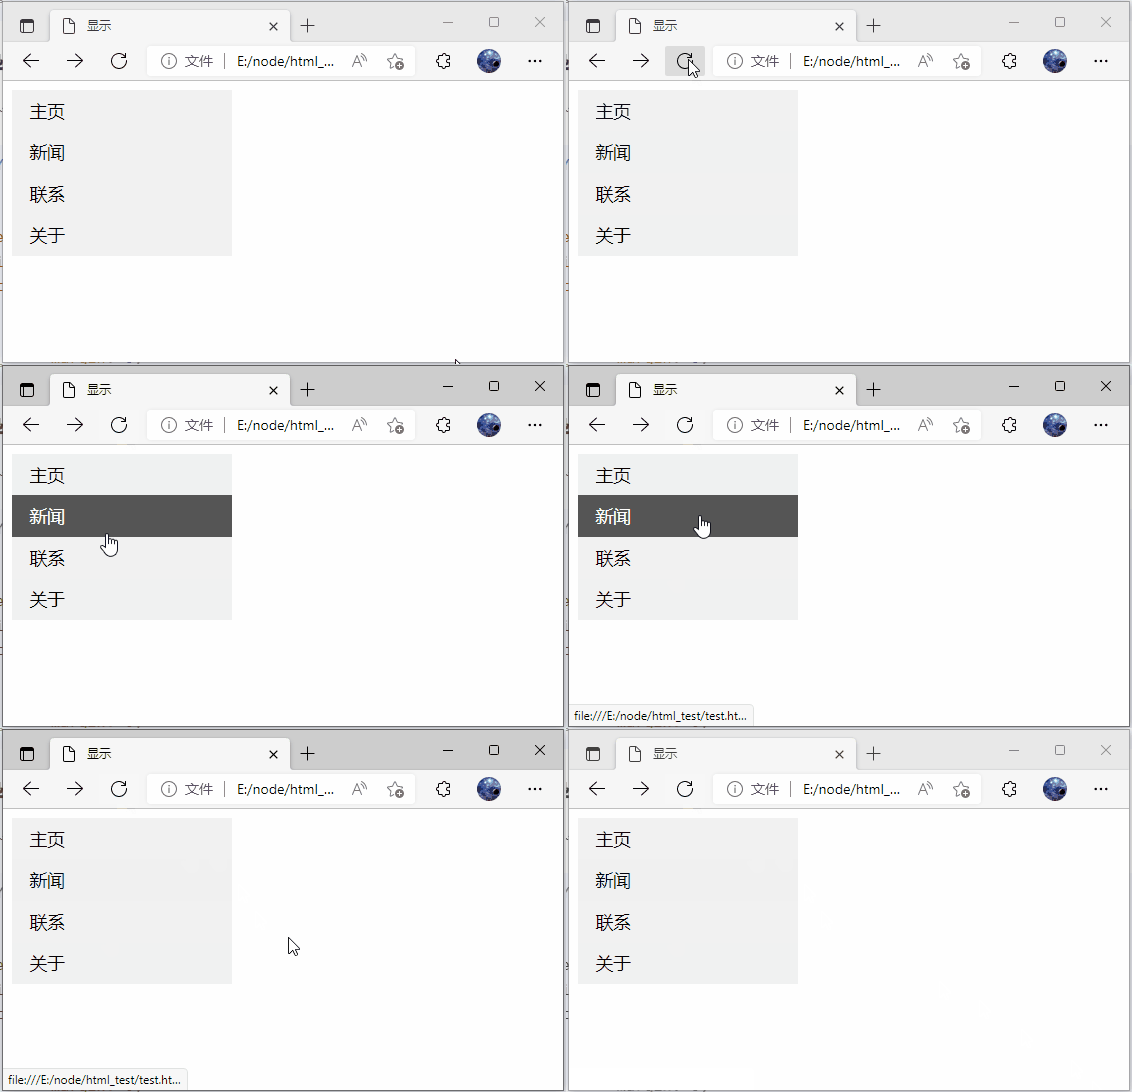
建立一個簡單的垂直導覽列範例,在滑鼠移動到選項時,修改背景顏色:
<!DOCTYPE html><html><head>
    <meta charset="UTF-8">
    <title>顯示</title>
    <style>
        ul {
            list-style-type: none;
            margin: 0;
            padding: 0;
            width: 200px;
            background-color: #f1f1f1;
        }
        li a {
            display: block;
            color: #000;
            padding: 8px 16px;
            text-decoration: none;
        }
        /* 滑鼠移動到選項上修改背景顏色 */
        li a:hover {
            background-color: #555;
            color: white;
        }
    </style></head><body><ul>
    <li><a href="#home">主頁</a></li>
    <li><a href="#news">新聞</a></li>
    <li><a href="#contact">聯絡</a></li>
    <li><a href="#about">關於</a></li></ul></body></html>
啟用/當前導覽列範例
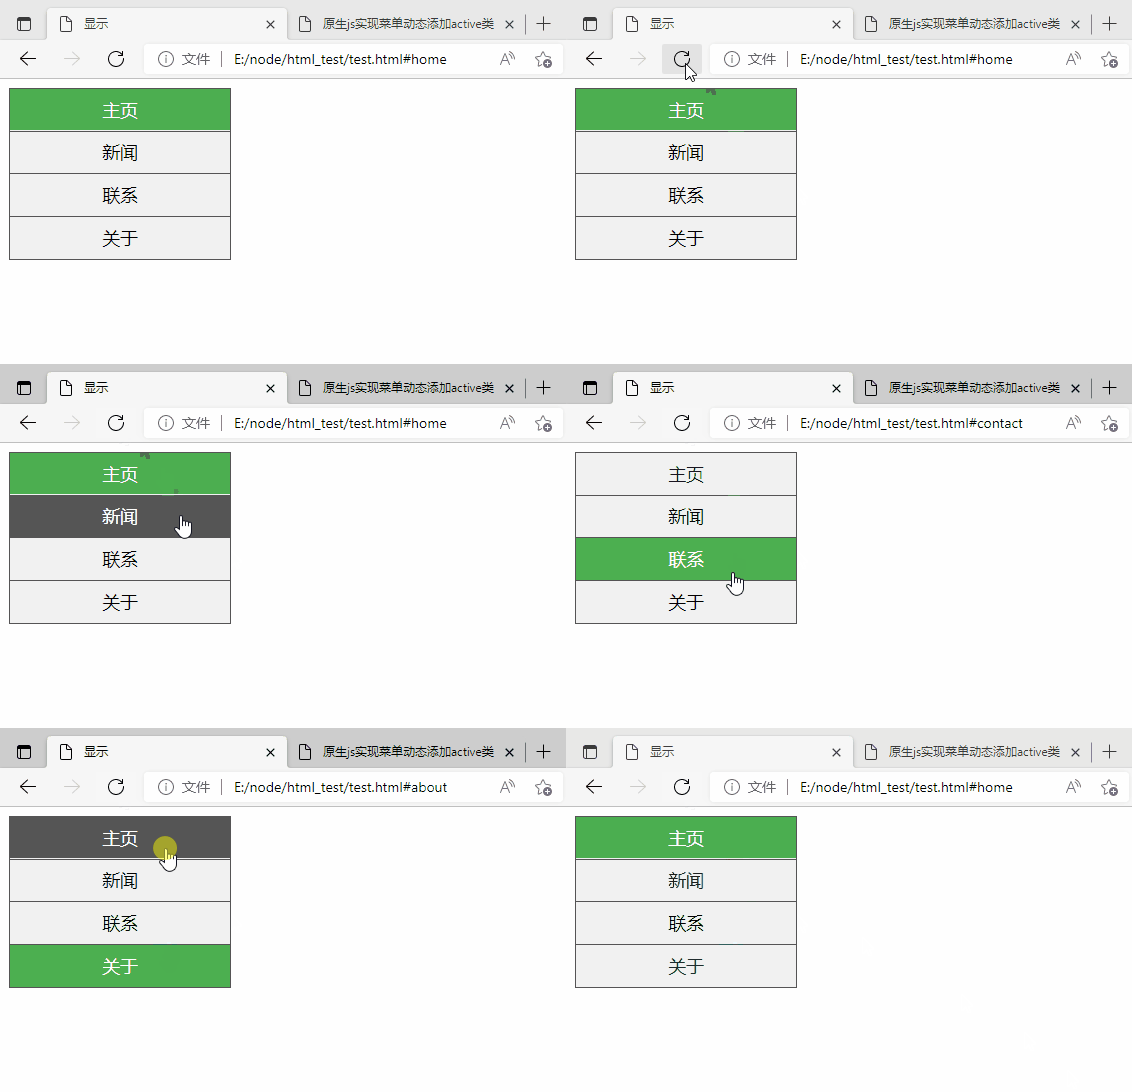
在點選了選項後,我們可以新增 「active」 類來標準哪個選項被選中: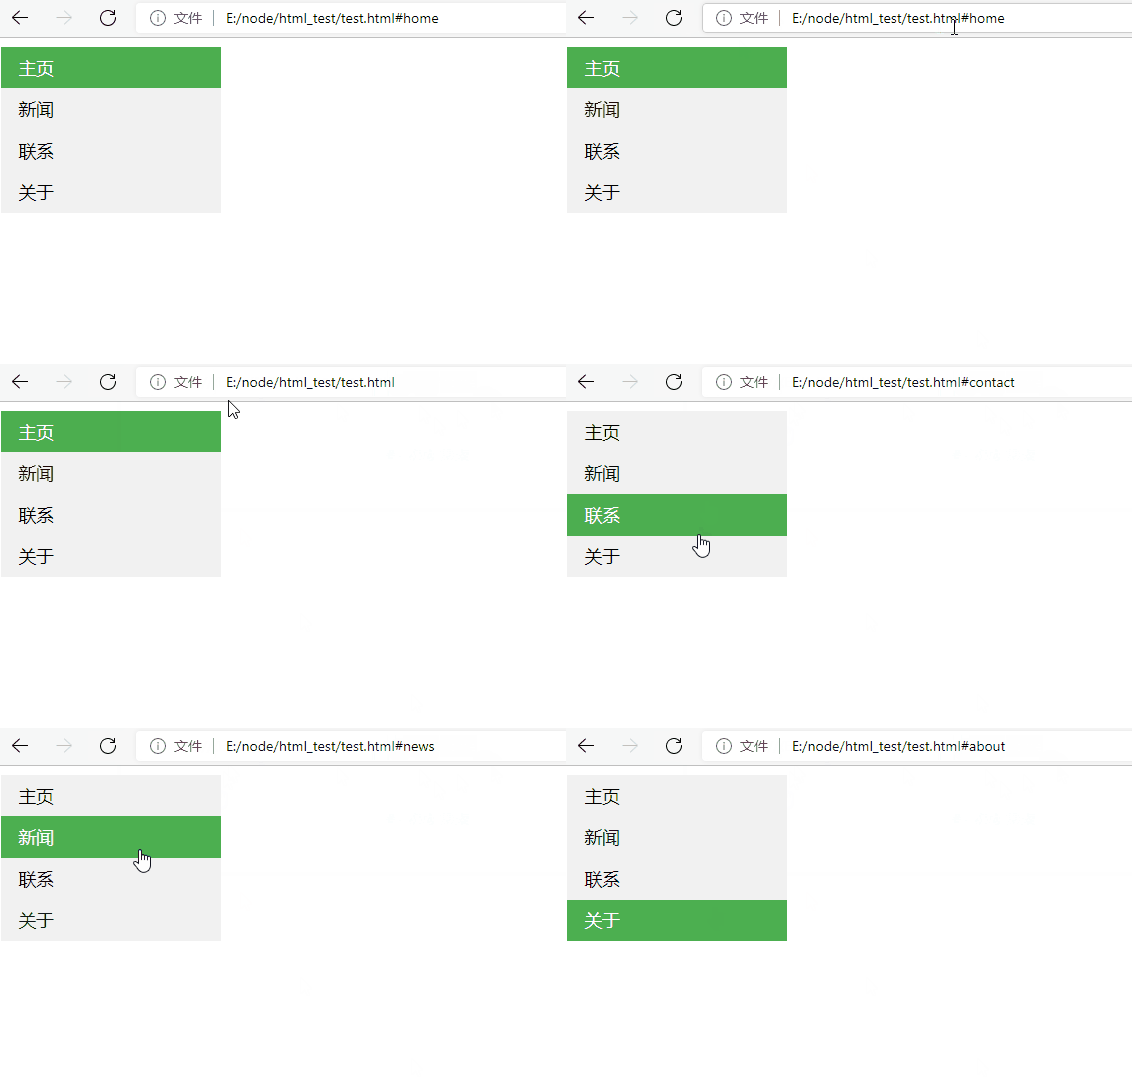
li a.active {
    background-color: #4CAF50;
    color: white;}li a:hover:not(.active) {
    background-color: #555;
    color: white;}
範例程式碼:
<!DOCTYPE html><html><head>
    <meta charset="UTF-8">
    <title>顯示</title>
    <style>
        ul {
            list-style-type: none;
            margin: 0;
            padding: 0;
            width: 200px;
            background-color: #f1f1f1;
        }
        li a {
            display: block;
            color: #000;
            padding: 8px 16px;
            text-decoration: none;
        }
        /* 滑鼠移動到選項上修改背景顏色 */
        li a:hover {
            background-color: #555;
            color: white;
        }
        li a.active {
            background-color: #4CAF50;
            color: white;
        }
        li a:hover:not(.active) {
            background-color: #555;
            color: white;
        }
    </style></head><body><ul id="nav">
    <li><a class="active" href="#home">主頁</a></li>
    <li><a href="#news">新聞</a></li>
    <li><a href="#contact">聯絡</a></li>
    <li><a href="#about">關於</a></li></ul><script>function removeActiveClass(node) {
    node.className = '';}let menus = document.querySelectorAll('#nav');menus.forEach(function (value, index) {
    value.addEventListener('click', function (e) {
        var target = e.target;
        Array.prototype.forEach.call(document.querySelectorAll('#nav li a'), removeActiveClass);
        target.className = 'active';
    })});</script></body></html>
創連結並新增邊框
可以在 <li> or <a> 上新增 text-align:center 樣式來讓連結居中。
可以在 border <ul> 上新增 border 屬性來讓導航欄有邊框。
如果要在每個選項上新增邊框,可以在每個 <li> 元素上新增 border-bottom :
<!DOCTYPE html><html><head>
    <meta charset="UTF-8">
    <title>顯示</title>
    <style>
        ul {
            list-style-type: none;
            margin: 0;
            padding: 0;
            width: 200px;
            background-color: #f1f1f1;
            border: 1px solid #555;
        }

        li a {
            display: block;
            color: #000;
            padding: 8px 16px;
            text-decoration: none;
        }

        li {
            text-align: center;
            border-bottom: 1px solid #555;
        }

        li:last-child {
            border-bottom: none;
        }

        li a.active {
            background-color: #4CAF50;
            color: white;
        }

        li a:hover:not(.active) {
            background-color: #555;
            color: white;
        }
    </style></head><body><ul id="nav">
    <li><a class="active" href="#home">主頁</a></li>
    <li><a href="#news">新聞</a></li>
    <li><a href="#contact">聯絡</a></li>
    <li><a href="#about">關於</a></li></ul><script>function removeActiveClass(node) {
    node.className = '';}let menus = document.querySelectorAll('#nav');menus.forEach(function (value, index) {
    value.addEventListener('click', function (e) {
        var target = e.target;
        Array.prototype.forEach.call(document.querySelectorAll('#nav li a'), removeActiveClass);
        target.className = 'active';
    })});</script></body></html>
全螢幕高度的固定導覽列
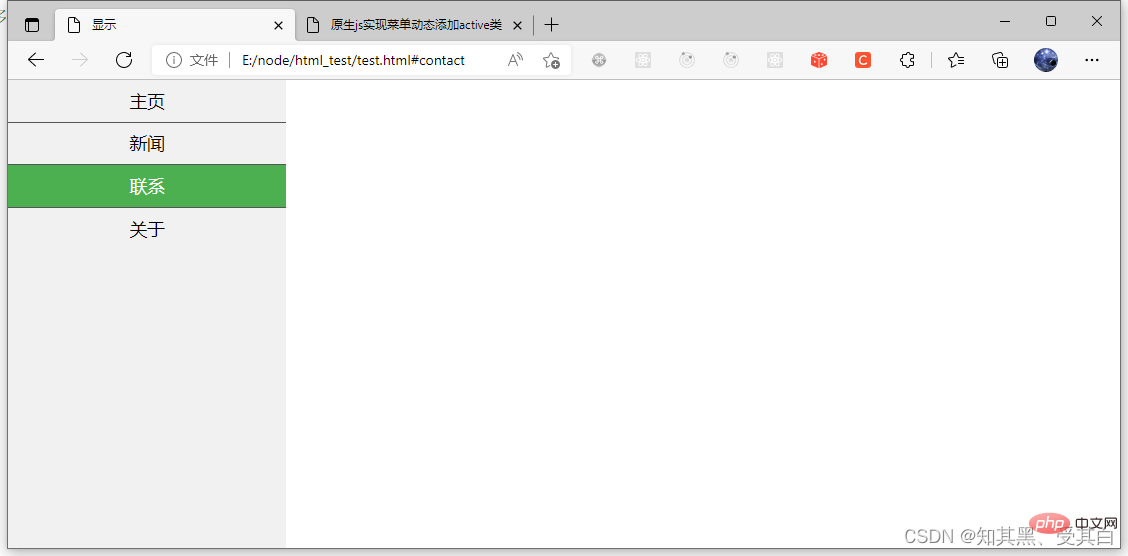
接下來我們建立一個左邊是全螢幕高度的固定導覽列,右邊是可捲動的內容。
ul {
    list-style-type: none;
    margin: 0;
    padding: 0;
    width: 25%;
    background-color: #f1f1f1;
    height: 100%; /* 全螢幕高度 */
    position: fixed;
    overflow: auto; /* 如果導航欄選項多,允許捲動 */}
注意: 該範例可以在移動裝置上使用。
原始碼
<!DOCTYPE html><html><head>
    <meta charset="UTF-8">
    <title>顯示</title>
    <style>
        *{
            margin: 0;
            padding: 0;
        }
        ul {
            list-style-type: none;
            margin: 0;
            padding: 0;
            width: 25%;
            background-color: #f1f1f1;
            height: 100%; /* 全螢幕高度 */
            position: fixed;
            overflow: auto; /* 如果導航欄選項多,允許捲動 */
        }

        li a {
            display: block;
            color: #000;
            padding: 8px 16px;
            text-decoration: none;
        }

        li {
            text-align: center;
            border-bottom: 1px solid #555;
        }

        li:last-child {
            border-bottom: none;
        }

        li a.active {
            background-color: #4CAF50;
            color: white;
        }

        li a:hover:not(.active) {
            background-color: #555;
            color: white;
        }
    </style></head><body><ul id="nav">
    <li><a class="active" href="#home">主頁</a></li>
    <li><a href="#news">新聞</a></li>
    <li><a href="#contact">聯絡</a></li>
    <li><a href="#about">關於</a></li></ul><script>function removeActiveClass(node) {
    node.className = '';}let menus = document.querySelectorAll('#nav');menus.forEach(function (value, index) {
    value.addEventListener('click', function (e) {
        var target = e.target;
        Array.prototype.forEach.call(document.querySelectorAll('#nav li a'), removeActiveClass);
        target.className = 'active';
    })});</script></body></html>
水平導航欄
有兩種方法建立橫向導航欄。使用 內聯 (inline) 或 浮動 (float) 的列表項。
這兩種方法都很好,但如果你想連結到具有相同的大小,你必須使用浮動的方法。
內聯列表項
建立一個橫向導航欄的方法之一是指定元素, 上述程式碼是標準的內聯:
ul {
    list-style-type:none;
    margin:0;
    padding:0;}li {
    display:inline;}
範例解析:
display:inline; -預設情況下,<li> 元素是塊元素。
在這裡,我們刪除換行符之前和之後每個列表項,以顯示一行。
浮動列表項
在上面的例子中連結有不同的寬度。
對於所有的連結寬度相等,浮動 <li> 元素,並指定為 <a> 元素的寬度:
ul {
    list-style-type:none;
    margin:0;
    padding:0;
    overflow:hidden;}li {
    float:left;}li a {
    display: block;
    color: #000;
    padding: 8px 16px;
    text-decoration: none;}
範例解析:
   float:left – 使用浮動塊元素的幻燈片彼此相鄰。
display:block – 顯示塊元素的連結,讓整體變為可點選連結區域(不只是文字),它允許我們指定寬度。
   width:60px – 塊元素預設情況下是最大寬度。我們要指定一個60畫素的寬度。
水平導覽列範例
建立一個水平導覽列,在滑鼠移動到選項後修改背景顏色。
ul {
    list-style-type: none;
    margin: 0;
    padding: 0;
    overflow: hidden;
    background-color: #333;}
 li {
    float: left;}
 li a {
    display: block;
    color: white;
    text-align: center;
    padding: 14px 16px;
    text-decoration: none;}
 /*滑鼠移動到選項上修改背景顏色 */li a:hover {
    background-color: #111;}
連結右對齊
將導覽列最右邊的選項設定右對齊 (float:right;):
<li style="float:right"><a href="#about">關於</a></li>
新增分割線
<li> 通過 border-right 樣式來新增分割線:
/* 除了最後一個選項(last-child) 其他的都新增分割線 */
li {
    border-right: 1px solid #bbb;
}

li:last-child {
    border-right: none;
}<ul>
  <li><a class="active" href="#home">主頁</a></li>
  <li><a href="#news">新聞</a></li>
  <li><a href="#contact">聯絡</a></li>
  <li><a href="#about">關於</a></li></ul>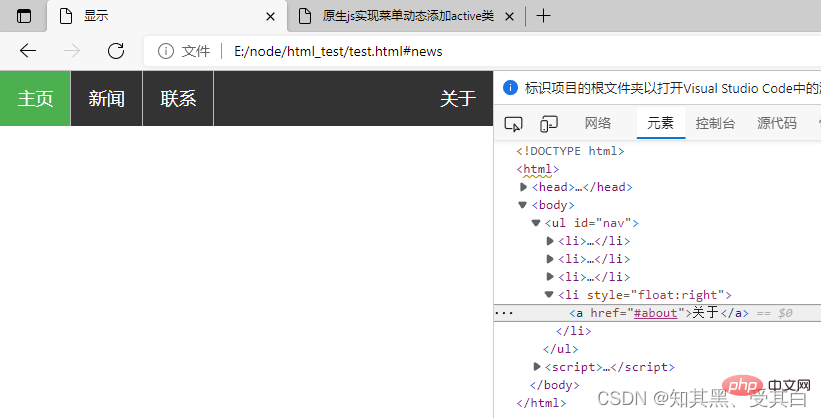
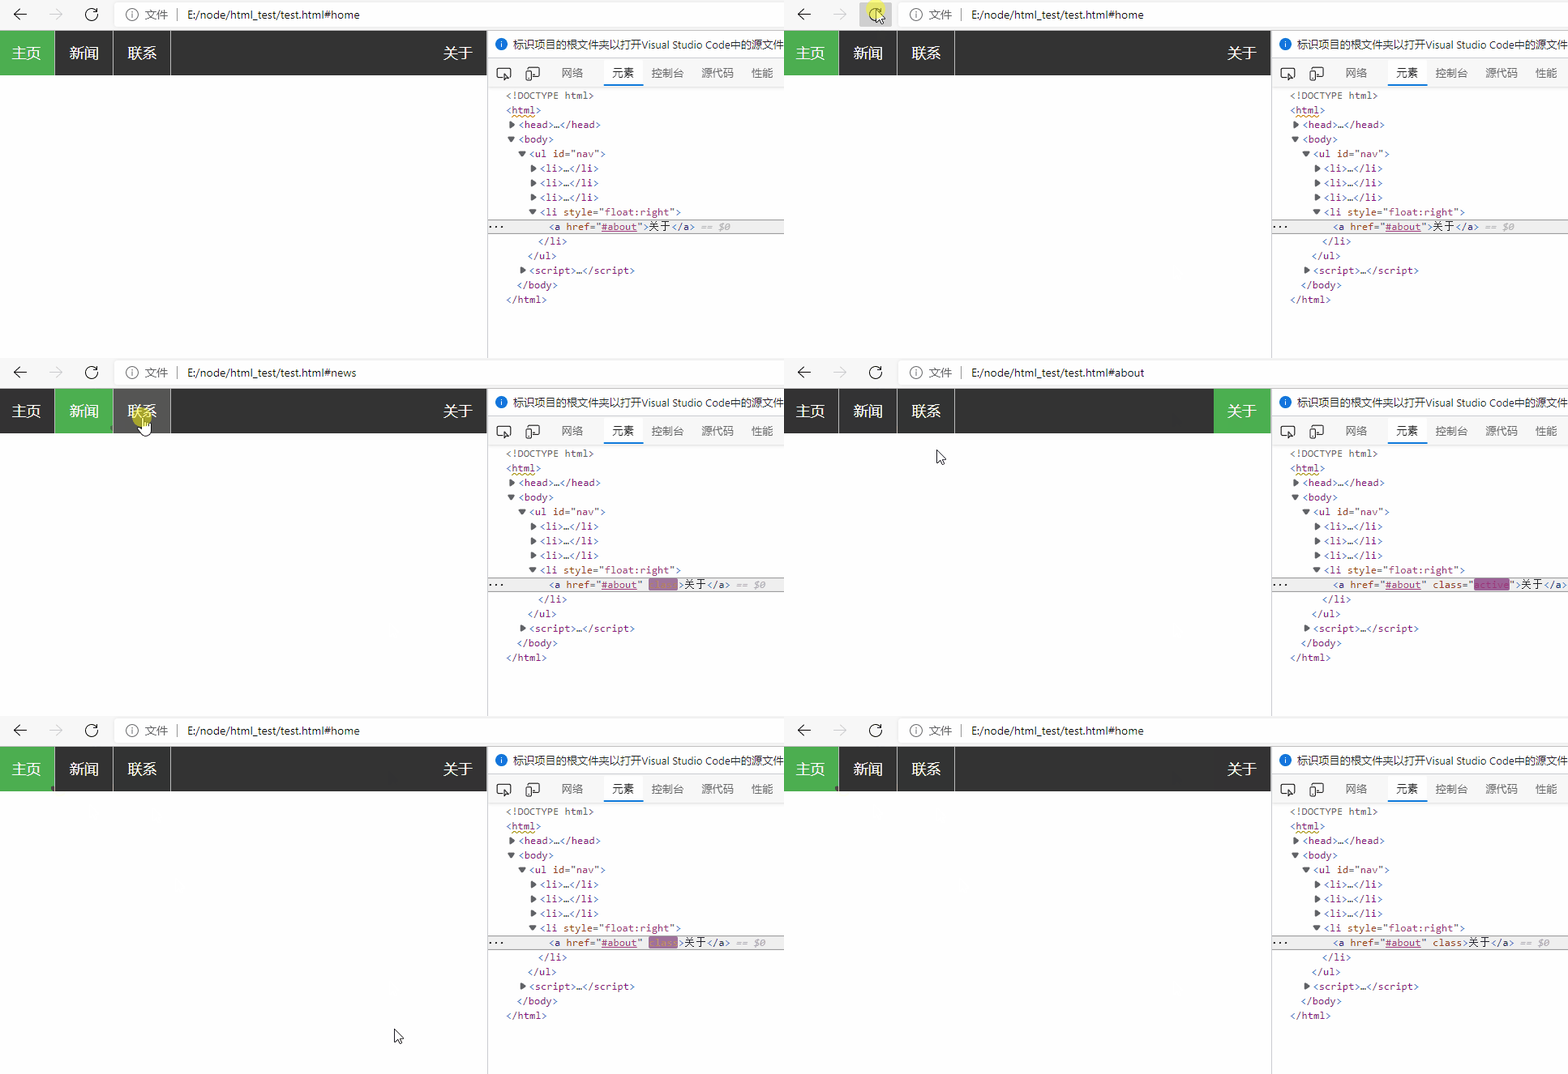
固定導覽列
可以設定頁面的導覽列固定在頭部或者底部。
固定在頭部:
ul {
    position: fixed;
    top: 0;
    width: 100%;}
固定在底部:
ul {
    position: fixed;
    bottom: 0;
    width: 100%;}
注意: 該範例可以在移動裝置上使用。
原始碼
<!DOCTYPE html><html><head>
    <meta charset="UTF-8">
    <title>顯示</title>
    <style>
        *{
            margin: 0;
            padding: 0;
        }
        ul {
            list-style-type: none;
            margin: 0;
            padding: 0;
            overflow: hidden;
            background-color: #333;
        }
        li {
            float: left;
            border-right: 1px solid #bbb;
        }
        li a {
            display: block;
            color: white;
            text-align: center;
            padding: 14px 16px;
            text-decoration: none;
        }
        /*滑鼠移動到選項上修改背景顏色 */
        li a:hover {
            background-color: #111;
        }
        li a.active {
            background-color: #4CAF50;
            color: white;
        }
        li a:hover:not(.active) {
            background-color: #555;
            color: white;
        }
    </style></head><body><ul id="nav">
    <li><a class="active" href="#home">主頁</a></li>
    <li><a href="#news">新聞</a></li>
    <li><a href="#contact">聯絡</a></li>
    <li style="float:right"><a href="#about">關於</a></li></ul><script>function removeActiveClass(node) {
    node.className = '';}let menus = document.querySelectorAll('#nav');menus.forEach(function (value, index) {
    value.addEventListener('click', function (e) {
        var target = e.target;
        Array.prototype.forEach.call(document.querySelectorAll('#nav li a'), removeActiveClass);
        target.className = 'active';
    })});</script></body></html>
範例 1
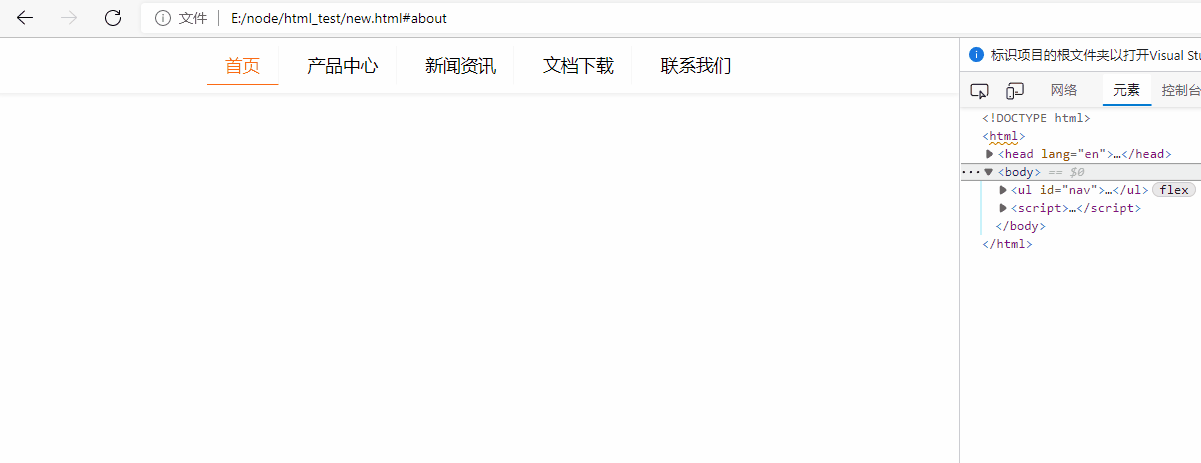
<!DOCTYPE html><html><head lang="en">
    <meta charset="UTF-8">
    <title>原生js實現選單動態新增active類</title>
    <style>
        *{
            margin: 0;
            padding: 0;
        }
        ul{
            margin: 0 auto;
            display: flex;
            justify-content: center;
            align-items: center;
            height: 50px;
            list-style: none;
            box-shadow: 0 2px 4px #eeeeee;
        }
        ul > li {
            padding: 6px 16px;
            margin: 0 5px;
            border-right: 1px solid #f7f7f7;
            border-bottom: 1px solid transparent;
            cursor: pointer;
        }
        ul > li:last-child{
            border-right: none;
        }
        li:hover, li:focus, .active {
            color: #ff6615;
            border-bottom: 1px solid #ff6615;
        }
    </style></head><body><ul id="nav">
    <li class="active">首頁</li>
    <li>產品中心</li>
    <li>新聞資訊</li>
    <li>檔案下載</li>
    <li>聯絡我們</li></ul><script>
    function removeActiveClass(node) {
        node.className = '';
    }

    let menus = document.querySelectorAll('#nav');
    menus.forEach(function (value, index) {
        value.addEventListener('click', function (e) {
            var target = e.target;
            Array.prototype.forEach.call(document.querySelectorAll('#nav li'), removeActiveClass);
            target.className = 'active';
        })
    });</script></body></html>
CSS 下拉式選單
使用 CSS 建立一個滑鼠移動上去後顯示下拉式選單的效果。
基本下拉式選單
當滑鼠移動到指定元素上時,會出現下拉式選單。
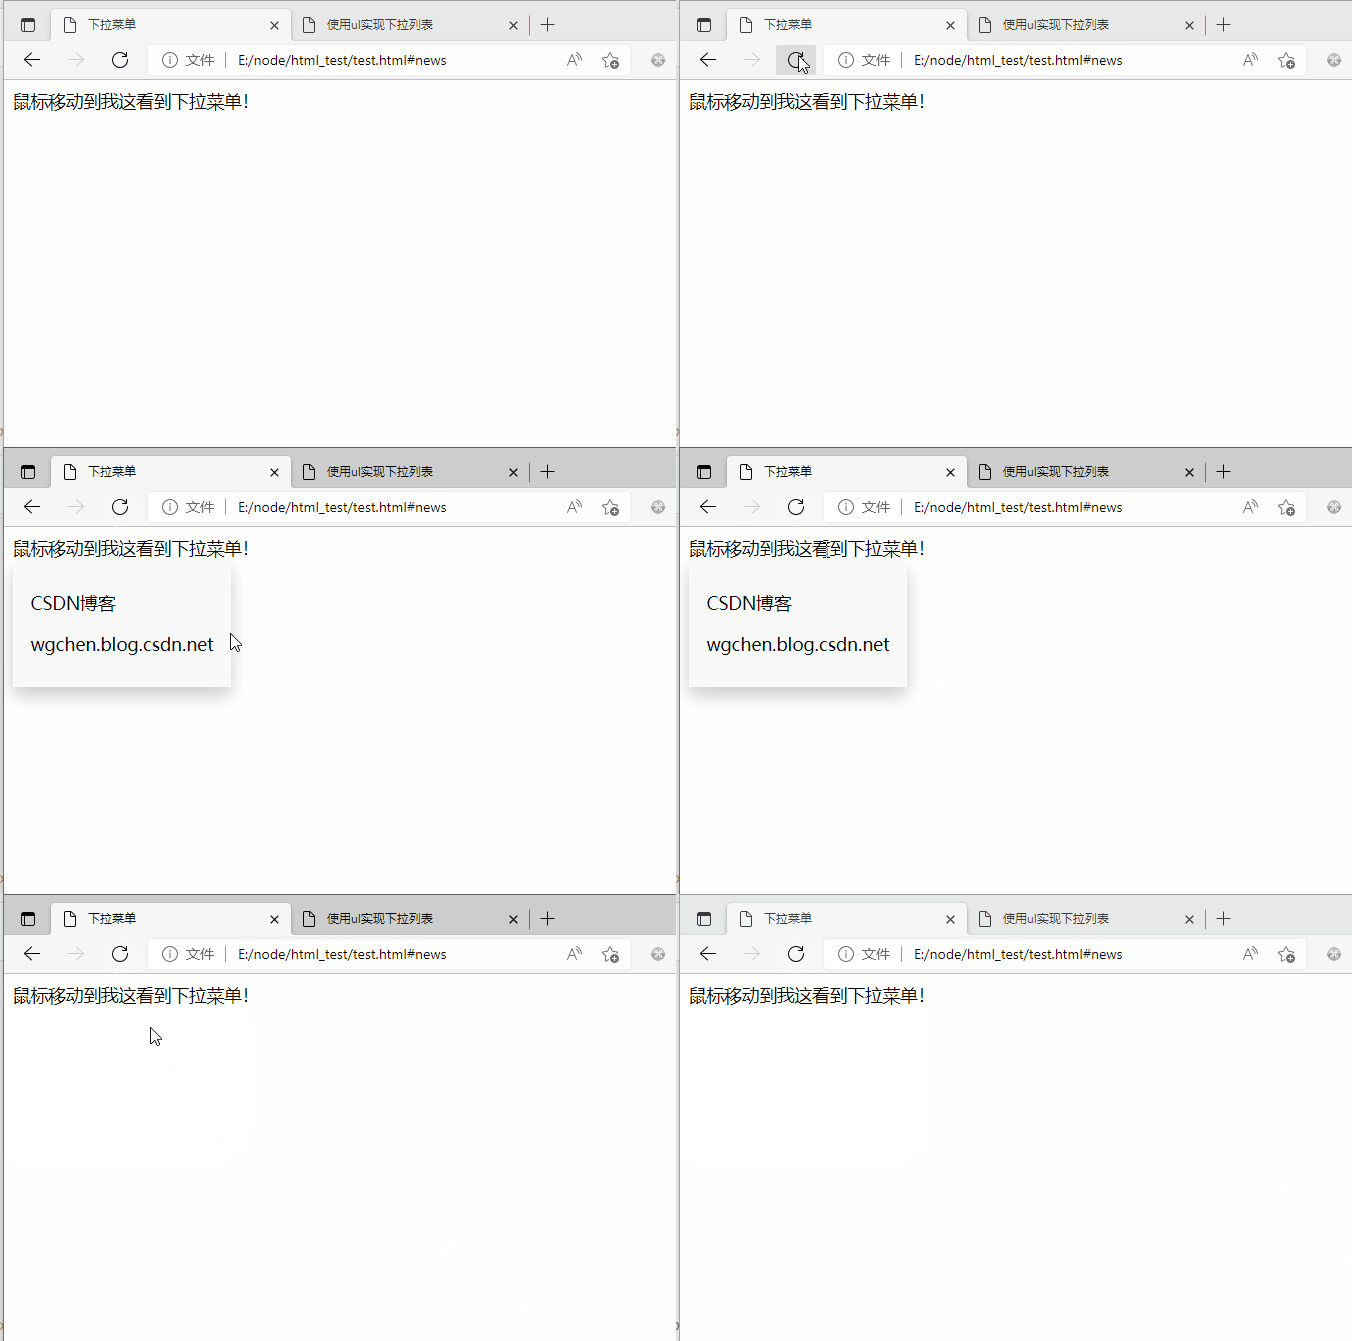
<!DOCTYPE html><html><head>
    <meta charset="UTF-8">
    <title>下拉式選單</title>
    <style>
        /*滑鼠下拉式選單*/
        .dropdown {
            position: relative;
            display: inline-block;
        }
        .dropdown-content {
            display: none;
            position: absolute;
            background-color: #f9f9f9;
            min-width: 160px;
            box-shadow: 0px 8px 16px 0px rgba(0,0,0,0.2);
            padding: 12px 16px;
        }
        .dropdown:hover .dropdown-content {
            display: block;
        }
    </style></head><body><p class="dropdown">
    <span>滑鼠移動到我這看到下拉式選單!</span>
    <p class="dropdown-content">
        <p>CSDN部落格</p>
        <p>wgchen.blog.csdn.net</p>
    </p></p></body></html>
範例解析
HTML 部分
我們可以使用任何的 HTML 元素來開啟下拉式選單,如:<span> , 或 a <button> 元素。
使用容器元素 (如: <p> ) 來建立下拉式選單的內容,並放在任何你想放的位置上。
使用 <p> 元素來包裹這些元素,並使用 CSS 來設定下拉內容的樣式。
CSS 部分
.dropdown 類使用 position:relative:
這將設定下拉式選單的內容放置在下拉按鈕 (使用 position:absolute ) 的右下角位置。
.dropdown-content 類中是實際的下拉式選單。
預設是隱藏的,在滑鼠移動到指定元素後會顯示。 注意 min-width 的值設定為 160px。你可以隨意修改它。
注意:如果你想設定下拉內容與下拉按鈕的寬度一致,可設定 width 為 100%
( overflow:auto 設定可以在小尺寸螢幕上捲動)。
我們使用 box-shadow 屬性讓下拉式選單看起來像一個」卡片」。
:hover 選擇器用於在使用者將滑鼠移動到下拉按鈕上時顯示下拉式選單。
下拉式選單
建立下拉式選單,並允許使用者選取列表中的某一項:
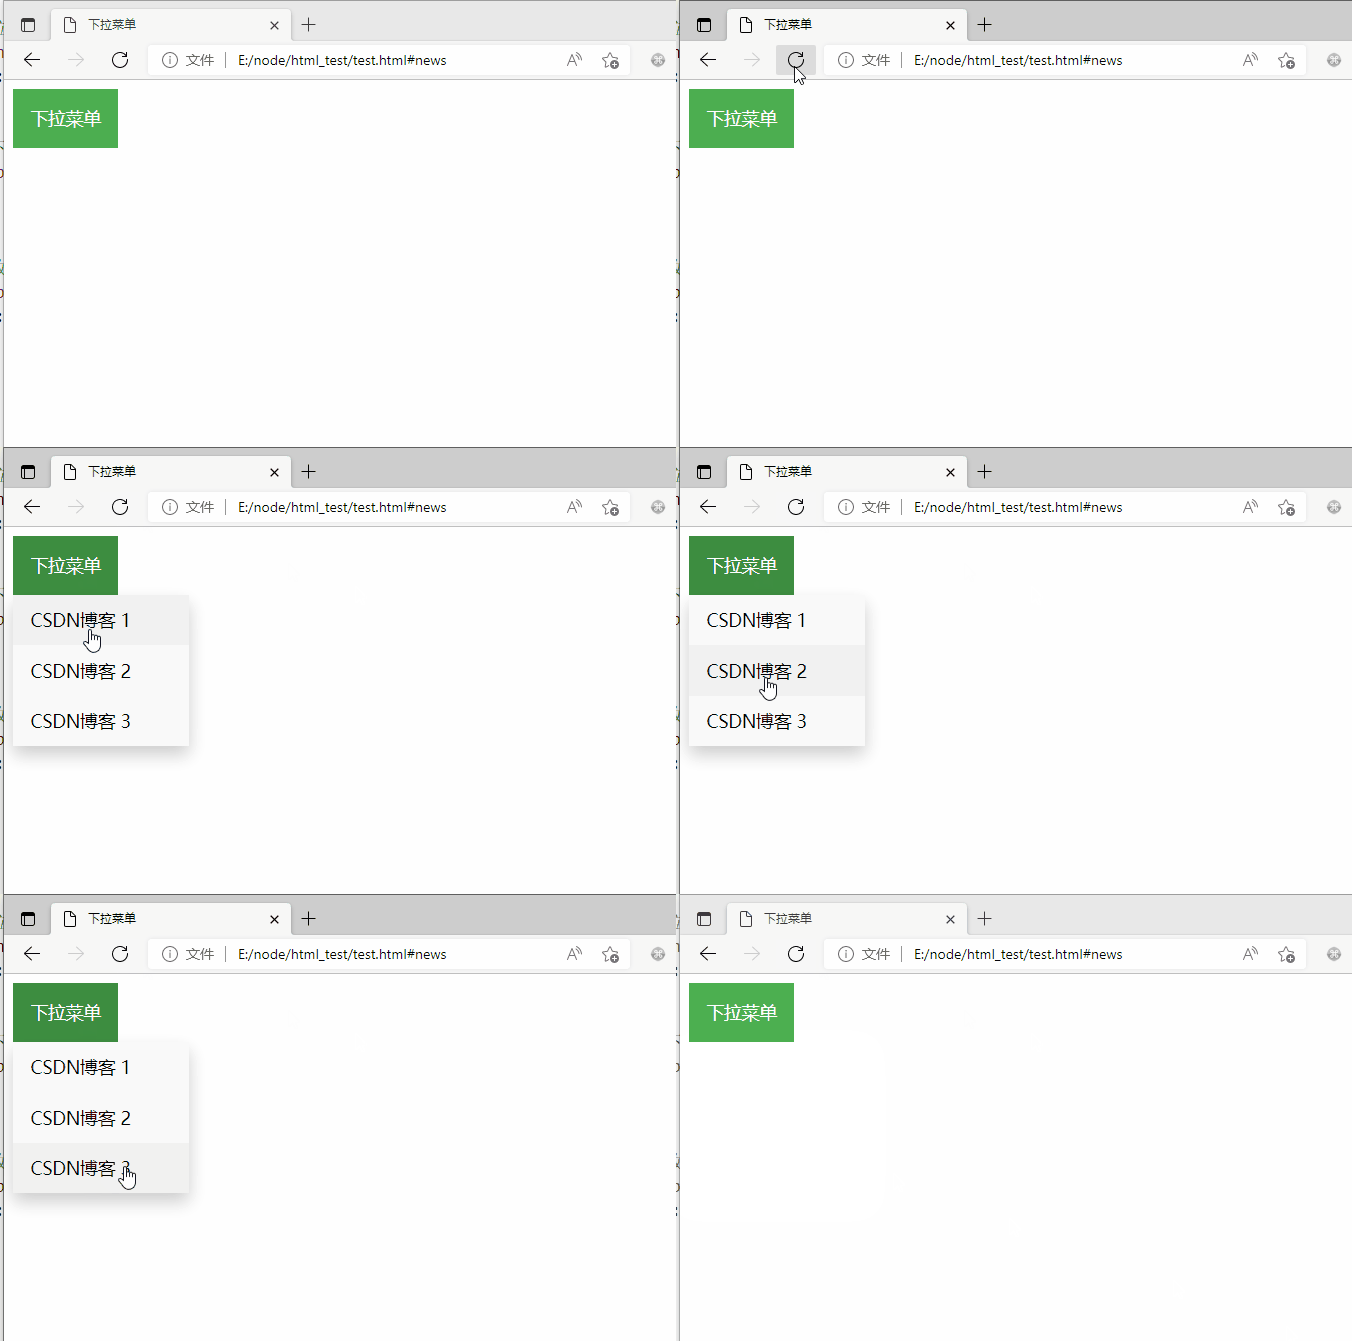
<!DOCTYPE html><html><head>
    <meta charset="UTF-8">
    <title>下拉式選單</title>
    <style>
        /* 下拉按鈕樣式 */
        .dropbtn {
            background-color: #4CAF50;
            color: white;
            padding: 16px;
            font-size: 16px;
            border: none;
            cursor: pointer;
        }

        /* 容器 <p> - 需要定位下拉內容 */
        .dropdown {
            position: relative;
            display: inline-block;
        }

        /* 下拉內容 (預設隱藏) */
        .dropdown-content {
            display: none;
            position: absolute;
            background-color: #f9f9f9;
            min-width: 160px;
            box-shadow: 0px 8px 16px 0px rgba(0, 0, 0, 0.2);
        }

        /* 下拉式選單的連結 */
        .dropdown-content a {
            color: black;
            padding: 12px 16px;
            text-decoration: none;
            display: block;
        }

        /* 滑鼠移上去後修改下拉式選單連結顏色 */
        .dropdown-content a:hover {
            background-color: #f1f1f1        }

        /* 在滑鼠移上去後顯示下拉式選單 */
        .dropdown:hover .dropdown-content {
            display: block;
        }

        /* 當下拉內容顯示後修改下拉按鈕的背景顏色 */
        .dropdown:hover .dropbtn {
            background-color: #3e8e41;
        }
    </style></head><body>

    <p class="dropdown">
        <button class="dropbtn">下拉式選單</button>
        <p class="dropdown-content">
            <a href="#">CSDN部落格 1</a>
            <a href="#">CSDN部落格 2</a>
            <a href="#">CSDN部落格 3</a>
        </p>
</p></body></html>(學習視訊分享:、html視訊教學)
以上就是通過範例簡單瞭解基礎CSS導航欄、CSS下拉式選單的詳細內容,更多請關注TW511.COM其它相關文章!
