基於.NetCore開發部落格專案 StarBlog
系列文章
- 基於.NetCore開發部落格專案 StarBlog - (1) 為什麼需要自己寫一個部落格?
- 基於.NetCore開發部落格專案 StarBlog - (2) 環境準備和建立專案
- 基於.NetCore開發部落格專案 StarBlog - (3) 模型設計
- 基於.NetCore開發部落格專案 StarBlog - (4) markdown部落格批次匯入
- 基於.NetCore開發部落格專案 StarBlog - (5) 開始搭建Web專案
- 基於.NetCore開發部落格專案 StarBlog - (6) 頁面開發之部落格文章列表
- 基於.NetCore開發部落格專案 StarBlog - (7) 頁面開發之文章詳情頁面
- 基於.NetCore開發部落格專案 StarBlog - (8) 分類層級結構展示
- 基於.NetCore開發部落格專案 StarBlog - (9) 圖片批次匯入
- 基於.NetCore開發部落格專案 StarBlog - (10) 圖片瀑布流
- 基於.NetCore開發部落格專案 StarBlog - (11) 實現存取統計
- 基於.NetCore開發部落格專案 StarBlog - (12) Razor頁面動態編譯
- 基於.NetCore開發部落格專案 StarBlog - (13) 加入友情連結功能
- ...
前言
很快啊,pia的一下,部落格上線已經一週時間了(網址:http://blog.deali.cn)
閱讀量不高,不過對於沒有做過SEO的網站來說已經不錯了~
這段時間雖然忙不過一直在寫程式碼給部落格添磚加瓦(Github上的Commit每天不斷的)
這不,友情連結功能來了~
本文來一步步介紹這個功能的實現。
同時所有專案程式碼已經上傳GitHub,歡迎各位大佬Star/Fork!
- 部落格後端+前臺專案地址:https://github.com/Deali-Axy/StarBlog
- 管理後臺前端專案地址:https://github.com/Deali-Axy/StarBlog-Admin
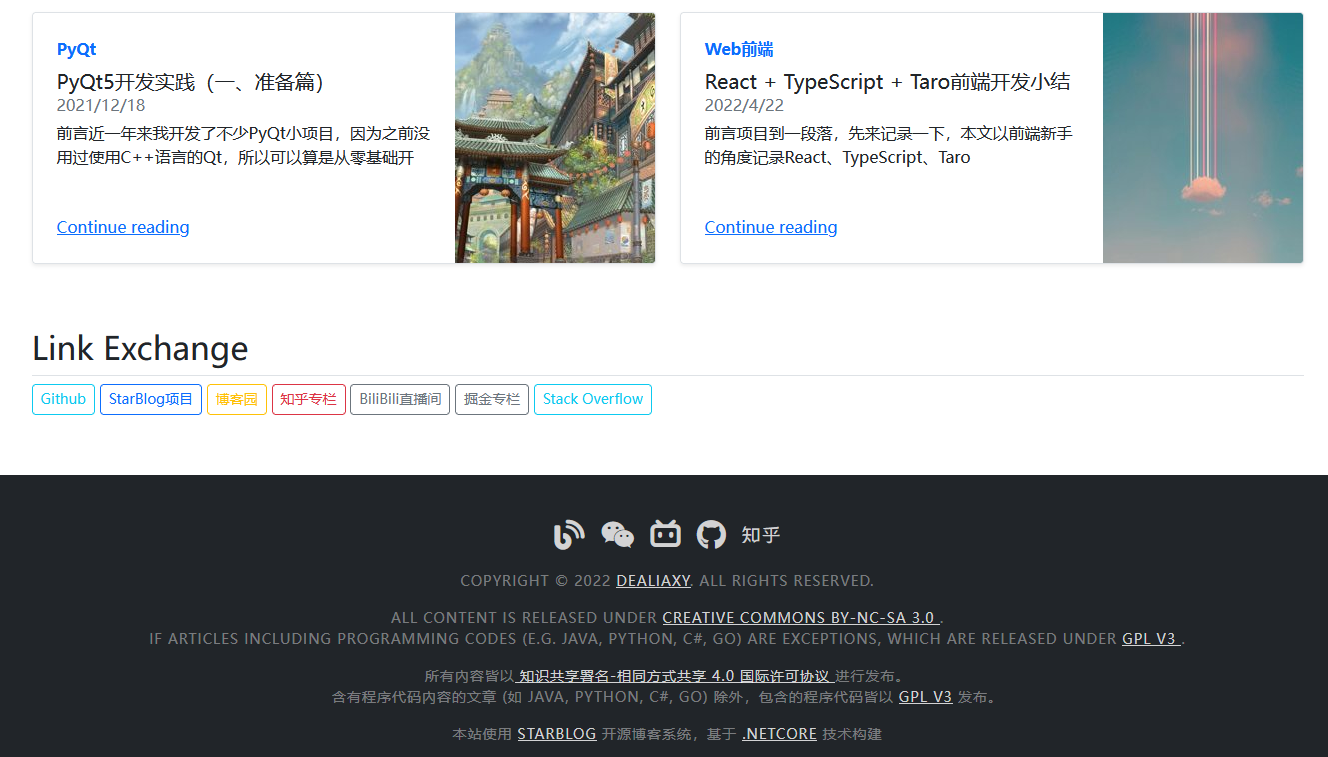
先看效果

分析
先分析一下功能
友情連結,既可以自己手動新增,也可以由存取網站的人申請
其他站長可以申請互換友鏈,提交申請之後在部落格後臺可以看到,確認之後就會顯示到網站中啦~
這就是初步的功能設計
當然我還想到了一些擴充套件的功能,比如根據連結的點選量來調整連結的顯示順序(百度:聽起來怎麼那麼熟悉)
建模
根據需求,需要倆模型
一個是要顯示的友情連結,一個是友情連結申請記錄
那開始吧
在StarBlog.Data/Models中建立資料模型
/// <summary>
/// 友情連結
/// </summary>
public class Link {
    [Column(IsIdentity = true, IsPrimary = true)]
    public int Id { get; set; }

    /// <summary>
    /// 網站名稱
    /// </summary>
    public string Name { get; set; }

    /// <summary>
    /// 介紹
    /// </summary>
    public string? Description { get; set; }

    /// <summary>
    /// 網址
    /// </summary>
    public string Url { get; set; }

    /// <summary>
    /// 是否顯示
    /// </summary>
    public bool Visible { get; set; }
}
還有這個
/// <summary>
/// 友情連結申請記錄
/// </summary>
public class LinkExchange {
    [Column(IsIdentity = true, IsPrimary = true)]
    public int Id { get; set; }

    /// <summary>
    /// 網站名稱
    /// </summary>
    public string Name { get; set; }

    /// <summary>
    /// 介紹
    /// </summary>
    public string? Description { get; set; }

    /// <summary>
    /// 網址
    /// </summary>
    public string Url { get; set; }

    /// <summary>
    /// 站長
    /// </summary>
    public string WebMaster { get; set; }

    /// <summary>
    /// 聯絡郵箱
    /// </summary>
    public string Email { get; set; }

    /// <summary>
    /// 是否已驗證
    /// <para>友情連結需要驗證後才顯示在網站上</para>
    /// </summary>
    public bool Verified { get; set; } = false;

    /// <summary>
    /// 申請時間
    /// </summary>
    public DateTime ApplyTime { get; set; } = DateTime.Now;
}
Service
有了模型,接下來完善一下邏輯
在StarBlog.Web/Services中寫邏輯
首先是友情連結的,增刪改查除外,還加一個設定可見性的快捷方式
public class LinkService {
    private IBaseRepository<Link> _repo;

    public LinkService(IBaseRepository<Link> repo) {
        _repo = repo;
    }

    /// <summary>
    /// 獲取全部友情連結
    /// </summary>
    /// <param name="onlyVisible">只獲取顯示的連結</param>
    /// <returns></returns>
    public List<Link> GetAll(bool onlyVisible = true) {
        return onlyVisible
            ? _repo.Where(a => a.Visible).ToList()
            : _repo.Select.ToList();
    }

    public Link? GetById(int id) {
        return _repo.Where(a => a.Id == id).First();
    }

    public Link? GetByName(string name) {
        return _repo.Where(a => a.Name == name).First();
    }

    public Link AddOrUpdate(Link item) {
        return _repo.InsertOrUpdate(item);
    }

    public Link? SetVisibility(int id, bool visible) {
        var item = GetById(id);
        if (item == null) return null;
        item.Visible = visible;
        _repo.Update(item);
        return GetById(id);
    }

    public int DeleteById(int id) {
        return _repo.Delete(a => a.Id == id);
    }
}
這個沒啥特別的
繼續
管理友情連結申請記錄的邏輯,同樣也是有增刪改查,這部分程式碼跟上面的一樣,省略了
這裡只貼設定是否驗證的程式碼
public class LinkExchangeService {
    private readonly IBaseRepository<LinkExchange> _repo;
    private readonly LinkService _linkService;

    public LinkExchangeService(IBaseRepository<LinkExchange> repo, LinkService linkService) {
        _repo = repo;
        _linkService = linkService;
    }

	// 設定是否驗證
    public LinkExchange? SetVerifyStatus(int id, bool status) {
        var item = GetById(id);
        if (item == null) return null;

        item.Verified = status;
        _repo.Update(item);


        var link = _linkService.GetByName(item.Name);
        if (status) {
            if (link == null) {
                _linkService.AddOrUpdate(new Link {
                    Name = item.Name,
                    Description = item.Description,
                    Url = item.Url,
                    Visible = true
                });
            }
            else {
                _linkService.SetVisibility(link.Id, true);
            }
        }
        else {
            if (link != null) _linkService.DeleteById(link.Id);
        }

        return GetById(id);
    }
}
在設定是否驗證的方法中,實現了:
- 設定一個申請為已驗證,自動將該申請的連結新增到友情連結中
- 設定一個申請為未驗證,則自動將對應的友情連結刪除(如果存在的話)
其他地方就跟上面的友情連結一樣了。
寫完之後別忘了註冊服務
builder.Services.AddScoped<LinkExchangeService>();
builder.Services.AddScoped<LinkService>();
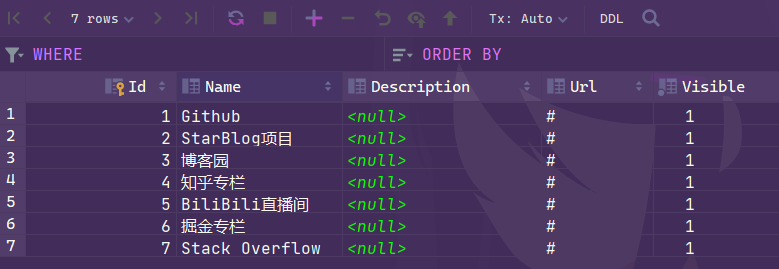
新增資料
雖然管理這些連結的介面我也寫了,但目前本系列文章還處在介紹前臺的部分,我打算把介面實現放到後面的RESTFul介面開發部分講~
所以先直接在資料庫中新增吧~

頁面展示
資料模型和邏輯都實現了,接下來就是找一個合適的地方顯示
參考了幾個同類的部落格之後,我決定把友鏈放在主頁底部
編輯StarBlog.Web/ViewModels/HomeViewModel.cs,新增一個新屬性
public class HomeViewModel {
    /// <summary>
    /// 友情連結
    /// </summary>
    public List<Link> Links { get; set; } = new();
}
用Bootstrap5的responsive variation來做響應式的友情連結展示
<div class="d-grid gap-2 d-md-block">
  <button class="btn btn-primary" type="button">Button</button>
  <button class="btn btn-primary" type="button">Button</button>
</div>
官網上的例子效果是這樣的

勉強還行,不過都是一樣的顏色太單調了,我要七彩的!
封裝Razor元件
於是封裝了一個名為ColorfulButton的Razor元件
先定義ViewModel,用來設定這個元件
在StarBlog.Web/ViewModels中新增ColorfulButtonViewModel.cs檔案,程式碼如下
public static class LinkTarget {
    public const string Blank = "_blank";
    public const string Parent = "_parent";
    public const string Self = "_self";
    public const string Top = "_top";
}

public class ColorfulButtonViewModel {
    public string Name { get; set; }
    public string Url { get; set; } = "#";
    public string Target { get; set; } = "_self";
}
然後在StarBlog.Web/Views/Shared/Widgets中新增ColorfulButton.cshtml
把Bootstrap支援的幾種按鈕顏色放進去,然後每次隨機顯示一個顏色~
@model ColorfulButtonViewModel

@{
    var rnd = Random.Shared;
    var colorList = new[] {
        "btn-outline-primary",
        "btn-outline-secondary",
        "btn-outline-success",
        "btn-outline-danger",
        "btn-outline-warning",
        "btn-outline-info",
        "btn-outline-dark",
    };
    var btnColor = colorList[rnd.Next(0, colorList.Length)];
}

<a href="@Model.Url" role="button" class="btn btn-sm @btnColor mb-1" target="@Model.Target">
    @Model.Name
</a>
新增到頁面中
元件完成了,最後在主頁中實現友情連結的展示
編輯StarBlog.Web/Views/Home/Index.cshtml檔案
在最底下(推薦部落格板塊下方)新增程式碼
<div class="container px-4 py-3">
    <h2 class="pb-2 border-bottom">Link Exchange</h2>
    @if (Model.Links.Count > 0) {
        <div class="d-grid gap-2 d-md-block">
            @foreach (var link in Model.Links) {
                @await Html.PartialAsync("Widgets/ColorfulButton",
                    new ColorfulButtonViewModel { Name = link.Name, Url = link.Url })
            }
        </div>
    }
    else {
        @await Html.PartialAsync("Widgets/PlaceholderCard", "友情連結")
    }
</div>
最終效果就是一開始展示的那樣,每次存取都會有不同的顏色,老炫酷了~
搞定
完成了,很簡單的一個功能,可以給單調的部落格小小增色一下~
同時也歡迎各位站長大佬來交換友鏈~!