SpringCloud 設定管理:Nacos
2022-06-07 15:02:27
統一設定管理
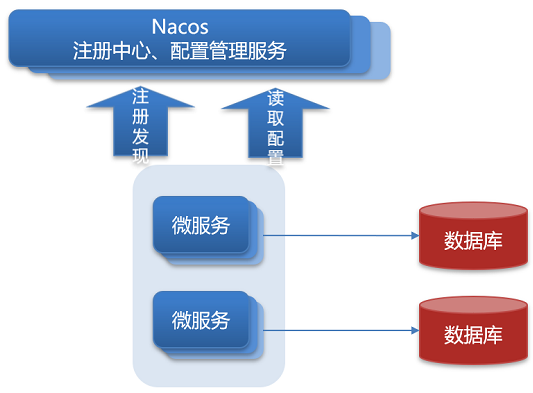
將設定交給 Nacos 管理的步驟:
- 在 Nacos 中新增組態檔。
- 在微服務中引入 nacos 的 config 依賴。
- 在微服務中新增 bootstrap.yml,設定 nacos 地址、當前環境、服務名稱、檔案字尾名。這些決定了程式啟動時去 nacos 讀取哪個檔案。
具體操作:
1)在 Nacos 中新增設定資訊
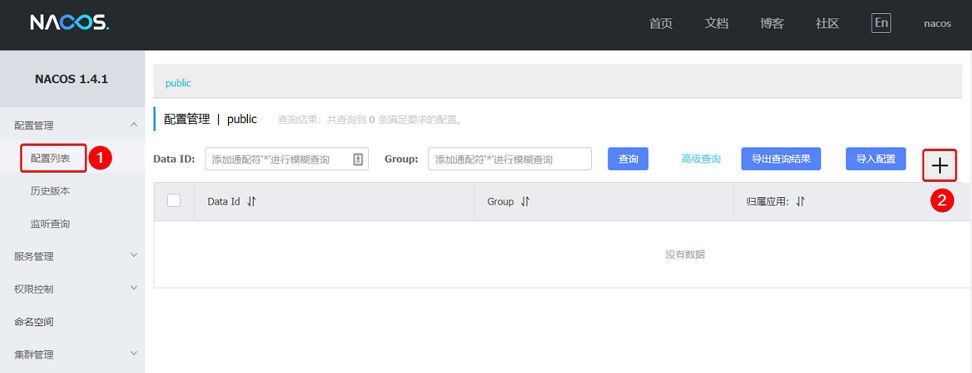
2)在彈出表單中填寫設定資訊
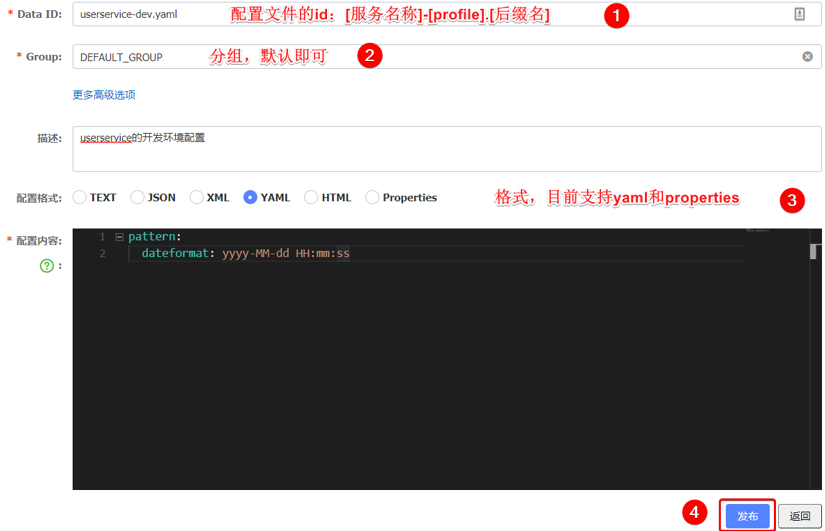
3)設定獲取的步驟如下

4)引入 Nacos 的設定管理使用者端依賴
<!-- nacos設定管理依賴 -->
<dependency>
    <groupId>com.alibaba.cloud</groupId>
    <artifactId>spring-cloud-starter-alibaba-nacos-config</artifactId>
</dependency>
5)在 resource 目錄新增一個 bootstrap.yml 檔案,這個檔案是引導檔案,優先順序高於 application.yml
spring:
application:
  name: userservice  # 服務名稱
profiles:
  active: dev  # 開發環境,這裡是dev
cloud:
  nacos:
    server-addr: localhost:8848  # Nacos地址
    config:
      file-extension: yaml  # 檔案字尾名
6)測試:將(Nacos 設定內容中的)pattern.dateformat 這個屬性注入到 UserController 中
@RestController
    @RequestMapping("/user")
    public class UserController {

    // 注入nacos中的設定屬性
    @Value("${pattern.dateformat}")
    private String dateformat;

    // 編寫controller,通過日期格式化器來格式化現在時間並返回
    @GetMapping("now")
    public String now(){
        return LocalDate.now().format(
            DateTimeFormatter.ofPattern(dateformat, Locale.CHINA)
        );
    }
    // ... 略
    }
設定熱更新
Nacos 設定更改後,微服務可以實現熱更新,兩種方式如下:
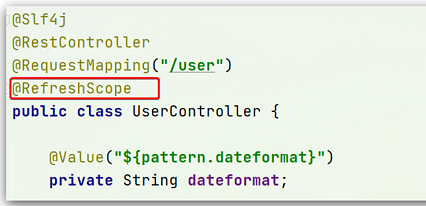
- 通過 @Value 註解注入,結合 @RefreshScope 來重新整理。
- 通過 @ConfigurationProperties 注入,自動重新整理。
注意事項:
- 不是所有的設定都適合放到設定中心,否則維護起來比較麻煩。
- 建議將一些關鍵引數,需要執行時調整的引數放到 nacos 設定中心,一般都是自定義設定。
方式一:在 @Value 注入的變數所在類上新增註解 @RefreshScope
方式二:使用 @ConfigurationProperties 註解
@Component
@Data
@ConfigurationProperties(prefix="pattern")
public class PatternProperties {
    private String dateformat;
}
設定共用
多環境設定共用
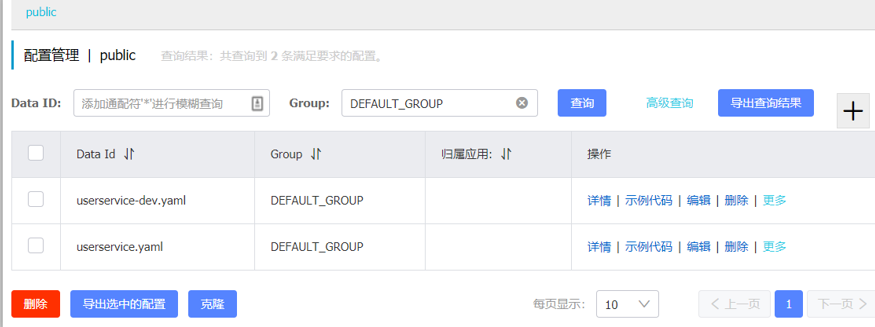
微服務會從 nacos 讀取的組態檔:
[服務名]-[spring.profile.active].yaml:環境設定(例如 userservice-dev.yaml)。[服務名].yaml:預設設定,多環境共用(例如 userservice.yaml)。- 無論 profile 如何變化,
[服務名].yaml這個檔案一定會載入,因此多環境共用設定可以寫入這個檔案。
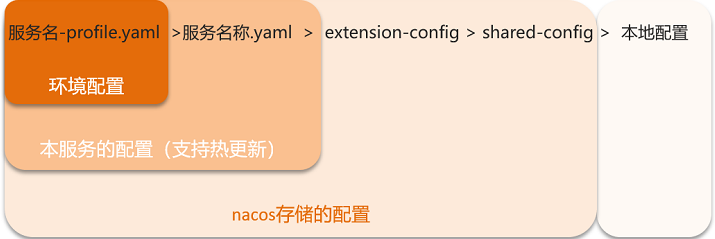
設定載入優先順序:

多服務設定共用
不同服務之間共用組態檔的兩種方式:
- 通過 shared-configs 指定
- 通過 extension-configs 指定
方式一:通過 shared-configs 指定
spring:
  application:
    name: userservice  # 服務名稱
  profiles:
    active: dev  # 環境
  cloud:
    nacos:
      server-addr: localhost:8848  # Nacos 地址
      config:
        file-extension: yaml  # 檔案字尾名
        shared-configs:  # 多微服務間共用的設定列表
          - dataId: common.yaml  # 要共用的組態檔 id
方式二:通過 extension-configs 指定
spring:
  application:
    name: userservice  # 服務名稱
  profiles:
    active: dev  # 環境
  cloud:
    nacos:
      server-addr: localhost:8848  # Nacos 地址
      config:
        file-extension: yaml  # 檔案字尾名
        extends-configs:  # 多微服務間共用的設定列表
          - dataId: extend.yaml  # 要共用的組態檔 id
多種設定的優先順序:
