從零開始構建並編寫神經網路---Keras【學習筆記】[1/2]
Keras簡介:
Keras是由純python編寫的基於theano/tensorflow的深度學習框架。
Keras是一個高層神經網路API,支援快速實驗,能夠把你的idea迅速轉換為結果,如果有如下需求,可以優先選擇Keras:
- 簡易和快速的原型設計(keras具有高度模組化,極簡,和可擴充特性)
- 支援CNN和RNN,或二者的結合
- 無縫CPU和GPU切換

一、背景
本次構建神經網路最終目的:輸入一張手寫數點陣圖片後,網路輸出該圖片對應的數位。
二、Keras程式碼實現
2.1 匯入Keras庫
import tensorflow as tf
from tensorflow.keras.datasets import mnist
如果沒有安裝TensorFlow,那麼可以參考我之前的文章:重灌CUDA和cuDNN(目的是裝TensorFlow和pytorch)【個人梳理總結】
2.2 載入資料集(訓練集和測試集)
我們使用Keras下的MNIST手寫字元資料集,可以使用如下命令下載資料集:
(train_images, train_labels), (test_images, test_labels) = keras.datasets.mnist.load_data()
'''
load_data() returns tuple of NumPy arrays: (x_train, y_train), (x_test, y_test).
train_images: uint8 NumPy array of grayscale image data with shapes (60000, 28, 28), containing the training data.
Pixel values range from 0 to 255.
train_labels: uint8 NumPy array of digit labels (integers in range 0-9) with shape (60000,) for the training data.
test_images: uint8 NumPy array of grayscale image data with shapes (10000, 28, 28), containing the test data.
Pixel values range from 0 to 255.
test_labels: uint8 NumPy array of digit labels (integers in range 0-9) with shape (10000,) for the test data.
'''
下面是選做步驟~
如果想驗證一下各個變數的shape可以使用python中的斷言關鍵字:
assert train_images.shape == (60000, 28, 28)
assert train_labels.shape == (10000, 28, 28)
assert test_images.shape == (60000,)
assert test_labels.shape == (10000,)
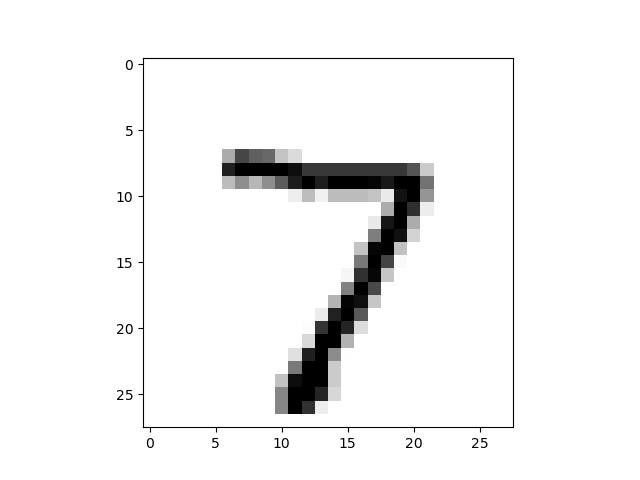
我們可以使用matplotlib先為我們顯示一下測試集第一張圖片,請記住它:
digit = test_images[0]
import matplotlib.pyplot as plt

plt.imshow(digit, cmap=plt.cm.binary)  # 輸出二值化影象
plt.show()
需要安裝matplotlib,請移步至Matplotlib 3.5.2 documentation
或者可以列印test_labels,記住第一個元素的label是什麼。
print('test_labels', test_labels)
不出意外的話結果是「7」。

2.3 搭建神經網路
Sequential序貫模型是多個網路層的線性堆疊,也就是「一條路走到黑」。
可以通過向Sequential模型傳遞一個layer的list來構造該模型,也可以像本文使用的通過.add()方法一個個的將layer加入模型中:
from tensorflow.keras import models
from tensorflow.keras import layers

network = models.Sequential()  # 建立範例命名為network。Sequential意為順序的,即序貫模型。
network.add(layers.Dense(512, activation='relu', input_shape=(28*28,)))  # 第一層需要加一個input_shape關鍵字引數
network.add(layers.Dense(10, activation='softmax'))  # ①輸出層的units=10,意味著存在10個類別,實際意義為輸出的結果是從0~10這是個數位。②我們想要將結果的分類數值範圍限定在[0,1]之間,理論上activation也可以換成其他能夠將結果限定在[0,1]的啟用函數
關於Dense層的理解,可以閱讀深入理解 KERAS 中 DENSE 層引數
此時,我們可以通過一些命令整體檢視搭建的神經網路(可任選其一):
network.summary()  # 輸出一下搭建的神經網路框架總結
tf.keras.utils.plot_model(network, "my_first_network.png")  # 圖形化輸出
keras.utils.plot_model(network, "my_first_network_with_shape_info.png", show_shapes=True)  # 帶有輸入shape和輸出shape的圖形化輸出
輸出結果省略,各位可在實踐中自行感受。
完成模型的搭建後,我們需要使用.compile()方法來編譯模型:
- 優化器optimizer:該引數可指定為已預定義的優化器名,如rmsprop、adagrad,或一個Optimizer類的物件;
- 損失函數loss:該引數為模型試圖最小化的目標函數,它可為預定義的損失函數名,如categorical_crossentropy、mse,也可以為一個損失函數;
- 指標列表metrics:對分類問題,我們一般將該列表設定為metrics=['accuracy']。指標可以是一個預定義指標的名字,也可以是一個使用者客製化的函數。指標函數應該返回單個張量,或一個完成metric_name - > metric_value對映的字典。
network.compile(optimizer='rmsprop', loss='categorical_crossentropy', metrics=['accuracy'])
2.4 資料預處理
2.4.1 對訓練集和測試集的資料部分預處理
- 將每張圖片資料由(28, 28)的二維陣列變成(28 * 28)的一維陣列
- 將灰度圖中[0, 255]的整數灰度值歸一化為[0, 1]的浮點數
train_images = train_images.reshape((60000, 28 * 28))
train_images = train_images.astype('float32') / 255
test_images = test_images.reshape((10000, 28 * 28))
test_images = test_images.astype('float32') / 255
2.4.2 對訓練集和測試集的標籤部分預處理
對應輸出層的units=10,將標籤做one-hot編碼,用一個擁有10個元素的一位陣列替換標籤。我們需要把數值7變成一個含有10個元素的陣列,然後在第8個元素設定為1,其他元素設定為0,即[0., 0., 0., 0., 0., 0., 0., 1., 0., 0.]
from tensorflow.keras.utils import to_categorical

print("before change:", test_labels[0])
train_labels = to_categorical(train_labels)
test_labels = to_categorical(test_labels)
print("after change: ", test_labels[0])
你一定發現了我們使用了to_categorical函數。它是將類別向量(從0到nb_classes的整數向量)對映為二值類別矩陣, 用於應用到以categorical_crossentropy為目標函數的模型中.
而我們在使用.compile()方法來編譯模型引數中損失函數loss='categorical_crossentropy',這符合多分類的要求。
2.5 開始對神經網路進行訓練
network.fit(train_images, train_labels, epochs=5, batch_size=128)
"""
傳入fit()各變數的含義:
train_images:用於訓練的手寫數點陣圖片;
train_labels:對應的是圖片的標記;
batch_size=128:每次網路從輸入的圖片陣列中隨機選取128個作為一組進行計算。
epochs=5: 每次計算訓練資料將會被遍歷5次。
fit函數返回一個History的物件,其History.history屬性記錄了損失函數和其他指標的數值隨epoch變化的情況,如果有驗證集的話,也包含了驗證集的這些指標變化情況。
"""
2.6 測試神經網路的訓練效果
測試資料輸入,檢驗網路學習後的圖片識別效果。
P.S. 識別效果與硬體有關(CPU/GPU)
本人使用的TensorFlow 2.5搭配GPU為:NVIDIA GeForce GTX 1660 Ti with Max-Q Design computeCapability: 7.5(辣雞啊!多麼想要一個3080!!!)
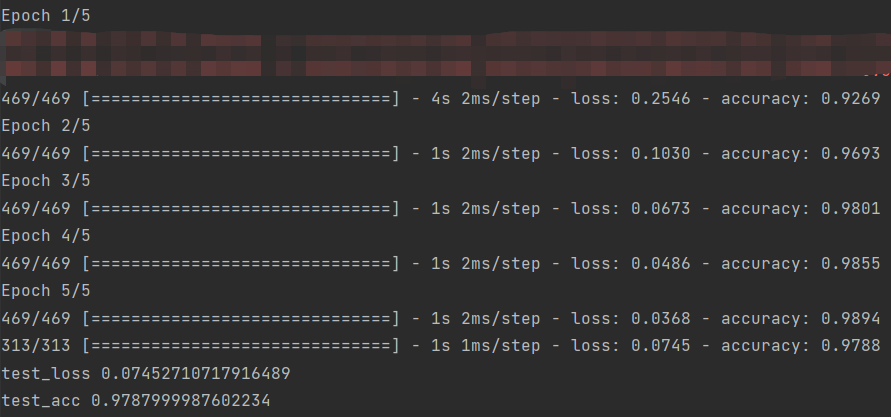
test_loss, test_acc = network.evaluate(test_images, test_labels, verbose=1)
# verbose: 紀錄檔記錄——0:靜默不顯示任何資訊,1(default):輸出進度條記錄
print('test_loss', test_loss)  # 列印loss
print('test_acc', test_acc)  # 列印accuracy
展示訓練過程輸出資訊:

2.7 神經網路的預測能力
隨機輸入一張手寫數點陣圖片到網路中,看看它的識別效果
(train_images, train_labels), (test_images, test_labels) = mnist.load_data()
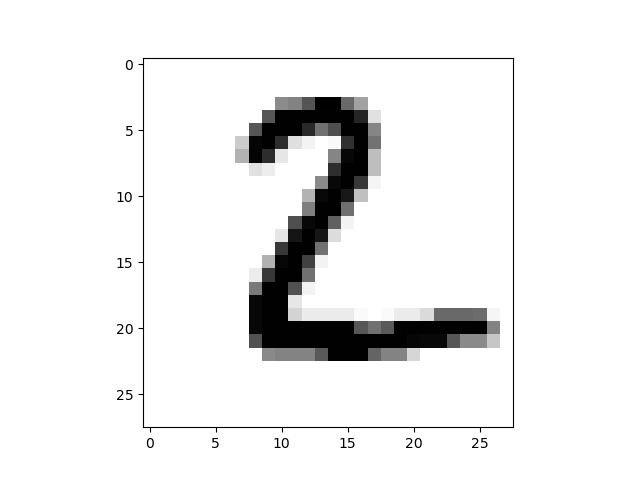
digit = test_images[1]  # 挑選測試集第2張圖片,是數位2

plt.imshow(digit, cmap=plt.cm.binary)
plt.show()

test_images = test_images.reshape((10000, 28*28))
res = network.predict(test_images)  # 應用已經訓練好的模型進行預測

for i in range(res[1].shape[0]):  # 提取第二個預測結果,即對數位2的預測結果
    if res[1][i] == 1:  # 看結果中10個元素的陣列中第幾位是1
        print("the number for the picture is : ", i)  # 第幾位是1就輸出這個數位的預測結果是幾
        break
展示預測結果輸出:

結尾
至此,我們完成了藉助Keras編寫出一個簡單的預測手寫數位的神經網路並完成了訓練、測試和預測過程,實現了我們最初的目的。
當然Keras的功能強大遠不止於本文所展示的內容,更多豐富且便利的功能請各位繼續參考附錄學習探索。
接下來我們還將繼續學習,嘗試不借助Keras而是依託numpy等庫,更加貼近「從零開始」構建一個神經網路。
最最重要的,本文一定存在錯誤和不足,懇請各位不吝賜教,不吝賜教!謝謝~!
附錄一:有幫助的檔案
1. 【官方】The Functional API
2. 【官方】The Model class
3. 【官方】The Sequential class
4. 【官方】Layer activation functions
5. Keras中文檔案
附錄二:網路上的好文分享
1. 深度學習筆記 目標函數的總結與整理 model.compile(loss='categorical_crossentropy'