Go微服務架構go-kratos實戰02:proto 程式碼生成和專案程式碼編寫步驟
在上一篇 kratos quickstart 文章中,我們直接用 kratos new 命令生成了一個專案。
這一篇來看看 kratos API 的定義和使用。
一、kratos 中 API 簡介
1.1 簡介
API 全稱是 Application Programming Interface,應用程式介面。
在 kratos 中,API 指的是 REST API 和 RPC API ,REST API 是使用者存取應用程式時的入口,
RPC API 作為應用程式內部相互存取的介面定義。
那怎麼定義 API?使用的是 protocol-buffers 這種與程式語言無關的介面自定義語言(IDL),它可以根據定義的 pb 來生成你
所需的程式語言程式。
gRPC 是 Go 語言編寫的一個開源的 RPC 框架,它使用的 IDL 就是 protocol-buffers。
protocol-buffers 語法學習可以參考檔案:
-
proto3 語法, https://developers.google.com/protocol-buffers/docs/proto3
- 中譯版 (時間有點早2017-03)
-
proto2 語法,https://developers.google.com/protocol-buffers/docs/proto
二、kratos 中 API 定義和使用
下面一步一步實現 api 檔案(proto 檔案)生成,然後根據 proto 檔案生成對應的 pb.http, pb.grpc 程式碼。
然後生成 service 程式碼,使用 service 程式碼。然後編寫 biz 程式碼等等步驟。
來理清 kratos 里程式碼編寫的步驟。畢竟 internal 資料夾裡各種 go 檔案業務邏輯順序還是要有些繁瑣。
2.1 快速生成 proto 檔案
在上一篇文章的專案基礎上生成一個新的 API(proto 檔案)。
先安裝 kratos cli :
go install github.com/go-kratos/kratos/cmd/kratos/v2@latest
kratos cli 工具使用檔案:https://go-kratos.dev/docs/getting-started/usage
進入專案 quickstart 目錄,執行命令:
kratos proto add api/helloworld/v1/student.proto
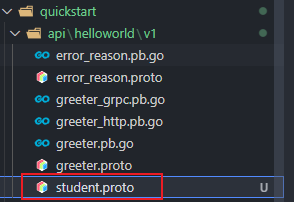
在 api/helloworld/v1 目錄先就會出現一個 student.proto 的檔案,

裡面的程式碼:
syntax = "proto3";

package api.helloworld.v1;

option go_package = "quickstart/api/helloworld/v1;v1";
option java_multiple_files = true;
option java_package = "api.helloworld.v1";

service Student {
	rpc CreateStudent (CreateStudentRequest) returns (CreateStudentReply);
	rpc UpdateStudent (UpdateStudentRequest) returns (UpdateStudentReply);
	rpc DeleteStudent (DeleteStudentRequest) returns (DeleteStudentReply);
	rpc GetStudent (GetStudentRequest) returns (GetStudentReply);
	rpc ListStudent (ListStudentRequest) returns (ListStudentReply);
}

message CreateStudentRequest {}
message CreateStudentReply {}

message UpdateStudentRequest {}
message UpdateStudentReply {}

message DeleteStudentRequest {}
message DeleteStudentReply {}

message GetStudentRequest {}
message GetStudentReply {}

message ListStudentRequest {}
message ListStudentReply {}
生成了一個 student.proto 的模板,定義了一些基本操作,Create、Update、Delete、Get、List。
2.2 給 proto 新增內容
學習 greeter.proto 裡的用法,給 student.proto 新增一個簡單的 HTTP 轉換。
新增一個 hello 的 http 轉換介面
第一步:引入 import "google/api/annotations.proto";
第二步:在 service Student 裡新增程式碼:
在服務裡定義一個 Hello 的操作,然後在裡面用 option (google.api.http) 語法,如下:
rpc Hello (HelloReq) returns (HelloResp) {
		option (google.api.http) = {
			get: "/hello/{name}"
		};
}
定義 HelloReq 和 HelloResp:
請求的欄位和返回的欄位
message HelloReq {
	string name = 1;
}
message HelloResp {
	string message = 1;
}
上面就是把 HTTP REST 轉換為 gRPC :
| HTTP | gRPC |
|---|---|
| GET /hello/tom | Hello(name: "tom") |
還可以給這個介面新增額外的介面,用 additional_bindings:
rpc Hello (HelloReq) returns (HelloResp) {
		option (google.api.http) = {
		    // 定義 GET 介面,把 name 引數對映到 HelloReq
			get: "/hello/{name}",
			// 新增額外的介面
			additional_bindings {
			    // 定義了一個 POST 介面,並且把 body 對映到了 HelloReq
				post: "/hello/{id}/sayhello/{sayname}",
				body: "*",
			}
		};
}

// 這裡的 HelloReq 和 HelloResp
message HelloReq {
	string name    = 1;
	string id      = 2;
	string sayname = 3;
}
message HelloResp {
	string message = 1;
	string text    = 2;
}
HTTP 轉換問 gRPC:
| HTTP | gRPC |
|---|---|
| GET /hello/tom | Hello(name: "tom") |
| POST /hello/123/sayhello/tom {text: "world!"} | Hello(id: "123", sayname:"tom" text:"world!") |
2.3 生成 proto 對應程式碼
通過 make 命令生成:
make api
或者通過 kratos cli 生成:
kratos proto client api/helloworld/v1/student.proto
這裡通過 kratos proto client api/helloworld/v1/student.proto 來生成 proto 對應的程式碼:
api/helloworld/v1/student.pb.go
api/helloworld/v1/student_grpc.pb.go// 注意 http 程式碼只會在 proto 檔案中宣告了 http 時才會生成
api/helloworld/v1/student_http.pb.go

2.4 生成 Service 程式碼
通過 proto 檔案,直接生成對應的 Service 程式碼。使用 -t 指定生成目錄:
kratos proto server api/helloworld/v1/student.proto -t internal/service

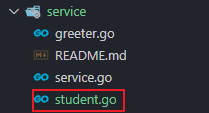
internal/service/student.go:
package service

import (
	"context"

	pb "quickstart/api/helloworld/v1"
)

type StudentService struct {
	pb.UnimplementedStudentServer
}

func NewStudentService() *StudentService {
	return &StudentService{}
}

func (s *StudentService) Createstudent(ctx context.Context, req *pb.CreateStudentRequest) (*pb.CreateStudentReply, error) {
	return &pb.CreateStudentReply{}, nil
}
func (s *StudentService) Updatestudent(ctx context.Context, req *pb.UpdateStudentRequest) (*pb.UpdateStudentReply, error) {
	return &pb.UpdateStudentReply{}, nil
}
func (s *StudentService) Deletestudent(ctx context.Context, req *pb.DeleteStudentRequest) (*pb.DeleteStudentReply, error) {
	return &pb.DeleteStudentReply{}, nil
}
func (s *StudentService) Getstudent(ctx context.Context, req *pb.GetStudentRequest) (*pb.GetStudentReply, error) {
	return &pb.GetStudentReply{}, nil
}
func (s *StudentService) Liststudent(ctx context.Context, req *pb.ListStudentRequest) (*pb.ListStudentReply, error) {
	return &pb.ListStudentReply{}, nil
}
func (s *StudentService) Hello(ctx context.Context, req *pb.HelloReq) (*pb.HelloResp, error) {
	return &pb.HelloResp{}, nil
}
看上面的程式碼,裡面的內容是空的,需要你自己編寫相應的程式碼邏輯。
通過上一篇文章我們知道,service 實現了 api 定義的服務,其實就是 student.proto 裡定義的服務。它要把資料傳輸物件(比如 http request data) 傳入到 internal/biz 裡進行處理,它一般不會涉及業務邏輯程式碼。業務邏輯的組裝會在 biz 裡實現。
有了 service/student.go ,怎麼使用?
2.5 向 wire 中注入 Service 程式碼
在 kratos 中,組織程式碼是用 wire 依賴注入的方式。
在 internal/service/service.go 檔案里加上 NewStudentService:
var ProviderSet = wire.NewSet(NewGreeterService, NewStudentService)
假如我們要通過 http 來存取,那又要怎麼做?對,還需要在伺服器端加 student 服務程式碼。
2.6 向server新增程式碼
向 internal/server/http.go,internal/server/grpc.go 新增服務程式碼:
在 http.go 中:
// 在函數引數中新增 student *service.StudentService
func NewHTTPServer(c *conf.Server, greeter *service.GreeterService, student *service.StudentService, logger log.Logger) *http.Server {
	... ...

	srv := http.NewServer(opts...)
	v1.RegisterGreeterHTTPServer(srv, greeter)
	v1.RegisterStudentHTTPServer(srv, student) // 在 httpserver 上註冊 student
	return srv
}
在 grpc.go 中:
// 在函數引數中新增 student *service.StudentService
func NewGRPCServer(c *conf.Server, greeter *service.GreeterService, student *service.StudentService, logger log.Logger) *grpc.Server {
	... ...

	v1.RegisterGreeterServer(srv, greeter)
	v1.RegisterStudentServer(srv, student) // 在 grpcserver 上註冊 student
	return srv
}
那需不需要在向 wire 註冊後才能使用呢?不需要,在 internal/server/server.go 中已經有了:
var ProviderSet = wire.NewSet(NewHTTPServer, NewGRPCServer)
接下來,接受了引數,是不是要對引數進行相應處理。
順序是:service -> biz -> data
2.7 業務邏輯 biz
先簡單分析下 internal/biz/greeter.go 裡的程式碼。
// 定義了一個 Greeter struct,主要內容就是定義 Greeter 的欄位
type Greeter struct {
	Hello string
}

// 對 Greeter 定義操作介面 GreeterRepo
type GreeterRepo interface {
	Save(context.Context, *Greeter) (*Greeter, error)
	Update(context.Context, *Greeter) (*Greeter, error)
	FindByID(context.Context, int64) (*Greeter, error)
	ListByHello(context.Context, string) ([]*Greeter, error)
	ListAll(context.Context) ([]*Greeter, error)
}

// 操作加上紀錄檔
type GreeterUsecase struct {
	repo GreeterRepo
	log  *log.Helper
}

// 初始化 GreeterUsercase
func NewGreeterUsecase(repo GreeterRepo, logger log.Logger) *GreeterUsecase

// 對 Greeter 的真正操作,用到的方法都是上面 GreeterRepo 定義的
func (uc *GreeterUsecase) CreateGreeter(ctx context.Context, g *Greeter) (*Greeter, error) {
	uc.log.WithContext(ctx).Infof("CreateGreeter: %v", g.Hello)
	return uc.repo.Save(ctx, g)
}
基本步驟:1.定義 struct,裡面包含欄位 2.定義操作 struct 的 interface 3.給操作加上紀錄檔 4.定義真正執行操作函數
這裡只定義了操作的介面 GreeterRepo interface,裡面定義了常規的操作。
而操作介面裡定義的操作需要到 data 裡實現。
照葫蘆畫瓢,在 internal/biz/ 資料夾下新建檔案 student.go:
1.定義 struct Student:
type Student struct {
	ID      string
	Name    string
	Sayname string
}
2.定義對 struct student 的操作介面:
type StudentRepo interface {
	Save(context.Context, *Student) (*Student, error)
	Get(context.Context, *Student) (*Student, error)
}
3.對 student 的操作加上紀錄檔:
type StudentUsercase struct {
	repo StudentRepo
	log  *log.Helper
}
4.初始化 StudentUsercase
func NewStudentUsercase(repo StudentRepo, logger log.Logger) *StudentUsercase {
	return &StudentUsercase{repo: repo, log: log.NewHelper(logger)}
}
5.編寫 CreateStudent 方法,也就是一些業務邏輯編寫
func (uc *StudentUsercase) CreateStudent(ctx context.Context, stu *Student) (*Student, error) {
	uc.log.WithContext(ctx).Infof("CreateStudent: %v", stu.ID)
	return uc.repo.Save(ctx, stu)
}
biz 裡就是完成業務邏輯組裝,資料的處理。
6.向 wire 注入 student
internal/biz/biz.go:
var ProviderSet = wire.NewSet(NewGreeterUsecase, NewStudentUsercase)
上面對 struct student 定義了操作的介面,那具體實現在哪裡實現?就是在 internal/data 裡實現。
2.8 持久化操作
可以仿照 2.7 小結,先看看 internal/data/greeter.go 怎麼編寫程式碼的。
greeter.go 裡的具體程式碼就留給讀者自己研究了。
下面開始編寫 internal/data/student.go 程式碼。
1.定義持久化的 struct
type studentRepo struct {
	data *Data   // 這裡 *Data 是連線資料庫使用者端
	log  *log.Helper
}
2.初始化 studentRepo struct
func NewStudentRepo(data *Data, logger log.Logger) biz.StudentRepo {
	return &studentRepo{
		data: data,
		log:  log.NewHelper(logger),
	}
}
3.實現介面定義的操作
在 biz/student.go 裡的 StudentRepo 介面,定義了 2 個操作 Save、Get,在這裡實現,
func (repo *studentRepo) Save(ctx context.Context, stu *biz.Student) (*biz.Student, error) {
	return stu, nil
}

func (repo *studentRepo) Get(ctx context.Context, stu *biz.Student) (*biz.Student, error) {
	return stu, nil
}
上面是一個實現的模板程式碼。
2.9 組態檔
組態檔是放在 internal/conf 資料夾中,這裡放置了組態檔結構的定義檔案,使用 .proto 進行設定定義,
然後通過在根目錄執行 make config 命令,就可以將對應的 .pb.go 檔案生成到同一目錄下使用。
在初始狀態下,這個 conf.proto 所定義的結構,就是 configs/config.yaml 的介面,請保持兩者一致。
每次修改組態檔後,記得使用
make config命令重新生成 go 檔案。
2.10 重新生成 wire_gen.go 檔案
進入到 cmd/quickstart 目錄,然後直接用 wire 命令重新生成 wire_gen.go 檔案。
// cmd/quickstart
wire
wire 的用法可以看這篇文章:Go 依賴注入工具 wire 使用
這篇文章已經寫的有點長了,接下來的一篇文章結合 gorm 進行一些簡單的增加修改列表等簡單的操作。
雖然 kratos 以前用的是 Ent 運算元據庫,但是我感覺還是 gorm 使用的人多。
三、參考
- https://go-kratos.dev/docs/getting-started/usage kratos cli 工具使用
- https://go-kratos.dev/docs/component/api kratos api 定義
- https://cloud.google.com/endpoints/docs/grpc/transcoding http/json 轉碼為 gRPC
- https://go-kratos.dev/docs/guide/api-protobuf/ Protobuf 規範
- https://go-kratos.dev/docs/component/config 設定
- https://developers.google.com/protocol-buffers/docs/proto3 proto3 檔案
- https://colobu.com/2017/03/16/Protobuf3-language-guide/ Protobuf3 語法指南(中譯)