深入瞭解CSS動畫新特性:@scroll-timeline

在 CSS 規範 Scroll-linked Animations 中,推出了一個劃時代的 CSS 功能。也就是 -- The @scroll-timeline at-rule,直譯過來就是捲動時間線。
本文,就將帶大家一探究竟,從入門到學會使用 CSS @scroll-timeline。(推薦學習:)
何為 @scroll-timeline 捲動時間線?
什麼是 @scroll-timeline 捲動時間線呢?
@scroll-timeline 能夠設定一個動畫的開始和結束由捲動容器內的捲動進度決定,而不是由時間決定。
意思是,我們可以定義一個動畫效果,該動畫的開始和結束可以通過容器的捲動來進行控制。
示意 DEMO
再系統性學習語法之前,我們通過一個 DEMO,簡單瞭解一下它的用法:
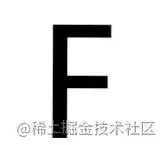
我們首先實現一個簡單的字型 F 旋轉動畫:
<div id="g-box">F</div>
#g-box {
    animation-name: rotate;
    animation-duration: 3s;
    animation-direction: alternate;
    animation-easing-function: linear;
}
@keyframes rotate {
    0% {
        transform: rotate(0);
    }
    100% {
        transform: rotate(360deg);
    }
}
正常而言,它是這樣一個簡單的動畫:
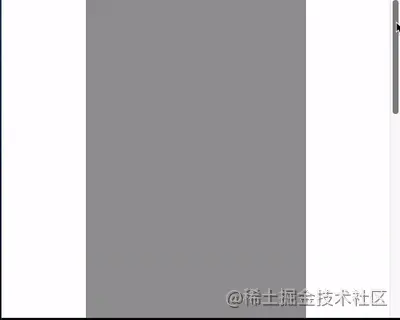
接下來,我們把這個動畫和 @scroll-timeline 相結合,需要把它放置到一個可捲動的容器中:
<div id="g-content">
    <div id="g-box">F</div>
</div>
#g-content {
width: 300px;
height: 170vh;
background: #999;
}
#g-box {
font-size: 150px;
margin: 70vh auto 0;
animation-name: rotate;
animation-duration: 3s;
animation-direction: alternate;
animation-easing-function: linear;
animation-timeline: box-rotate;
}
@keyframes rotate {
0% {
transform: rotate(0);
}
100% {
transform: rotate(360deg);
}
}
@scroll-timeline box-rotate {
source: selector("#g-content");
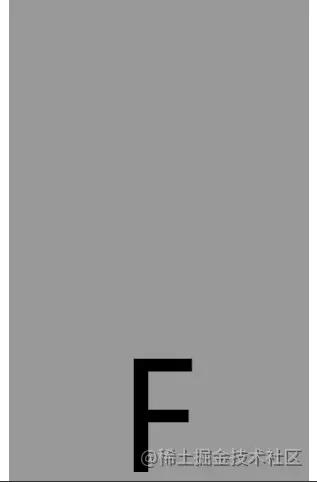
}這裡,我們實現了一個可捲動容器 #g-content,它的高度是 170vh,也就是可視介面高度的 1.7 倍,並且把 #g-box 容器放置在一個距離頂部 70vh 高度的地方:
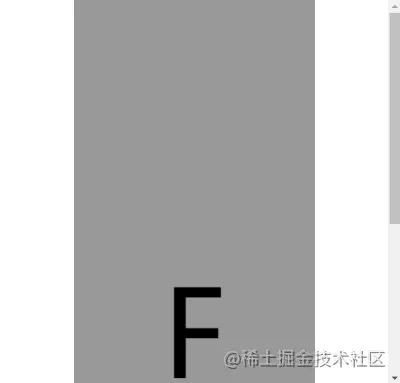
有意思的來了,我們設定的旋轉動畫不會自動開始,只有當我們向下捲動的時候,動畫才會開始進行,實際效果 Gif:
CodePen Demo -- @scroll-timeline Demo
https://codepen.io/Chokcoco/pen/JjOZMaQ
看到這裡,大家應該能夠理解 @scroll-timeline 的作用及含義了,它賦予了 CSS 能夠基於卷軸的捲動去控制動畫行進的能力! Amazing!!
@scroll-timeline 語法介紹
接下來,我們先緩一緩,簡單看一看 @scroll-timeline 的語法。
使用 @scroll-timeline,最核心的就是需要定義一個 @scroll-timeline 規則:
@scroll-timeline moveTimeline {
  source: selector("#g-content");
  orientation: vertical;
  scroll-offsets: 0px, 500px;
}
其中:
- source:繫結觸發捲動動畫的捲動容器
source: auto:繫結到Document,也就是全域性 Windows 物件source: selector("id-selector"),通過selector(),內建一個#id選擇器,選取一個可捲動容器source: none:不指的捲動容器
- orientation:設定捲動時間線的方向
orientation: auto:預設為 vertical,也就是豎直方向的捲動orientation: vertical:豎直方向的捲動orientation: horizontal:水平方向的捲動orientation: block:不太常用,使用沿塊軸的捲動位置,符合書寫模式和方向性orientation: inline:不太常用,使用沿內聯軸的捲動位置,符合書寫模式和方向性
- scroll-offsets:捲動時間線的核心,設定在捲動的什麼階段,觸發動畫,可通過三種方式之一進行設定:
scroll-offsets: none這意味著沒有 scroll-offset 指定。- 由逗號分隔的 length-percentage 值列表確定。每個值都對映到animation-duration。例如,如果 ananimation-duration 設定為 2s 且捲動偏移量為 0px, 30px, 100px,則在 1s 時,捲動偏移量將為 30px。
- 第三種確定捲動偏移量的方法是使用元素偏移量。這意味著可以指定頁面內的元素,其位置決定了捲動時間線以及要使用這些元素的哪個邊緣。指定元素是使用 selector() 函數完成的,該函數接收元素的 id。邊緣由關鍵字 start 或確定 end。可選的閾值的 0–1 可用於表示元素捲動中預期可見的百分比。
scroll-offsets 的理解會比較困難,我們稍後詳述。
在設定了一個 @scroll-timeline 之後,我們只需要將它和動畫繫結起來即可,通過 animation-timeline:
@scroll-timeline moveTimeline {
  source: selector("#g-content");
  orientation: vertical;
  scroll-offsets: 0px, 500px;
}
div {
    animation-name: move;
    animation-duration: 3s;
    animation-timeline: moveTimeline;
}
@keyframes move{
    0% {
        transform: translate(0, 0);
    }
    100% {
        transform: translate(100%, 0);
    }
}
使用 @scroll-timeline 實現捲動進度指示器
之前在 不可思議的純 CSS 捲動進度條效果 一文中,我們介紹了一種使用漸變實現的純 CSS 捲動進度指示器效果:
該方法有些小小的瑕疵。其中一個就是當捲動距離太短的時候,進度條右側會有明顯的斜邊效果。
而有了 @scroll-timeline 之後,我們終於可以將捲動和動畫這兩個元素繫結起來,再實現捲動進度指示器,就已經非常輕鬆了:
<div id="g-container">
    <p>...文字內容...</p>
</div>
#g-container {
width: 100vw;
}
#g-container::before {
content: "";
position: fixed;
height: 5px;
left: 0;
top: 0;
right: 0;
background: #ffc107;
animation-name: scale;
animation-duration: 1s;
animation-fill-mode: forwards;
animation-timeline: box-rotate;
transform-origin: 0 50%;
}
@keyframes scale {
0% {
transform: scaleX(0);
}
100% {
transform: scaleX(1);
}
}
@scroll-timeline box-rotate {
source: auto;
orientation: vertical;
}1、我們在頁面最上方,通過一個偽元素,實現一個佔滿螢幕 100% 的 5px 高的進度條。正常而言是這樣:

2、通過設定一個 transform: scaleX(0) 到 transform: scaleX(1) 的動畫,並且將它與 body 的捲動相繫結,即可得到捲動指示器,效果如下:

完整的程式碼,你可以戳這裡:CodePen Demo - 使用 @scroll-timeline 實現捲動進度條
https://codepen.io/Chokcoco/pen/eYeKLMj
使用 scroll-offsets 精確控制動畫觸發時機
大家可以再看看上面的 Gif 圖,都有一個問題,就是動畫的開始時間都是從捲動一開始就開始了,剛好在捲動結束時結束。那麼如果我希望動畫在捲動的特定階段觸發,那該怎麼辦呢?
這裡,就需要藉助 scroll-offsets,去更加精確的控制我們的動畫。
在捲動過程中,我們可以將一個元素,劃分為 3 個區域:
- 捲動過程中,從上方視野盲區,進入視野
- 捲動過程中,處於視野中
- 捲動過程中,從視野中,進入下方視野盲區
在這裡,我們就可以得到兩個邊界,上方邊界,下方邊界:
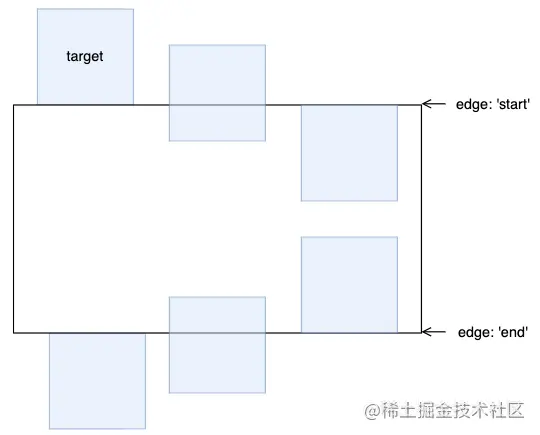
而對於上下兩個邊界,又會有兩種狀態。以上邊界為例子,會有:
- 元素剛剛開始進入可視區
- 元素完全進入可視區
對於這兩種狀態,我們用 start 0 和 start 1 表示,同理,下方的邊界也可以用 end 0 和 end 1 表示:
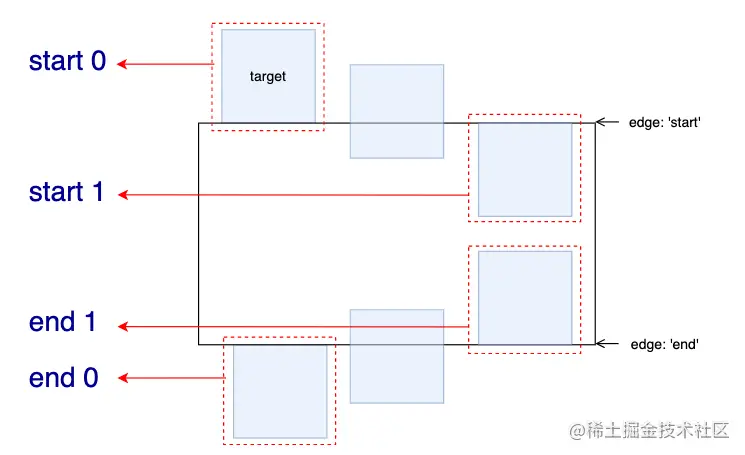
這裡的 0 和 1 實際表示的是,元素捲動中預期可見的百分比。
有了這些狀態值,配合 scroll-offsets,我們就可以精確控制捲動動畫的觸發時間。
我們設定一個從左向右並且伴隨透明度變化的動畫,的看看下面幾種情況:
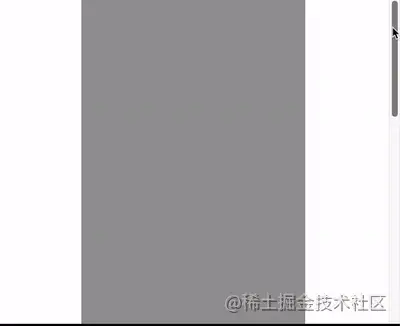
1、捲動動畫在元素從下方開始出現時開始,完全出現後截止。
動畫執行範圍:end 0 --> end 1:
@keyframes move {
    0% {
        transform: translate(-100%, 0);
        opacity: 0;
    }
    100% {
        transform: translate(0, 0);
        opacity: 1;
    }
}
@scroll-timeline box-move {
    source: auto;
    orientation: "vertical";
    scroll-offsets:
        selector(#g-box) end 0,
        selector(#g-box) end 1;

    /* Legacy Descriptors Below: */
    start: selector(#g-box) end 0;
    end: selector(#g-box) end 1;
    time-range: 1s;
}
#g-box {
    animation-name: move;
    animation-duration: 3s;
    animation-fill-mode: both;
    animation-timeline: box-move;
}
效果如下:
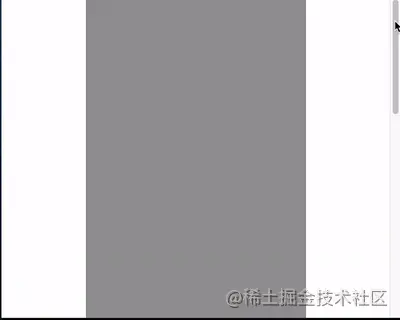
2、捲動動畫在元素從下方完全出現時開始,在捲動到上方即將離開螢幕後截止:
動畫執行範圍:end 1 --> start 1:
// ...
@scroll-timeline box-move {
    source: auto;
    orientation: "vertical";
    scroll-offsets:
        selector(#g-box) end 1,
        selector(#g-box) start 1;

    /* Legacy Descriptors Below: */
    start: selector(#g-box) end 1;
    end: selector(#g-box) start 1;
    time-range: 1s;
}
// ...
效果如下:
3、捲動動畫在元素捲動到上方即將離開螢幕後開始,完全離開螢幕後截止:
動畫執行範圍:start 1 --> start 0:
// ...
@scroll-timeline box-move {
    source: auto;
    orientation: "vertical";
    scroll-offsets:
        selector(#g-box) start 1,
        selector(#g-box) start 0;

    /* Legacy Descriptors Below: */
    start: selector(#g-box) start 1;
    end: selector(#g-box) start 0;
    time-range: 1s;
}
// ...
效果如下:
掌握 scroll-offsets 的用法是靈活運用捲動時間線的關鍵,當然,在上面你還會看到 start: selector(#g-box) start 1 和 end: selector(#g-box) start 0 這種寫法,這是規範歷史遺留問題,最新的規範已經使用了 scroll-offsets 去替代 start: 和 end: 的寫法。
把上述 3 種情況放在一起,再比較比較:

完整的程式碼,你可以戳這裡:CodePen Demo - @scroll-timeline Demo | element-based offset
使用 @scroll-timeline 實現各類效果
在能夠掌握 @scroll-timeline 的各個語法之後,我們就可以開始使用它創造各種動畫效果了。
譬如如下的,捲動內容不斷劃入:

程式碼較長,可以戳這裡,來自 bramus 的 Codepen CodePen Demo -- Fly-in Contact List (CSS @scroll-timeline version)
https://codepen.io/bramus/pen/bGwJVzg
甚至可以結合 scroll-snap-type 製作一些全螢幕捲動的大屏特效動畫:

要知道,這在以前,是完全不可能利用純 CSS 實現的。完整的程式碼你可以戳這裡:CodePen Demo -- CSS Scroll-Timeline Split Screen Carousel
https://codepen.io/Chokcoco/pen/QWOrPdM
簡而言之,任何動畫效果,如今,都可以和捲動相結合起來,甚至乎是配合 SVG 元素也不例外,這裡我還簡單改造了一下之前的一個 SVG 線條動畫:

完整的程式碼你可以戳這裡:CodePen Demo -- SVG Text Line Effect | Scroll Timeline
https://codepen.io/Chokcoco/pen/wvPxbRm
@scroll-timeline 的實驗室特性與特性檢測
@scroll-timeline 雖好,目前仍處於實驗室特性時間,Chrome 從 85 版本開始支援,但是預設是關閉的。
相容性如下(2022-03-07):
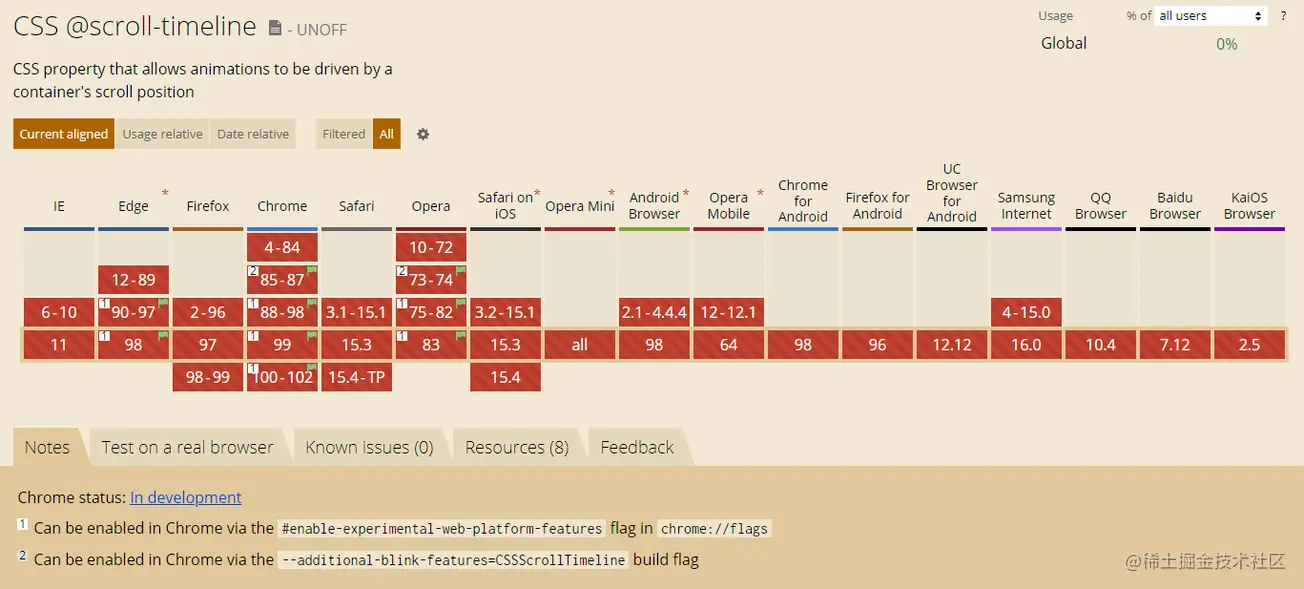
在最新的 chrome、Edge、Opera 可以通過瀏覽器設定開啟該特性,Chrome 下開啟該特性需要:
瀏覽器 URL 框輸入
chrome://flags開啟
#enable-experimental-web-platform-features
美酒雖好,但是離完全能用,瀏覽器大規模支援還需要等待一會,給時間一點時間吧!
特性檢測
基於目前的相容性問題,我們可以通過瀏覽器的特性檢測 @supports 語法,來漸進增強使用該功能。
特性檢測的語法也非常簡單:
@supports (animation-timeline: works) {
    @scroll-timeline list-item-1 {
	source: selector(#list-view);
	start: selector(#list-item-1) end 0;
	end: selector(#list-item-1) end 1;
        scroll-offsets:
            selector(#list-item-1) end 0,
            selector(#list-item-1) end 1
        ;
	time-range: 1s;
    }
    // ...
}
通過 @supports (animation-timeline: works) {} 可以判斷瀏覽器是否支援 @scroll-timeline。
最後
目前關於 @scroll-timeline 的相關介紹還非常少,但是它確是能夠改變 CSS 動畫的一個非常大的革新。隨著相容性的逐漸普及,未來勢必會在 CSS 中佔據一席之地。
本文到此結束,希望對你有幫助 :)
(學習視訊分享:)
以上就是深入瞭解CSS動畫新特性:@scroll-timeline的詳細內容,更多請關注TW511.COM其它相關文章!