還不會寫springboot介面?來我教你
2022-01-09 23:00:01
首先要明白資料的流通方向

資料的觸發是前端請求後端引起的,遵循傳統的mvc規範的話 我們需要pojo mapper service controller 四個層次,Pojo 是於資料庫中欄位直接對應的
線上搭建一個springboot專案
https://start.spring.io/
其中需要加入的四個依賴
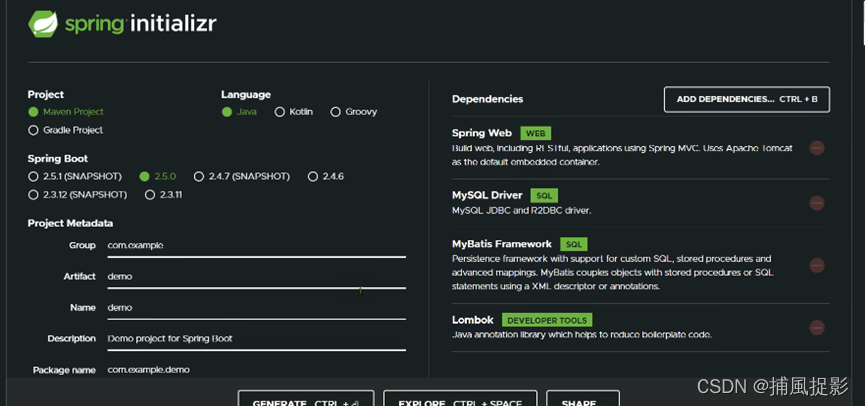
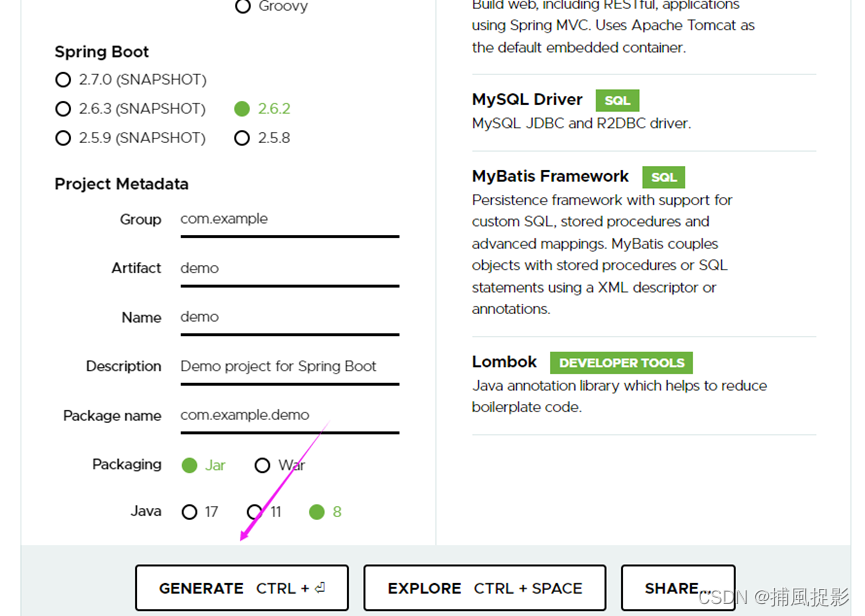
點選確定 把沒有用的檔案刪除 最後保留一下兩個
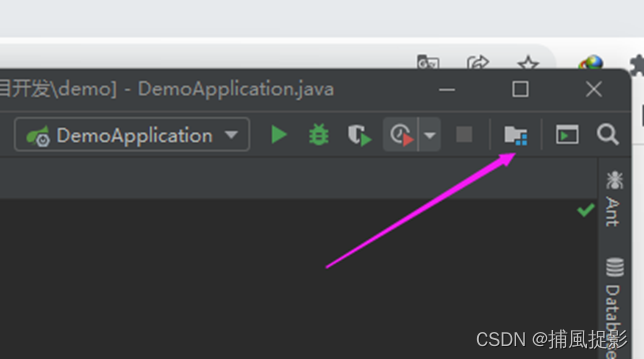
在此處新增jdk的版本
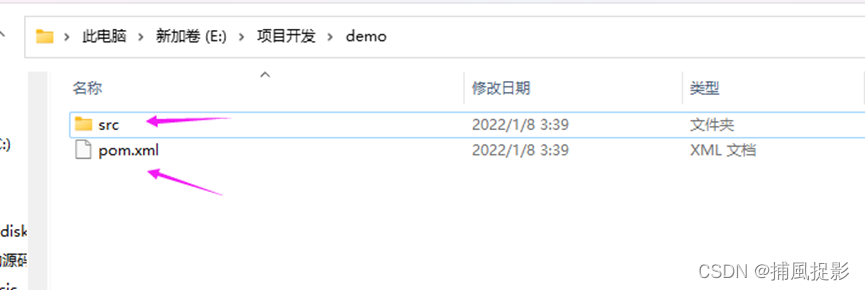
開始編寫介面實現
pon.xml
<?xml version="1.0" encoding="UTF-8"?>
<project xmlns="http://maven.apache.org/POM/4.0.0" xmlns:xsi="http://www.w3.org/2001/XMLSchema-instance"
	xsi:schemaLocation="http://maven.apache.org/POM/4.0.0 https://maven.apache.org/xsd/maven-4.0.0.xsd">
	<modelVersion>4.0.0</modelVersion>
	<parent>
		<groupId>org.springframework.boot</groupId>
		<artifactId>spring-boot-starter-parent</artifactId>
		<version>2.6.2</version>
		<relativePath/> <!-- lookup parent from repository -->
	</parent>
	<groupId>com.example</groupId>
	<artifactId>demo</artifactId>
	<version>0.0.1-SNAPSHOT</version>
	<name>demo</name>
	<description>Demo project for Spring Boot</description>
	<properties>
		<java.version>1.8</java.version>
	</properties>
	<dependencies>
		<dependency>
			<groupId>org.springframework.boot</groupId>
			<artifactId>spring-boot-starter-web</artifactId>
		</dependency>
		<dependency>
			<groupId>org.mybatis.spring.boot</groupId>
			<artifactId>mybatis-spring-boot-starter</artifactId>
			<version>2.2.1</version>
		</dependency>

		<dependency>
			<groupId>mysql</groupId>
			<artifactId>mysql-connector-java</artifactId>
			<scope>runtime</scope>
		</dependency>
		<dependency>
			<groupId>org.projectlombok</groupId>
			<artifactId>lombok</artifactId>
			<optional>true</optional>
		</dependency>
		<dependency>
			<groupId>org.springframework.boot</groupId>
			<artifactId>spring-boot-starter-test</artifactId>
			<scope>test</scope>
		</dependency>
	</dependencies>

	<build>
		<plugins>
			<plugin>
				<groupId>org.springframework.boot</groupId>
				<artifactId>spring-boot-maven-plugin</artifactId>
				<configuration>
					<excludes>
						<exclude>
							<groupId>org.projectlombok</groupId>
							<artifactId>lombok</artifactId>
						</exclude>
					</excludes>
				</configuration>
			</plugin>
		</plugins>
	</build>

</project>
application.yml
spring:
  datasource:
    driver-class-name: com.mysql.cj.jdbc.Driver
    url: jdbc:mysql://localhost:3306/test?useUnicode=true&useSSL=false&characterEncoding=utf8&serverTimezone=Asia/Shanghai
    username: root
    password: 123456
server:
  port: 8001
持久層
package com.example.demo.entity;

import lombok.Data;

@Data
public class User {
    private Integer id;
    private String name;
    private String address;
    private Integer age;
    private String sex;
    private String phone;

}
這裡我們引入了 lombok 不需要寫get和set方法簡化程式碼
<dependency>
    <groupId>org.projectlombok</groupId>
    <artifactId>lombok</artifactId>
    <version>1.16.10</version>
    <scope>provided</scope>
</dependency>
mapper層
package com.example.demo.mapper;

import com.example.demo.entity.User;
import org.apache.ibatis.annotations.Delete;
import org.apache.ibatis.annotations.Select;
import org.apache.ibatis.annotations.Update;
import org.springframework.transaction.annotation.Transactional;
import org.springframework.web.bind.annotation.PutMapping;
import org.springframework.web.bind.annotation.RequestBody;

import java.util.List;

public interface UserMapper {

    @Select("select * from user")
    List<User> findAll();

    @Update("INSERT INTO `user` (`name`, `address`, `age`, `sex`, `phone`) VALUES (#{name},#{address},#{age},#{sex},#{phone});")
    @Transactional
    void save(User user);


    @Update("update user set name=#{name} , address=#{address}, age=#{age}, sex=#{sex},phone=#{phone} where id =#{id}")
    @Transactional
    void updateById(User user);


    @Delete("delete from user where id =#{id}")
    @Transactional
    void deleteById(Long id);


    @Select("select * from user where id =#{id}")
    User findById(Long id);


    @Select("select * from user limit #{offset},#{pageSize}")
    List<User> findByPage(Integer offset, Integer pageSize);

    @Select("select count(id) from user")
    Integer countUser();
}
controller
package com.example.demo.controller;

import com.example.demo.entity.User;
import com.example.demo.mapper.UserMapper;
import com.example.demo.vo.Page;
import org.apache.ibatis.annotations.Delete;
import org.springframework.web.bind.annotation.*;

import javax.annotation.Resource;
import java.util.List;

@RestController
@RequestMapping("/user")
public class UserController {

    @Resource
    UserMapper userMapper;
    @GetMapping
    public List<User> getUser() {
        return userMapper.findAll();
    }

    @PostMapping
    public String addUser(@RequestBody User user){
        //把前端傳過來的資料轉化為user實體類的物件插入到資料庫中
        userMapper.save(user);
        return "success";


    }
    @PutMapping
    public String updateUser(@RequestBody User user){
        userMapper.updateById(user);
        return "success";
    }

    @DeleteMapping("/{id}")  //一一對相應的關係
    public String deleteUser(@PathVariable("id") Long id){
        //註解是循序json回傳帶有id
        userMapper.deleteById(id);
        return "success";
    }
    @GetMapping("/{id}")  //把返回的結果 返回出來 包裝成一個user物件
    public User findById(@PathVariable("id") Long id){
        //註解是循序json回傳帶有id
        return userMapper.findById(id);
    }


    @GetMapping("/page")
    public Page<User> findByPage(@RequestParam(defaultValue = "1") Integer pageNum,
                                 @RequestParam(defaultValue = "10") Integer pageSize) {
        Integer offset = (pageNum - 1) * pageSize;
        List<User> userData = userMapper.findByPage(offset, pageSize);
        Page<User> page = new Page<>();
        page.setData(userData);

        Integer total = userMapper.countUser();
        page.setTotal(total);
        page.setPageNum(pageNum);
        page.setPageSize(pageSize);
        return page;
    }


}
注意 在實現過程中需要抓啟動類中新增 掃描mapper的註解
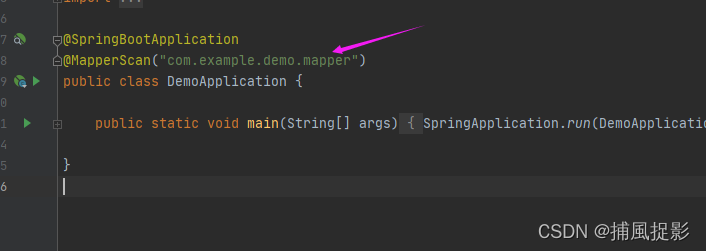
以前就是對介面的增刪改查 和分頁查詢的實現
實現過程
快速寫出插入語句
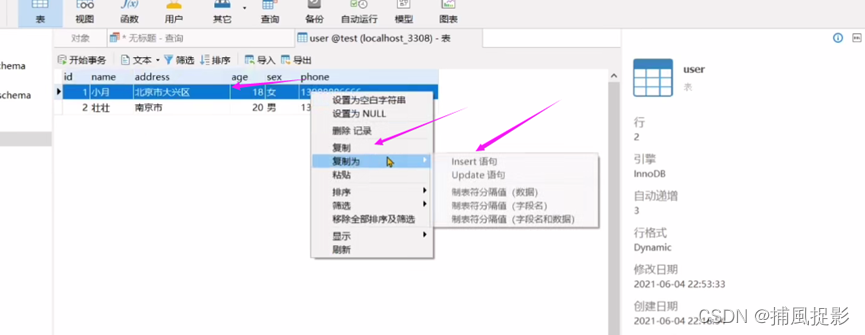
插入實現 模擬前端想後端傳送json資料
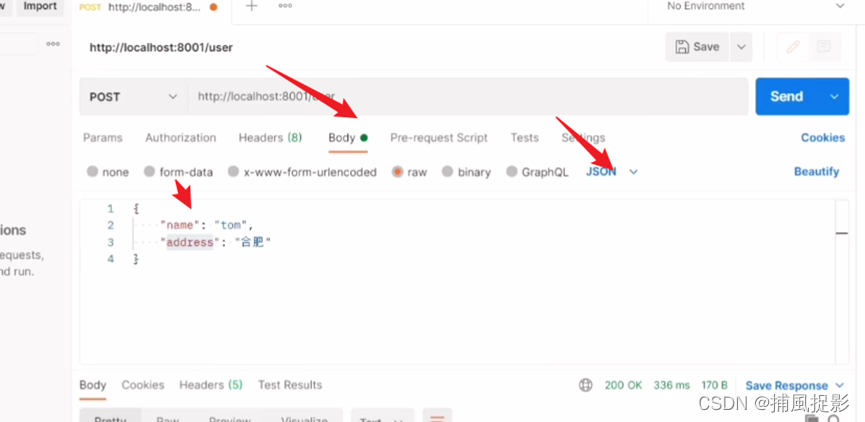
更新測試
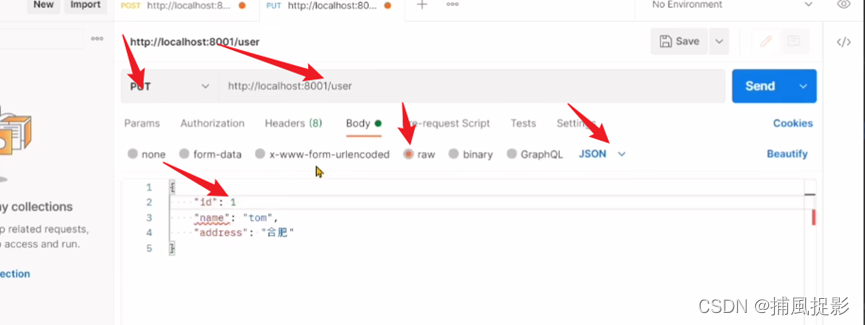
刪除實現
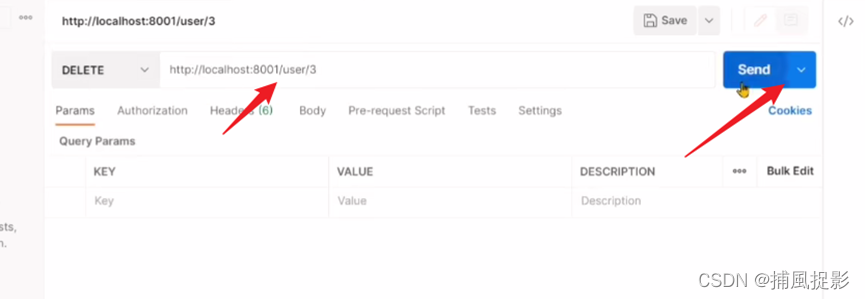
刪除是要注意 id的一一對應

分頁查詢

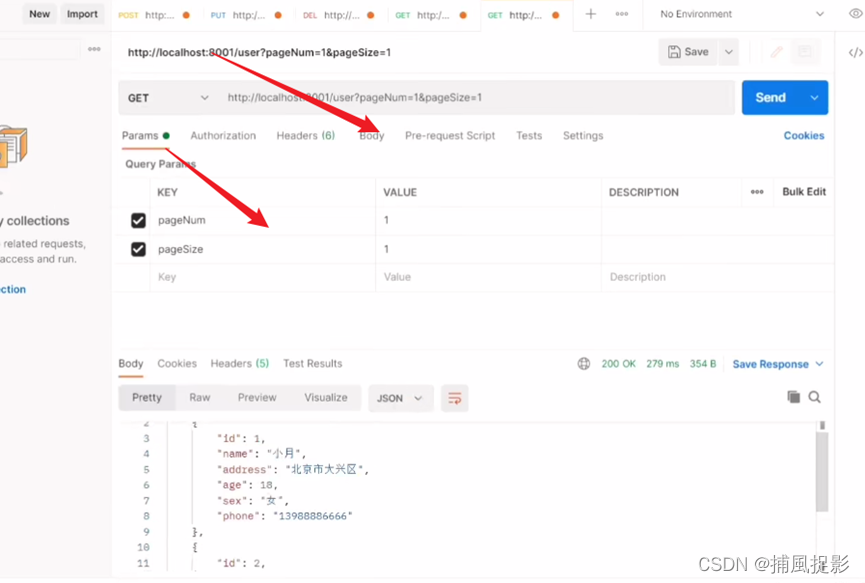
分頁查詢 引數1 第幾頁 引數2 一頁有多少個資料
