uni-app 新手入門到精通2
2020-10-16 14:00:13
承接 uni-app 新手入門到精通1
1, uni 基本的資料繫結 v-bind v-for 註冊事件和傳遞函數 和vue 基本是一樣的,這裡我就不多說了
2, 生命週期 API=>基礎=>生命週期
主要作用的話,大家去官網看檔案吧
https://uniapp.dcloud.io/api/lifecycle
分為兩部分
其一,應用生命週期 在App.vue 執行的時候的控制檯可以直接看到列印結果
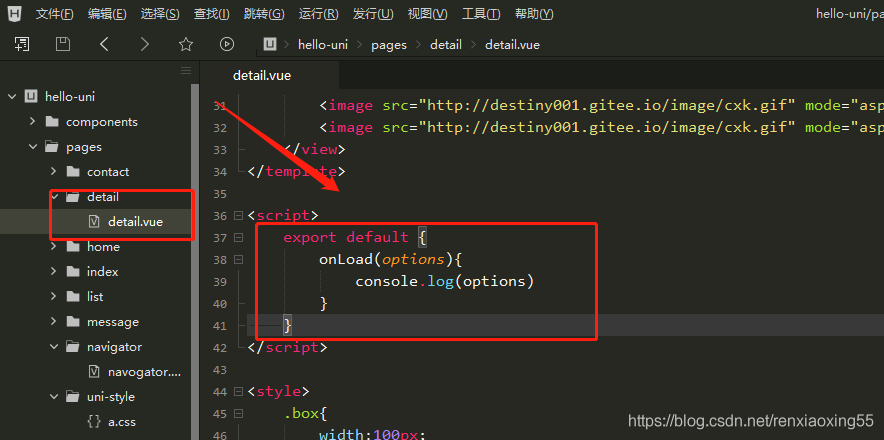
其二, 頁面生命週期 用的比較多的是onLoad 監聽頁面載入,其引數為上個頁面傳遞的資料,引數型別為Object(用於頁面傳參)
onShow和onHide用途和應用生命週期是樣的
點選隱藏這個的時候會觸發onHide
3,下拉重新整理 API=>介面=>下拉重新整理
首先要在需要下拉重新整理頁面設定可重新整理的屬性 pages.json
{
	"path": "pages/index/index",
	"style": {
		"navigationBarTitleText": "首頁",
		"enablePullDownRefresh": true
	}
},
<template>
	<view>
		<view class="box-item" v-for="item in list">
			{{item}}
		</view>
	</view>
</template>
<script>
 export default{
	 data(){
		 return {
		 	list: ['張三','李四','王五','小美','張三丰','李二','王八']
		 }
	 },
	 onPullDownRefresh () {    //下拉重新整理的監聽事件 觸發下拉重新整理
	 	console.log('觸發了下拉重新整理')
	 	setTimeout(()=>{
	 		this.list = ['張三','李四']   //下拉重新整理之後,頁面重新渲染
	 		uni.stopPullDownRefresh()    //停止下拉重新整理,設定了計時器,兩秒後停止重新整理
	 	},2000)
	 },
 }
</script>
4, 上拉載入
 首先要設定下 上拉載入 的屬性  pages.json
 onReachBottomDistance  頁面上拉觸底事件觸發時距頁面底部距離,單位只支援px
{
	"path": "pages/product/product",
	"style": {
	"navigationBarTitleText": "商品",
	"onReachBottomDistance": 200
	}
},
onReachBottom() {
	console.log('頁面觸底了')
    this.list = [...this.list,...['射手','雙子','天蠍','雙魚']]
},
5,傳送get請求
uni.request API=>網路=>發起請求
get () {
	uni.request({
	url: "http://**************",
	success (res) {
		console.log(res)
	}
})
},
6,圖片的上傳和預覽 API=>媒體 =>圖片
<template>
	<view>
		<button type="primary" @click="chooseImg">上傳圖片</button>
		<image v-for="item in imgArr" :src="item" @click="previewImg(item)"></image>
	</view>
</template>

<script>
	export default {
		data() {
			return {
				imgArr: []
			}
		},
		methods: {
			chooseImg() {
				uni.chooseImage({   //圖片上傳的API
					count: 5,    //count 最多可以選擇的圖片張數,預設9
					success: res => {
						this.imgArr = res.tempFilePaths
					}
				})
			},
			previewImg(current) {
				uni.previewImage({   //圖片預覽API current 點選哪個預覽哪張圖片 所以在圖片的點選事件需要傳一個引數item
					current:current,
					urls: this.imgArr,
					loop: true,
					indicator: 'default'
				})
			}
		}
	}
</script>
7,條件編譯跨端相容
條件編譯是用特殊的註釋作為標記,在編譯時根據這些特殊的註釋,將註釋裡面的程式碼編譯到不同平臺。
寫法:以 #ifdef 或 #ifndef 加 %PLATFORM% 開頭,以 #endif 結尾
<!-- #ifdef H5 -->
<view>我希望只在h5頁面中看見</view>
<!-- #endif -->
<!-- #ifdef MP-WEIXIN -->
<view>我希望只在微信小程式頁面中看見</view>
<!-- #endif -->
<style>
	/* h5中的樣式 */
	/* #ifdef H5 */
	view{
		color: hotpink;
	}
	/* #endif */
	/* 微信小程式中的樣式 */
	/* #ifdef MP-WEIXIN */
	view{
		color: #0000FF;
	}
	/* #endif */
</style>
<script>
onLoad () {
	// #ifdef H5
	console.log('我希望h5中列印')
	// #endif
	// #ifdef MP-WEIXIN
	console.log('我希望微信小程式中列印')
	// #endif
}
<script>
8,兩種方式與傳參
第一種
<navigator url="/pages/detail/detail?id=80&age=19">跳轉至詳情頁</navigator>
<navigator url="/pages/message/message" open-type="switchTab">跳轉至資訊頁</navigator>
<navigator url="/pages/detail/detail" open-type="redirect">跳轉至詳情頁</navigator>
open-type="redirect"   把當前頁面關閉跳轉到另一個頁面  可以觸發onUnload事件(屬於監聽事件)
open-type="switchTab" 正常跳轉
第二種
<template>
	<view>
		<view>導航跳轉的學習</view>
		<button @click="goDetail">跳轉之詳情頁</button>
		<button @click="goMessage">跳轉至資訊頁</button>
		<button type="primary" @click="redirectDetail()">跳轉到詳情頁並關閉當前頁面</button>
	</view>
</template>

<script>
	export default {
		onUnload() {
			console.log('導航頁面解除安裝了')
		},
		methods: {
			goDetail () {
				uni.navigateTo({
					url: '/pages/detail/detail?id=80&age=19'//向跳轉頁面傳遞引數id=80和age=19
				})
			},
			goMessage () {
				uni.switchTab({  //跳轉到 tabBar 頁面,並關閉其他所有非 tabBar 頁面
					url: '/pages/message/message'
				})
			},
			redirectDetail () {
				uni.redirectTo({   //關閉當前頁面,跳轉到應用內的某個頁面。
					url: '/pages/detail/detail'
				});
			},
		}
	}
</script>
<style>
</style>
向跳轉頁面detail 傳遞引數id=80和age=19

